
Amazon S3 Sink Connector for Confluent Cloud
You can use the fully-managed Amazon S3 Sink connector for Confluent Cloud to export Avro, JSON Schema, Protobuf, JSON (schemaless), Bytes or String data from Apache Kafka® topics to S3 objects in Avro, Parquet, JSON, or Bytes format. Depending on your environment, the S3 connector can export data by guaranteeing exactly-once delivery semantics to consumers of the S3 objects it produces.
Confluent Cloud is available through AWS Marketplace or directly from Confluent.
The fully-managed Amazon S3 Sink connector periodically polls data from Kafka and in turn uploads it to S3. The data of every Kafka partition will be split into chunks, where each chunk is represented as a S3 object, using the configured partitioner. The size of each data chunk is determined by the number of records written to S3 and by schema compatibility.
Note
This Quick Start is for the fully-managed Confluent Cloud connector. If you are installing the connector locally for Confluent Platform, see Amazon S3 Sink Connector for Confluent Platform.
The fully-managed Amazon S3 Sink connector for Confluent Cloud connects to resources in the same region and cloud provider as your Confluent Cloud cluster. If your Amazon S3 is in a different region or cloud provider than your Confluent Cloud cluster, contact Confluent Support to enable cross-region or cross-cloud connectivity before you configure the connector.
If you require private networking for fully-managed connectors, make sure to set up the proper networking beforehand. For more information, see Manage Networking for Confluent Cloud Connectors.
Features
The Amazon S3 Sink connector provides the following features:
Exactly Once Delivery: Records that are exported using a deterministic partitioner are delivered with exactly-once semantics regardless of the eventual consistency of Amazon S3.
Note that if versioning is enabled for the S3 bucket, you might see multiple versions of the same file in S3; but, if you view the most recent version among those files, you will see that the persistence of data exactly once remains valid.
Provider integration support: The connector supports IAM role-based authorization using Confluent Provider Integration. For more information about provider integration setup, see the IAM roles authentication.
Client-side encryption (CSFLE and CSPE) support: The connector supports CSFLE and CSPE for sensitive data. For more information about CSFLE or CSPE setup, see the connector configuration.
Data Format with or without a Schema: The connector supports input data from Kafka topics in Avro, JSON Schema, Protobuf, JSON (schemaless), Bytes or String format and exports data to Amazon S3 in Avro, Parquet, JSON, or Bytes format. A valid schema must be available in Schema Registry to use a schema-based message format (for example, Avro).
Partitioner: The connector supports three classes for partitioning data:
TimeBasedPartitioner: Partitions data based on the Kafka classTimeStamp. Time-based partitioning options are daily or hourly.FieldPartitioner: Partitions data based on the value of a specified field. This creates S3 object paths that reflect the field’s name and value, such as<prefix>/<topic>/<fieldName>=<fieldValue>/<topic>+<kafkaPartition>+<startOffset>.<format>.DefaultPartitioner: Creates a single partition per Kafka topic partition. This results in S3 object paths using the format<prefix>/<topic>/partition=<kafkaPartition>/<topic>+<kafkaPartition>+<startOffset>.<format>.
Scheduled Rotation and Rotation Interval: The connector supports a regularly scheduled interval for closing and uploading files to storage. See Scheduled Rotation for details.
Flush size: Defaults to 1000. The value can be increased if needed. The value can be lowered (1 minimum) if you are running a Dedicated Confluent Cloud cluster. The minimum value is 1000 for non-dedicated clusters.
The following scenarios describe a couple of ways records may be flushed to storage:
You use the default setting of 1000 and your topic has six partitions. Files start to be created in storage after more than 1000 records exist in each partition.
You use the default setting of 1000 and the partitioner is set to Hourly. 500 records arrive at one partition from 2:00pm to 3:00pm. At 3:00pm, an additional 5 records arrive at the partition. You will see 500 records in storage at 3:00pm.
Note
The properties
rotate.schedule.interval.msandrotate.interval.mscan be used withflush.sizeto determine when files are created in storage. These parameters kick in and files are stored based on which condition is met first.For FieldPartitioner in fully-managed connectors, an additional automatic rotation occurs when the number of open files reaches 50. This uploads the current batch of files to storage and creates a new batch.
For example: You have one topic partition. You set
flush.size=1000androtate.schedule.interval.ms=600000(10 minutes). 500 records arrive at the topic partition from 12:01 to 12:10. 500 additional records arrive from 12:11 to 12:20. You will see two files in the storage bucket with 500 records in each file. This is because the 10 minuterotate.schedule.interval.mscondition tripped before theflush.size=1000condition was met.
Writing Record Keys and Headers: In addition to writing the value files to storage, you can enable the connector to write the associated Kafka record keys and headers to storage as files. To enable writing keys, set the configuration property
store.kafka.keystotrue. To enable writing headers, setstore.kafka.headerstotrue. After enabling these configuration properties, the connector writes keys and headers as additional files. These files use the same name as the associated file that stores the record values, with an extension identifying the part of the record (for example,<filename>.keys.avroand<filename>.headers.avro). Key and header files have a one-to-one mapping to the associated value files.Consider the following when enabling this feature:
If you configure the connector to store keys or headers as files and the Kafka record has no key or headers present, the connector writes the record to the DLQ. The record will not be in the stored output in Amazon S3.
If both
store.kafka.keysandstore.kafka.headersare set totrue, schema evolution will only work for record values, and not keys and headers. If the record headers and keys have schemas, and records are sent with a different schema from the initial one, the connector stops and the task fails.
Secret manager integration: The connector supports secret manager integration. For
Access Keysbased authentication, the connector can retrieve the following configurations from an integrated secret manager at runtime as needed.Secret manager managed configuration
Type
aws.access.key.idSTRINGaws.secret.access.keyPASSWORDFor more information, see Create a secret manager integration in Confluent Cloud.
For more information and examples to use with the Confluent Cloud API for Connect, see the Confluent Cloud API for Connect Usage Examples section.
Limitations
Be sure to review the following information.
For connector limitations, see Amazon S3 Sink Connector limitations.
If you plan to use one or more Single Message Transformations (SMTs), see SMT Limitations.
User Account IAM Policy
The AWS user account accessing the S3 bucket must have the following effective permissions:
ListAllMyBuckets
ListBucket
GetBucketLocation
ListBucketMultipartUploads
PutObject
GetObject
AbortMultipartUpload
ListMultipartUploadParts
Copy the following JSON to create the IAM policy for the user account. Change <bucket-name> to a real bucket name. For more information, see Create and attach a policy to an IAM user. This is the IAM policy for the user account and not a bucket policy.
Note
If you use object tagging in the S3 bucket, set the connector configuration property
s3.object.taggingtotrue. When you enable object tagging, you must also includes3:PutObjectTaggingin the IAM policy for the user account. This optional entry is highlighted in the following JSON example.If you use AWS Key Management Service (KMS), you must modify the key policy to grant IAM user account permission for the
kms:GenerateDataKeyandkms:Decryptactions. This will allow the connector to access the S3 bucket. For more information, see this AWS knowledge center article.If the IAM user/role accessing the bucket is in a different account than the s3 bucket, you must also update your bucket policy to allow all the above operations to be performed by the user on the bucket . For more information, see AWS knowledge center article
The connector uses
GetBucketAclto verify bucket existence, but this permission is optional. To avoid AccessDenied errors in your CloudTrail logs, you can add the equivalent permission to the connector.
{
   "Version":"2012-10-17",
   "Statement":[
      {
         "Effect":"Allow",
         "Action":[
            "s3:ListAllMyBuckets"
         ],
         "Resource":"arn:aws:s3:::*"
      },
      {
         "Effect":"Allow",
         "Action":[
            "s3:ListBucket",
            "s3:GetBucketLocation",
            "s3:ListBucketMultipartUploads"
         ],
         "Resource":"arn:aws:s3:::<bucket-name>"
      },
      {
         "Effect":"Allow",
         "Action":[
            "s3:PutObject",
            "s3:PutObjectTagging",
            "s3:GetObject",
            "s3:AbortMultipartUpload",
            "s3:ListMultipartUploadParts"
         ],
         "Resource":"arn:aws:s3:::<bucket-name>/*"
      }
   ]
}
Quick Start
Use this quick start to get up and running with the Confluent Cloud S3 Sink connector. The quick start provides the basics of selecting the connector and configuring it to stream events to an S3 bucket.
Prerequisites
Ensure you meet all the following prerequisites:
Authorized access to a Confluent Cloud cluster on AWS.
The Confluent CLI installed and configured for the cluster. See Install the Confluent CLI.
Schema Registry must be enabled to use a Schema Registry-based format (for example, Avro, JSON_SR (JSON Schema), or Protobuf).
The data system the sink connector is connecting to should be in the same region as your Confluent Cloud cluster. If you use a different region or cloud platform, be aware that you may incur additional data transfer charges. Contact your Confluent account team or Confluent Support if you need to use Confluent Cloud and connect to a data system that is in a different region or on a different cloud platform.
For networking considerations, see Networking and DNS. To use a set of public egress IP addresses, see Public Egress IP Addresses for Confluent Cloud Connectors.
An AWS User Account IAM Policy configured for bucket access.
An AWS account configured with Access Keys. You use these access keys when setting up the connector.
Kafka cluster credentials. The following lists the different ways you can provide credentials.
Enter an existing service account resource ID.
Create a Confluent Cloud service account for the connector. Make sure to review the ACL entries required in the service account documentation. Some connectors have specific ACL requirements.
Create a Confluent Cloud API key and secret. To create a key and secret, you can use confluent api-key create or you can autogenerate the API key and secret directly in the Cloud Console when setting up the connector.
(Optional) Confluent Cloud Schema Registry enabled for your cluster, if you are using a messaging schema (like Apache Avro). See Work with schemas and data contracts.
Caution
You can’t mix schema and schemaless records in storage using kafka-connect-storage-common. Attempting this causes a runtime exception.
Using the Confluent Cloud Console
Step 1: Launch your Confluent Cloud cluster
To create and launch a Kafka cluster in Confluent Cloud, see Create a kafka cluster in Confluent Cloud.
Step 2: Add a connector
In the left navigation menu, click Connectors. If you already have connectors in your cluster, click + Add connector.
Step 3: Select your connector
Click the Amazon S3 Sink connector card.
Step 4: Enter the connector details
Note
Ensure you have all your prerequisites completed.
An asterisk ( * ) designates a required entry.
At the Add Amazon S3 Sink connector screen, complete the following:
If you’ve already populated your Kafka topics, select the topics you want to connect from the Topics list.
To create a new topic, click +Add new topic.
Select the way you want to provide Kafka Cluster credentials. You can choose one of the following options:
My account: This setting allows your connector to globally access everything that you have access to. With a user account, the connector uses an API key and secret to access the Kafka cluster. This option is not recommended for production.
Service account: This setting limits the access for your connector by using a service account. This option is recommended for production.
Use an existing API key: This setting allows you to specify an API key and a secret pair. You can use an existing pair or create a new one. This method is not recommended for production environments.
Note
Freight clusters support only service accounts for Kafka authentication.
Click Continue.
Configure the authentication properties:
AWS S3 Region: In the AWS S3 Region dropdown, select the AWS region where the S3 bucket is defined.
Store URL: In the Store URL field, enter the object storage connection URL to access the S3 bucket, if applicable.
AWS credentials
Authentication method: Select how you want to authenticate with AWS.
If you select Access Keys, enter your AWS credentials in the Amazon Access Key ID and Amazon Secret Access Key fields. For information about how to set these up, Access Keys.
If you select IAM Roles, choose an existing integration name under Provider integration name dropdown that has access to your resource. For more information, see Manage Provider Integration for Fully-Managed Connectors in Confluent Cloud.
Amazon Access Key ID: Enter your Amazon Access Key ID to allow this connector to access the S3 bucket if you select Access Keys as your authentication method.
Provider Integration: Select an existing integration that has access to your resource if you select IAM Roles as your authentication method.
Amazon Secret Access Key: Enter your Amazon Secret Access Key to allow this connector to access the S3 bucket if you select Access Keys as your authentication method.
Use secret manager: Let Confluent Cloud fetch sensitive configuration values from a secret manager.
Secret manager configuration
Secret manager: Select the secret manager that stores the sensitive data that Confluent Cloud should retrieve.
Configurations from Secret manager: Select the configurations to let Confluent Cloud fetch their values from the secret manager.
Provider Integration: Select an existing integration that has access to your resource if you select IAM Roles as your authentication method.
Amazon S3 bucket name
Bucket name: Under the Amazon S3 bucket name field, specify the S3 bucket name where you want to export your data. An Amazon S3 bucket must be in the same region as your Confluent Cloud cluster.
Click Continue.
Input Kafka record value format: Select the input Kafka record value format (data coming from the Kafka topic). Valid entries are AVRO, JSON_SR (JSON Schema), PROTOBUF, JSON (schemaless), BYTES or STRING. A valid schema must be available in Schema Registry to use a schema-based message format (for example, Avro, JSON_SR (JSON Schema), or Protobuf). The following input-to-output formats are not supported for this connector:
Input format JSON to output format AVRO
Input format JSON to output format PARQUET
Input format STRING to output format BYTES
Input format STRING to output format PARQUET
Output message format: Select the output message format (data coming from the connector). Valid entries are AVRO, PARQUET, JSON, or BYTES. A valid schema must be available in Schema Registry to use a schema- based message format (for example, Avro).
Tip
The following Topic directory, Path format, and Time interval properties can be used to build a directory structure for data stored in S3. For example: You set Time interval to
Hourly, Topics directory tojson_logs/hourly, and Path format to'dt'=YYYY-MM-dd/'hr'=HH. The result is the directory structure:s3://<s3-bucket-name>/json_logs/hourly/<Topic-Name>/dt=2020-02-06/hr=09/<files>.Note that the S3 Sink connector does not allow recursive schema types. Writing to PARQUET output format with a recursive schema type results in a StackOverflowError.
Performing a compatible schema change may cause the connector to flush data prior to whatever is configured for
flush.size.
Partitioner Class: Select the Partitioner class that sets which partitioner to use for the connector:
TimeBasedPartitioner: Groups messages into folders based on time. When selected, you can configure the Time interval, Path format, Timezone, and Locale settings.
FieldPartitioner: Groups messages into folders based on specified record field values. When selected, you must specify the Partitioner Field Name (required field, up to 5 values).
DefaultPartitioner: Groups messages by Kafka topic partition. This creates a single partition folder per topic partition, using the format
partition=<kafkaPartition>.
Locale: (
TimeBasedPartitioneronly) Formats dates and times. For example, you can useen-USfor English (US),en-GBfor English (UK),en-INfor English (India), orfr-FRfor French (France). Defaults toen. For a list of locale IDs, see Java locales.Flush size: Enter the Flush size. Defaults to 1000. The value can be increased if needed. The value can be lowered (1 minimum) if you are running a Dedicated Confluent Cloud cluster. The minimum value is 1000 for non-dedicated clusters. Note that performing a compatible schema change may cause the connector to flush data prior to whatever is configured for
flush.size.Timezone: (
TimeBasedPartitioneronly) Uses a valid timezone. For example, you can useEST,PST,WET, orUTC. Defaults toUTCif not used.Path format: (
TimeBasedPartitioneronly) Configures the time-based partitioning path created in S3. The property converts the UNIX timestamp to a date format string. If not used, this property defaults to'year'=YYYY/'month'=MM/'day'=dd/'hour'=HHif an Hourly Time interval was selected or'year'=YYYY/'month'=MM/'day'=ddif a Daily Time interval was selected.Partition Field Name: The partition field name to use. This field appears when you choose
FieldPartitioneras the partitioner class.Time interval: Time interval sets how your messages are grouped in the S3 bucket. For example, if you select Hourly, messages are grouped into folders for each hour data is streamed to the bucket.
This field appears when you choose
TimeBasedPartitioneras the partitioner class.
Data decryption
Enable Client-Side Field Level Encryption for data decryption. Specify a Service Account to access the Schema Registry and associated encryption rules or keys with that schema. Select the connector behavior (
ERRORorNONE) on data decryption failure. If set toERROR, the connector fails and writes the encrypted data in the DLQ. If set toNONE, the connector writes the encrypted data in the target system without decryption. For more information on CSFLE or CSPE setup, see Manage encryption for connectors.
Show advanced configurations
Schema context: Select a schema context to use for this connector, if using a schema-based data format. This property defaults to the Default context, which configures the connector to use the default schema set up for Schema Registry in your Confluent Cloud environment. A schema context allows you to use separate schemas (like schema sub-registries) tied to topics in different Kafka clusters that share the same Schema Registry environment. For example, if you select a non-default context, a Source connector uses only that schema context to register a schema and a Sink connector uses only that schema context to read from. For more information about setting up a schema context, see What are schema contexts and when should you use them?.
Topic directory: This is a top-level directory path to use for data stored in S3. Defaults to
topicsif not used.Input Kafka record key format: Select the input Kafka record key format. Options are AVRO, BYTES, JSON, JSON_SR, PROTOBUF, or STRING. A valid schema must be available in Schema Registry to use a schema-based message format like AVRO, JSON_SR, and PROTOBUF.
Maximum span of record time (in ms) before scheduled rotation: See Scheduled Rotation for details on how this field uses
rotate.schedule.interval.msto configure a schedule for when files are closed and uploaded to storage.Maximum span of record time (in ms) before rotation: See Scheduled Rotation for details on how this field uses
rotate.interval.msto configure the maximum time span (in milliseconds) that a file can remain open for additional records.The following scenarios describe a couple of ways records may be flushed to storage:
You use the default setting of 1000 and your topic has six partitions. Files start to be created in storage after more than 1000 records exist in each partition.
You use the default setting of 1000 and the partitioner is set to Hourly. 500 records arrive at one partition from 2:00pm to 3:00pm. At 3:00pm, an additional 5 records arrive at the partition. You will see 500 records in storage at 3:00pm.
Note
The properties
rotate.schedule.interval.msandrotate.interval.mscan be used withflush.sizeto determine when files are created in storage. These parameters kick in and files are stored based on which condition is met first.For
FieldPartitionerin fully-managed connectors, an additional automatic rotation occurs when the number of open files reaches 50. This uploads the current batch of files to storage and creates a new batch.For example: You have one topic partition. You set
flush.size=1000androtate.schedule.interval.ms=600000(10 minutes). 500 records arrive at the topic partition from 12:01 to 12:10. 500 additional records arrive from 12:11 to 12:20. You will see two files in the storage bucket with 500 records in each file. This is because the 10 minuterotate.schedule.interval.mscondition tripped before theflush.size=1000condition was met.Subject Name Strategy (DEPRECATED): (DEPRECATED) Strategy used for deriving subject name from topic and record schema name. Use
value.converter.value.subject.name.strategyinstead, which can be added as “Additional Properties” available when configuring through the UI.Schema Partition Affix Type: Select an affix type to append the record schema name as a
PREFIXorSUFFIXin the S3 path after the topic name. The default setting,None, will not append the schema name to the S3 path.How to handle records with null values: How to handle records with null values (for example, Kafka tombstone records). Defaults to
ignore.Compression Type: Select the compression type for files written to S3. Valid entries are
AVRO - bzip2,AVRO - deflate,AVRO - snappy,BYTES - gzip, orJSON - gzip.Note
When using Parquet, only compression types
PARQUET - none,PARQUET - gzip, andPARQUET - snappyare currently supported.Timestamp field name: The record field used for the timestamp, which is then used with the time-base partitioner. If not used, this defaults to the timestamp when the Kafka record was produced or stored by the Kafka broker.
Gzip Compression Level: Select the compression level for files written to S3. This is applicable when using
JSONorBYTESinput. For Gzip compression type, you must select a level between 1 to 9. Selecting 1 results in high-speed compression and a low compression ratio. Selecting 9 provides the highest compression ratio and a much slower compression speed.Preserves Avro schema information. True by default: When set to
true, this property preserves Avro schema package information and Enums when going from Avro schema to Connect schema. This information is added back in when going from Connect schema to Avro schema.Report null value to dlq: Determine whether to log records with null values to dlq.
Schema Compatibility: The schema compatibility rule to use when the connector is observing schema changes in files. For usage details, see Schema Evolution. Note that this schema compatibility property is specific to S3 file schemas and not related to Schema Registry operation.
Tombstone Encoded Partition: Configure the S3 output folder to write tombstone records to. The configured partitioner will map tombstone records to the S3 output folder.
An S3 canned ACL header value: A canned Amazon S3 ACL header value to use when writing objects.
S3 Retry Backoff (ms): How long to wait in milliseconds before attempting the first retry of a failed S3 request. Upon a failure, this connector may wait up to twice as long as the previous wait, up to the maximum number of retries. This avoids retrying in a tight loop under failure scenarios.
Enable or disable writing record keys to storage: Enable or disable writing record keys to storage. Defaults to
false. If set totrue, select the Output keys format.S3 Part Upload Retries: Maximum number of retry attempts for failed requests. Zero means no retries. The actual number of attempts is determined by the S3 client based on multiple factors including, but not limited to the value of this parameter, type of exception occurred, and throttling settings of the underlying S3 client.
Output keys format: If writing record keys to storage, select the output format. Options are
AVRO,BYTES,JSON, andPARQUET. A valid schema must be available in Schema Registry to use a schema-based message format. Note that if you selectedJSON - gziporBYTES - gzipfor compression then the output keys format must beJSONorBYTES, respectively.Enable or disable writing record headers to storage: Enable or disable writing record headers to storage. Defaults to
false. If set totrue, select the Output headers format.Directory Delimiter: Defines the delimiter character used to separate directory levels in S3 object keys.
Output headers format: If writing record headers to storage, select the output format. Options are
AVRO,BYTES,JSON, andPARQUET. A valid schema must be available in Schema Registry to use a schema-based message format. Note that if you selectedJSON - gziporBYTES - gzipfor compression then the output headers format must be JSON or BYTES, respectively.File Delimiter: Defines the character used to separate topic name, partition number, and start offset within the filename.
JSON decimal format: Controls which format json converter will serialize decimals in. This value can be either ‘BASE64’ (default) or ‘NUMERIC’ and is applicable only when the output format is JSON.
Timestamp source: Extracts timestamps from records for time-based operations. Required for time-based partitioners and file rotation based on time intervals. If set to
Recordtimestamp extractor will depend on timestamp.field configuration. If timestamp.field is set to empty, the connector will use the timestamp of the record to determine the partitioning of file, otherwise it will pick the value of the field denoted by timestamp.field from the record to determine the time. Iftimestamp.sourceis set toWallclock, it will use the system time to determine the timestamp for partitioning.Tag S3 objects offsets and record count.: Tag S3 objects with start and end offsets, as well as record count.
ByteArray Format Extension: Sets the file extension for S3 objects when using
ByteArrayFormat.The S3 Server Side Encryption Algorithm: The type of S3 Server Side Encryption Algorithm to use.
Filename Offset Zero Pad Width: Controls the number of digits used for zero-padding Kafka offset numbers in S3 object filenames. This ensures consistent filename formatting and enables proper lexicographic (alphabetical) sorting.
S3 Server Side (SSE-C) Key: A customer-provided server-side encryption key (SSE-C).
ByteArray Format Line Separator: The line separator string that is inserted between individual records when using the
ByteArrayFormat. Supports escape sequences like\n,\r\n,\t.S3 Server Side Encryption Key: The name of the AWS Key Management Service (AWS-KMS) key to be used for server side encryption of the S3 objects. No encryption is used when no key is provided, but it is enabled when
KMSis specified as encryption algorithm with a valid key name.S3 HTTP Send Uses Expect Continue: Enable or disable use of the HTTP/1.1 handshake using
EXPECT: 100-CONTINUEduring multi-part upload. If true, the client will wait for a 100 (CONTINUE) response before sending the request body. Else, the client uploads the entire request body without checking if the server is willing to accept the request.Part Size in Multi-part Uploads: The part size (bytes) for S3 object multipart uploads. Defaults to
5242880.Behavior for S3 object tagging error: How to handle S3 object tagging error. Valid options are
ignoreandfail.Use S3 accelerated endpoint: Enable or disable S3 transfer acceleration. Defaults to
false.S3 Object Tagging Extra Key Value pairs: Additional S3 tag key value pairs. For example,
environment=production,team=data-engineering.Enable Path Style Access to S3: Specify whether to enable path style access for the S3 bucket used by the connector. Defaults to
true.
Additional Configs
Value Converter Replace Null With Default: Specifies whether to replace fields that have a default value and that are null to the default value. When set to
true, the connector uses the default value; otherwise, it usesnull. Applies to theJSONconverter.Value Converter Schema ID Deserializer: Sets the class name of the schema ID deserializer for values. The deserializer reads schema IDs from message headers.
Value Converter Reference Subject Name Strategy: Sets the subject reference name strategy for values. Valid entries are
DefaultReferenceSubjectNameStrategyorQualifiedReferenceSubjectNameStrategy. You can use this strategy only withPROTOBUFformat; the default strategy isDefaultReferenceSubjectNameStrategy.Schema ID For Value Converter: Sets the schema ID to use for deserialization when using
ConfigSchemaIdDeserializer. This lets you specify a fixed schema ID for deserializing message values. This property is applicable only whenvalue.converter.value.schema.id.deserializeris set toConfigSchemaIdDeserializer.Value Converter Schemas Enable: Includes schema within each of the serialized values. Input messages must contain
schemaandpayloadfields and must not contain additional fields. For plainJSONdata, set this tofalse. Applies to theJSONconverter.Errors Tolerance: Use this property to configure the connector’s error handling behavior.
Warning
Use this property with caution for sink connectors, as it can lead to data loss. If you set this property to
all, the connector does not fail on errant records, but logs them (and sends to DLQ for sink connectors) and continues processing. If you set this property tonone, the connector task fails on errant records.Value Converter Ignore Default For Nullables: When set to
true, this property ensures that the corresponding record in Kafka isnull, instead of showing the default column value. Applies to theAVRO,PROTOBUF, andJSON_SRconverters.Key Converter Schema ID Deserializer: Sets the class name of the schema ID deserializer for keys. The deserializer reads schema IDs from message headers.
Value Converter Decimal Format: Specifies the
JSONorJSON_SRserialization format for ConnectDECIMALlogical type values with two allowed literals:BASE64to serializeDECIMALlogical types as base64 encoded binary data, andNUMERICto serializeDECIMALlogical type values inJSONorJSON_SRas a number representing the decimal value.Schema GUID For Key Converter: Sets the schema GUID to use for deserialization when using
ConfigSchemaIdDeserializer. This lets you specify a fixed schema GUID for deserializing message keys. This property is applicable only whenkey.converter.key.schema.id.deserializeris set toConfigSchemaIdDeserializer.Schema GUID For Value Converter: Sets the schema GUID to use for deserialization when using
ConfigSchemaIdDeserializer. This lets you specify a fixed schema GUID for deserializing message values. This property is applicable only whenvalue.converter.value.schema.id.deserializeris set toConfigSchemaIdDeserializer.Value Converter Connect Meta Data: Enables the Connect converter to add its metadata to the output schema. Applies to Avro converters.
Value Converter Value Subject Name Strategy: Determines how to construct the subject name under which the value schema is registered with Schema Registry.
Key Converter Key Subject Name Strategy: Determines how to construct the subject name for key schema registration.
Schema ID For Key Converter: Sets the schema ID to use for deserialization when using
ConfigSchemaIdDeserializer. This lets you specify a fixed schema ID for deserializing message keys. This property is applicable only whenkey.converter.key.schema.id.deserializeris set toConfigSchemaIdDeserializer.
Auto-restart policy
Enable Connector Auto-restart: Enables the auto-restart behavior of the connector and its task in the event of user-actionable errors. Defaults to
true, enabling the connector to automatically restart in case of user-actionable errors. Set this property tofalseto disable auto-restart for failed connectors. If disabled, you must manually restart the connector.
Consumer configuration
Max poll interval(ms): Sets the maximum delay between subsequent consume requests to Kafka. Use this property to improve connector performance in cases when the connector cannot send records to the sink system. The default is 300,000 milliseconds (5 minutes).
Max poll records: Sets the maximum number of records to consume from Kafka in a single request. Use this property to improve connector performance in cases when the connector cannot send records to the sink system. The default is 500 records.
Transforms
Single Message Transformations: To add a new SMT, see Add transforms. For more information about unsupported SMTs, see Unsupported transformations.
Processing position
Set offsets: Click Set offsets to define a specific offset for this connector to begin procession data from. For more information on managing offsets, see Manage offsets.
Click Continue.
Based on the number of topic partitions you select, you will be provided with a recommended number of tasks. One task can handle up to 100 partitions (but is limited to 1 partition when using FieldPartitioner).
To change the number of recommended tasks, enter the number of tasks for the connector to use in the Tasks field.
For help with sizing your connector, click How many tasks do I need?.
Click Continue.
Note
See Configuration Properties for all property values and definitions.
Review the configuration summary and verify the following:


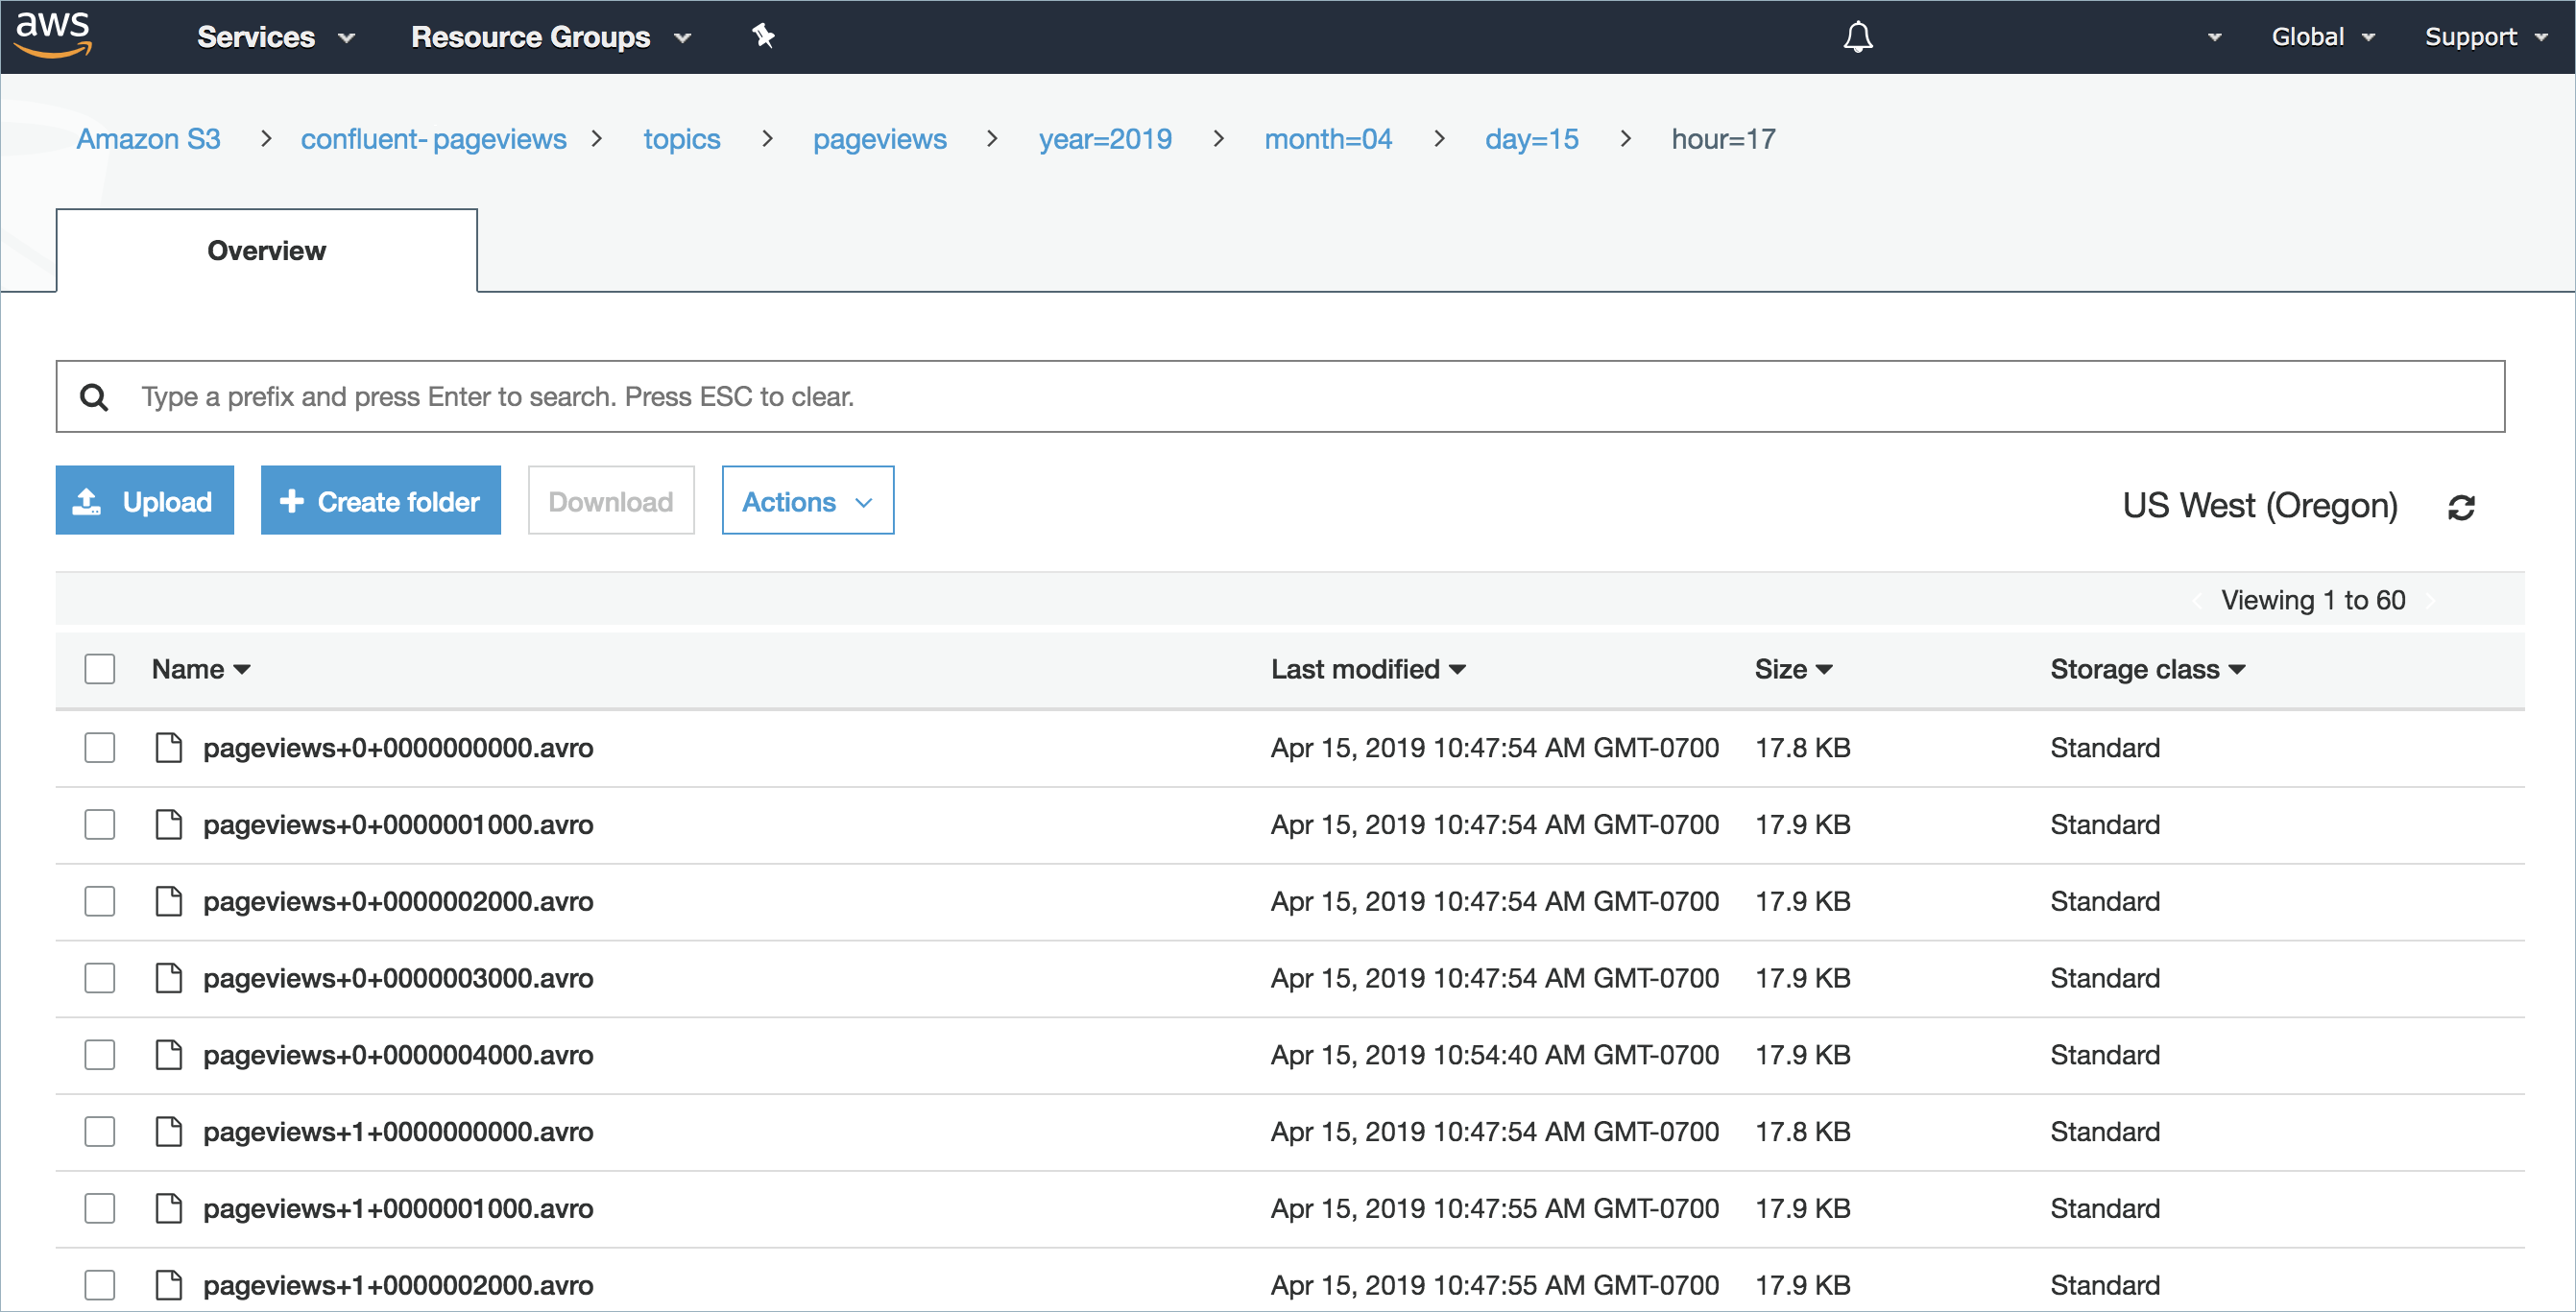
Step 5. Check the S3 bucket.
Check the S3 Bucket by going to the AWS Management Console and select Storage > S3.
Open your S3 bucket.
Open your topic folder and each subsequent folder until you see your messages displayed.
For more information and examples to use with the Confluent Cloud API for Connect, see the Confluent Cloud API for Connect Usage Examples section.
Tip
When you launch a connector, a Dead Letter Queue topic is automatically created. See View Connector Dead Letter Queue Errors in Confluent Cloud for details.
Using the Confluent CLI
Complete the following steps to set up and run the connector using the Confluent CLI.
Note
Make sure you have all your prerequisites completed.
Step 1: List the available connectors
Enter the following command to list available connectors:
confluent connect plugin list
Step 2: List the connector configuration properties
Enter the following command to show the connector configuration properties:
confluent connect plugin describe <connector-plugin-name>
The command output shows the required and optional configuration properties.
Step 3: Create the connector configuration file
Create a JSON file that contains the connector configuration properties. The following examples show the required connector properties for both partitioner types.
Example configuration for TimeBasedPartitioner:
{
   "name" : "confluent-s3-sink-time",
   "connector.class": "S3_SINK",
   "kafka.auth.mode": "KAFKA_API_KEY",
   "kafka.api.key": "<my-kafka-api-key>",
   "kafka.api.secret": "<my-kafka-api-secret>",
   "aws.access.key.id" : "<my-aws-access-key>",
   "aws.secret.access.key": "<my-aws-access-key-secret>",
   "input.data.format": "JSON",
   "output.data.format": "JSON",
   "compression.codec": "JSON - gzip",
   "s3.compression.level": "6",
   "s3.bucket.name": "<my-bucket-name>",
   "partitioner.class": "TimeBasedPartitioner",
   "locale": "en",
   "timezone": "UTC",
   "time.interval" : "HOURLY",
   "flush.size": "1000",
   "tasks.max" : "1",
   "topics": "<topic-1>, <topic-2>"
}
Example configuration for FieldPartitioner:
{
   "name" : "confluent-s3-sink-field",
   "connector.class": "S3_SINK",
   "kafka.auth.mode": "KAFKA_API_KEY",
   "kafka.api.key": "<my-kafka-api-key>",
   "kafka.api.secret": "<my-kafka-api-secret>",
   "aws.access.key.id" : "<my-aws-access-key>",
   "aws.secret.access.key": "<my-aws-access-key-secret>",
   "input.data.format": "JSON",
   "output.data.format": "JSON",
   "compression.codec": "JSON - gzip",
   "s3.compression.level": "6",
   "s3.bucket.name": "<my-bucket-name>",
   "partitioner.class": "FieldPartitioner",
   "partition.field.name": "<field-name-1>,<field-name-2>",
   "flush.size": "1000",
   "tasks.max" : "2",
   "topics": "<topic-1>, <topic-2>"
}
Note the following required property definitions:
"name": Sets a name for your new connector."connector.class": Identifies the connector plugin name.
"kafka.auth.mode": Identifies the connector authentication mode you want to use. There are two options:SERVICE_ACCOUNTorKAFKA_API_KEY(the default). To use an API key and secret, specify the configuration propertieskafka.api.keyandkafka.api.secret, as shown in the example configuration (above). To use a service account, specify the Resource ID in the propertykafka.service.account.id=<service-account-resource-ID>. To list the available service account resource IDs, use the following command:confluent iam service-account list
For example:
confluent iam service-account list

   Id     | Resource ID |       Name        |    Description
+---------+-------------+-------------------+-------------------
   123456 | sa-l1r23m   | sa-1              | Service account 1
   789101 | sa-l4d56p   | sa-2              | Service account 2
"input.data.format": Sets the input Kafka record value format (data coming from the Kafka topic). Valid entries are AVRO, JSON_SR, PROTOBUF, JSON, BYTES, or STRING. You must have Confluent Cloud Schema Registry configured if using a schema-based message format (for example, Avro, JSON_SR (JSON Schema), or Protobuf).Note
The following input-to-output formats are not supported for this connector:
Input format JSON to output format PARQUET (unless
value.converter.schemas.enableis set to true)Input format STRING to output format BYTES
Input format STRING to output format PARQUET
"output.data.format": Sets the output Kafka record value format (data coming from the connector). Valid entries are AVRO, PARQUET, JSON, or BYTES. A valid schema must be available in Schema Registry to use a schema-based message format (for example, Avro)."compression.codec": Sets the compression type. Valid entries areAVRO - bzip2,AVRO - deflate,AVRO - snappy,BYTES - gzip, orJSON - gzip. For PARQUET only compression types"PARQUET - none","PARQUET - gzip", and"PARQUET - snappy"are currently supported."s3.compression.level": Sets a gzip level. Valid entries are from1to9.Selecting1results in high-speed compression and a low compression ratio. Selecting9provides the highest compression ratio and a much slower compression speed. The default gzip compression level is6."partitioner.class": Sets the partitioner class to use. Valid entries are:"TimeBasedPartitioner"(default)"FieldPartitioner""DefaultPartitioner"
"locale": (TimeBasedPartitioner only) The locale to use with the time-based partitioner. Used to format dates and times. For example, you can useen-USfor English (USA),en-GBfor English (UK),en-INfor English (India), orfr-FRfor French (France). Defaults toen. For a list of locale IDs, see Java locales."timezone": (TimeBasedPartitioner only) A valid timezone. For example, you can useEST,PST,WET, orUTC. Defaults toUTCif not used."path.format": (TimeBasedPartitioner only) Configures the time-based partitioning path created in S3. The property converts the UNIX timestamp to a date format string. If not used, this property defaults to'year'=YYYY/'month'=MM/'day'=dd/'hour'=HHif an Hourlytime.intervalwas selected or'year'=YYYY/'month'=MM/'day'=ddif a Daily Time interval was selected."time.interval": (TimeBasedPartitioner only) Sets how your messages are grouped in the S3 bucket. Valid entries are DAILY or HOURLY (in uppercase only)."partition.field.name": (FieldPartitioner only) Specifies the record field names to use for partitioning. This property is required when using the FieldPartitioner. You can specify up to five field names in a comma-separated list (for example,"<field-name-1>,<field-name-2>"). The property supports nested field paths using dot-separated notation which allows the partitioner to traverse hierarchicalSTRUCTrecords to locate values within the record schema. The property has the following limitations:The partitioner does not support fields that contain a literal dot (
.) in their name, as the dot is strictly interpreted as a path separator.The partitioner does not support partitioning for fields located within or under an
ARRAYelement. The partitioner can only traverse nestedSTRUCTtypes.
(Optional)
flush.size: Defaults to 1000. The value can be increased if needed. The value can be lowered (1 minimum) if you are running a Dedicated Confluent Cloud cluster. The minimum value is 1000 for non-dedicated clusters. Note that performing a compatible schema change may cause the connector to flush data prior to whatever is configured forflush.size.The following scenarios describe a couple of ways records may be flushed to storage:
You use the default setting of 1000 and your topic has six partitions. Files start to be created in storage after more than 1000 records exist in each partition.
You use the default setting of 1000 and the partitioner is set to Hourly. 500 records arrive at one partition from 2:00pm to 3:00pm. At 3:00pm, an additional 5 records arrive at the partition. You will see 500 records in storage at 3:00pm.
Note
The properties
rotate.schedule.interval.msandrotate.interval.mscan be used withflush.sizeto determine when files are created in storage. These parameters kick in and files are stored based on which condition is met first.For FieldPartitioner in fully-managed connectors, an additional automatic rotation occurs when the number of open files reaches 50. This uploads the current batch of files to storage and creates a new batch.
For example: You have one topic partition. You set
flush.size=1000androtate.schedule.interval.ms=600000(10 minutes). 500 records arrive at the topic partition from 12:01 to 12:10. 500 additional records arrive from 12:11 to 12:20. You will see two files in the storage bucket with 500 records in each file. This is because the 10 minuterotate.schedule.interval.mscondition tripped before theflush.size=1000condition was met.
"tasks.max": Enter the maximum number of tasks for the connector to use."topics": Enter the topic name or a comma-separated list of topic names.Tip
For TimeBasedPartitioner: The
time.intervalproperty above and the following optional propertiestopics.dirandpath.formatcan be used to build a directory structure for data stored in S3. For example, you set"time.interval" : "HOURLY","topics.dir" : "json_logs/hourly", and"path.format" : "'dt'=YYYY-MM-dd/'hr'=HH". The result in S3 is the directory structure:s3://<s3-bucket-name>/json_logs/hourly/<Topic-Name>/dt=2020-02-06/hr=09/<files>.For FieldPartitioner: The
partition.field.nameproperty will create a directory structure based on field values. For example, if you set"partition.field.name" : "<field-name-1>,<field-name-2>"and your data has<field-name-1>=<value-1>and<field-name-2>=<value-2>, the result in S3 is the directory structure:s3://<s3-bucket-name>/topics/<Topic-Name>/<field-name-1>=<value-1>/<field-name-2>=<value-2>/<files>.For DefaultPartitioner: The connector automatically creates a directory structure based on the Kafka topic partition number. The resulting S3 directory structure is:
s3://<s3-bucket-name>/topics/<Topic-Name>/partition=<kafkaPartition>/<files>.
The following are optional properties that can be used to organize your data in storage:
"topics.dir": A top-level directory path to use for data stored in S3. Defaults totopicsif not used.rotate.schedule.interval.msandrotate.interval.ms: See Scheduled Rotation for details about using these properties.timestamp.field: (TimeBasedPartitioner only) The record field used for the timestamp, which is used with the time-base partitioner. If not used, this defaults to the timestamp when the Kafka record was produced or stored by the Kafka broker.
Note
To enable CSFLE or CSPE for data encryption, specify the following properties:
csfle.enabled: Flag to indicate whether the connector honors CSFLE or CSPE rules.sr.service.account.id: A Service Account to access the Schema Registry and associated encryption rules or keys with that schema.csfle.onFailure: Configures the connector behavior (ERRORorNONE) on data decryption failure. If set toERROR, the connector fails and writes the encrypted data in the DLQ. If set toNONE, the connector writes the encrypted data in the target system without decryption.
When using CSFLE or CSPE with connectors that route failed messages to a Dead Letter Queue (DLQ), be aware that data sent to the DLQ is written in unencrypted plaintext. This poses a significant security risk as sensitive data that should be encrypted may be exposed in the DLQ.
Do not use DLQ with CSFLE or CSPE in the current version. If you need error handling for CSFLE- or CSPE-enabled data, use alternative approaches such as:
Setting the connector behavior to
ERRORto throw exceptions instead of routing to DLQImplementing custom error handling in your applications
Using
NONEto pass encrypted data through without decryption
For more information on CSFLE or CSPE setup, see Manage encryption for connectors.
See Configuration Properties for property values and definitions.
Step 4: Load the properties file and create the connector
Enter the following command to load the configuration and start the connector:
confluent connect cluster create --config-file <file-name>.json
For example:
confluent connect cluster create --config-file s3-sink-config.json
Example output:
Created connector confluent-s3-sink lcc-ix4dl
Step 5: Check the connector status
Enter the following command to check the connector status:
confluent connect cluster list
Example output:
ID          |       Name        | Status  | Type
+-----------+-------------------+---------+------+
lcc-ix4dl   | confluent-s3-sink | RUNNING | sink
Step 6: Check the S3 bucket.
Go to the AWS Management Console and select Storage > S3.
Open your S3 bucket.
Open your topic folder and each subsequent folder until you see your messages displayed.
For more information and examples to use with the Confluent Cloud API for Connect, see the Confluent Cloud API for Connect Usage Examples section.
Tip
When you launch a connector, a Dead Letter Queue topic is automatically created. See View Connector Dead Letter Queue Errors in Confluent Cloud for details.
Scheduled Rotation
Two optional properties are available that allow you to set up a rotation schedule. These properties are provided in the Cloud Console (shown below) and in the Confluent CLI.
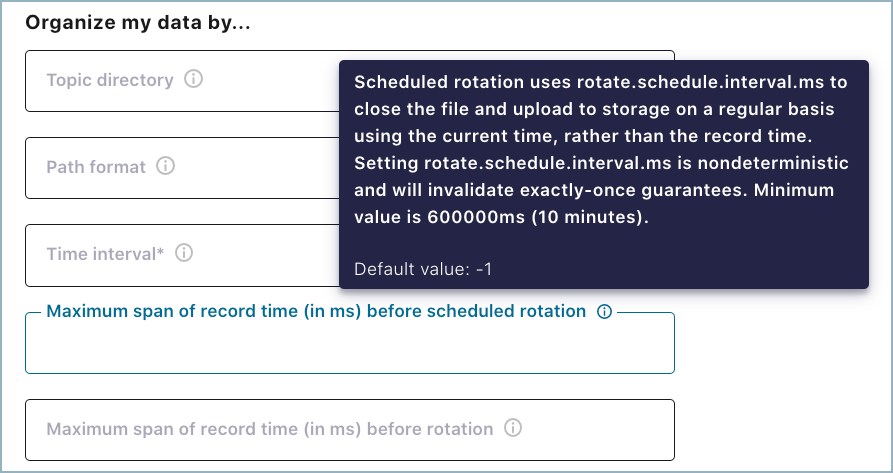
rotate.schedule.interval.ms(Scheduled rotation): This property allows you to configure a regular schedule for when files are closed and uploaded to storage. The default value is-1(disabled). For example, when this is set for 600000 ms, you will see files available in the storage bucket at least every 10 minutes.rotate.schedule.interval.msdoes not require a continuous stream of data.Note
Using the
rotate.schedule.interval.msproperty results in a non-deterministic environment and invalidates exactly-once guarantees.rotate.interval.ms(Rotation interval): This property allows you to specify the maximum time span (in milliseconds) that a file can remain open for additional records. When using this property, the time span interval for the file starts with the timestamp of the first record added to the file. The connector closes and uploads the file to storage when the timestamp of a subsequent record falls outside the time span set by the first file’s timestamp. This property defaults to the interval set by thetime.intervalproperty.rotate.interval.msrequires a continuous stream of data.Important
The start and end of the time span interval is determined using file timestamps. For this reason, a file could potentially remain open for a long time if a record does not arrive with a timestamp falling outside the time span set by the first file’s timestamp.
Schema Evolution
The Amazon S3 connector supports schema evolution and reacts to schema changes of record data according to the schema.compatibility configuration. You can set schema.compatibility to NONE, BACKWARD, FORWARD and FULL. Review the following information for details.
Note
If you see a large number of small files in the S3 bucket, it may be that consecutive records in a partition have incompatible schemas, leading to the connector closing and creating many files for each record.
The following schema compatibility information is specific to S3 file schemas and not associated with Schema Registry operation.
NONE (NO compatibility):
NONEshould only be used when records use the same schema. By default, theschema.compatibilityis set toNONE.The connector ensures that each file written to S3 has the proper schema. When the connector observes a schema change in data, it commits the current set of files for the affected topic partitions and writes the data with new schema in a new file.
- For example:
When two consecutive records arrive (R1 and R2), the connector checks both record schemas (R1/S1 and R2/S2) for compatibility. If the schemas are not identical, the connector commits R1/S1 and creates a new file for R2/S2.
FORWARD Compatibility: If you set
schema.compatibilitytoFORWARD, the connector compares schemas and uses the earliest version to query all the data uniformly. Removing a field that had a default value is forward compatible, since the earlier schema will use the default value when the field is missing.- For example:
When two consecutive records arrive (R1 and R2), the connector checks both record schemas (R1/S1 and R2/S2) for compatibility. If the schema types are not identical, the schema names are compared. The schema names are not identical, the schema parameters are compared. If these are not identical, the S2 version must be later than S1 or the schemas are not compatible and the connector commits R1/S1 and creates a new file for R2/S2.
BACKWARD Compatibility: If you set
schema.compatibilitytoBACKWARD, the connector keeps track of the latest schema used in writing data to S3, and if a record with a later schema version than current schema arrives, the connector commits the current set of files and writes the record using the new schema to a new file. For records that arrive later which are using an earlier schema, the connector projects the record to the latest schema before writing to the same set of files in S3. This supports rolling back a schema to an earlier version.- For example:
When two consecutive records arrive (R1 and R2), the connector checks both record schemas (R1/S1 and R2/S2) for compatibility. If the schema types are not identical, the schema names are compared. The schema names are not identical, the schema parameters are compared. If these are not identical, the S2 version must be earlier than S1 or the schemas are not compatible and the connector commits R1/S1 and creates a new file for R2/S2
FULL Compatibility: Full compatibility means that old data can be read with the new schema and new data can also be read with the old schema.
FULLperforms the same action asBACKWARD.
Configuration Properties
Use the following configuration properties with the fully-managed connector. For self-managed connector property definitions and other details, see the connector docs in Self-managed connectors for Confluent Platform.
Which topics do you want to get data from?
topics.regexA regular expression that matches the names of the topics to consume from. This is useful when you want to consume from multiple topics that match a certain pattern without having to list them all individually.
Type: string
Importance: low
topicsIdentifies the topic name or a comma-separated list of topic names.
Type: list
Importance: high
errors.deadletterqueue.topic.nameThe name of the topic to be used as the dead letter queue (DLQ) for messages that result in an error when processed by this sink connector, or its transformations or converters. Defaults to ‘dlq-${connector}’ if not set. The DLQ topic will be created automatically if it does not exist. You can provide
${connector}in the value to use it as a placeholder for the logical cluster ID.Type: string
Default: dlq-${connector}
Importance: low
Schema Config
schema.context.nameAdd a schema context name. A schema context represents an independent scope in Schema Registry. It is a separate sub-schema tied to topics in different Kafka clusters that share the same Schema Registry instance. If not used, the connector uses the default schema configured for Schema Registry in your Confluent Cloud environment.
Type: string
Default: default
Importance: medium
Input messages
input.data.formatSets the input Kafka record value format. Valid entries are AVRO, JSON_SR, PROTOBUF, JSON, BYTES or STRING. Note that you need to have Confluent Cloud Schema Registry configured if using a schema-based message format like AVRO, JSON_SR, and PROTOBUF.
Type: string
Default: JSON
Importance: high
input.key.formatSets the input Kafka record key format. Valid entries are AVRO, BYTES, JSON, JSON_SR, PROTOBUF, or STRING. Note that you need to have Confluent Cloud Schema Registry configured if using a schema-based message format like AVRO, JSON_SR, and PROTOBUF
Type: string
Default: BYTES
Valid Values: AVRO, BYTES, JSON, JSON_SR, PROTOBUF, STRING
Importance: high
How should we connect to your data?
nameSets a name for your connector.
Type: string
Valid Values: A string at most 64 characters long
Importance: high
Kafka Cluster credentials
kafka.auth.modeKafka Authentication mode. It can be one of KAFKA_API_KEY or SERVICE_ACCOUNT. It defaults to KAFKA_API_KEY mode, whenever possible.
Type: string
Valid Values: SERVICE_ACCOUNT, KAFKA_API_KEY
Importance: high
kafka.api.keyKafka API Key. Required when kafka.auth.mode==KAFKA_API_KEY.
Type: password
Importance: high
kafka.service.account.idThe Service Account that will be used to generate the API keys to communicate with Kafka Cluster.
Type: string
Importance: high
kafka.api.secretSecret associated with Kafka API key. Required when kafka.auth.mode==KAFKA_API_KEY.
Type: password
Importance: high
AWS credentials
authentication.methodSelect how you want to authenticate with AWS.
Type: string
Default: Access Keys
Importance: high
aws.access.key.idType: password
Importance: high
provider.integration.idSelect an existing integration that has access to your resource. In case you need to integrate a new IAM role, use provider integration
Type: string
Importance: high
aws.secret.access.keyType: password
Importance: high
secret.manager.enabledFetch sensitive configuration values from a secret manager.
Type: boolean
Default: false
Importance: high
Secret manager configuration
secret.managerSelect the secret manager to use for retrieving sensitive data.
Type: string
Importance: high
secret.manager.managed.configsSelect the configurations to fetch their values from the secret manager.
Type: list
Importance: high
secret.manager.provider.integration.idSelect an existing provider integration that has access to your secret manager.
Type: string
Importance: high
Amazon S3 details
s3.regionThe AWS region where the S3 bucket is defined.
Type: string
Importance: low
s3.bucket.nameAn Amazon S3 bucket must be in the same region as your Confluent Cloud cluster.
Type: string
Importance: high
s3.ssea.nameThe S3 Server Side Encryption Algorithm.
Type: string
Default: “”
Importance: low
s3.sse.customer.keyThe S3 Server Side Encryption Customer-Provided Key (SSE-C)
Type: password
Importance: low
store.urlThe object storage connection URL, if applicable. For example: ‘https://bucket.s3-aws-region.amazonaws.com’
Type: string
Default: “”
Importance: medium
s3.sse.kms.key.idThe name of the AWS Key Management Service (AWS-KMS) key to be used for server side encryption of the S3 objects. No encryption is used when no key is provided, but it is enabled when
KMSis specified as encryption algorithm with a valid key name.Type: string
Importance: low
s3.part.sizeThe Part Size(bytes) in S3 Multi-part Uploads.
Type: int
Default: 5242880
Valid Values: [5242880,…,2147483647]
Importance: high
s3.wan.modeUse S3 accelerated endpoint.
Type: boolean
Default: false
Importance: medium
s3.path.style.access.enabledSpecifies whether or not to enable path style access to the bucket used by the connector
Type: boolean
Default: true
Importance: medium
s3.retry.backoff.msHow long to wait in milliseconds before attempting the first retry of a failed S3 request. Upon a failure, this connector may wait up to twice as long as the previous wait, up to the maximum number of retries. This avoids retrying in a tight loop under failure scenarios.
Type: long
Default: 200
Valid Values: [200,…,300000]
Importance: low
s3.part.retriesMaximum number of retry attempts for failed requests. Zero means no retries. The actual number of attempts is determined by the S3 client based on multiple factors including, but not limited to: the value of this parameter, type of exception occurred, and throttling settings of the underlying S3 client.
Type: int
Default: 10000
Valid Values: [0,…,10000]
Importance: medium
s3.http.send.expect.continueEnable or disable use of the HTTP/1.1 handshake using EXPECT: 100-CONTINUE during multi-part upload. If true, the client will wait for a 100 (CONTINUE) response before sending the request body. Else, the client uploads the entire request body without checking if the server is willing to accept the request.
Type: boolean
Default: true
Importance: low
s3.object.behavior.on.tagging.errorHow to handle S3 object tagging error. Valid options are ‘ignore’ and ‘fail’.
Type: string
Default: ignore
Importance: low
s3.object.tagging.key.value.pairsAdditional S3 tag key value pairs. Example: environment=production,team=data-engineering
Type: list
Default: “”
Importance: low
Output messages
output.data.formatSet the output message format for values. Valid entries are AVRO, JSON, PARQUET or BYTES. Note that you need to have Confluent Cloud Schema Registry configured if using a schema-based message format like AVRO. Note that the output message format defaults to the value in the Input Message Format field. If either PROTOBUF or JSON_SR is selected as the input message format, you should select one explicitly. If no value for this property is provided, the value specified for the ‘input.data.format’ property is used.
Type: string
Importance: high
output.keys.formatSet the output format for keys. Valid entries are AVRO, JSON, PARQUET or BYTES. Note that you need to have Confluent Cloud Schema Registry configured if using a schema-based message format like AVRO.
Type: string
Default: AVRO
Valid Values: AVRO, BYTES, JSON, PARQUET
Importance: high
output.headers.formatSet the output format for headers. Valid entries are AVRO, JSON, PARQUET or BYTES. Note that you need to have Confluent Cloud Schema Registry configured if using a schema-based message format like AVRO.
Type: string
Default: AVRO
Valid Values: AVRO, BYTES, JSON, PARQUET
Importance: high
json.decimal.formatControls which format json converter will serialize decimals in. This value can be either ‘BASE64’ (default) or ‘NUMERIC’ and is applicable only when the output format is JSON.
Type: string
Default: BASE64
Importance: low
Organize my data by…
partitioner.classThe partitioner to use when writing data to the Object store
Type: string
Default: TimeBasedPartitioner
Importance: high
topics.dirConfigures the directory to store the data ingested from Kafka. For a file like
s3://<s3-bucket-name>/json_logs/daily/<Topic-Name>/dt=2020-02-06/hr=09/<files>, settopics.dir=json_logs/daily,path.format='dt'=YYYY-MM-dd/'hr'=HH, andtime.interval=HOURLY. For another file likes3://<s3-bucket-name>/<Topic-Name>/dt=2020-02-06/hr=09/<files>, settopics.dir=" ", but keeppath.formatandtime.intervalthe same as in the previous example. This configures thetopics.dirto a space. In the UI, enter a blank space, and use" "for CLI and API configurations.Type: string
Default: topics
Importance: high
localeSets the locale to use with TimeBasedPartitioner.
Type: string
Default: en
Importance: high
timezoneSets the timezone used by the TimeBasedPartitioner.
Type: string
Default: UTC
Importance: high
rotate.schedule.interval.msScheduled rotation uses rotate.schedule.interval.ms to close the file and upload to storage on a regular basis using the current time, rather than the record time. Setting rotate.schedule.interval.ms is nondeterministic and will invalidate exactly-once guarantees.
Type: int
Default: -1
Importance: medium
rotate.interval.msThe connector’s rotation interval specifies the maximum timespan (in milliseconds) a file can remain open and ready for additional records. In other words, when using rotate.interval.ms, the timestamp for each file starts with the timestamp of the first record inserted in the file. The connector closes and uploads a file to the blob store when the next record’s timestamp does not fit into the file’s rotate.interval time span from the first record’s timestamp. If the connector has no more records to process, the connector may keep the file open until the connector can process another record (which can be a long time). If no value for this property is provided, the value specified for the ‘time.interval’ property is used.
Type: int
Importance: high
path.formatThis configuration is used to set the format of the data directories when partitioning with TimeBasedPartitioner. The format set in this configuration converts the Unix timestamp to a valid directory string. To organize files like this example, s3://<s3-bucket-name>/json_logs/daily/<Topic-Name>/dt=2020-02-06/hr=09/<files>, use the properties: topics.dir=json_logs/daily, path.format=’dt’=YYYY-MM-dd/’hr’=HH, and time.interval=HOURLY.
Type: string
Default: ‘year’=YYYY/’month’=MM/’day’=dd/’hour’=HH
Importance: high
partition.field.nameThe partition field name to use when partitioning with FieldPartitioner
Type: list
Importance: high
flush.sizeNumber of records written to storage before invoking file commits.
Type: int
Default: 1000
Valid Values: [1000,…] for non-dedicated clusters and [1,…] for dedicated clusters
Importance: high
compression.codecCompression type for files written to S3.
Type: string
Valid Values: AVRO - bzip2, AVRO - deflate, AVRO - snappy, BYTES - gzip, JSON - gzip, PARQUET - gzip, PARQUET - none, PARQUET - snappy
Importance: high
timestamp.fieldSets the field that contains the timestamp used for the TimeBasedPartitioner
Type: string
Default: “”
Importance: high
behavior.on.null.valuesHow to handle records with null values, e.g Kafka tombstone records. Valid options are ‘ignore’, ‘fail’ and ‘write’. Default is ‘ignore’
Type: string
Default: ignore
Importance: low
subject.name.strategy(DEPRECATED) Strategy used for deriving subject name from topic and record schema name. Use
value.converter.value.subject.name.strategyinstead, which can be added as “Additional Properties” available when configuring through the UI.Type: string
Default: TopicNameStrategy
Valid Values: TopicNameStrategy, TopicRecordNameStrategy
Importance: low
s3.compression.levelGzip compression level for files written to S3. Applied when using JSON or BYTES input.
Type: int
Valid Values: [-1,…,9]
Importance: high
time.intervalPartitioning interval of data, according to the time ingested to storage.
Type: string
Valid Values: DAILY, HOURLY
Importance: high
enhanced.avro.schema.supportWhen set to true, this property preserves Avro schema package information and Enums when going from Avro schema to Connect schema. This information is added back in when going from Connect schema to Avro schema.
Type: boolean
Default: true
Importance: low
report.null.values.to.dlqDetermine whether to log records with null values to dlq
Type: boolean
Default: true
Importance: low
s3.schema.partition.affix.typeAppend the record schema name to prefix or suffix in the s3 path after the topic name. None will not append the schema name in the s3 path.
Type: string
Default: NONE
Valid Values: NONE, PREFIX, SUFFIX
Importance: low
schema.compatibilityThe schema compatibility rule to use when the connector is observing schema changes.
Type: string
Default: NONE
Importance: high
tombstone.encoded.partitionOutput s3 folder to write the tombstone records to. The configured partitioner would map tombstone records to this output folder.
Type: string
Default: tombstone
Importance: low
s3.acl.cannedAn S3 canned ACL header value to apply when writing objects.
Type: string
Valid Values: authenticated-read, aws-exec-read, bucket-owner-full-control, bucket-owner-read, log-delivery-write, private, public-read, public-read-write
Importance: low
store.kafka.keysEnable or disable writing record keys to storage
Type: boolean
Default: false
Importance: low
store.kafka.headersEnable or disable writing record headers to storage.
Type: boolean
Default: false
Importance: low
s3.object.taggingTag S3 objects with start and end offsets, as well as record count.
Type: boolean
Default: false
Importance: low
directory.delimDefines the delimiter character used to separate directory levels in S3 object keys.
Type: string
Default: /
Importance: low
file.delimDefines the character used to separate topic name, partition number, and start offset within the filename.
Type: string
Default: +
Importance: low
timestamp.sourceExtracts timestamps from records for time-based operations. Required for time-based partitioners and file rotation based on time intervals. If set to
Recordtimestamp extractor will depend on timestamp.field configuration. If timestamp.field is set to empty, the connector will use the timestamp of the record to determine the partitioning of file, otherwise it will pick the value of the field denoted by timestamp.field from the record to determine the time. Iftimestamp.sourceis set toWallclock, it will use the system time to determine the timestamp for partitioning.Type: string
Default: Record
Valid Values: Record, Wallclock
Importance: low
format.bytearray.extensionSets the file extension for S3 objects when using ByteArrayFormat.
Type: string
Default: .bin
Importance: low
filename.offset.zero.pad.widthControls the number of digits used for zero-padding Kafka offset numbers in S3 object filenames. This ensures consistent filename formatting and enables proper lexicographic (alphabetical) sorting.
Type: int
Default: 10
Valid Values: [1,…]
Importance: low
format.bytearray.separatorThe line separator string that is inserted between individual records when using the ByteArrayFormat. Supports escape sequences like n, rn, t.
Type: string
Default: “”
Importance: low
Consumer configuration
max.poll.interval.msThe maximum delay between subsequent consume requests to Kafka. This configuration property may be used to improve the performance of the connector, if the connector cannot send records to the sink system. Defaults to 300000 milliseconds (5 minutes).
Type: long
Default: 300000 (5 minutes)
Valid Values: [60000,…,1800000] for non-dedicated clusters and [60000,…] for dedicated clusters
Importance: low
max.poll.recordsThe maximum number of records to consume from Kafka in a single request. This configuration property may be used to improve the performance of the connector, if the connector cannot send records to the sink system. Defaults to 500 records.
Type: long
Default: 500
Valid Values: [1,…,500] for non-dedicated clusters and [1,…] for dedicated clusters
Importance: low
Number of tasks for this connector
tasks.maxMaximum number of tasks for the connector.
Type: int
Valid Values: [1,…]
Importance: high
Additional Configs
consumer.override.auto.offset.resetDefines the behavior of the consumer when there is no committed position (which occurs when the group is first initialized) or when an offset is out of range. You can choose either to reset the position to the “earliest” offset (the default) or the “latest” offset. You can also select “none” if you would rather set the initial offset yourself and you are willing to handle out of range errors manually. More details: https://docs.confluent.io/platform/current/installation/configuration/consumer-configs.html#auto-offset-reset
Type: string
Importance: low
consumer.override.isolation.levelControls how to read messages written transactionally. If set to read_committed, consumer.poll() will only return transactional messages which have been committed. If set to read_uncommitted (the default), consumer.poll() will return all messages, even transactional messages which have been aborted. Non-transactional messages will be returned unconditionally in either mode. More details: https://docs.confluent.io/platform/current/installation/configuration/consumer-configs.html#isolation-level
Type: string
Importance: low
header.converterThe converter class for the headers. This is used to serialize and deserialize the headers of the messages.
Type: string
Importance: low
key.converter.use.schema.guidThe schema GUID to use for deserialization when using ConfigSchemaIdDeserializer. This allows you to specify a fixed schema GUID to be used for deserializing message keys. Only applicable when key.converter.key.schema.id.deserializer is set to ConfigSchemaIdDeserializer.
Type: string
Importance: low
key.converter.use.schema.idThe schema ID to use for deserialization when using ConfigSchemaIdDeserializer. This allows you to specify a fixed schema ID to be used for deserializing message keys. Only applicable when key.converter.key.schema.id.deserializer is set to ConfigSchemaIdDeserializer.
Type: int
Importance: low
value.converter.allow.optional.map.keysAllow optional string map key when converting from Connect Schema to Avro Schema. Applicable for Avro Converters.
Type: boolean
Importance: low
value.converter.auto.register.schemasSpecify if the Serializer should attempt to register the Schema.
Type: boolean
Importance: low
value.converter.connect.meta.dataAllow the Connect converter to add its metadata to the output schema. Applicable for Avro Converters.
Type: boolean
Importance: low
value.converter.enhanced.avro.schema.supportEnable enhanced schema support to preserve package information and Enums. Applicable for Avro Converters.
Type: boolean
Importance: low
value.converter.enhanced.protobuf.schema.supportEnable enhanced schema support to preserve package information. Applicable for Protobuf Converters.
Type: boolean
Importance: low
value.converter.flatten.unionsWhether to flatten unions (oneofs). Applicable for Protobuf Converters.
Type: boolean
Importance: low
value.converter.generate.index.for.unionsWhether to generate an index suffix for unions. Applicable for Protobuf Converters.
Type: boolean
Importance: low
value.converter.generate.struct.for.nullsWhether to generate a struct variable for null values. Applicable for Protobuf Converters.
Type: boolean
Importance: low
value.converter.int.for.enumsWhether to represent enums as integers. Applicable for Protobuf Converters.
Type: boolean
Importance: low
value.converter.latest.compatibility.strictVerify latest subject version is backward compatible when use.latest.version is true.
Type: boolean
Importance: low
value.converter.object.additional.propertiesWhether to allow additional properties for object schemas. Applicable for JSON_SR Converters.
Type: boolean
Importance: low
value.converter.optional.for.nullablesWhether nullable fields should be specified with an optional label. Applicable for Protobuf Converters.
Type: boolean
Importance: low
value.converter.optional.for.proto2Whether proto2 optionals are supported. Applicable for Protobuf Converters.
Type: boolean
Importance: low
value.converter.scrub.invalid.namesWhether to scrub invalid names by replacing invalid characters with valid characters. Applicable for Avro and Protobuf Converters.
Type: boolean
Importance: low
value.converter.use.latest.versionUse latest version of schema in subject for serialization when auto.register.schemas is false.
Type: boolean
Importance: low
value.converter.use.optional.for.nonrequiredWhether to set non-required properties to be optional. Applicable for JSON_SR Converters.
Type: boolean
Importance: low
value.converter.use.schema.guidThe schema GUID to use for deserialization when using ConfigSchemaIdDeserializer. This allows you to specify a fixed schema GUID to be used for deserializing message values. Only applicable when value.converter.value.schema.id.deserializer is set to ConfigSchemaIdDeserializer.
Type: string
Importance: low
value.converter.use.schema.idThe schema ID to use for deserialization when using ConfigSchemaIdDeserializer. This allows you to specify a fixed schema ID to be used for deserializing message values. Only applicable when value.converter.value.schema.id.deserializer is set to ConfigSchemaIdDeserializer.
Type: int
Importance: low
value.converter.wrapper.for.nullablesWhether nullable fields should use primitive wrapper messages. Applicable for Protobuf Converters.
Type: boolean
Importance: low
value.converter.wrapper.for.raw.primitivesWhether a wrapper message should be interpreted as a raw primitive at root level. Applicable for Protobuf Converters.
Type: boolean
Importance: low
errors.toleranceUse this property if you would like to configure the connector’s error handling behavior. WARNING: This property should be used with CAUTION for SOURCE CONNECTORS as it may lead to dataloss. If you set this property to ‘all’, the connector will not fail on errant records, but will instead log them (and send to DLQ for Sink Connectors) and continue processing. If you set this property to ‘none’, the connector task will fail on errant records.
Type: string
Default: all
Importance: low
key.converter.key.schema.id.deserializerThe class name of the schema ID deserializer for keys. This is used to deserialize schema IDs from the message headers.
Type: string
Default: io.confluent.kafka.serializers.schema.id.DualSchemaIdDeserializer
Importance: low
key.converter.key.subject.name.strategyHow to construct the subject name for key schema registration.
Type: string
Default: TopicNameStrategy
Importance: low
key.converter.replace.null.with.defaultWhether to replace fields that have a default value and that are null to the default value. When set to true, the default value is used, otherwise null is used. Applicable for JSON Key Converter.
Type: boolean
Default: true
Importance: low
key.converter.schemas.enableInclude schemas within each of the serialized keys. Input message keys must contain schema and payload fields and may not contain additional fields. For plain JSON data, set this to false. Applicable for JSON Key Converter.
Type: boolean
Default: false
Importance: low
value.converter.decimal.formatSpecify the JSON/JSON_SR serialization format for Connect DECIMAL logical type values with two allowed literals:
BASE64 to serialize DECIMAL logical types as base64 encoded binary data and
NUMERIC to serialize Connect DECIMAL logical type values in JSON/JSON_SR as a number representing the decimal value.
Type: string
Default: BASE64
Importance: low
value.converter.flatten.singleton.unionsWhether to flatten singleton unions. Applicable for Avro and JSON_SR Converters.
Type: boolean
Default: false
Importance: low
value.converter.ignore.default.for.nullablesWhen set to true, this property ensures that the corresponding record in Kafka is NULL, instead of showing the default column value. Applicable for AVRO,PROTOBUF and JSON_SR Converters.
Type: boolean
Default: false
Importance: low
value.converter.reference.subject.name.strategySet the subject reference name strategy for value. Valid entries are DefaultReferenceSubjectNameStrategy or QualifiedReferenceSubjectNameStrategy. Note that the subject reference name strategy can be selected only for PROTOBUF format with the default strategy being DefaultReferenceSubjectNameStrategy.
Type: string
Default: DefaultReferenceSubjectNameStrategy
Importance: low
value.converter.replace.null.with.defaultWhether to replace fields that have a default value and that are null to the default value. When set to true, the default value is used, otherwise null is used. Applicable for JSON Converter.
Type: boolean
Default: true
Importance: low
value.converter.schemas.enableInclude schemas within each of the serialized values. Input messages must contain schema and payload fields and may not contain additional fields. For plain JSON data, set this to false. Applicable for JSON Converter.
Type: boolean
Default: false
Importance: low
value.converter.value.schema.id.deserializerThe class name of the schema ID deserializer for values. This is used to deserialize schema IDs from the message headers.
Type: string
Default: io.confluent.kafka.serializers.schema.id.DualSchemaIdDeserializer
Importance: low
value.converter.value.subject.name.strategyDetermines how to construct the subject name under which the value schema is registered with Schema Registry.
Type: string
Default: TopicNameStrategy
Importance: low
Auto-restart policy
auto.restart.on.user.errorEnable connector to automatically restart on user-actionable errors.
Type: boolean
Default: true
Importance: medium
Frequently asked questions
Find answers to frequently asked questions about the Amazon S3 Sink connector.
Why should tasks.max match the topic’s partition count when using FieldPartitioner?
When you use FieldPartitioner in Confluent Cloud, a single Kafka partition can be distributed across many object-store partitions. If one task owns many Kafka partitions, each open encoded partition requires its own in-memory buffer and multipart upload handle.
Therefore, to prevent high memory usage and instability, you must set tasks.max to the topic partition count.
If your workload can’t support a one-partition-per-task configuration, switch to DefaultPartitioner or TimeBasedPartitioner.
Why is the connector experiencing low throughput even after scaling tasks.max or connector size?
Scaled connectors may still experience throughput bottlenecks if the configuration forces frequent file rotation. This typically occurs when a low flush.size is combined with aggressive rotate.interval.ms or rotate.schedule.interval.ms settings.
To improve throughput:
Increase
flush.sizeto ensure each S3 object contains a larger volume of records.Lengthen rotation and rotation schedule intervals to prevent time-based triggers from overriding the flush size.
Why does the connector log successful writes but no data appears in the S3 bucket?
If the connector logs show object creation, but running the aws s3 ls command shows the bucket is empty, the most likely cause is that the connector hasn’t yet committed the files to S3. The connector buffers data in memory and only performs a final commit to S3 once flush.size is reached or the rotate.schedule.interval.ms and rotate.interval.ms expires.
To make low-volume workloads easier, temporarily reduce flush.size and shorten rotate.schedule.interval.ms and rotate.interval.ms values to commit files sooner. After you validate this behavior, tune these settings for your expected production volume.
Why does the connector with provider integration fail with STS AccessDenied or credentials errors?
The connector fails with AccessDenied or Failed to build credentials provider errors if there is a mismatch in your AWS IAM configuration. Align your permissions and trust policies with the provider integration requirements:
Ensure the IAM role has the necessary S3 actions including
s3:PutObject,s3:ListBucket, ands3:GetBucketLocationgranted for your target bucket and its contents. For more information, see the User Account IAM Policy section.Ensure the
sts:ExternalIdin the trust policy matches yourprovider.integration.id.After updating the policies, restart the connector or update its configuration to force a fresh STS handshake.
Why does the connector fail to resume after pause?
If the connector stays in a Failed or Stalled state and refuses to resume consumption after restarting or after a pause, the connector could be encountering a problematic record at its last committed offset.
Check the following areas:
Check the Confluent Cloud UI or use the Confluent CLI to look for
RecordTooLargeExceptionor serialization errors.If you use a topic regex, verify it is not accidentally pulling in topics with incompatible schemas or unexpectedly large record sizes.
If a specific record is blocking the connector:
Filter the problematic data using SMT. For more information, see Configure Single Message Transformations for Kafka Connectors in Confluent Cloud.
Purge the source topic to move past the corrupted offset.
Next Steps
For an example that shows fully-managed Confluent Cloud connectors in action with Confluent Cloud for Apache Flink, see the Cloud ETL Demo. This example also shows how to use Confluent CLI to manage your resources in Confluent Cloud.
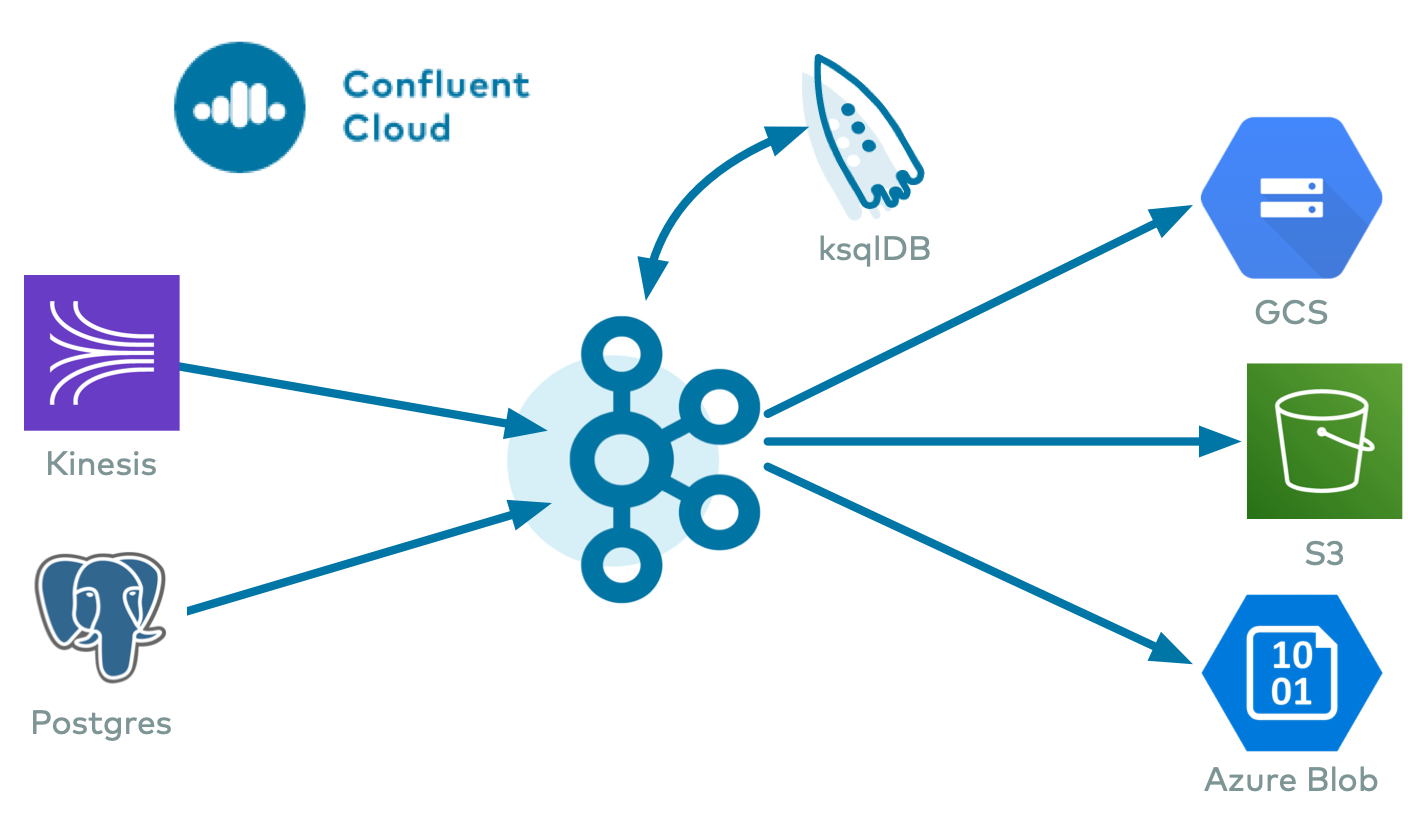
Try Confluent Cloud on AWS Marketplace with $1000 of free usage for 30 days, and pay as you go. No credit card is required.