
Quick Start for Confluent Cloud
Confluent Cloud is a fully managed, cloud-native data streaming platform powered by Apache Kafka®. This quick start guide helps you begin streaming data by showing you how to create a cluster, add a topic, and produce data.
Why use Confluent Cloud instead of managing Kafka yourself?
Confluent Cloud eliminates the operational complexity of Kafka with:
Automatic scaling and reliability
Built-in security, monitoring, and schema management
Lower total cost of ownership and faster development
Compare Confluent Cloud and Apache Kafka or sign up for Confluent Cloud to get started.
- Considerations
This quick start gets you up and running with Confluent Cloud using a Basic Kafka cluster.
The first section shows how to use Confluent Cloud to create topics, and produce and consume data to and from the cluster.
The second section walks you through how to use Confluent Cloud for Apache Flink® to run queries on the data using SQL syntax.
The quick start workflows assume you already have a working Confluent Cloud environment, which includes a Stream Governance package. To learn more about Stream Governance packages, features, and environment setup workflows, see Manage Stream Governance Packages in Confluent Cloud.
Confluent Cloud has a web interface called the Cloud Console, a local command line interface, and REST APIs. Use the Cloud Console to manage cluster resources, settings, and billing. Use the Confluent CLI and REST APIs to create and manage topics and more.
- Prerequisites
Access to Confluent Cloud. To get started for free, see Confluent Cloud Free Trial.
Internet connectivity
Stream Governance package
Section 1: Create a cluster and add a topic
Follow the steps in this section to set up a Kafka cluster on Confluent Cloud and produce data to Kafka topics on the cluster.
Step 1: Create a Kafka cluster in Confluent Cloud
In this step, you create and launch a basic Kafka cluster inside your default environment.
Sign in to Confluent Cloud at https://confluent.cloud.
Click Add cluster.
On the Create cluster page, for the Basic cluster, select Begin configuration.
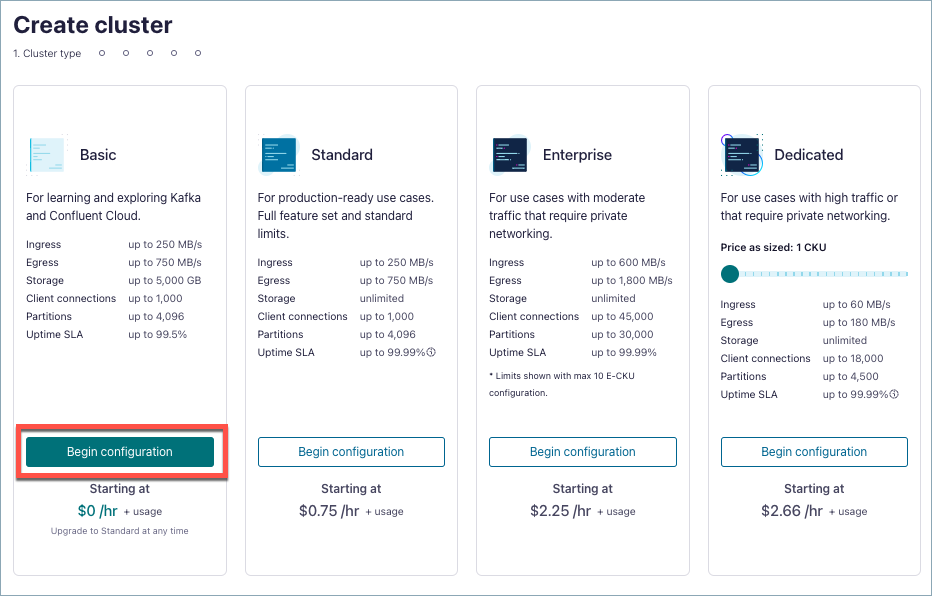
This example creates a Basic Kafka cluster, which supports single-zone availability. For information about other cluster types, see Kafka Cluster Types in Confluent Cloud.
On the Region/zones page, choose a cloud provider, region, and select a single availability zone.
Select Continue.
If you haven’t set up a payment method, you see the Set payment page. Enter a payment method and select Review.
On the Create cluster page, specify a cluster name, review the configuration and cost information, and then select Launch cluster.
Depending on the chosen cloud provider and other settings, it might take a few minutes to provision your cluster, but after the cluster has provisioned, the Cluster Overview page displays.
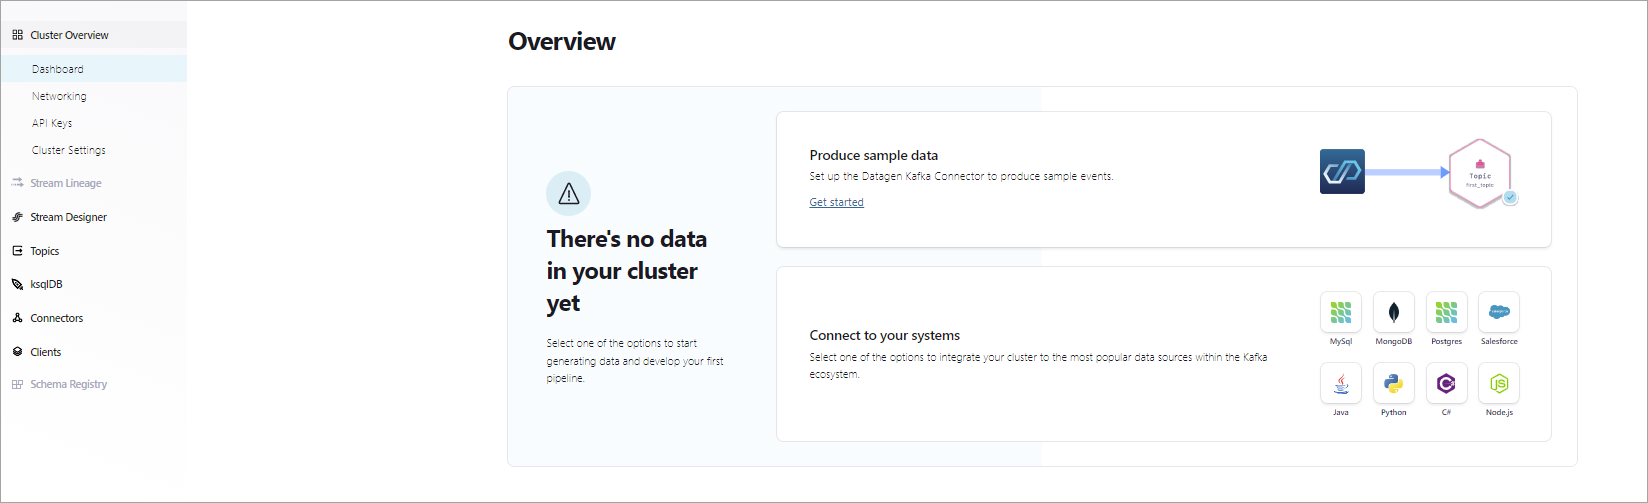
Now you can configure apps and data on your new cluster.
Log in or sign up to Confluent Cloud:
Log in:
confluent login
Create a Kafka cluster:
confluent kafka cluster create <name> [flags]
For example:
confluent kafka cluster create quickstart_cluster --cloud "aws" --region "us-west-2"
Create a Kafka cluster.
Request:
POST /cmk/v2/clusters
Host: api.confluent.cloud

{
   "spec": {
      "display_name": "quickstart_cluster",
      "availability": "SINGLE_ZONE",
      "cloud": "{provider}",
      "region": "{region}",
      "config": {
         "kind": "Basic"
      },
      "environment": {
         "id": "env-a12b34"
      }
   }
}
Response:
{
   "api_version": "cmk/v2",
   "id": "lkc-000000",
   "kind": "Cluster",
   "metadata": {
      "created_at": "2022-11-21T22:50:07.496522Z",
      "resource_name": "crn://confluent.cloud/organization=example1-org1-1111-2222-33aabbcc444dd55/environment=env-00000/cloud-cluster=lkc-000000/kafka=lkc-000000",
      "self": "https://api.confluent.cloud/cmk/v2/clusters/lkc-000000",
      "updated_at": "2022-11-21T22:50:07.497443Z"
   },
   "spec": {
      "api_endpoint": "https://pkac-{00000}.{region}.{provider}.confluent.cloud",
      "availability": "SINGLE_ZONE",
      "cloud": "{provider}",
      "config": {
            "kind": "Basic"
      },
      "display_name": "quickstart_cluster",
      "environment": {
            "api_version": "org/v2",
            "id": "env-a12b34",
            "kind": "Environment",
            "related": "https://api.confluent.cloud/org/v2/environments/env-a12b34",
            "resource_name": "crn://confluent.cloud/organization=example1-org1-1111-2222-33aabbcc444dd55/environment=env-a12b34}"
      ,
      "http_endpoint": "https://pkc-{00000}.{region}.{provider}.confluent.cloud:443",
      "kafka_bootstrap_endpoint": "SASL_SSL://pkc-{00000}.{region}.{provider}.confluent.cloud:9092",
      "region": "{region}"
   },
   "status": {
      "phase": "PROVISIONING"
   }
}
Step 2: Create a Kafka topic
In this step, you create a users Kafka topic by using the Cloud Console. A topic is a unit of organization for a cluster, and is essentially an append-only log. For more information about topics, see What is Apache Kafka.
From the navigation menu, click Topics, and then click Create topic.
In the Topic name field, type “users” and then select Create with defaults.
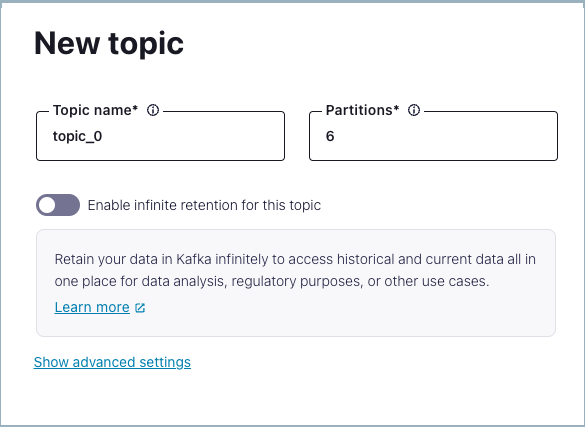
The users topic is created on the Kafka cluster and is available for use by producers and consumers.
The success message might prompt you to take an action, but continue with Step 3: Create a sample producer.
Create a topic:
confluent kafka topic create <name> [flags]
For example:
confluent kafka topic create users --cluster lkc-000000
Create a topic:
Request:
POST /kafka/v3/clusters/{cluster_id}/topics
Host: pkc-{00000}.{region}.{provider}.confluent.cloud

{
   "topic_name": "users",
   "partitions_count": 6,
   "replication_factor": 3,
   "configs": [{
         "name": "cleanup.policy",
         "value": "delete"
      },
      {
         "name": "compression.type",
         "value": "gzip"
      }
   ]
}
Response:
{
   "kind": "KafkaTopic",
   "metadata": {
      "self": "https://pkc-{00000}.{region}.{provider}.confluent.cloud/kafka/v3/clusters/quickstart/topics/users",
      "resource_name": "crn:///kafka=quickstart/topic=users"
   },
   "cluster_id": "quickstart",
   "topic_name": "users",
   "is_internal": false,
   "replication_factor": 3,
   "partitions_count": 1,
   "partitions": {
      "related": "https://pkc-{00000}.{region}.{provider}.confluent.cloud/kafka/v3/clusters/cluster-1/topics/topic-X/partitions"
   },
   "configs": {
      "related": "https://pkc-{00000}.{region}.{provider}.confluent.cloud/kafka/v3/clusters/cluster-1/topics/topic-X/configs"
   },
   "partition_reassignments": {
      "related": "https://pkc-{00000}.{region}.{provider}.confluent.cloud/kafka/v3/clusters/cluster-1/topics/topic-X/partitions/-/reassignments"
   }
}
Step 3: Create a sample producer
You can produce example data to your Kafka cluster by using the hosted Datagen Source Connector for Confluent Cloud.
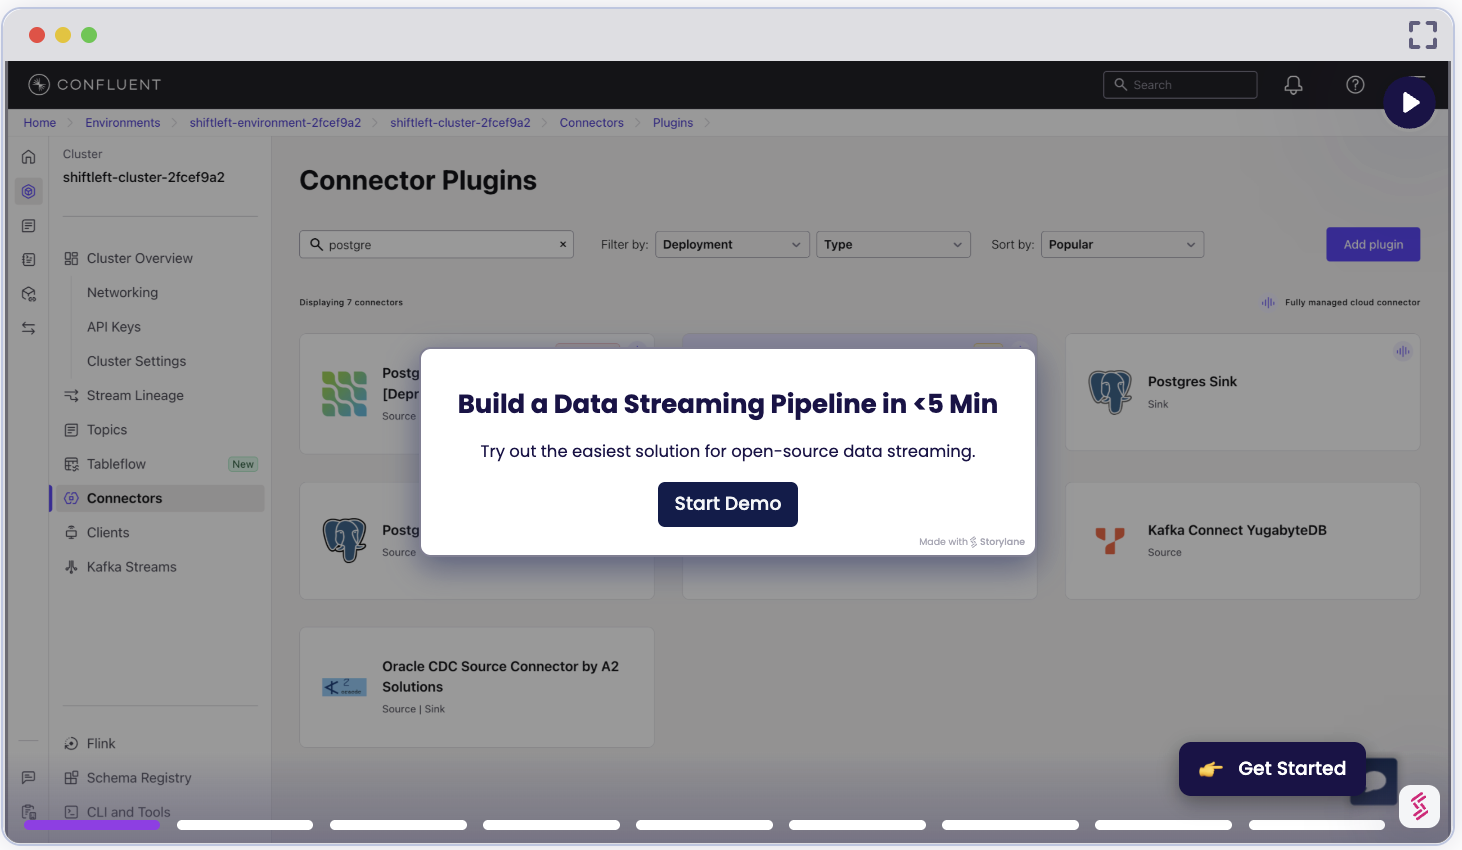
From the navigation menu, select Connectors.
To open Confluent Cloud at Connectors: https://confluent.cloud/go/connectors.
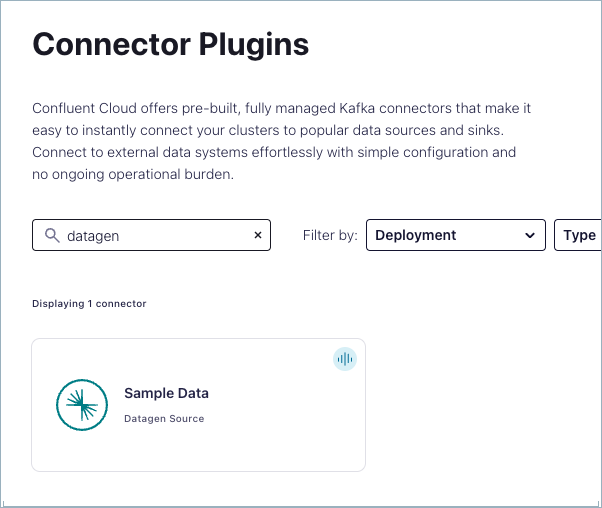
In the Search box, type “datagen”.
From the search results, select the Datagen Source connector.
Tip
If you see the Launch Sample Data box, select Additional configuration.
On the Launch Sample Data dialog, select the Users template, and click Additional configuration.
On the Topic selection dialog, select the “users” topic you created in the previous section and click Continue.
In the Kafka credentials dialog, select My account, and click Generate API key & download, then click Continue.
This creates an API key and secret that allows the connector to access your cluster, and downloads the key and secret to your computer. The key and secret are required for the connector and also for the Confluent CLI and ksqlDB CLI to access your cluster.
Note
An API key and associated secret apply to the active Kafka cluster. If you add a new cluster, you must create a new API key for producers and consumers on the new Kafka cluster. For more information, see Use API Keys to Authenticate to Confluent Cloud.
On the Configuration page, select JSON_SR for the output record value format, Users for the template, and click Continue.
For Connector sizing, leave the slider at the default of 1 task and click Continue.
On the Review and launch page, select the text in the Connector name box and replace it with “DatagenSourceConnector_users”.
Click Continue to start the connector.
The status of your new connector should read Provisioning, which lasts for a few seconds. When the status changes to Running, your connector is producing data to the
userstopic.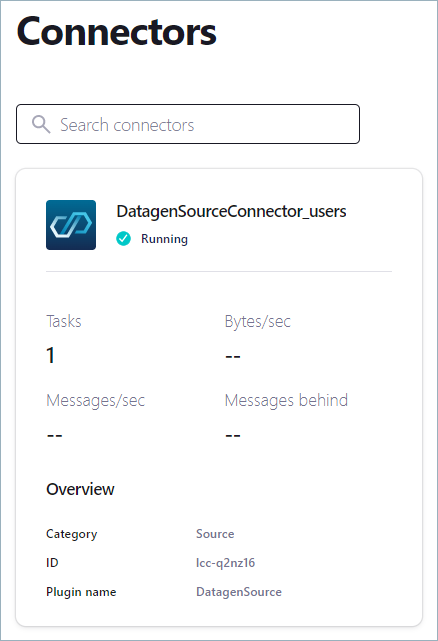
Create an API key:
confluent api-key create --resource <cluster_id> [flags]
For example:
confluent api-key create --resource lkc-000000
Example output:
+---------+------------------------------------------------------------------+
| API Key | EXAMPLEERFBSSSLK                                                 |
| Secret  | EXAMPLEEkYXOtOmn+En8397gCaeX05j0szygokwLRk1ypVby1UsgZpZLX7gJGR4G |
+---------+------------------------------------------------------------------+
It might take a few minutes for the API key to be ready. Save the API key and secret. The secret is not retrievable later.
Create a JSON file named
quick-start.jsonand copy and paste the following configuration properties into the file:{ "name" : "DatagenSourceConnector_users", "connector.class": "DatagenSource", "kafka.auth.mode": "KAFKA_API_KEY", "kafka.api.key": "[Add your cluster API key here]", "kafka.api.secret" : "[Add your cluster API secret here]", "kafka.topic" : "users", "output.data.format" : "JSON_SR", "quickstart" : "USERS", "tasks.max" : "1" }Replace
[Add your cluster API key here]and[Add your cluster API secret here]with your API key and secret.Create the sample producer:
confluent connect cluster create --config-file <file-name>.json --cluster <cluster_id>
For example:
confluent connect cluster create --config-file quick-start.json --cluster lkc-000000
Create a producer.
To create a producer with the Confluent Cloud APIs, you need two API keys:
Cloud API key added to the header for authorization
Kafka cluster API key added to the body for access to the cluster
Use the Confluent CLI or the Cloud Console to generate an API key for the Kafka cluster. For more information, see Authentication in the API reference.
Request:
POST /connect/v1/environments/{environment_id}/clusters/{cluster_id}/connectors
Host: api.confluent.cloud

{
   "name": "DatagenSourceConnector_users",
   "config": {
      "name": "DatagenSourceConnector_users"
      "connector.class": "DatagenSource",
      "kafka.auth.mode": "KAFKA_API_KEY",
      "kafka.api.key": "[Add your cluster API key here]",
      "kafka.api.secret" : "[Add your cluster API secret here]",
      "kafka.topic" : "users",
      "output.data.format" : "JSON_SR",
      "quickstart" : "USERS",
      "tasks.max" : "1"
   }
}
Replace [Add your cluster API key here] and [Add your cluster API secret here] with your cluster API key and secret.
Response:
{
   "name": "DatagenSourceConnector_users",
   "type": "source",
   "config": {
      "cloud.environment": "prod",
      "cloud.provider": "{provider}",
      "connector.class": "DatagenSource",
      "kafka.api.key": "[Your cluster API key]",
      "kafka.api.secret": "[Your cluster API secret]",
      "kafka.auth.mode": "KAFKA_API_KEY",
      "kafka.endpoint": "SASL_SSL://pkc-{00000}.{region}.{provider}.confluent.cloud:9092",
      "kafka.region": "{region}",
      "kafka.topic": "users1",
      "name": "DatagenSourceConnector_users",
      "output.data.format": "JSON_SR",
      "quickstart": "USERS",
      "tasks.max": "1"
   },
   "tasks": []
}
Step 4: View messages
Your new users topic is now receiving messages. Use Confluent Cloud Console to see the data.
From the navigation menu, select Topics to show the list of topics in your cluster.
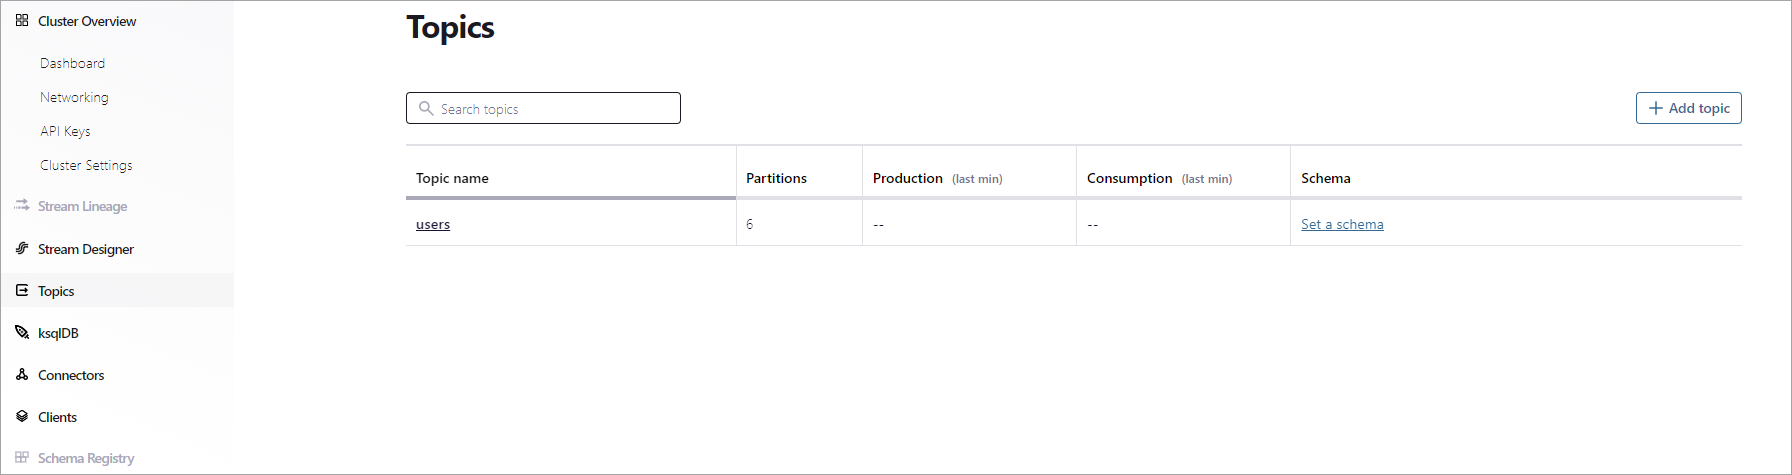
Select the users topic.
In the users topic detail page, select the Messages tab to view the messages being produced to the topic.
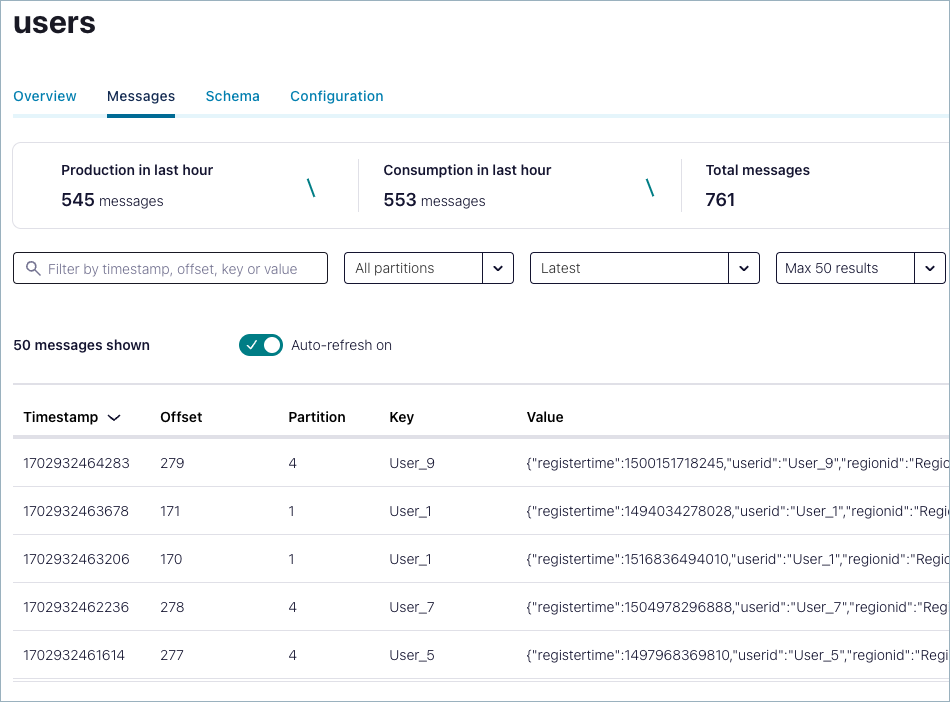
Step 5: Inspect the data stream
Use Stream Lineage to track data movement through your cluster.
Click Lineage in the navigation menu.
Click the DatagenSourceConnector_users node, which is the connector that you created in Step 3. The details overview shows graphs for total production and other data.
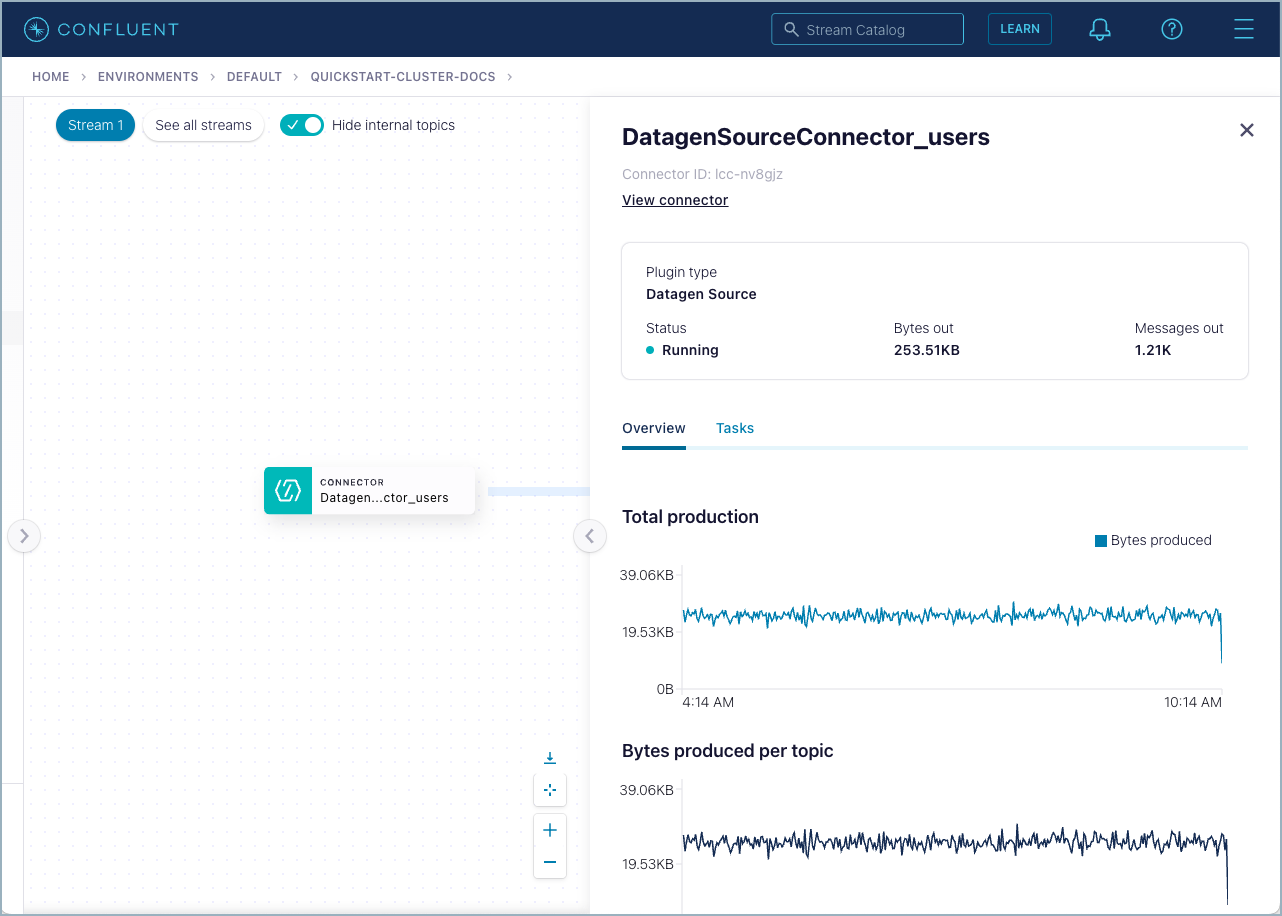
Dismiss this view and select the topic labeled users. Click Overview to show graphs for total throughput and other data. Click the other tabs to view the schema associated with the topic (if there is one defined), along with metadata and messages.
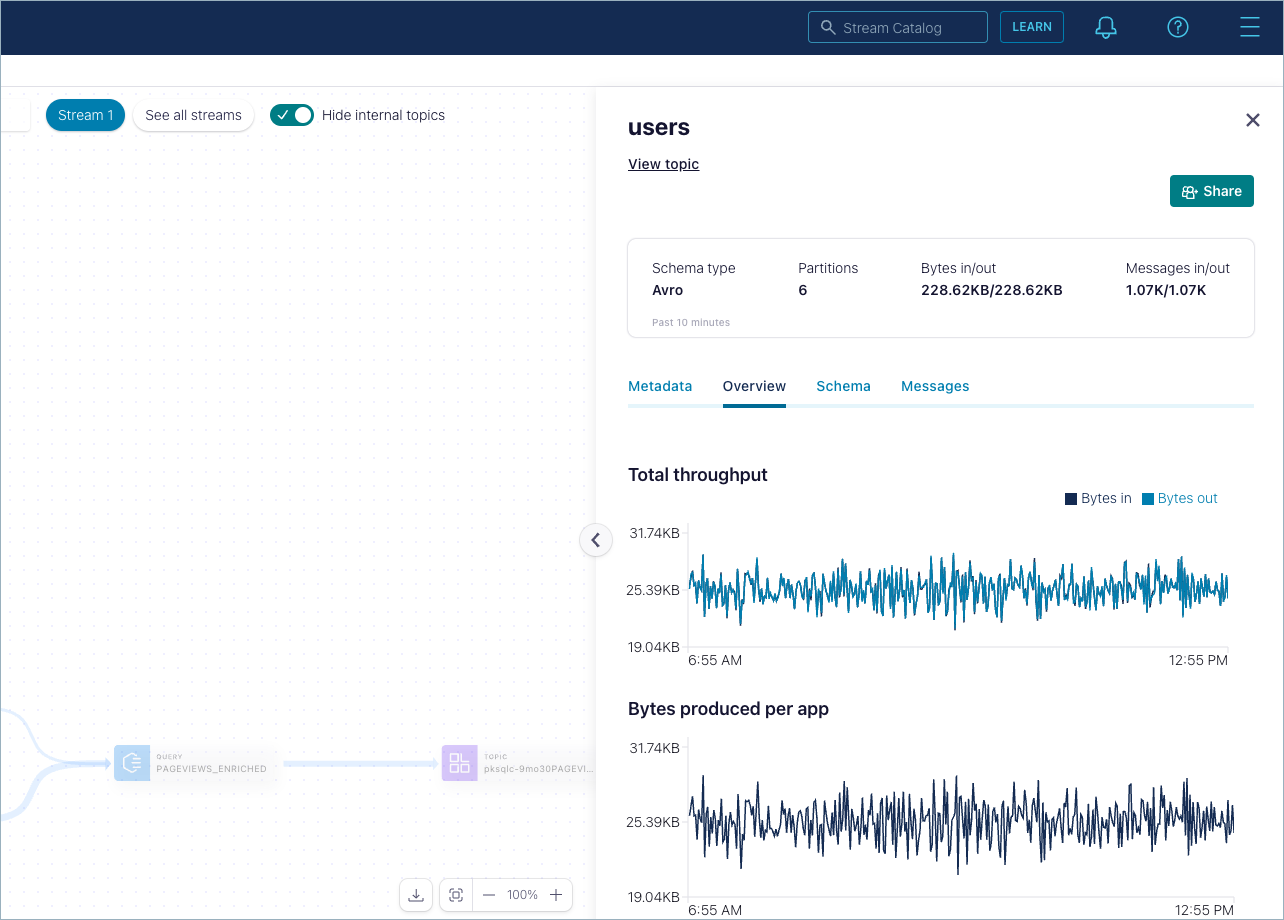
Click the arrow on the canvas border to re-open the navigation menu.
Step 6: Delete resources (optional)
Skip this step if you plan to move on to Section 2: Query streaming data with Flink SQL and learn how to use Flink SQL statements to query your data.
If you don’t plan to complete Section 2 and you’re ready to quit the Quick Start, delete the resources you created to avoid unexpected charges to your account.
Delete the connector:
From the navigation menu, select Connectors.
Click DatagenSourceConnector_users and choose the Settings tab.
Click Delete connector, enter the connector name (
DatagenSourceConnector_users), and click Confirm.
Delete the topic:
From the navigation menu, click Topics, select the users topic, and then choose the Configuration tab.
Click Delete topic, enter the topic name (
users), and select Continue.
Delete the cluster:
From the navigation menu, select Cluster Settings.
Click Delete cluster, enter the cluster name, and click Continue.
Delete the connector:
confluent connect cluster delete <connector-id> [flags]
For example:
confluent connect cluster delete lcc-aa1234 --cluster lkc-000000
Delete the topic:
confluent kafka topic delete <topic name> [flags]
For example:
confluent kafka topic delete users --cluster lkc-000000
Delete the cluster.
confluent kafka cluster delete <id> [flags]
For example (text you must enter is highlighted):
confluent kafka cluster delete lkc-123exa

Are you sure you want to delete Kafka cluster "lkc-123exa"?
To confirm, type "my-new-name". To cancel, press Ctrl-C:

my-new-name

Deleted Kafka cluster "lkc-123exa".
Delete a producer.
Request:
DELETE /connect/v1/environments/{environment_id}/clusters/{kafka_cluster_id}/connectors/{connector_name}
Host: api.confluent.cloud
Delete a topic.
Request:
DELETE /kafka/v3/clusters/{kafka_cluster_id}/topics/{topic_name}
Host: pkc-{0000}.{region}.{provider}.confluent.cloud
Delete a cluster.
Request:
DELETE /cmk/v2/clusters/{id}?environment={environment_id}
Host: api.confluent.cloud
Section 2: Query streaming data with Flink SQL
In Section 1, you installed a Datagen connector to produce data to the users topic in your Confluent Cloud cluster.
In this section, you create a Flink workspace and write queries against the users topic and other streaming data.
Step 1: Create a Flink workspace
To write queries against streaming data in tables, create a new Flink workspace.
Navigate to the SQL Workspaces page, and in the navigation menu, click Stream processing.
In the dropdown, select the environment where you created the
userstopic and the Datagen Source connector.Click Create workspace.
Tip
To experiment with example data streams provided by Confluent Cloud for Apache Flink, click Try example to open a curated Flink workspace that has example Flink SQL queries you can run immediately.
A new workspace opens with an example query in the code editor, or cell.
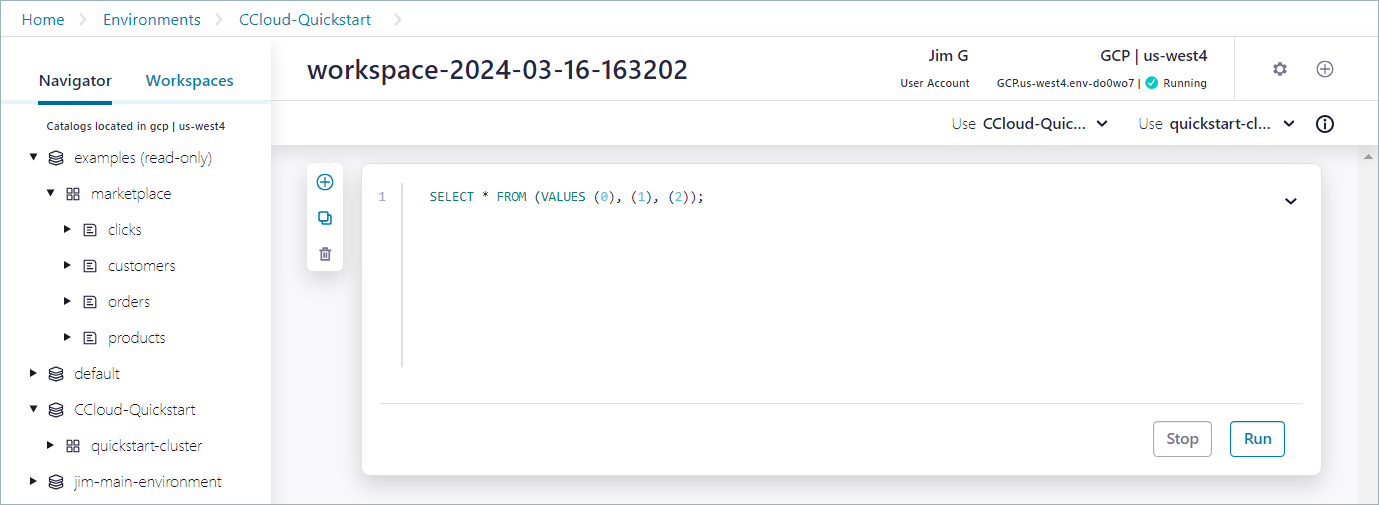
In the background, Confluent Cloud for Apache Flink creates a compute pool, which represents the compute resources that are used to run your SQL statements.
It might take a minute or two for the compute pool to be provisioned. The status is displayed in the upper-right section of the workspace.
Step 2: Run Flink SQL statements
When the compute pool status changes from Provisioning to Running, it’s ready to run queries.
Click Run to submit the example query.
The example statement is submitted, and information about the statement is displayed, including its status and a unique identifier. Click the Statement name link to open the statement details view, which displays the statement status and other information. Click X to dismiss the details view.
After an initialization period, the query results display beneath the cell.
Your output should resemble:
EXPR$0
0
1
2
Clear the previous query from the cell and run the following query to inspect the
usersstream.Confluent Cloud for Apache Flink registers tables automatically on your Kafka topics, and your query runs against the
userstable with the streaming data from the underlying topic.SELECT * FROM users;
Your output should resemble:
key             registertime  userid regionid gender
x'557365725f34' 1502088104187 User_4 Region_1 MALE
x'557365725f32' 1500243991207 User_2 Region_9 FEMALE
x'557365725f32' 1497969328414 User_2 Region_9 OTHER
...
Click Stop to end the query.
Data continues to flow from the Datagen connector into the
userstable even though the SELECT query is stopped.
Step 3: Mask a field
With a Flink compute pool running, you can run SQL queries on your streaming data.
In this step, you run a Flink SQL statement to hide personal information in the users stream and publish the scrubbed data to a new Kafka topic, named users_mask.
Run the following statement to create a new Flink table based on the
userstable.CREATE TABLE users_mask LIKE users;
When the status of the previous statement is Completed, run the following statement to inspect the schema of the
users_masktable.DESCRIBE users_mask;
Your output should resemble:
+--------------+-----------+----------+------------+
| Column Name  | Data Type | Nullable |   Extras   |
+--------------+-----------+----------+------------+
| key          | BYTES     | NULL     | BUCKET KEY |
| registertime | BIGINT    | NULL     |            |
| userid       | STRING    | NULL     |            |
| regionid     | STRING    | NULL     |            |
| gender       | STRING    | NULL     |            |
+--------------+-----------+----------+------------+
Run the following statement to start a persistent query that uses the Flink REGEXP_REPLACE function to mask the value of the
genderfield and stream the results to theusers_masktable.INSERT INTO users_mask SELECT `key`, registertime, userid, regionid, REGEXP_REPLACE(gender, '(\w)', '*') as gender FROM users;
The INSERT INTO FROM SELECT statement runs continuously until you stop it manually.
Click
 to create a new cell, and run the following statement to inspect the rows in the
 users_masktable.SELECT * FROM users_mask;
Your output should resemble:
key             registertime  userid regionid gender
x'557365725f34' 1488737391835 User_4 Region_5 *****
x'557365725f34' 1499070045309 User_4 Region_5 *****
x'557365725f32' 1505447077187 User_2 Region_7 *****
x'557365725f34' 1505592707164 User_4 Region_2 *****
...
Click Stop to end the SELECT statement.
The INSERT INTO statement that you started previously continues streaming data into the
users_masktopic.
Step 4: View the Stream Lineage
Your Flink SQL statements are resources in Confluent Cloud, like topics and connectors, so you can view them in Stream Lineage.
In the navigation menu, find your environment and click to open it.
The Kafka clusters in the environment are shown.
Click the cluster that has the
users_masktopic.The Kafka topics in the cluster are shown.
Hover over the
users_masktopic and click View topic details.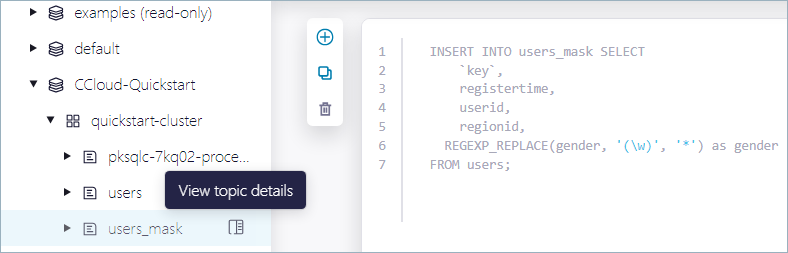
In the topic details pane, scroll to the Lineage section and click View full lineage.

Hover over the nodes in the Stream Lineage diagram to see details of the data flow.
Step 5: Delete resources
When you finish the Quick Start, delete the resources you created to avoid unexpected charges to your account.
Delete the persistent query
Navigate to your environment’s details page and click Flink.
In the statements list, find the statement that has a status of Running.
In the Actions column, click … and select Delete statement.
In the Confirm statement deletion dialog, copy and paste the statement name and click Confirm.
Delete the connector:
From the navigation menu, select Connectors.
Click DatagenSourceConnector_users and choose the Settings tab.
Click Delete connector, enter the connector name (
DatagenSourceConnector_users), and click Confirm.
Delete the topics:
From the navigation menu, click Topics, select the users topic, and choose the Configuration tab.
Click Delete topic, enter the topic name (
users), and click Continue.Repeat these steps with the
users_masktopic.
Delete the connector:
confluent connect delete <connector-id> [flags]
For example:
confluent connect delete lcc-aa1234 --cluster lkc-000000
Delete the topic:
confluent kafka topic delete <topic name> [flags]
For example:
confluent kafka topic delete users --cluster lkc-000000
Delete a producer.
Request:
DELETE /connect/v1/environments/{environment_id}/clusters/{kafka_cluster_id}/connectors/{connector_name}
Host: api.confluent.cloud
Delete a topic.
Request:
DELETE /kafka/v3/clusters/{kafka_cluster_id}/topics/{topic_name}
Host: pkc-{0000}.{region}.{provider}.confluent.cloud