
Cluster Linking Quick Start on Confluent Cloud
In this quick how-to, you will create a multi-region or multi-cloud architecture with just a few commands.
Setup
Get the latest version of the Confluent CLI
To start off, you’ll need the latest version of the CLI.
No Confluent CLI? You can get the latest version of the CLI with a quick command. To learn more, see Install Confluent CLI.
Got Confluent CLI? Make sure it’s up-to-date.
If you already have the Confluent CLI, verify that it’s up-to-date. Run
confluent updateto upgrade to the latest version. Once you’ve upgraded, check out this handy Confluent CLI commands reference available here.
Create source and destination clusters
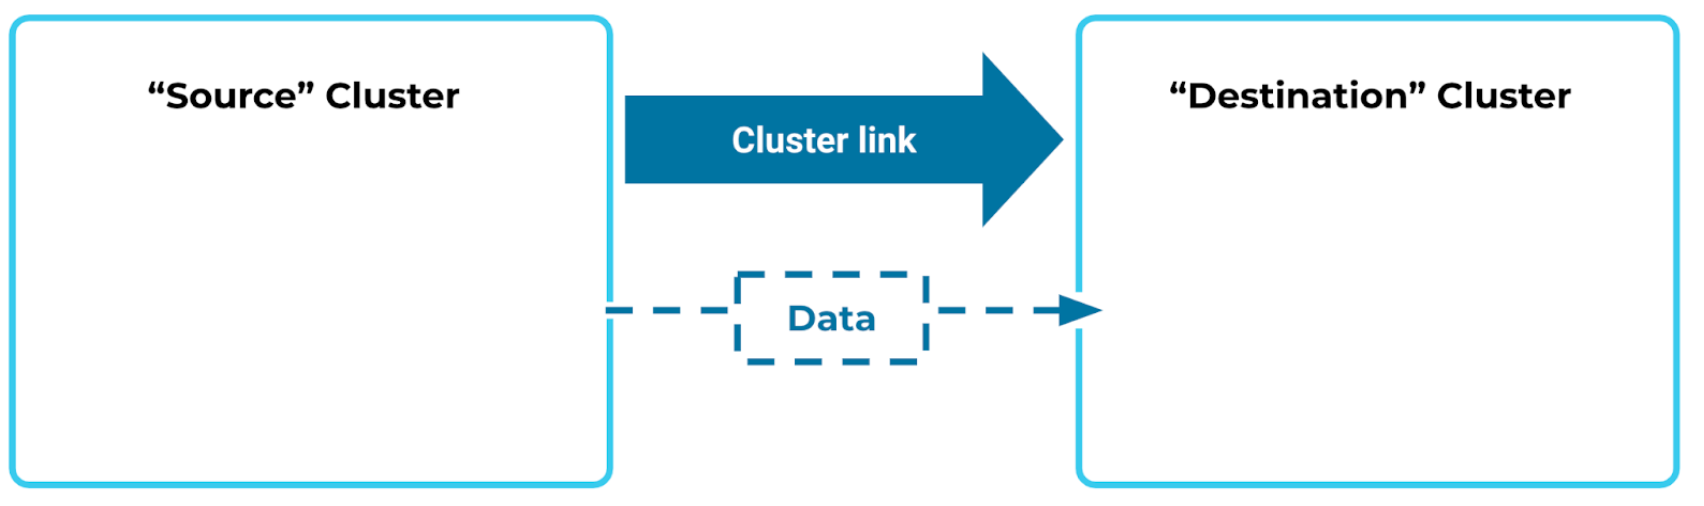
Next, you’ll need two Confluent Cloud clusters. Data will flow from a “source” cluster to a “destination” cluster, which you’ll want to put in a different region or cloud.

The source cluster can be a Basic, Standard, Dedicated, or Enterprise Confluent Cloud cluster with public networking.
To learn more about supported cluster types and combinations, see Supported cluster types and supported cluster combinations for private networking.
If you don’t already have a cluster you want to use, you can spin one up from the Confluent Cloud Console or directly from the Confluent CLI with this command:
confluent kafka cluster create ClusterLinkingSource --type basic --cloud aws --region us-west-2
Your destination cluster must be a Dedicated or Enterprise Confluent Cloud cluster with secure public endpoints.
If you don’t already have a dedicated cluster you want to use as the destination, you can create one from the Confluent Cloud Console or directly from the Confluent CLI with this command:
confluent kafka cluster create ClusterLinkingDestination --type dedicated --cloud aws --region us-east-1 --cku 1 --availability single-zone
Tip
Source and destination clusters should be in different regions to effectively demo Cluster Linking capabilities, so choose a different region or cloud for your destination cluster than your source cluster for a multi-region or multi-cloud setup. (For example, you might have a source cluster in Northern California, and a destination cluster in Northern Virginia.)
A Confluent Cloud cluster has an hourly charge, and charges for any data into, out of, or stored on the cluster. So, running this tutorial will accrue some charges. If you are only using the clusters for this demo, make sure to delete them once you have finished this walkthrough. This is covered in Teardown.
Replicate data across regions
Now that you have clusters coast-to-coast, you can geo-replicate some data.
Save cluster IDs and source endpoint
You will use your cluster details in each of the next few commands (when you create a cluster link and test out mirror topics), so put these in a handy place. Save your source cluster ID, your source cluster Endpoint, and your destination cluster ID as local variables in your terminal window.
You can get the IDs of your cluster(s) with confluent kafka cluster list, and the source cluster’s Endpoint with confluent kafka cluster describe <source_id>. If you’ve just created the clusters, you will get full descriptions of them with all this information as output to the confluent kafka cluster create commands.
Copy each of the following commands and substitute in your cluster IDs and endpoints to save them as local variables.
source_id=lkc-XXXXX
source_endpoint=SASL_SSL://pkc-XXXXX.us-west-2.aws.confluent.cloud:9092
destination_id=lkc-XXXXX
Create a cluster link
To move data from one region to another, you’ll first create a cluster link. A cluster link is a persistent, one-way bridge from one cluster to another.
The cluster link needs an API key to read data from your source cluster.
If you need an API key, create one like this:
confluent api-key create --resource $source_id
Copy the API key and secret to a safe place. You will need them later. For this example, you can save them as local variables in your terminal window:
source_api_key=<your-api-key>
source_api_secret=<your-api-secret>
Important
If you’re creating a cluster link in production, or if the two clusters belong to different people, then you should use a service account API key instead.
The type of cluster link you create depends on the RBAC role with which you are logged in, as described in the following sections.
There is an hourly charge to run a cluster link, so delete it when you are done with it. This is covered in Teardown.
You can create a cluster link either from the Confluent CLI or the Confluent Cloud Console. The following sections show you both workflows.
Create a cluster link from the Confluent CLI
Using the API key and secret as $source_api_key and $source_api_secret, create a cluster link named “my-link” like this:
confluent kafka link create my-link --cluster $destination_id \
    --source-cluster $source_id \
    --source-bootstrap-server $source_endpoint \
    --source-api-key $source_api_key --source-api-secret $source_api_secret
Tip
--source-cluster-id was replaced with --source-cluster in version 3 of confluent CLI, as described in the command reference for confluent kafka link create.
Create a cluster link from the Cloud Console
Alternatively, you can create a cluster link from the Cloud Console on any clusters for which you have CloudClusterAdmin access. To learn more about cluster access, see Manage Security for Cluster Linking on Confluent Cloud. To create a cluster link from the Cloud Console:
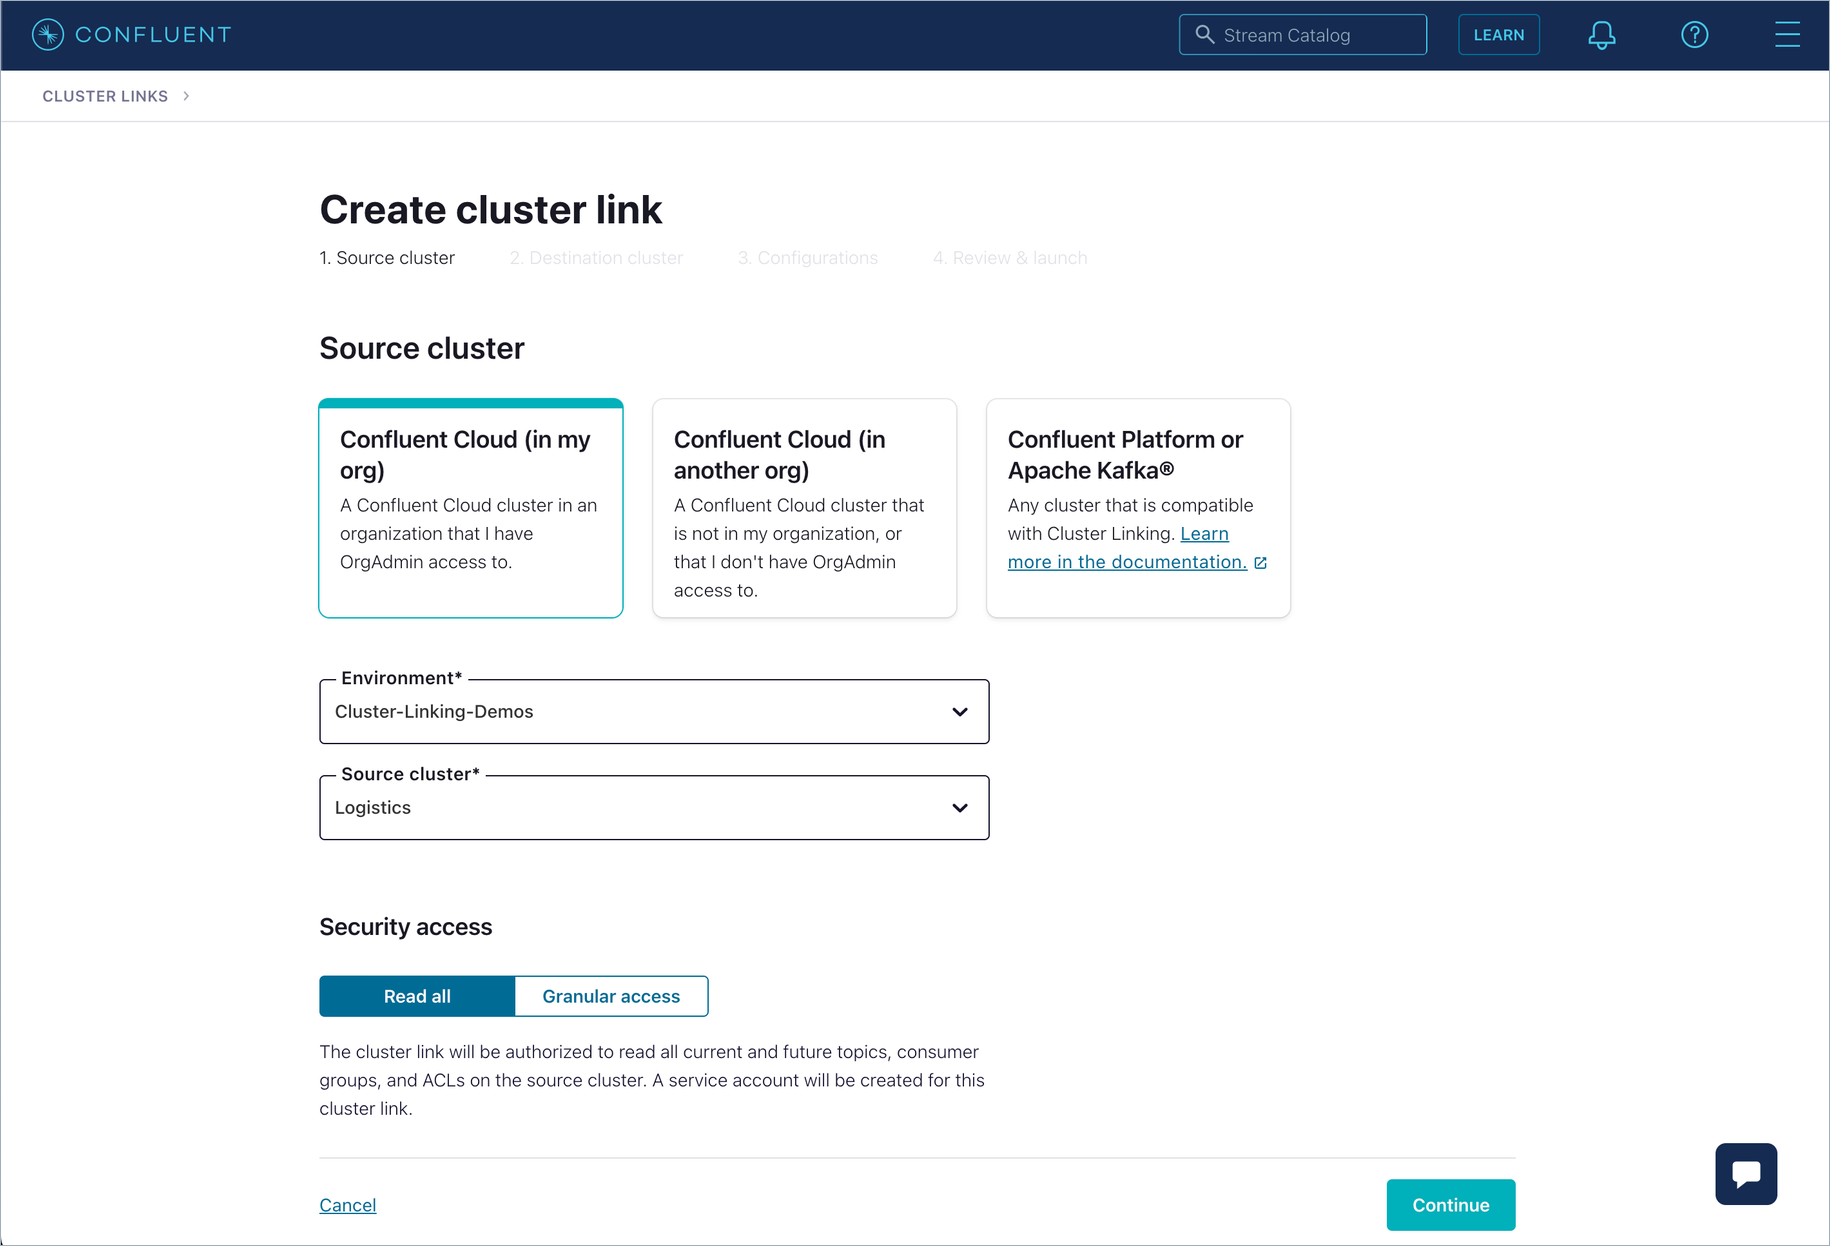
On the Cloud Console, navigate to Environments > Cluster links (https://confluent.cloud/cluster-links), and click Create cluster link.
Select the type of cluster, environment, the source cluster to use, and access.
If you are logged in as an OrganizationAdmin in the Cloud Console, select the first option (and choose Read all).
If you are logged in as an EnvironmentAdmin or a CloudClusterAdmin, then select the second option:
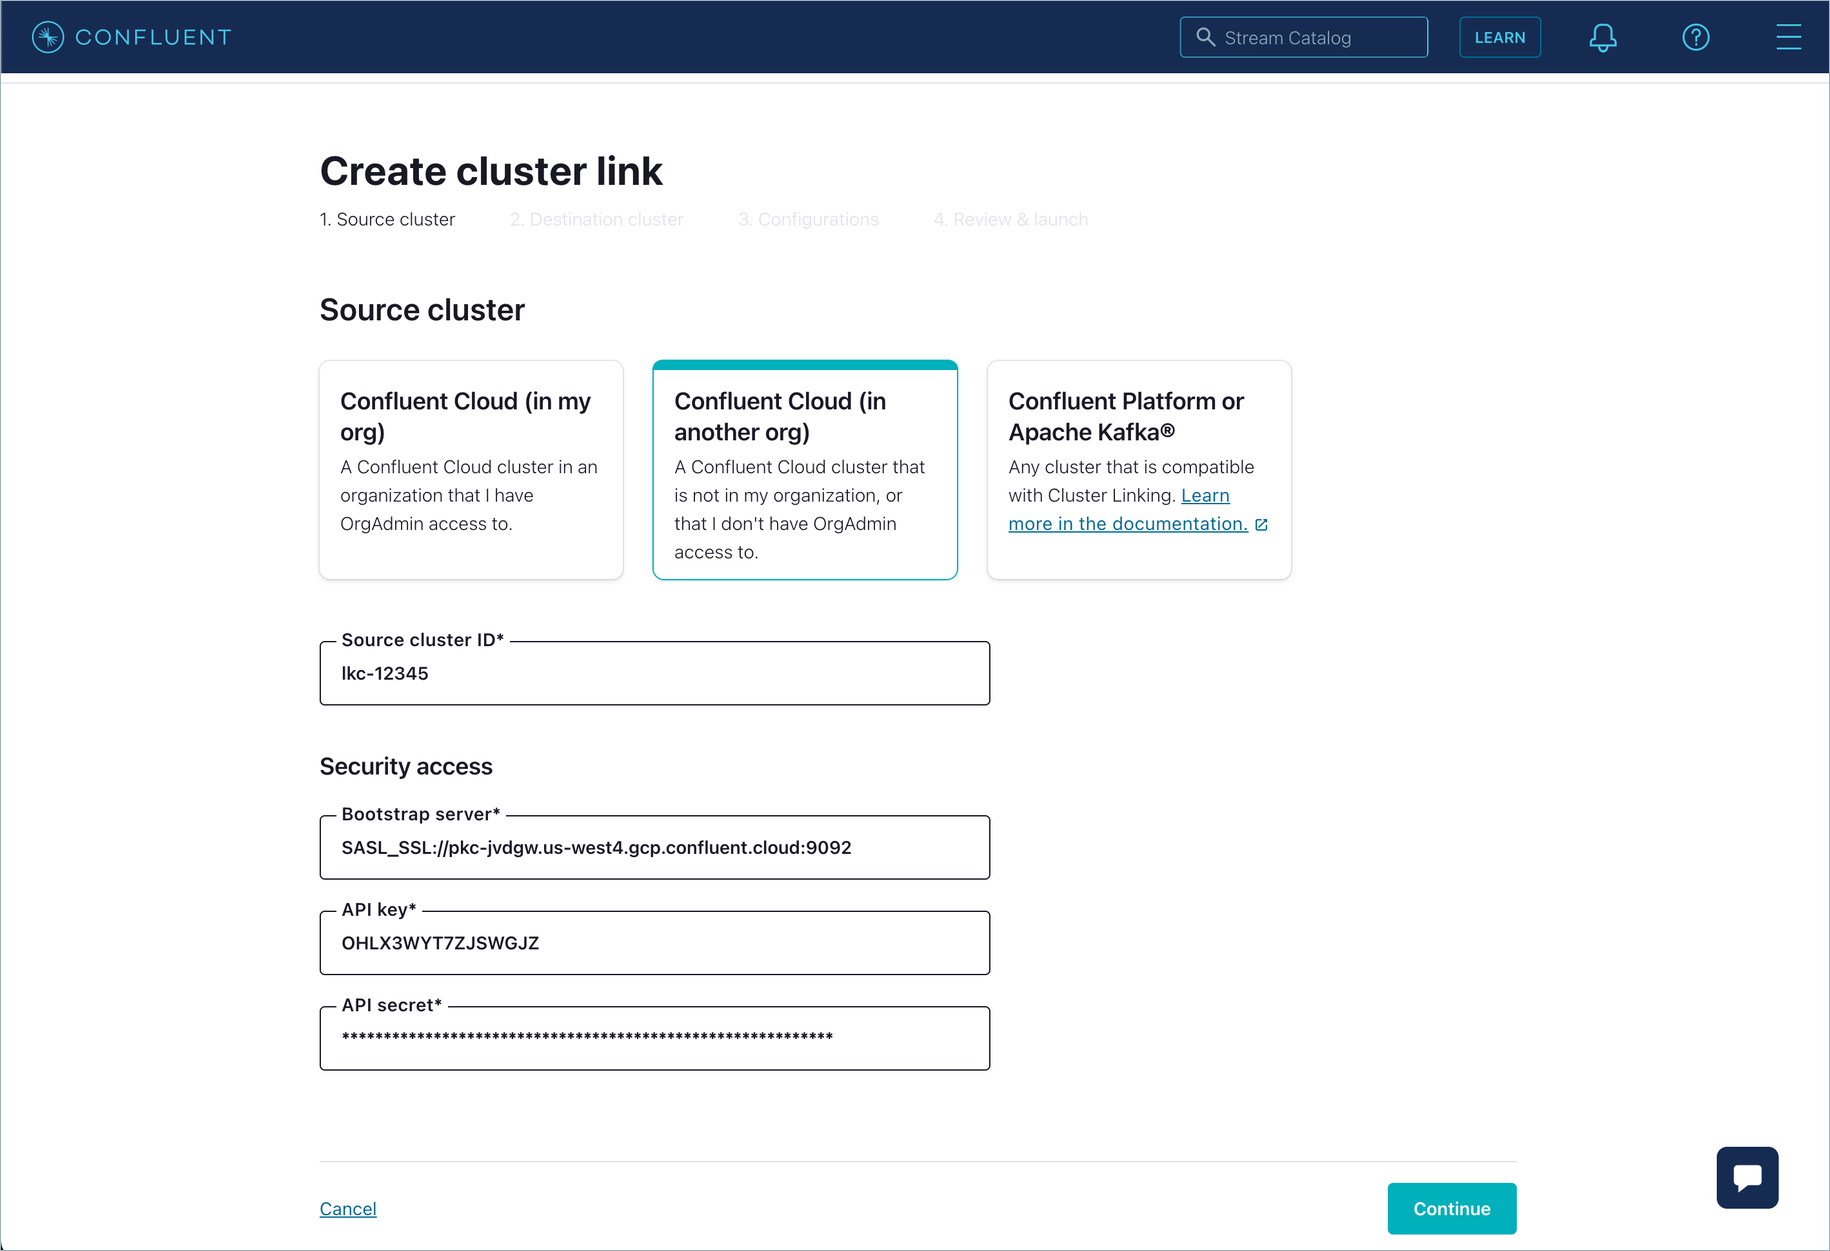
You will need an API key to use for the source cluster. You can create one for yourself or for an existing service account that has READ permissions on the source cluster. Enter the source cluster’s ID, bootstrap server, and the API key and secret.
Click Continue.
Select the environment and cluster for the destination.
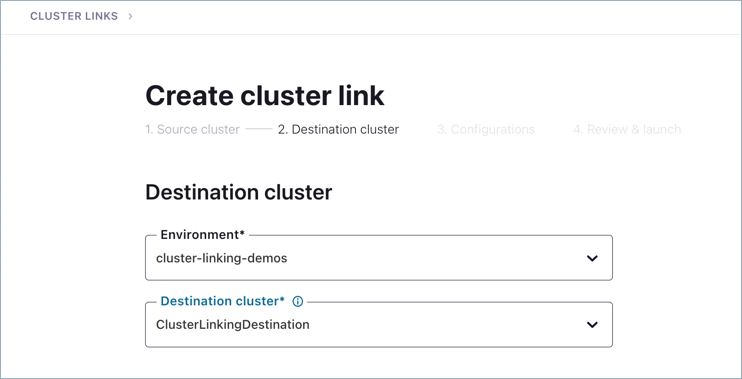
Click Continue.
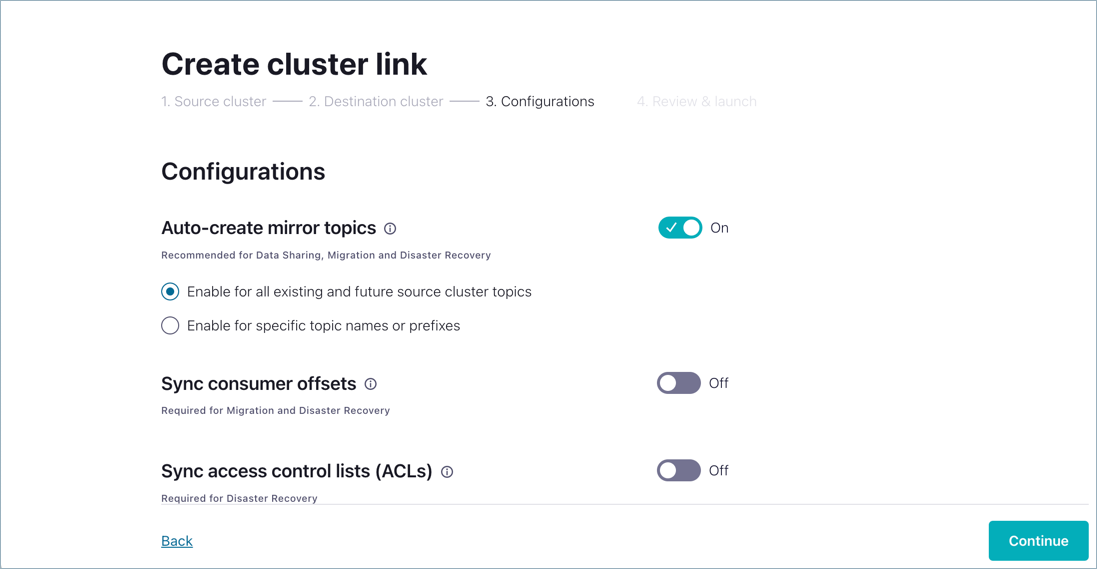
Review and accept the default configurations for mirror topics, consumer offsets, and ACLs, and click Continue.
Provide your name for the cluster link,
my-link, and click Launch cluster link.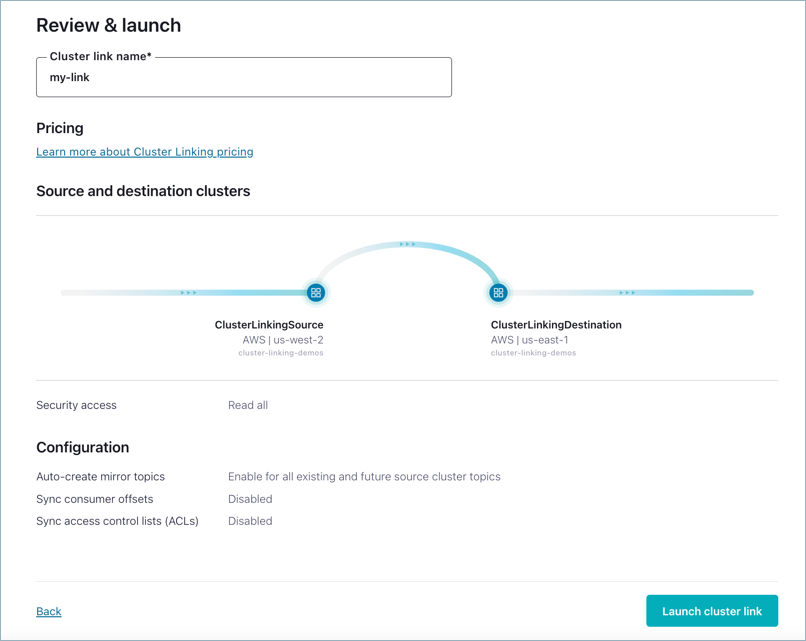
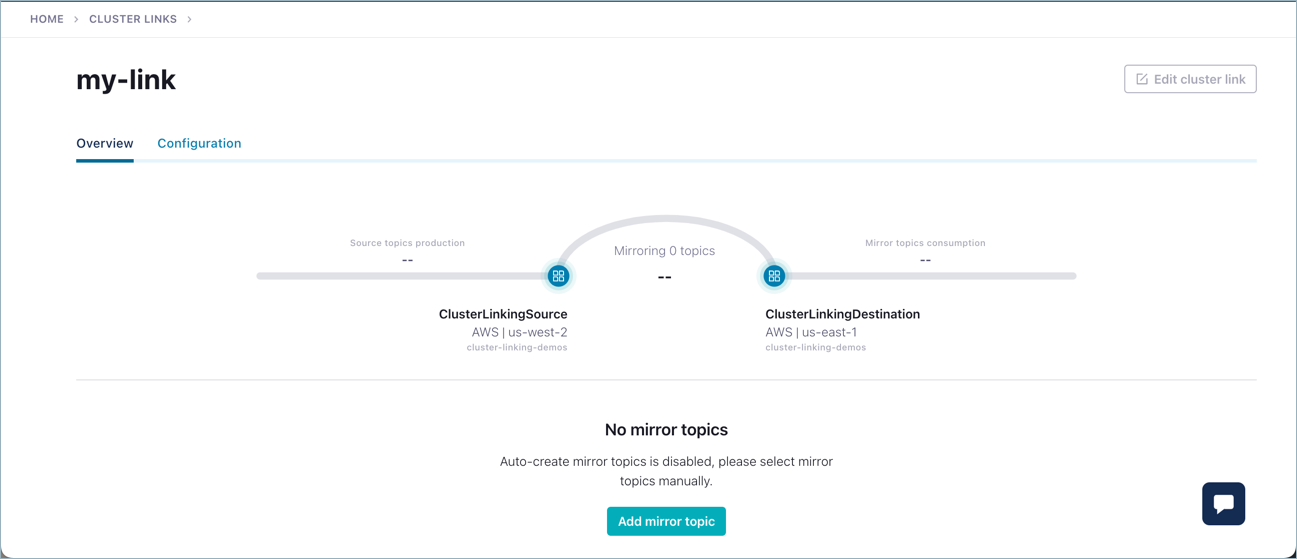
You should see the link across the two clusters reflected on the diagram. At this point, no mirror topics exist on the link because you haven’t created them yet.
Tip
The next tasks can be accomplished through the Confluent CLI or the Confluent Cloud Console. If you wanted to continue using the Cloud Console, at this point you would start by adding a topic in your source cluster, then return to this screen (Environments > Cluster Links > my-link) to add a mirror topic based on the source topic. From there, follow the steps below to produce data to the source topic. The messages will be reflected on the mirror topic.
Create source and mirror topics
Now, that you’ve got a link running, try it out!
The next tasks can be accomplished through the Confluent CLI or the Confluent Cloud Console. This tutorial goes into more detail for the Confluent CLI steps, as they are a bit less intuitive, but feel free to use either method.
In Confluent, data is stored in topics. To move data across clusters, start with a topic on the source cluster, then use your cluster link to create a copy of it (a “mirror topic”) on the destination cluster.
Mirror topics reflect all data from their source topics. Consumers can read from mirror topics, giving them a local copy of all events contained in the topic. Mirror topics sync their source topic configurations, and stay up to date; so you don’t need to set up or change any configs on your mirror topics.

Tip
Mirror topics are read-only, so don’t try to produce to one!
Specify the API key to use on the source cluster for producing and consuming data from the CLI:
confluent api-key use $source_api_key --resource $source_id
You’ll need a source topic. Make a one-partition topic called “topic-to-link” on your source cluster:
confluent kafka topic create topic-to-link --cluster $source_id --partitions 1
Then, put some data into it
seq 1 10 | confluent kafka topic produce topic-to-link --cluster $source_id
This produced the numbers 1 through 10 to your source cluster (which could be, for example, to AWS in Northern California).
You can mirror that data to your destination region (for example, Google Cloud in Northern Virginia), in one command:
confluent kafka mirror create topic-to-link --cluster $destination_id --link my-link
You just geo-replicated data!
Tip
No replication factors are synced to mirror topics. The replication factor defaults to 3 for all topics, and this is not configurable. Therefore, you do not specify replication factor flags when creating topics on Confluent Cloud. To learn more, see Mirror topic configurations not synced.
Consume from the mirror topic
Now, make use of your geo-replicated data by consuming those on the destination cluster.
You may need to first create an API key and secret for the CLI to use with the destination cluster:
confluent api-key create --resource $destination_id
Add the destination API key and secret into local variables ($destination_api_key and $destination_api_secret), then use the key to connect to the destination cluster.
confluent api-key use $destination_api_key --resource $destination_id
Now, read from the mirror topic.
confluent kafka topic consume topic-to-link --cluster $destination_id --from-beginning
Here is a copy of the command and the output you will see:
confluent kafka topic consume topic-to-link --cluster $destination_id --from-beginning
Starting Kafka Consumer. Use Ctrl-C to exit.
1
2
3
4
5
6
7
8
9
10
Tip
You can quit the consumer at any time by hitting Ctrl + C at the same time.
Congrats! You created a multi-region or multi-cloud real-time streaming architecture.
Go exploring
In the latest version of Confluent Cloud, you can:
Create a cluster link
Create source and mirror topics
View source and mirror topics, and monitor messages coming into them
List and inspect existing cluster links in all environments
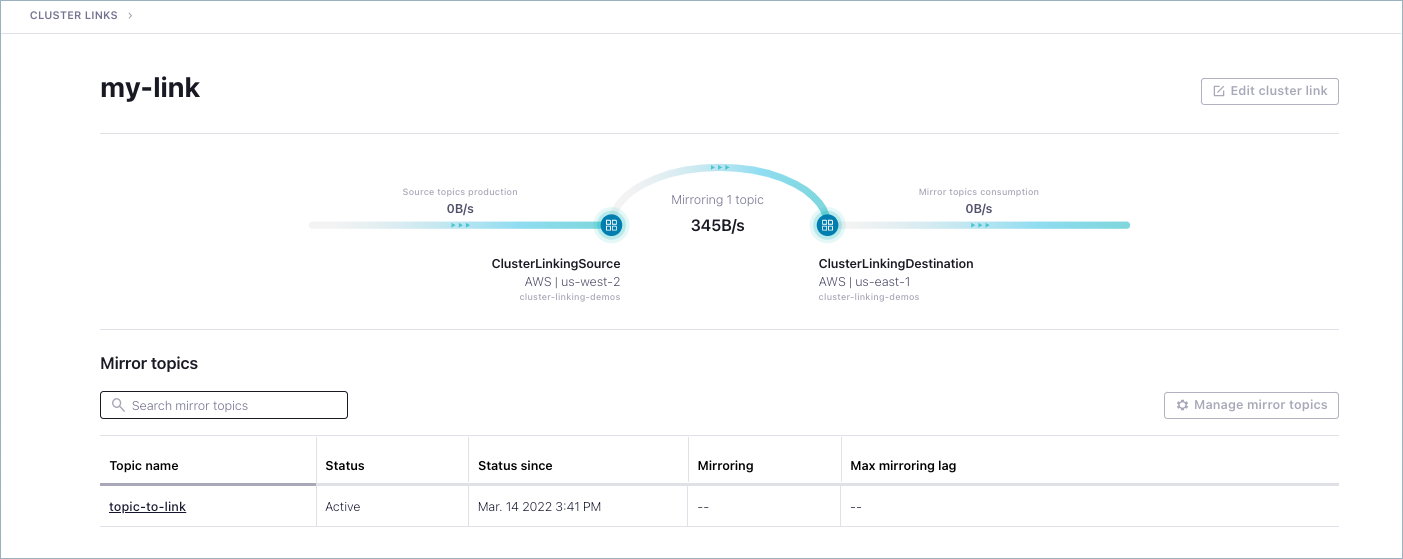
Drill down on a cluster link to view stats on its activity
Refer to an embedded cheat sheet on how to create cluster links
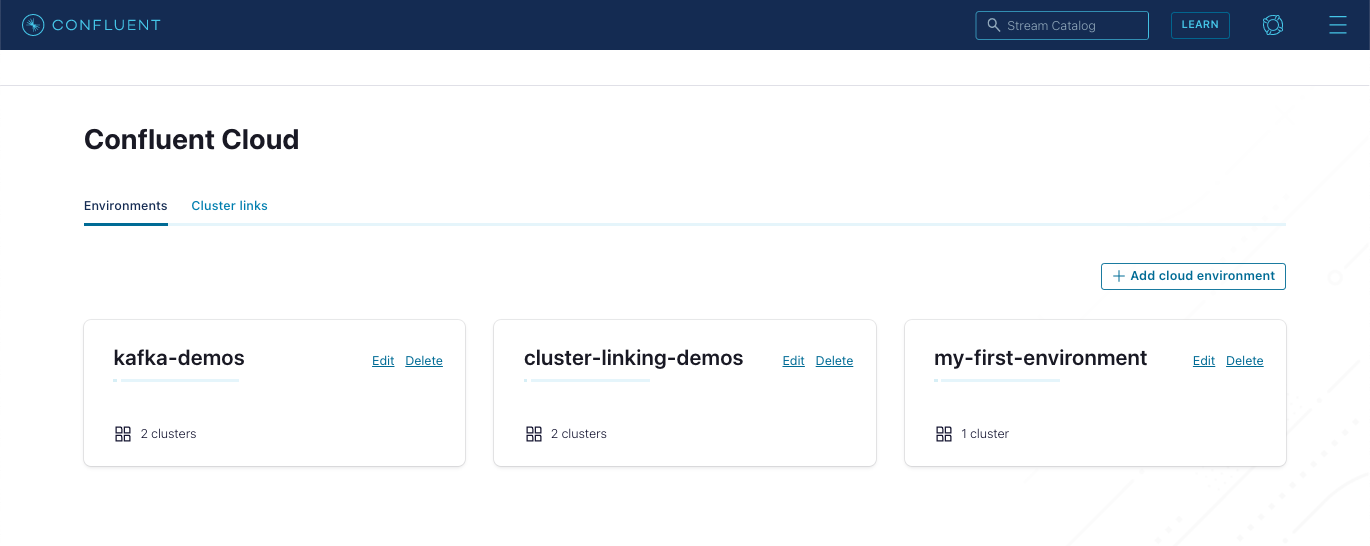
Log on to the Confluent Cloud Console, and view the clusters you created from there.
View source and mirror topics
Try producing more messages to topic-to-link on your source cluster and consuming them from its mirror on your destination cluster.
You can create more mirror topics; as many as you want, using the same cluster link.
You should be able to view the messages on both the source and destination (mirror) topics. To navigate to topic messages, select a cluster, click Topics, and select the Messages tab.

Tip
Choose “Jump to offset” or “Jump to timestamp”, type 1 and select 1/Parition 0. This shows all the messages on partition 1.
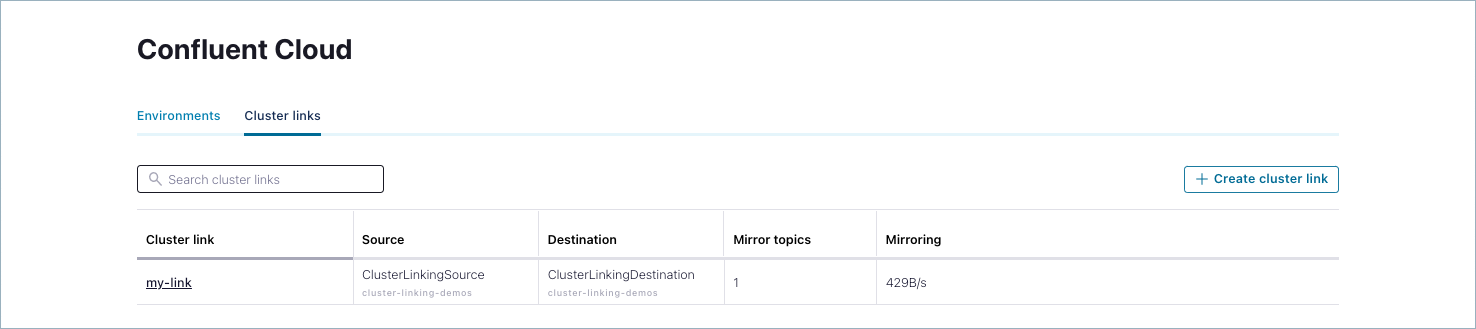
Review and inspect cluster links
Navigate to the Environments view, click the Cluster links tab.
All existing cluster links are shown. This shows cluster links across all environments, and clusters.
From the Cluster links list, click the link you just created for the tutorial (mylink).
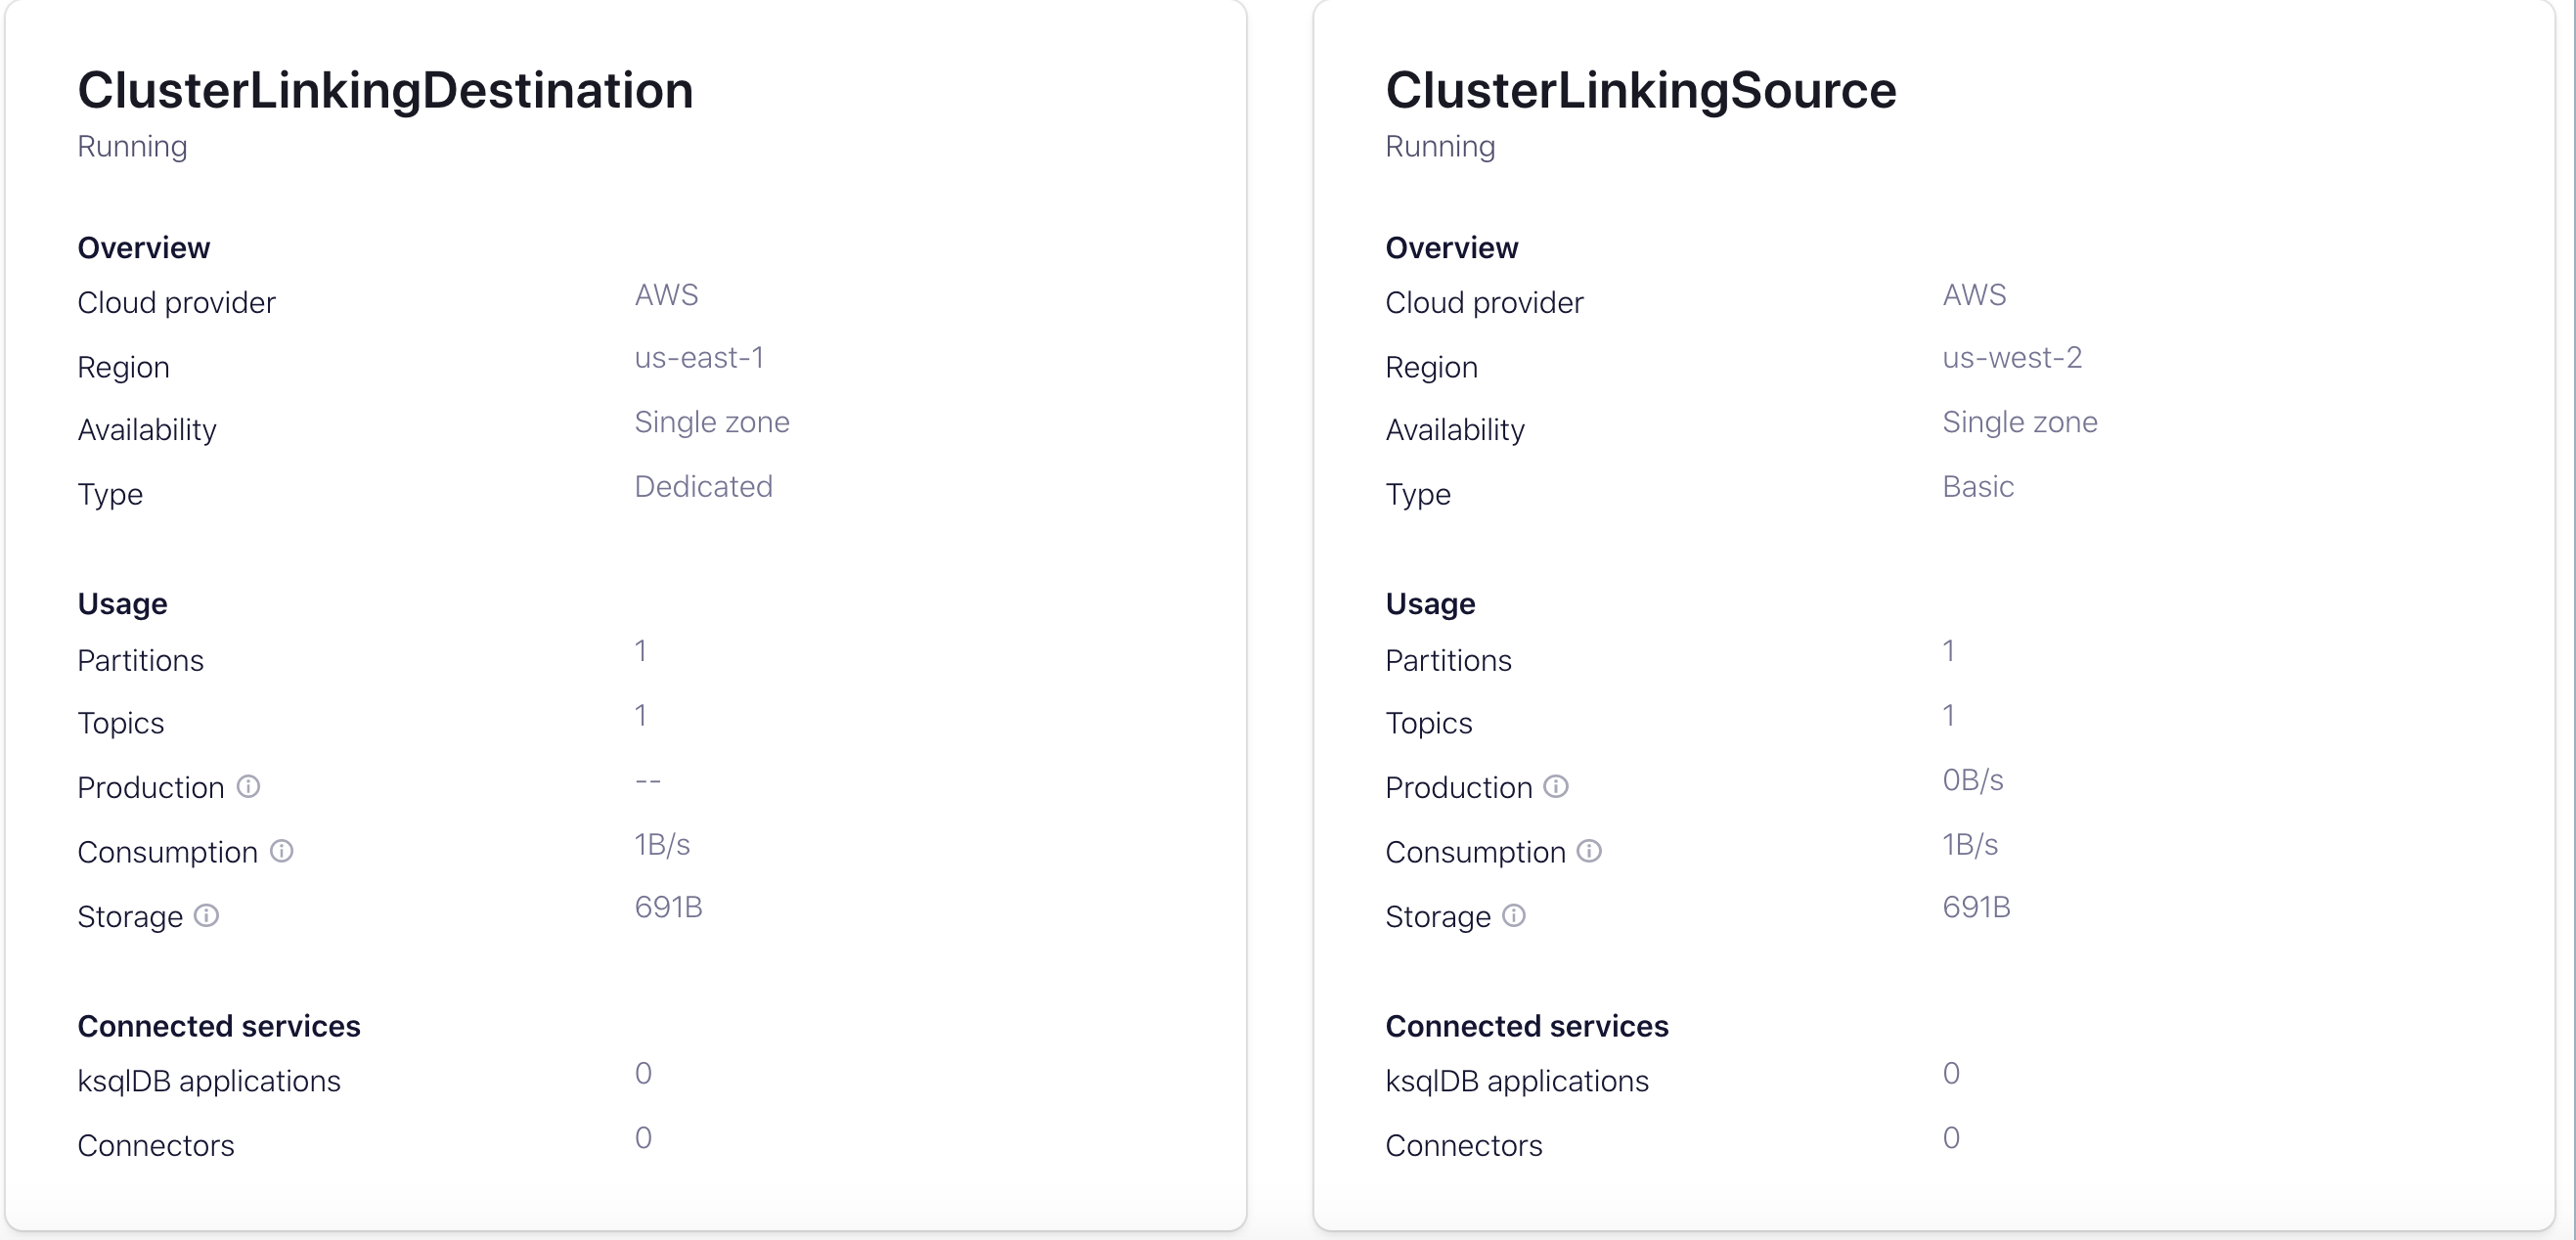
Details on the link are provided.
Teardown
When you are ready to quit the demo, don’t forget to tear down the resources so as not to incur hourly charges.
Delete
topic-to-linkon both clusters with these commands:confluent kafka topic delete topic-to-link --cluster $destination_id
confluent kafka topic delete topic-to-link --cluster $source_id
Delete any other mirror topics.
If you created more mirror topics, you’ll need to delete those, too.
You can see a list of all of the mirror topics on your destination cluster with:
confluent kafka mirror list --cluster $destination_id
Then, use this command to delete each mirror topic.
confluent kafka topic delete <topic-name> --cluster $destination_id
Delete the cluster link(s).
Once all of the mirror topics are gone, you can delete the cluster link on your destination cluster:
confluent kafka link delete my-link --cluster $destination_id
If you created more cluster links, you can see all of the cluster links going to your destination cluster with this command:
confluent kafka link list --cluster $destination_id
Delete any additional cluster links.
Delete any clusters you no longer need.
If you were using existing Confluent Cloud clusters that you want to continue to use, then you’re done!
If you spun new ones up for this demo, you can delete them with the command
confluent kafka cluster delete <cluster-id>.Note
Be careful; once you delete a cluster, you can’t get it back.
If you were following along with the demo and created new clusters, just use
$destination_idand$source_id:confluent kafka cluster delete $destination_id
confluent kafka cluster delete $source_id