
Use Azure Private Networking with Tableflow in Confluent Cloud
You can use Tableflow on Confluent Cloud clusters that are deployed in Azure private networks, ensuring that no data is transmitted over the public internet.
Tableflow supports connecting to Azure Storage Accounts over Azure Private Endpoints when using Enterprise or Dedicated clusters. Tableflow falls back to using Azure Service Endpoints to communicate with the Azure Storage Account.
To use Tableflow with Azure Storage Accounts that are accessible only over Azure Private endpoints, you must use a Confluent Cloud outbound networking gateway and two access points. For more information, see Use Azure Egress Private Link Endpoints for Serverless Products.
Prerequisites
A Confluent Cloud environment, an Apache Kafka® cluster, a topic with data, and a schema associated with the topic
Organization/network admin permissions to manage networking and access points in Confluent Cloud
A Confluent Cloud provider integration
An Azure Storage Account in the same region as the Kafka cluster with hierarchical namespaces enabled, and a container in the storage account
Permissions to create and approve Private Endpoints for your Azure Storage Account
Step 1: Get the Azure Resource ID
In the Azure portal, go to your service’s overview section, and click Json View.
Copy the Resource ID. This is required when you create the Egress Private Link Endpoint in Confluent Cloud.
Step 2: Create an Egress Private Link Gateway
In Confluent Cloud, you must create an Egress Private Link Gateway to connect to the Azure Storage Account.
Only one Gateway is required per environment per region.
In Confluent Cloud Console, check for an existing Egress Private Link Gateway in your region by navigating to your environment and clicking Network configurations.
In the Network management page, if you don’t see an EgressPrivateLink Gateway in the region you are operating in, create one now.
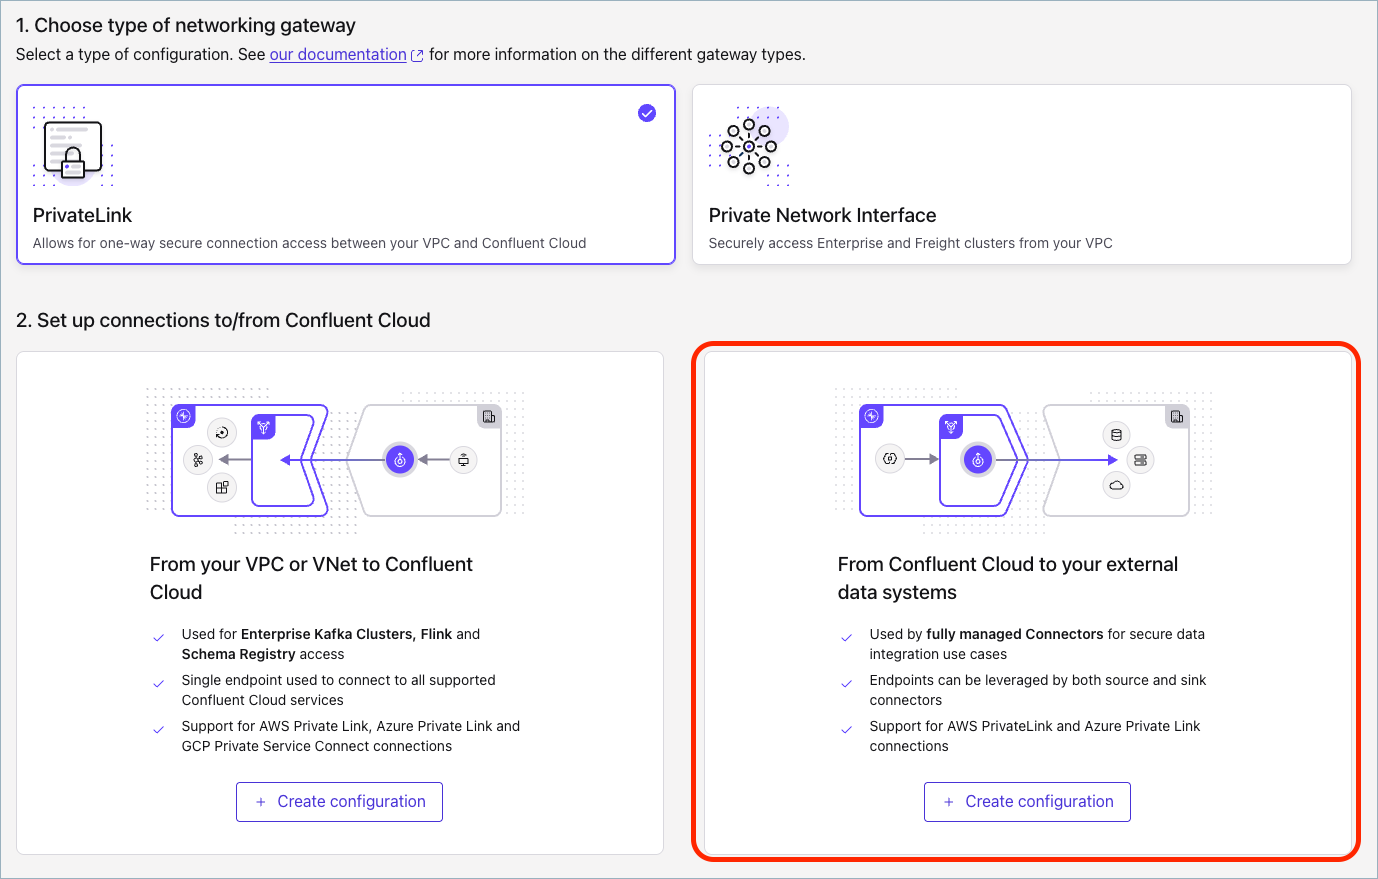
Click Add gateway configuration, and select the PrivateLink tile.
In the From Confluent Cloud to your external data systems section, click Create configuration.
In the Configure gateway panel, enter the following information:
Gateway name: Enter a name for the gateway.
Cloud provider: Click Microsoft Azure.
Provider Region: Select the region for the gateway.
Click Submit. After a few seconds, the Access point page opens.
In the Access point page, click Azure Blob. The Azure Blob endpoint section opens.
You must create two access points: one with the blob sub-resource, and one with the dfs sub-resource.
Enter the following information for the blob sub-resource:
Access point name: Enter a name for the access point.
Resource ID: Paste the Resource ID you copied in Step 1.
Sub-resource name: Select blob.
Click Create access point.
Enter the following information for the dfs sub-resource:
Access point name: Enter a name for the access point.
Resource ID: Paste the Resource ID you copied in Step 1.
Sub-resource name: Select dfs.
Click Create access point.
After a provisioning delay, you will see the message, Access point is pending acceptance.
Click Finish. You will add the DNS record in a later step.
Step 3: Approve the private link endpoints
In the Azure Portal, locate the Azure Storage Account resource you are using.
In the Security + networking section, click Networking, then click Private endpoints.
Find the two new entries from Confluent, named plap-xxxxxx with a description that includes your gateway and environment ID.
These are the two access points you created in the previous step. They are in a Pending connection state. Approve both of these connections.
Step 4: Add a Service Principal to the Azure Storage Account
If you haven’t provided permissions to the service principal created through the Confluent Cloud provider integration, do this now in the Azure Portal.
On your Azure Storage Account resource page, select Access Control (IAM).
Click Add > Add role assignment.
One at a time, add the Reader and Storage Blob Data Contributor roles to the service principal managed by Confluent Cloud, which has a name that resembles cspi-xxxx.
Step 5: Create the DNS record
In the Cloud Console, confirm that both access points are in the Ready state. It may take a few minutes after the connection was approved in the Azure Portal.
For the blob access point, click View all, copy the DNS domain, and click Close.
Click Create record and paste the DNS domain into the Domain field for the access point.

Repeat the previous steps for the dfs access point.
Step 6: Enable Tableflow with the private link endpoints
In the Cloud Console, navigate to your topic and click Enable Tableflow.
Enable Tableflow with custom storage, and use the provider integration and Azure Storage Account you configured earlier.
After a short time, you should see Tableflow syncing and tables appearing in your storage.