
Register a Confluent Platform Connect Cluster with USM
To monitor and govern your Confluent Platform Connect clusters from Confluent Cloud, you must first register them with Unified Stream Manager (USM). You can register a Connect cluster using either the Confluent Cloud Console or the Confluent CLI.
New to USM? Start with the Unified Stream Manager overview to learn what USM is and how it connects your Confluent Platform clusters to Confluent Cloud.
Warning
Before you register your Kafka Connect clusters, ensure that sensitive values, such as secrets and credentials, for all connectors on that cluster are configured only in properties of type PASSWORD. For USM, Confluent Platform masks configuration values of type PASSWORD before it sends them as part of the connector metadata to Confluent Cloud. To find which configuration options are of type PASSWORD, see Self-Managed Connectors for Confluent Platform for specific connectors.
Before you begin
Ensure that you have registered a Confluent Platform cluster to Confluent Cloud using USM.
Get the Kafka cluster details that the Connect worker uses as the metadata cluster.
Register a Connect cluster
To register a Connect cluster:
Log in to your Confluent Platform cluster by using the Confluent Platform CLI.
Get the Connect cluster ID by running the following command to list the available Kafka Connect clusters:
confluent connect cluster list
From the output, copy the ID of the Kafka Connect cluster that you want to register.
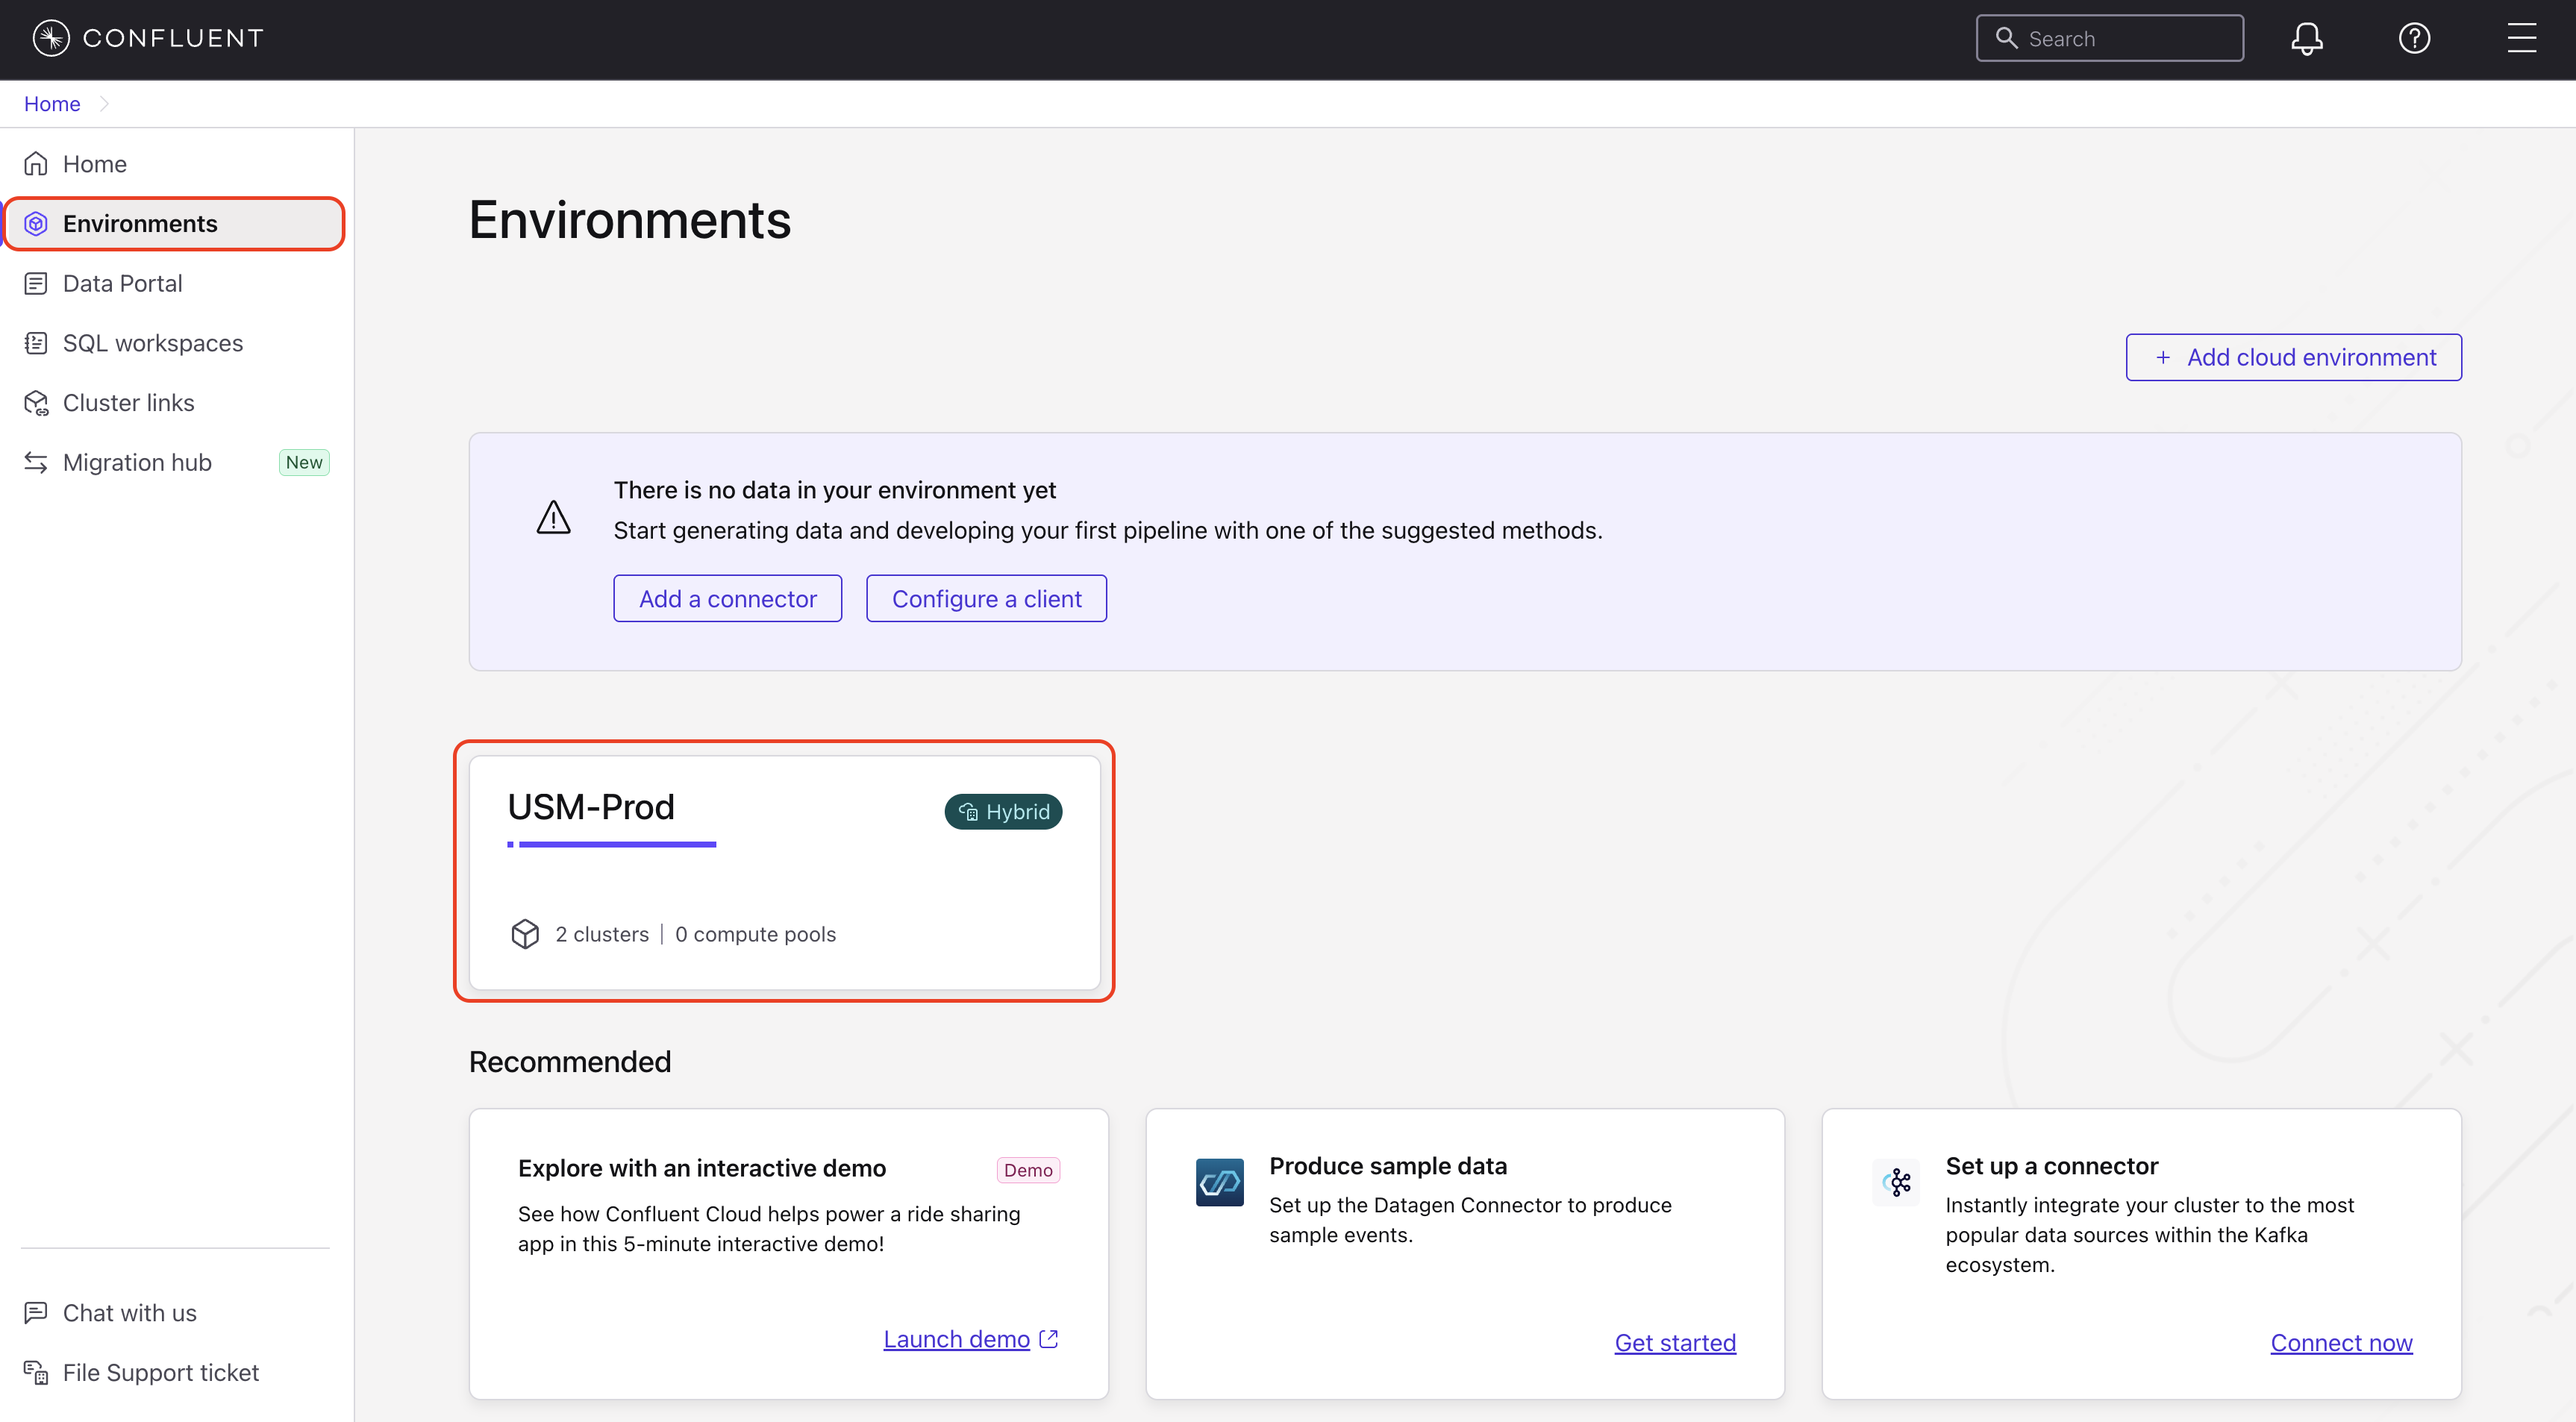
In the Confluent Cloud Console, navigate to Environments and select your environment.
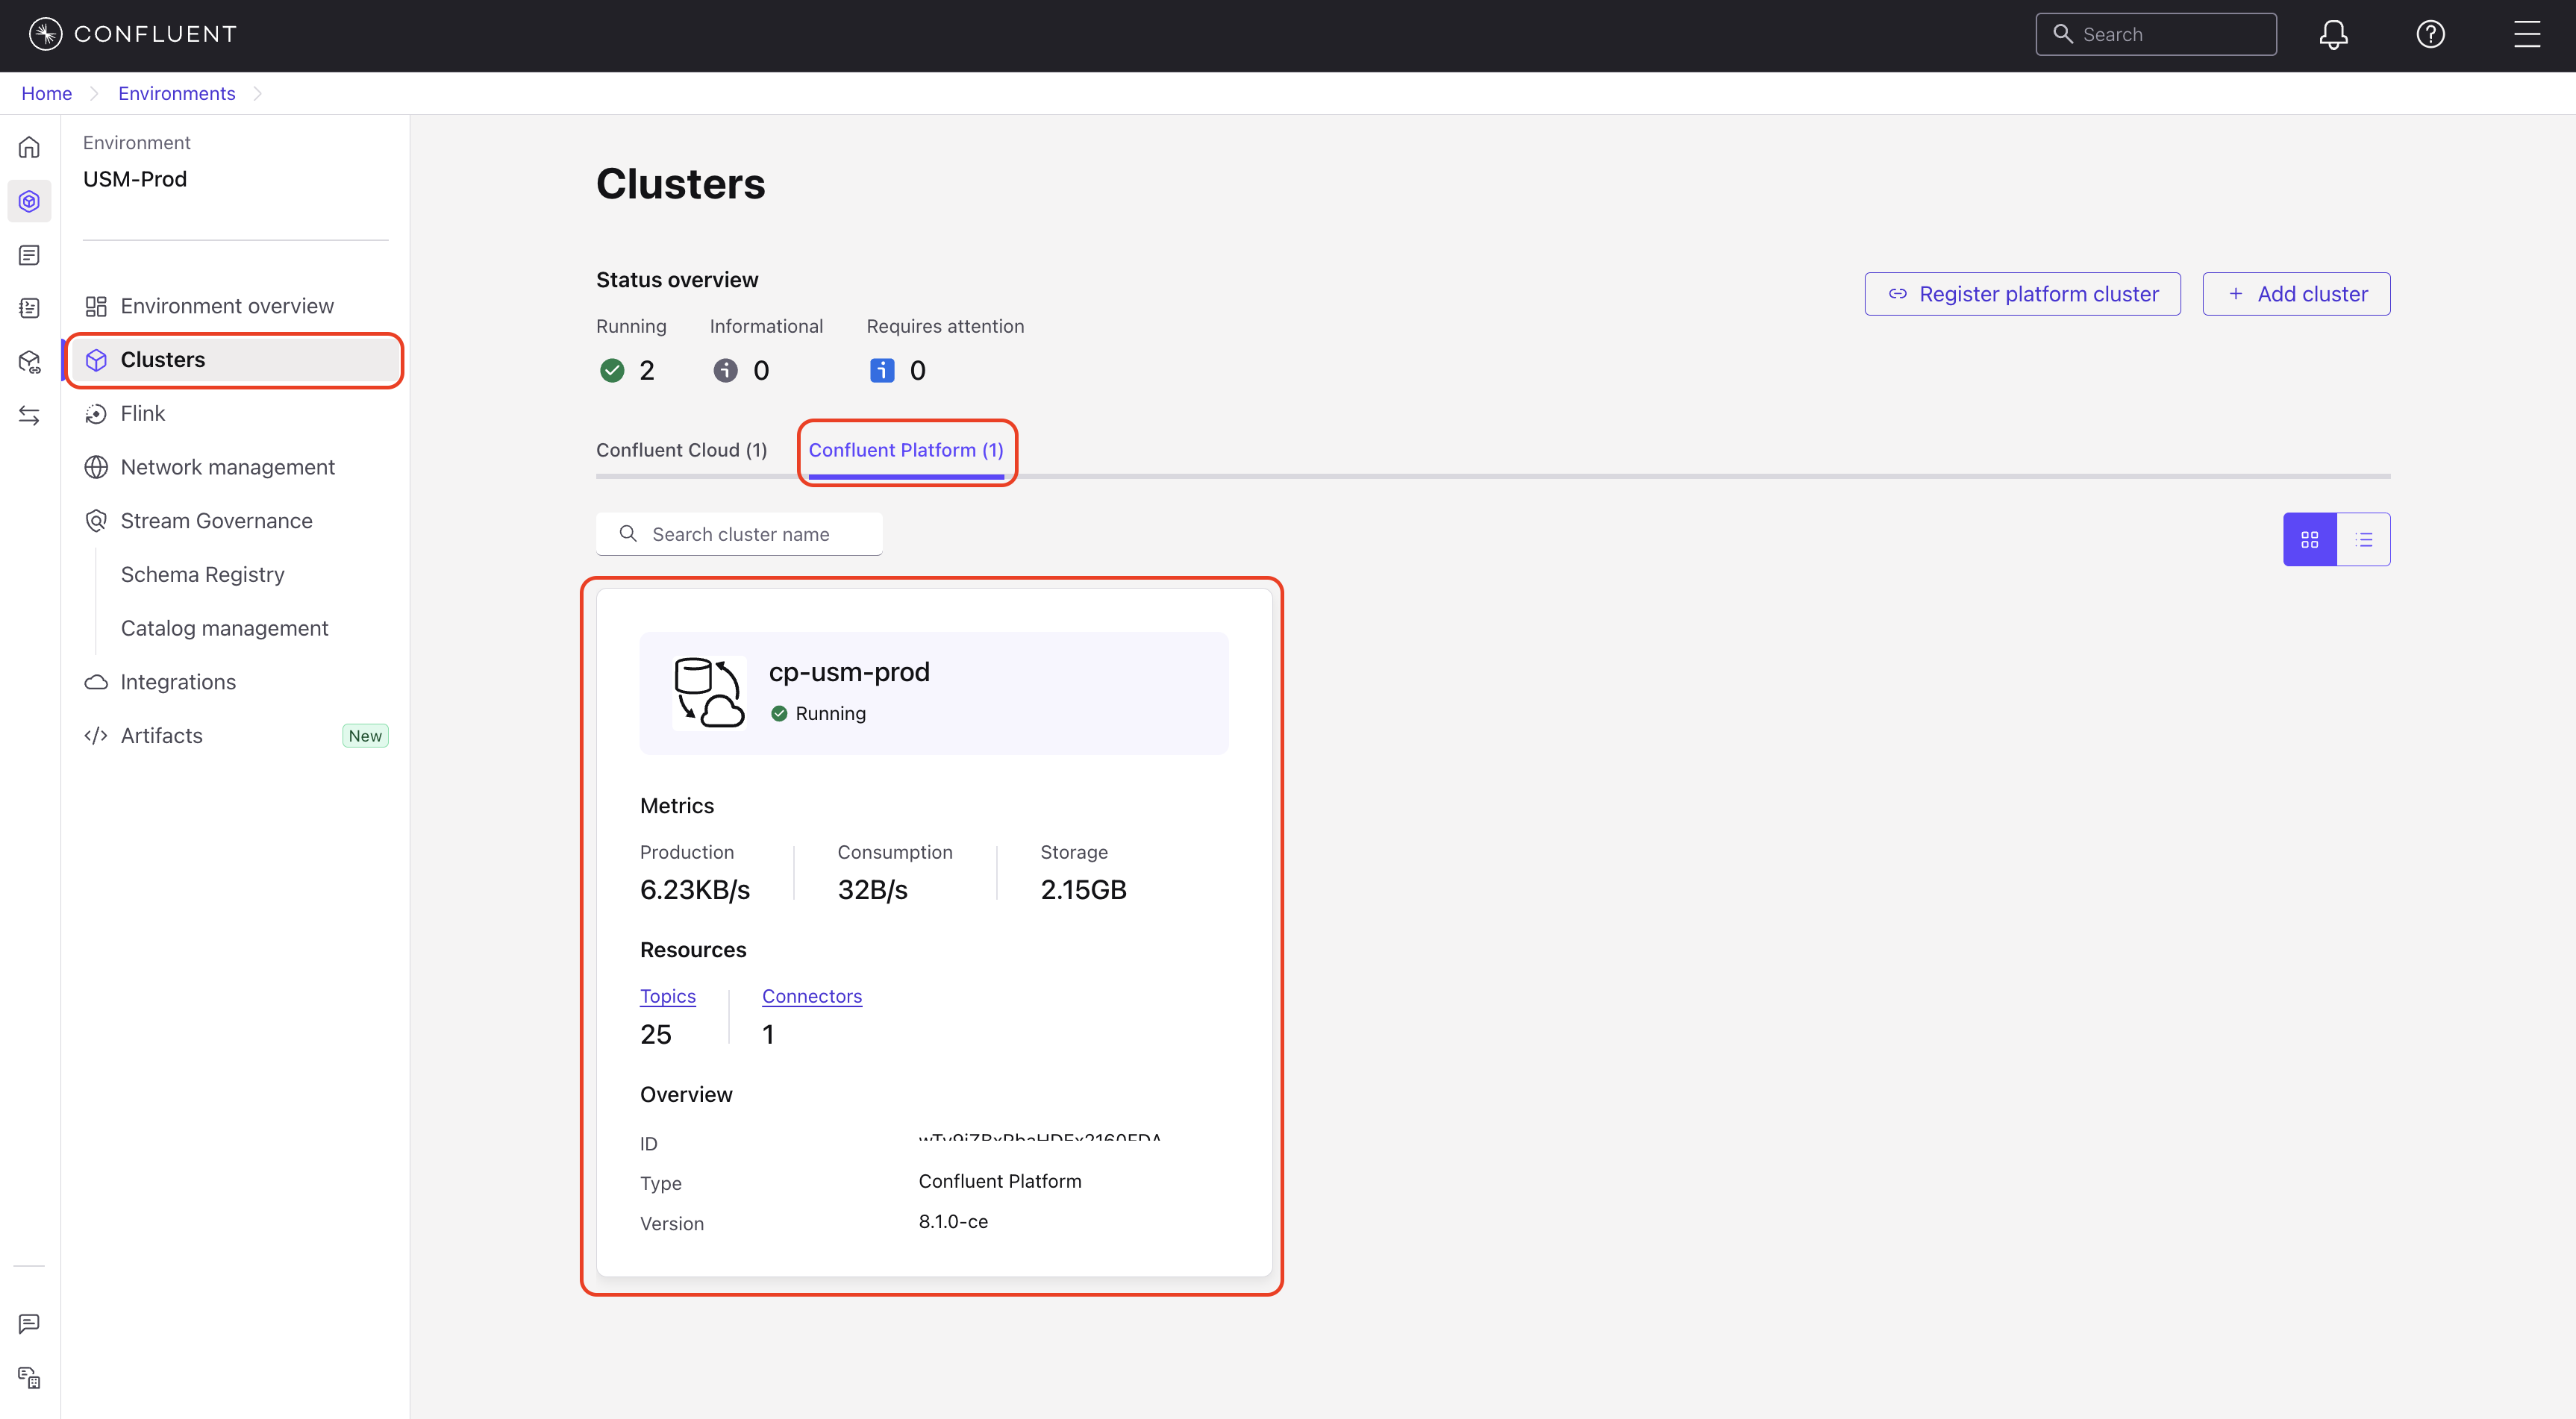
In the navigation menu, click Clusters and select a Confluent Platform cluster.
In the navigation menu, click Connectors.
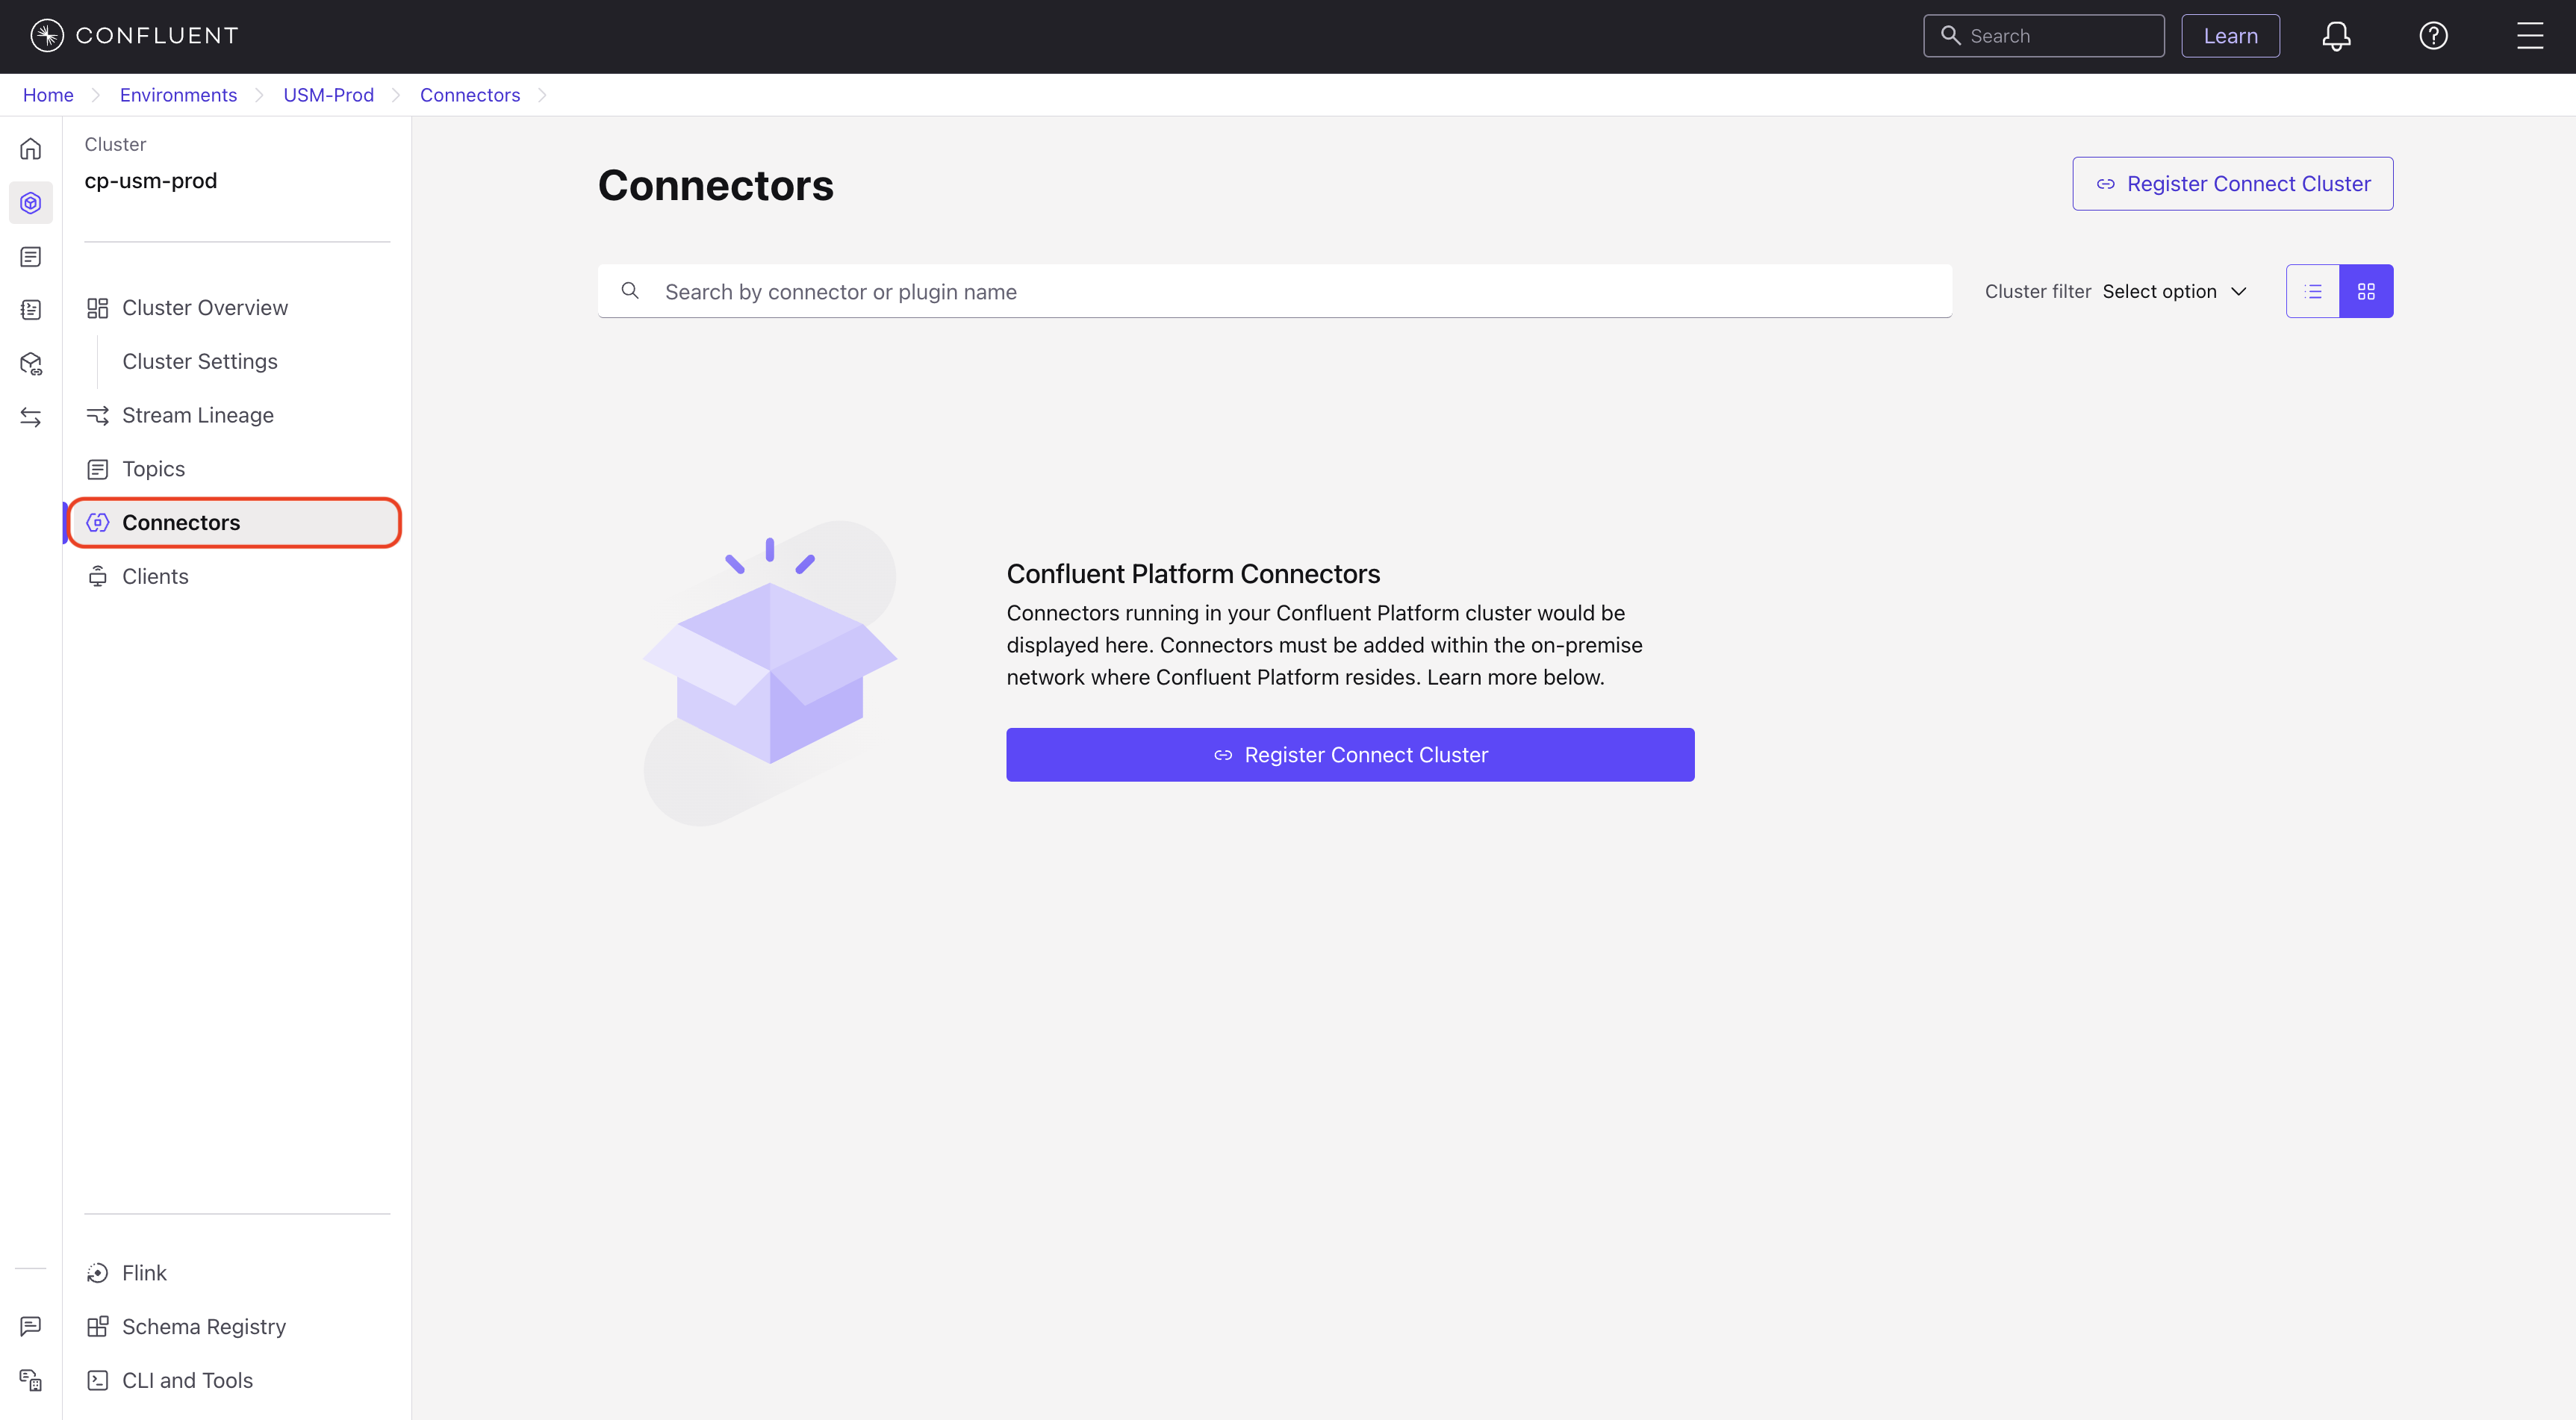
Click Register Connect cluster.
Paste the Kafka Connect cluster ID that you copied.
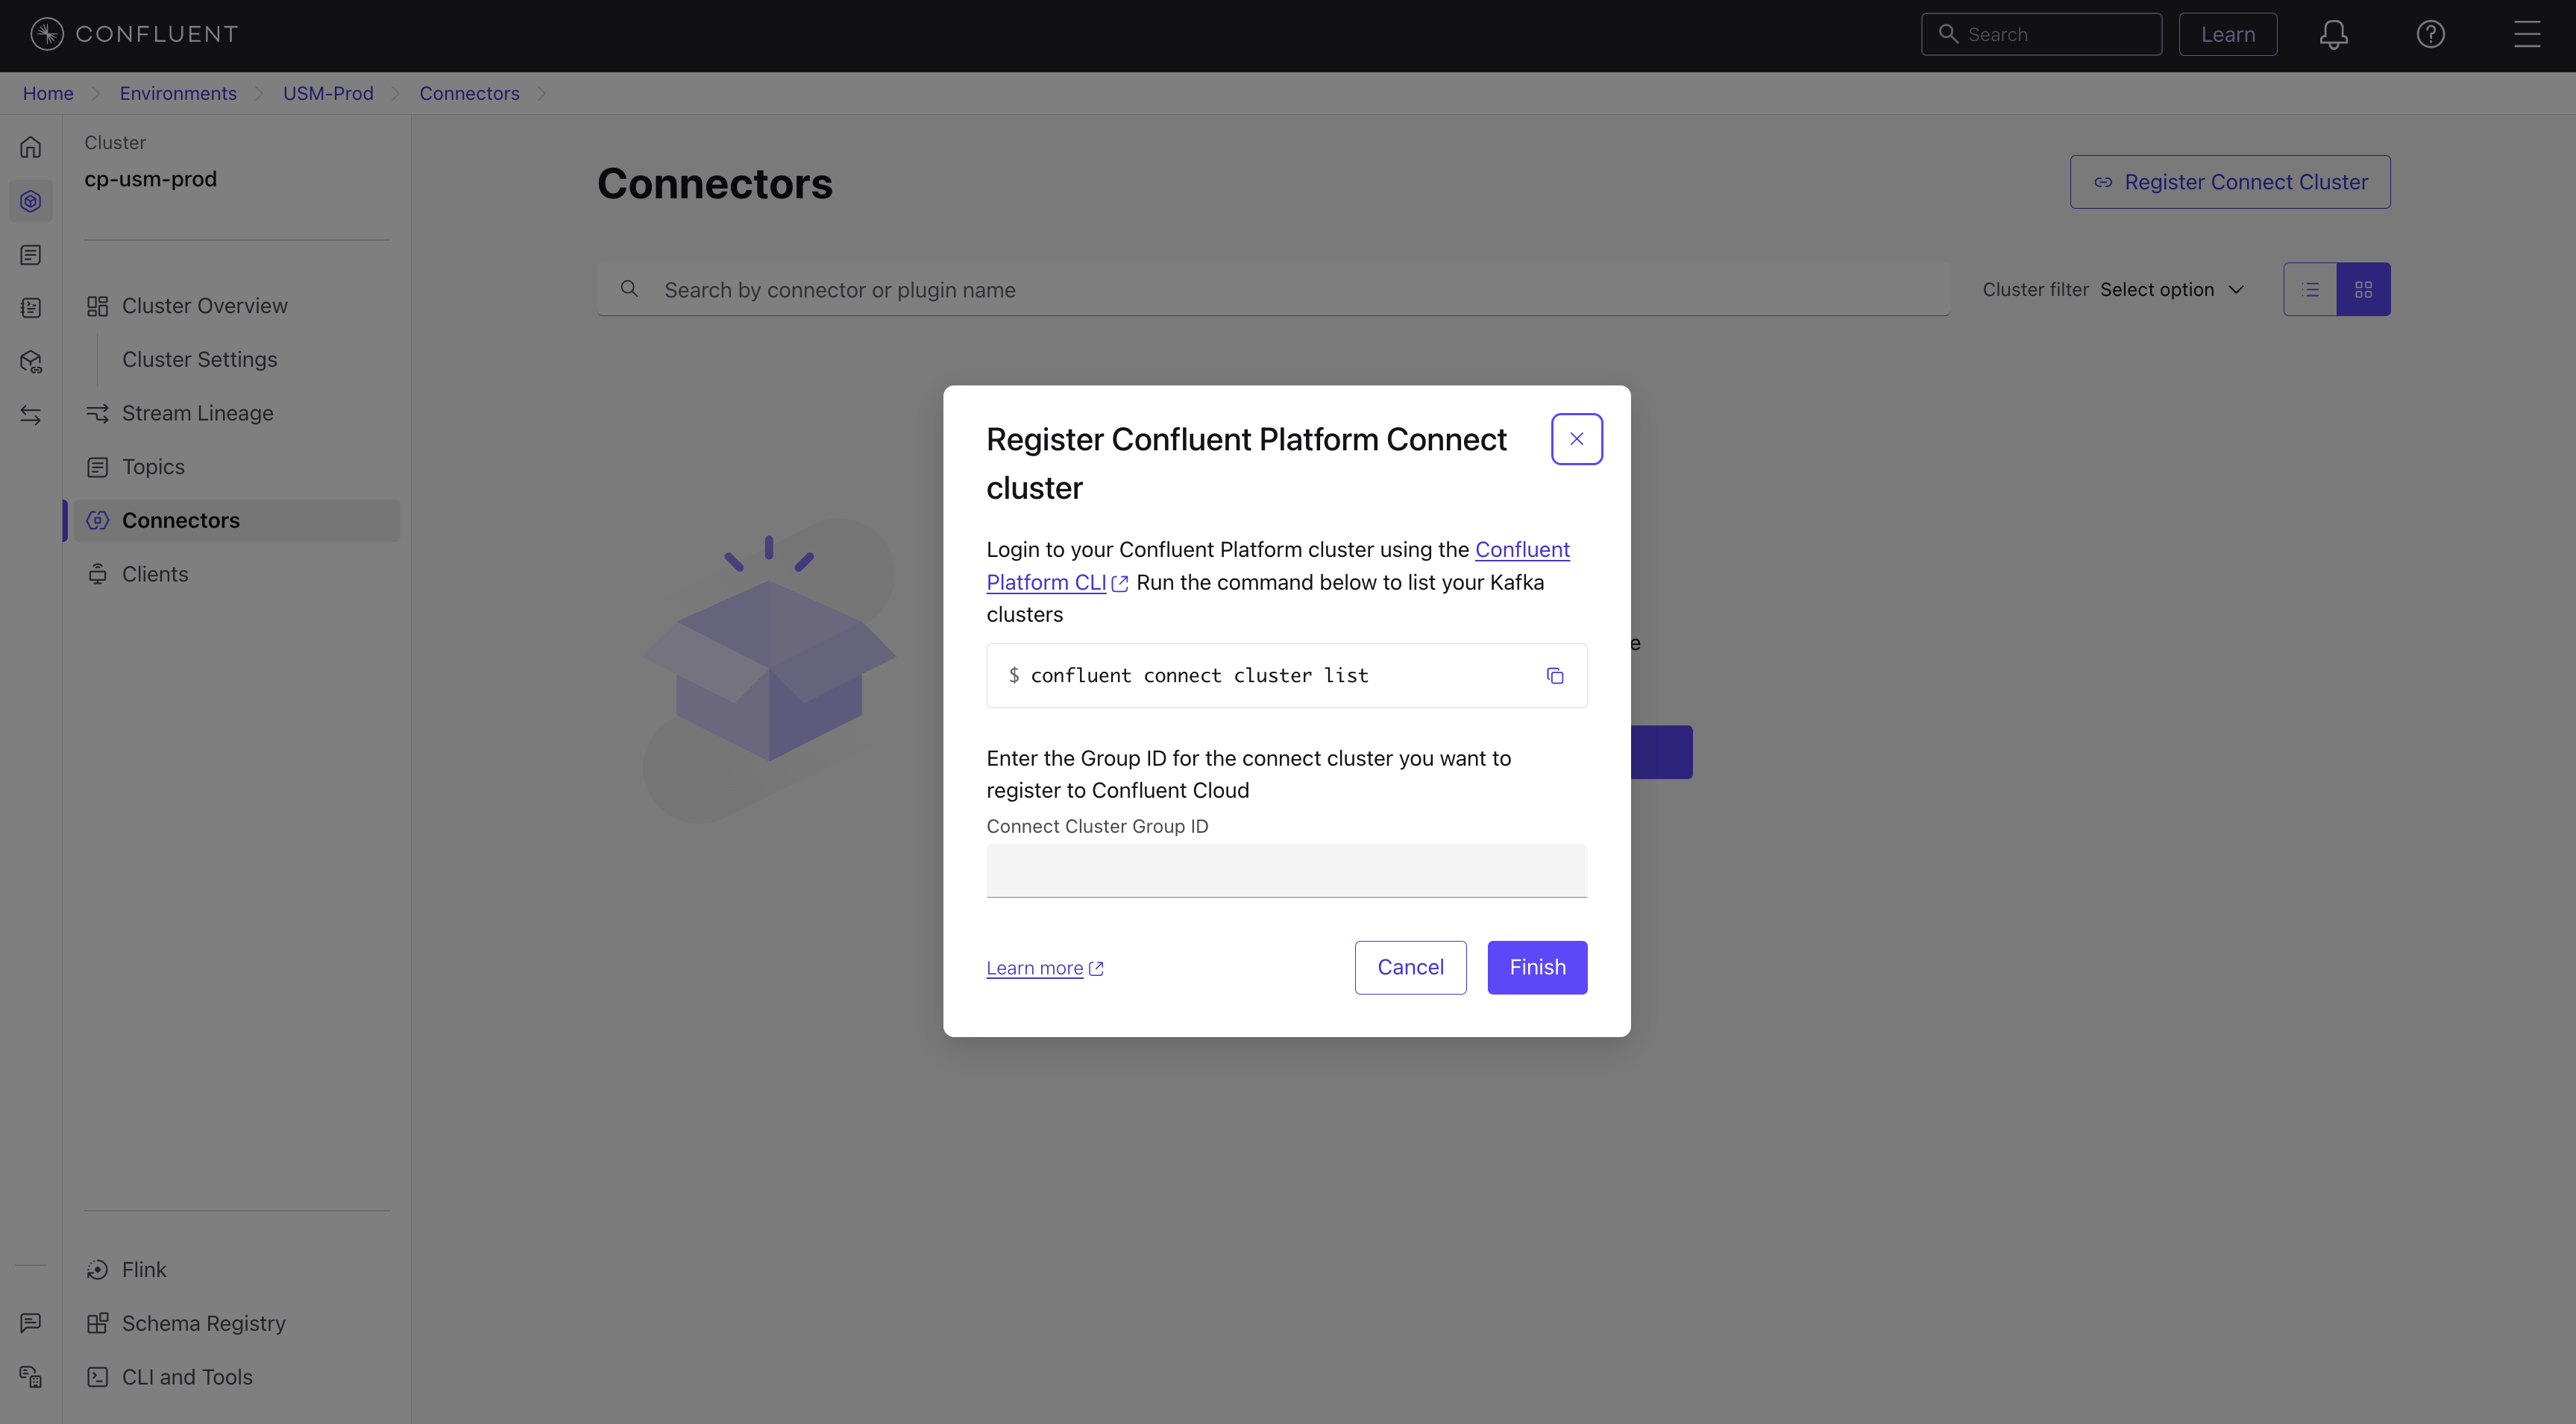
Click Finish.
Data from your connectors might take a few minutes to appear in the Confluent Cloud.
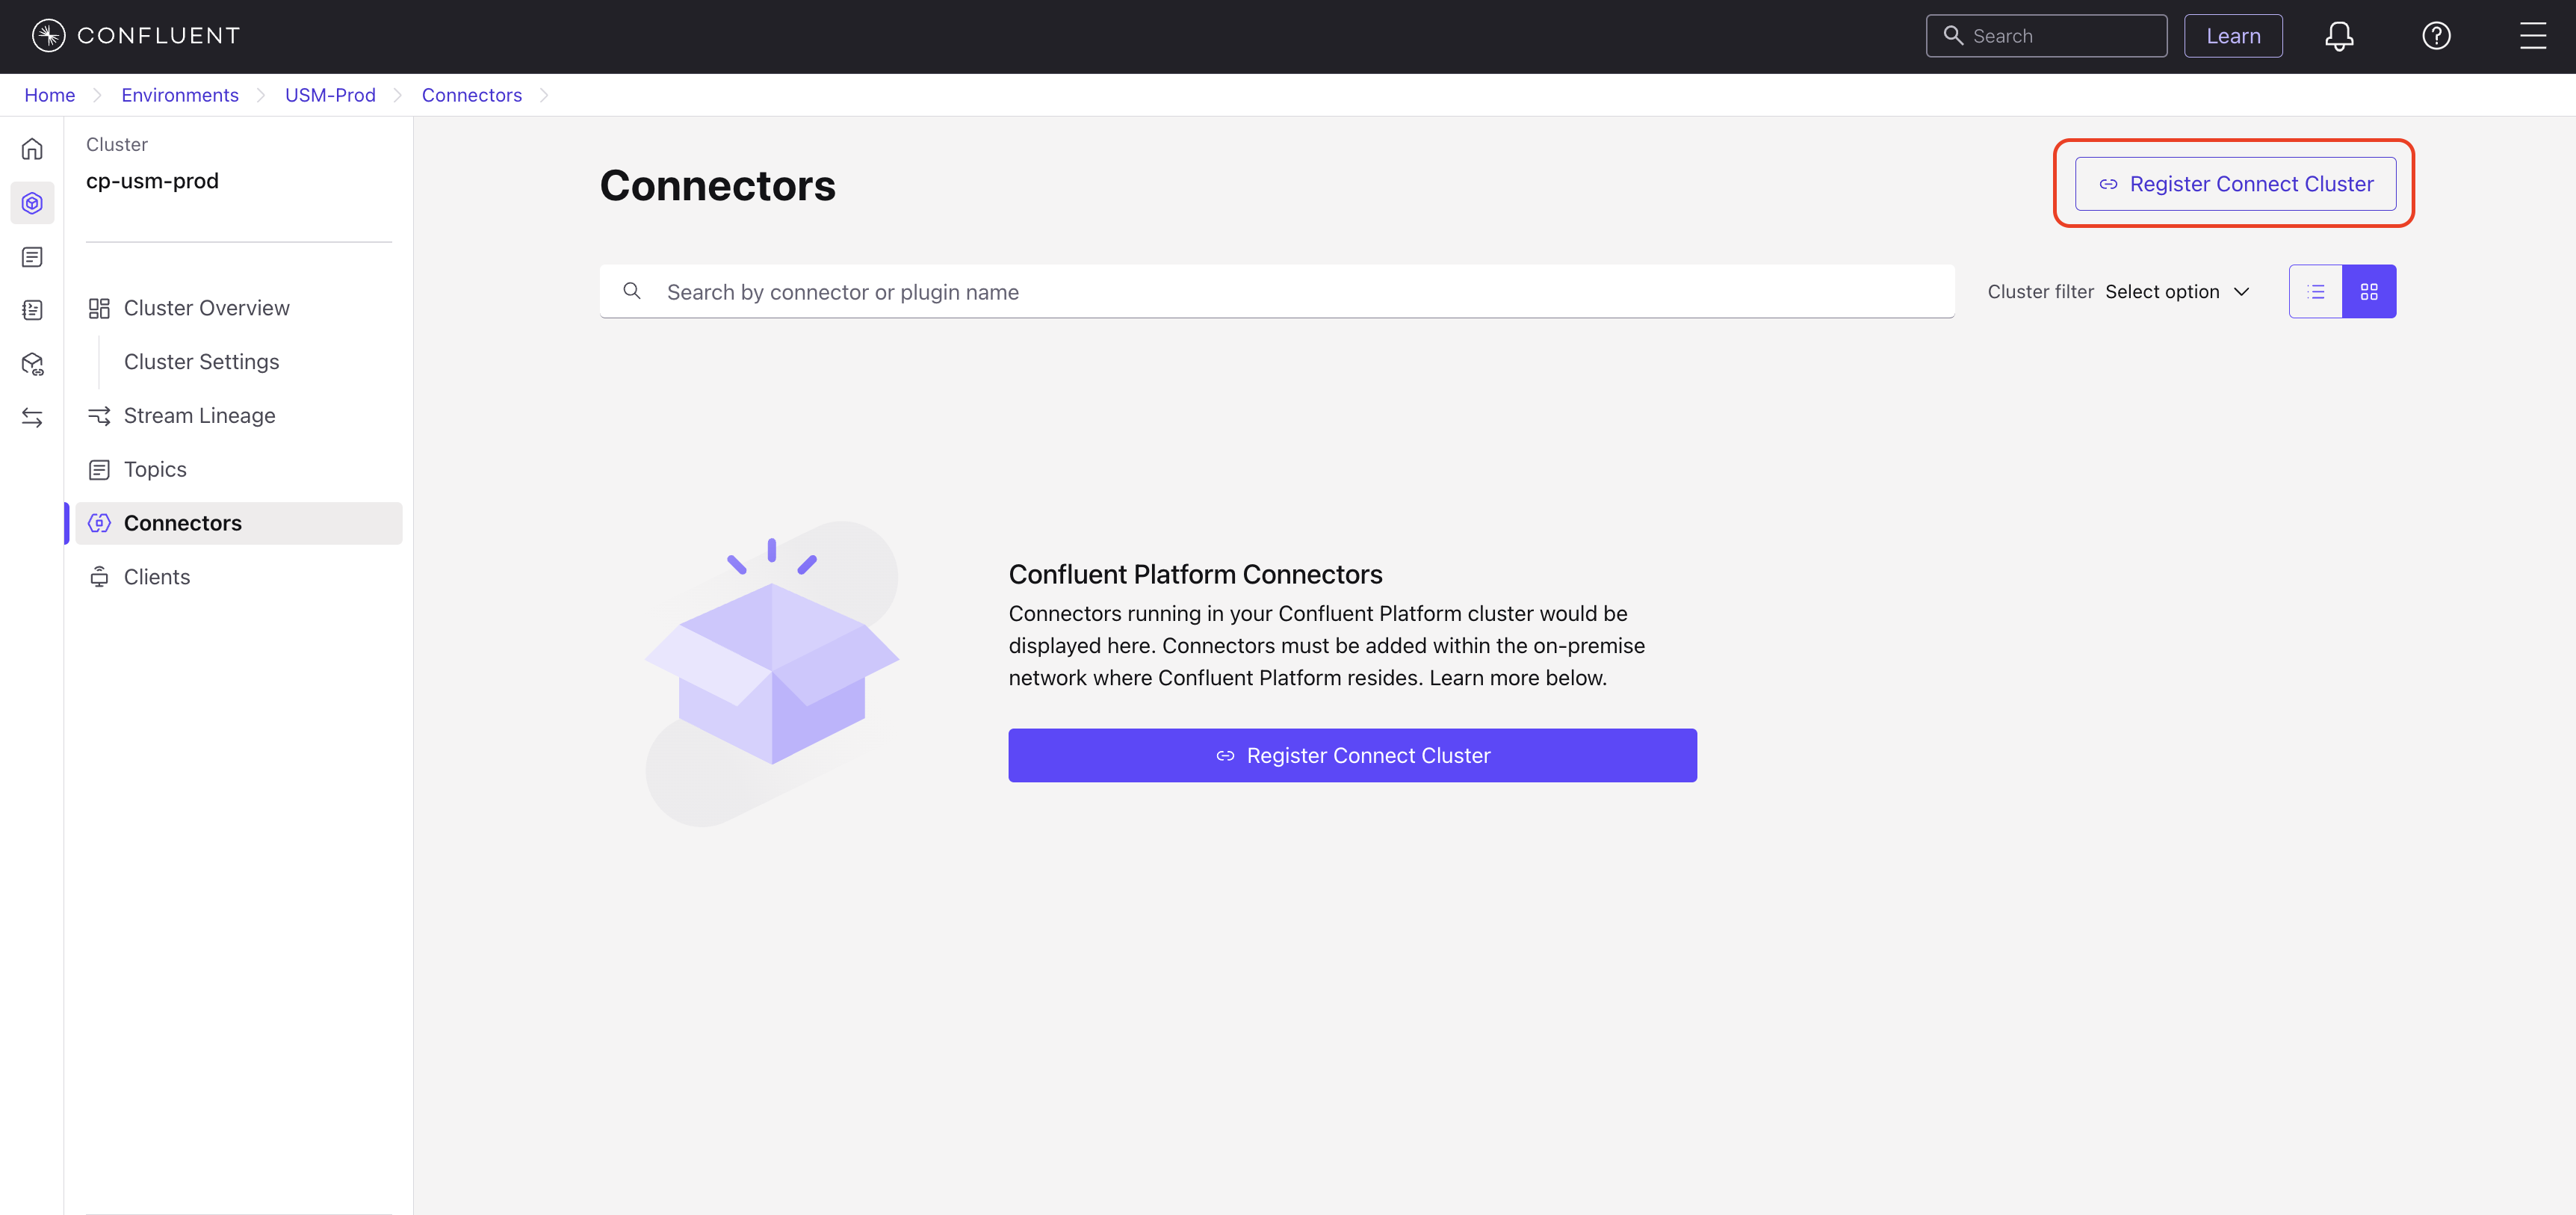
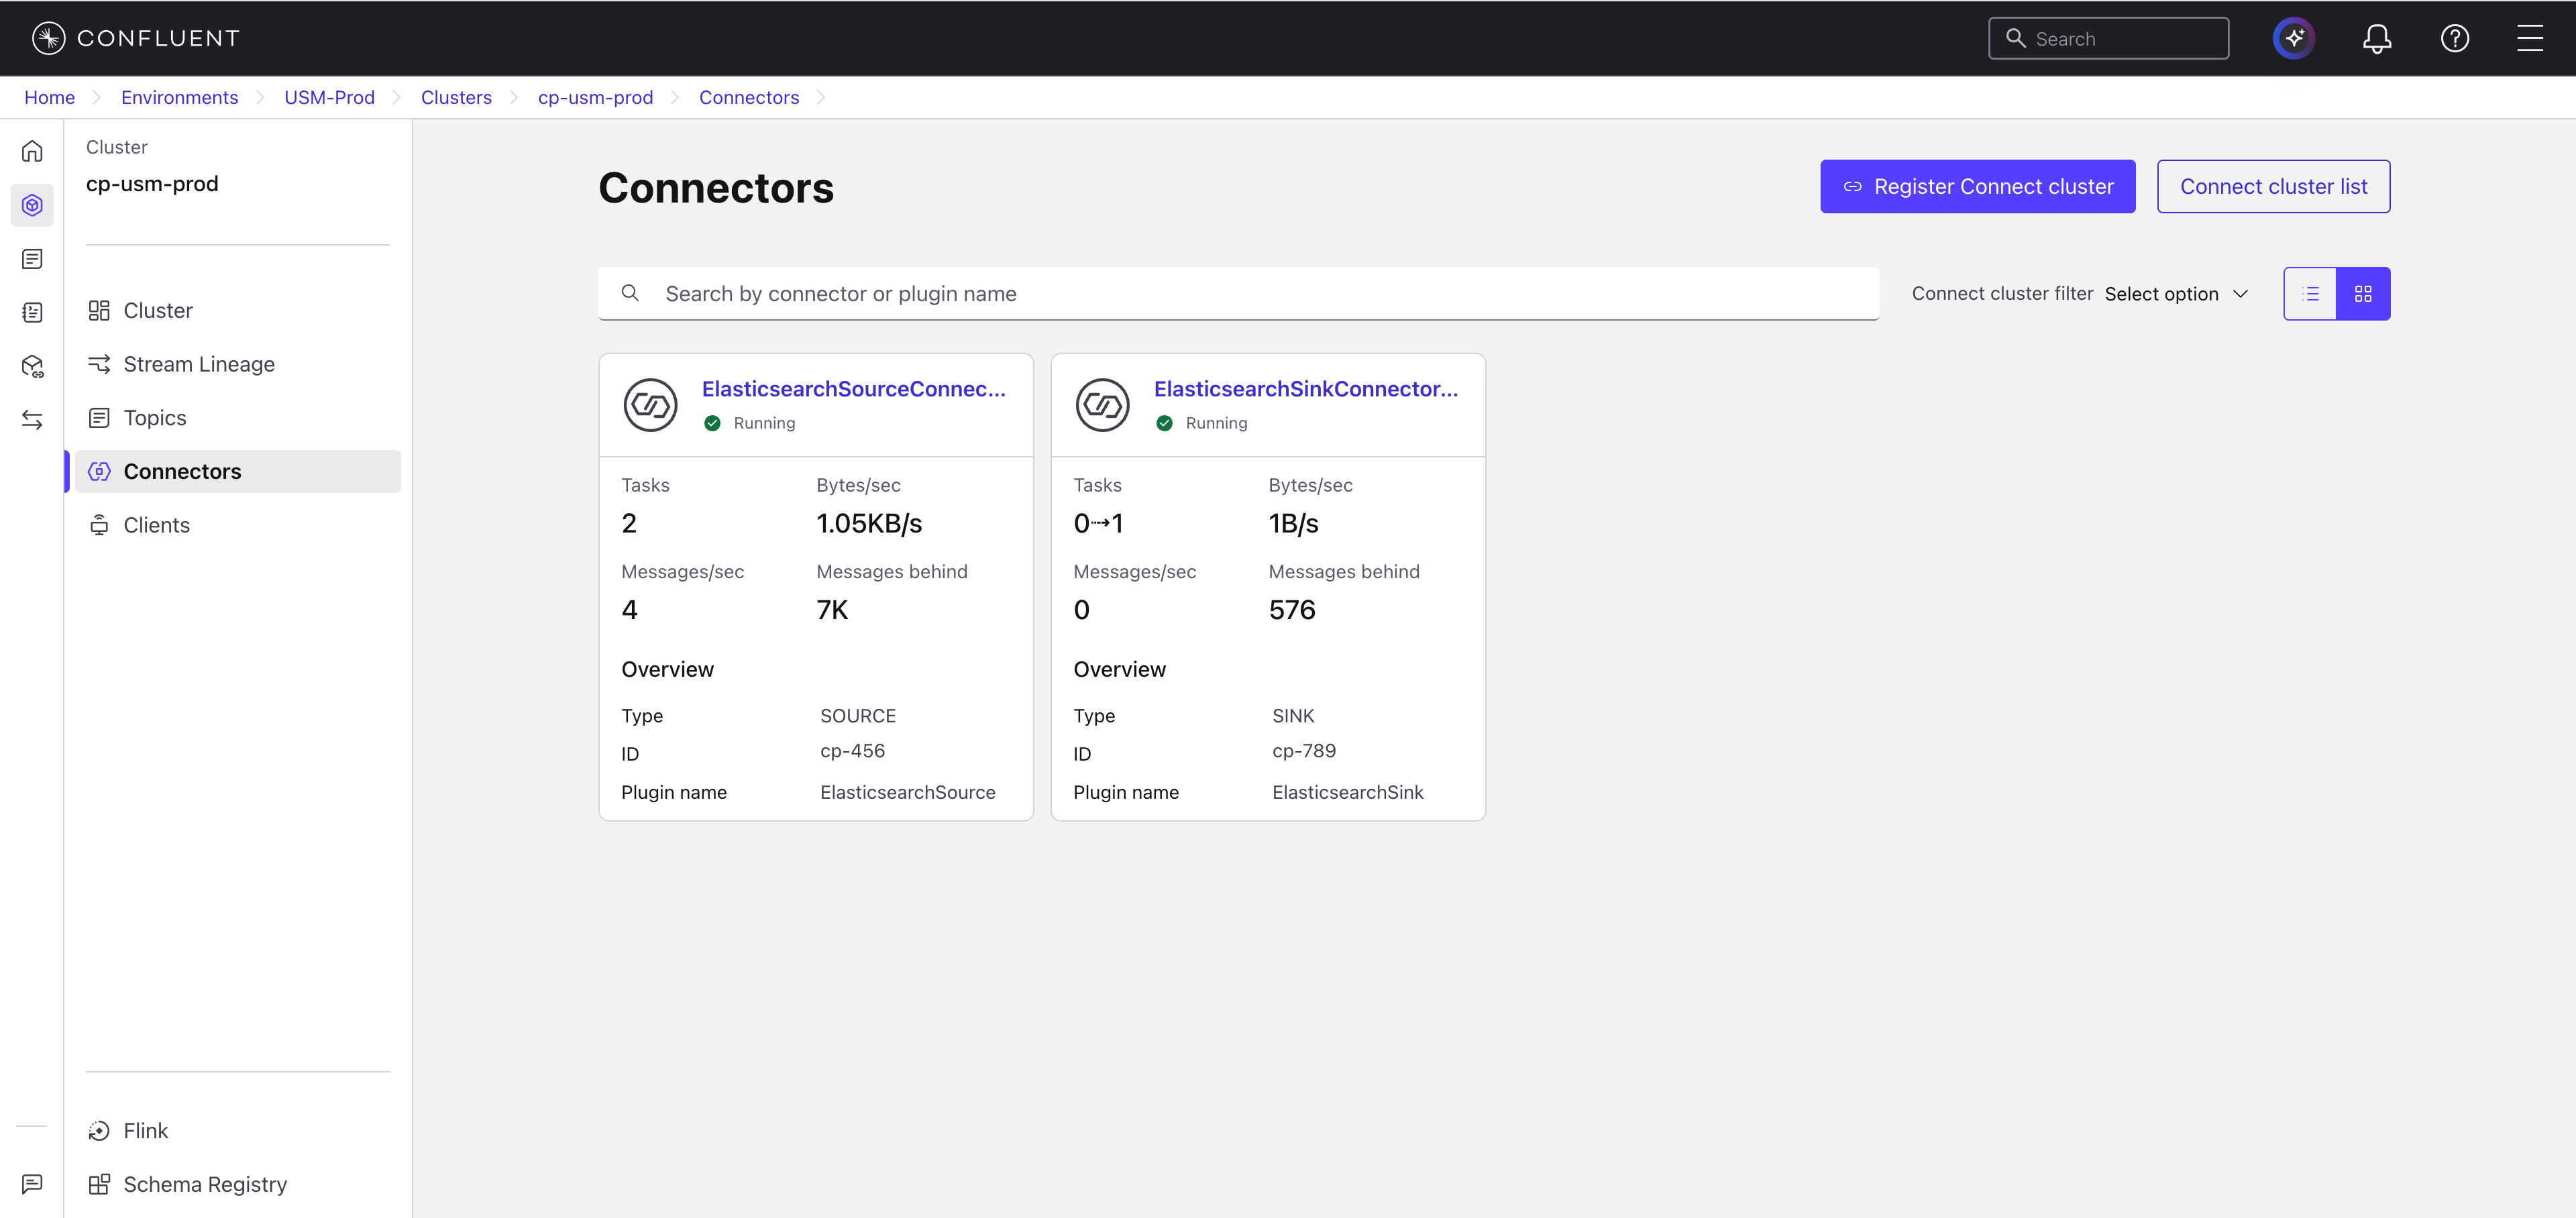
Alternatively, if connectors are already running but the cluster isn’t registered, a Register Connect cluster button is also available at the top right of the Connectors page.
To register a Confluent Platform Connect cluster, use the confluent usm connect register command.
confluent usm connect register <connect_ID> --confluent-platform-kafka-cluster <cluster-ID> --cloud <cloud-type> --region <region-name>
For example, to register a Kafka cluster with ID 4k0R9d1GTS5tI9f4Y2xZ0Q and connector ID connect-group-xyz123 in AWS region us-east-1:
confluent usm connect register connect-group-xyz123 --confluent-platform-kafka-cluster 4k0R9d1GTS5tI9f4Y2xZ0Q --cloud aws --region us-east-1
The following is an example of the output:
+--------------------------------+--------------------------+
| ID                             | usmcc-global-ghijkl67890 |
| Confluent Platform Connect     | connect-group-xyz123     |
| Cluster                        |                          |
| USM Kafka Cluster ID           | usmkc-global-abcdef12356 |
| Confluent Platform Kafka       | 4k0R9d1GTS5tI9f4Y2xZ0Q   |
| Cluster ID                     |                          |
| Cloud                          | AWS                      |
| Region                         | us-east-1                |
| Environment                    | env-stgcqqd737           |
+--------------------------------+--------------------------+
After registration, the Connectors page populates with all connectors that are associated with that cluster.
For a complete reference of related commands, see the confluent unified stream manager CLI documentation.
Register an additional Connect cluster
To register an additional Connect cluster, do the following:
Navigate to the Connectors page for your registered Confluent Platform cluster.
Click Connector cluster list.
Click Register Connect cluster.
In your Confluent Platform environment, get the ID of the additional Connect cluster by running the following command:
confluent connect cluster list
Enter the Confluent Platform Connect cluster ID in the Confluent Cloud Console.
Click Finish.
Configure Connect workers for metadata sync
After registering your cluster, the final step is to ensure your Connect workers can securely send metadata to Confluent Cloud. The required actions depend on your Confluent Platform deployment method.
For Confluent for Kubernetes or Ansible Playbooks for Confluent Platform deployments
If you deployed Confluent Platform using Confluent for Kubernetes or Ansible Playbooks, no additional configuration is needed. These tools automatically manage the settings required for metadata synchronization. After the registration is complete, your connector metadata begins to appear in Confluent Cloud.
For manual or other deployments
If you installed or manage Confluent Platform manually, you must update the properties file for each Kafka Connect worker in the registered cluster.
Open the properties file for each Kafka Connect worker in the cluster that you registered.
Confirm that the
bootstrap.serversproperty correctly points to the Kafka cluster that the Connect workers use to store connector metadata.Add the following metadata properties to the worker configuration file to enable the metadata events service.
confluent.connect.metadata.events.enabled=true
confluent.connect.metadata.events.client.base.url=https://usm-agent.connect.svc.cluster.local:10000
confluent.connect.metadata.events.ssl.key.password=${file:/mnt/sslcerts/tls-connect/jksPassword.txt:jksPassword}
confluent.connect.metadata.events.ssl.keystore.location=/mnt/sslcerts/tls-connect/keystore.p12
confluent.connect.metadata.events.ssl.keystore.password=${file:/mnt/sslcerts/tls-connect/jksPassword.txt:jksPassword}
confluent.connect.metadata.events.ssl.protocol=TLSv1.2
confluent.connect.metadata.events.ssl.truststore.location=/mnt/sslcerts/tls-connect/truststore.p12
confluent.connect.metadata.events.ssl.truststore.password=${file:/mnt/sslcerts/tls-connect/jksPassword.txt:jksPassword}
Save your changes.
Perform a rolling restart of your Connect workers. After they restart, the workers send metadata to Confluent Cloud.
Deregister a Connect cluster
When you deregister a Connect cluster, the cluster is removed as a USM entity from Confluent Cloud. The USM Agent continues to run in your Confluent Platform environment and emits events, but Confluent Cloud rejects them because the Confluent Platform cluster no longer has a corresponding mapping in Confluent Cloud.
To stop these events, remove the USM-specific configuration from the Connect cluster. After you remove the configuration, you can remove the USM Agent if no other Kafka or Connect cluster is using the agent.
You can deregister a Connect cluster using the Confluent Cloud Console or the Confluent CLI.
In the Confluent Cloud Console, navigate to the Environments page and select your environment.
In the left navigation, click Clusters and select your Confluent Platform cluster.
In the left navigation menu, click Connectors.
On the Connectors page, click Connect cluster list.
In the Connect cluster list panel, locate the Connect cluster you want to deregister. You can search by name or Confluent Cloud ID, or sort the list by clicking a column header.
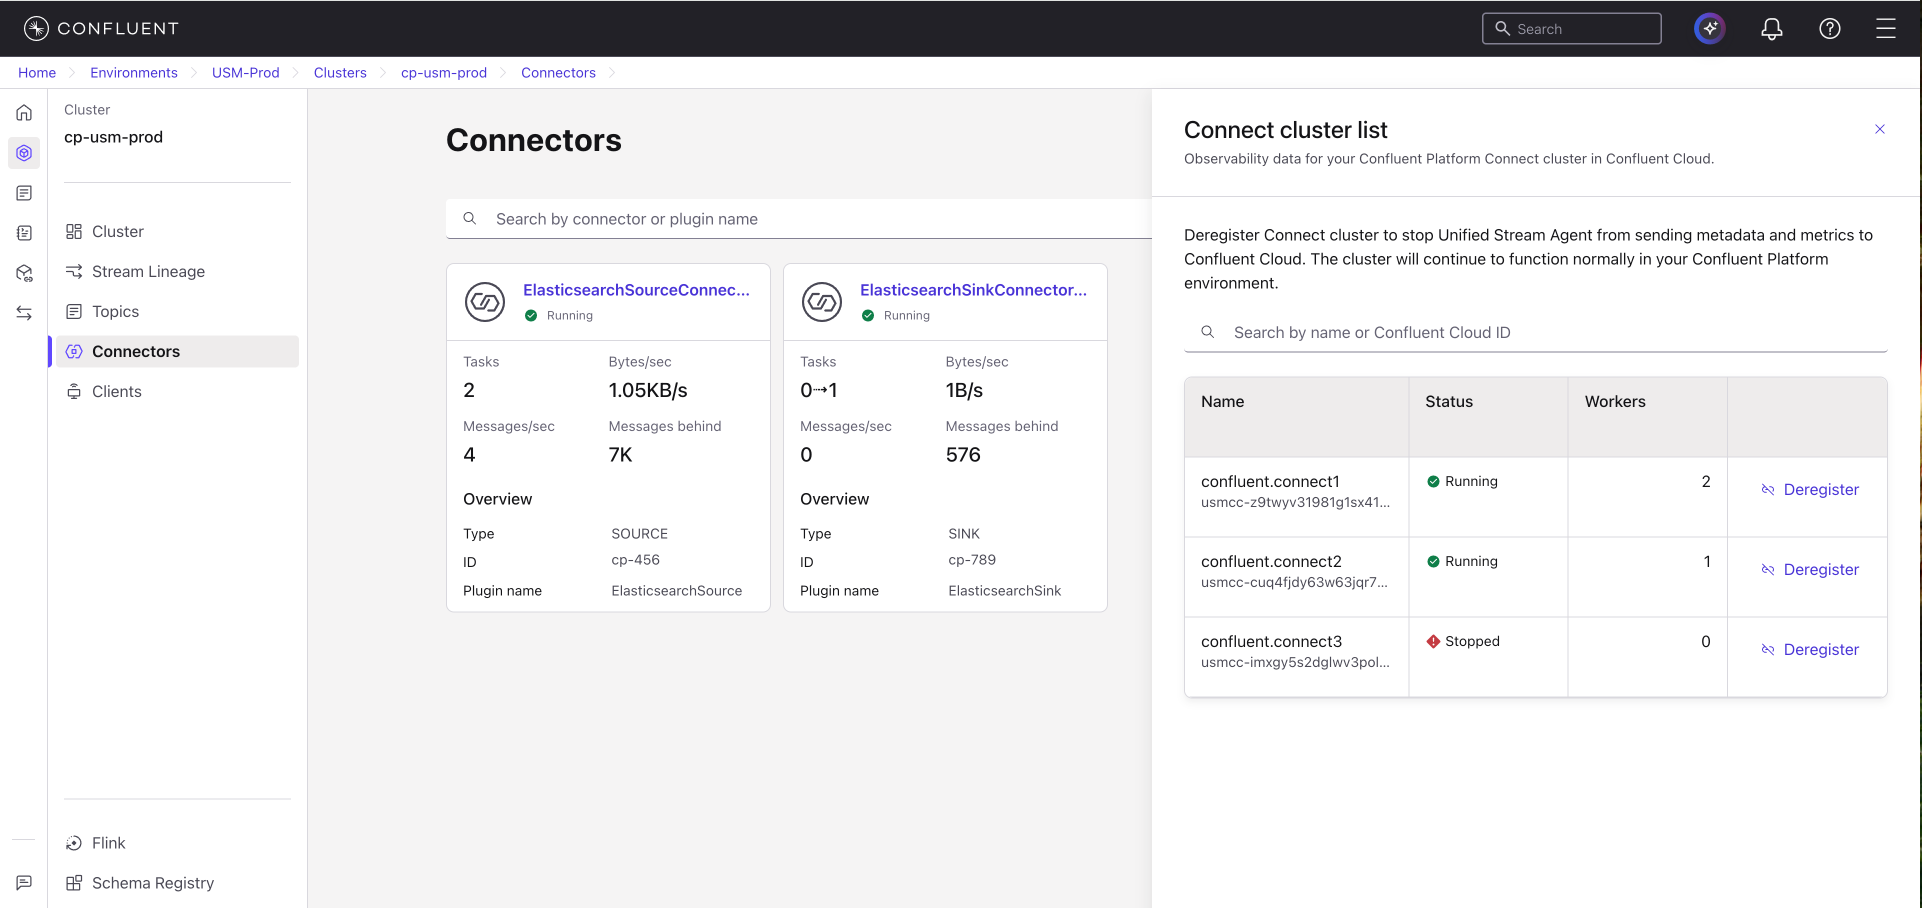
In the row for the cluster you want to deregister, click Deregister.
In the Deregister Connect cluster dialog, enter the cluster name exactly as shown.
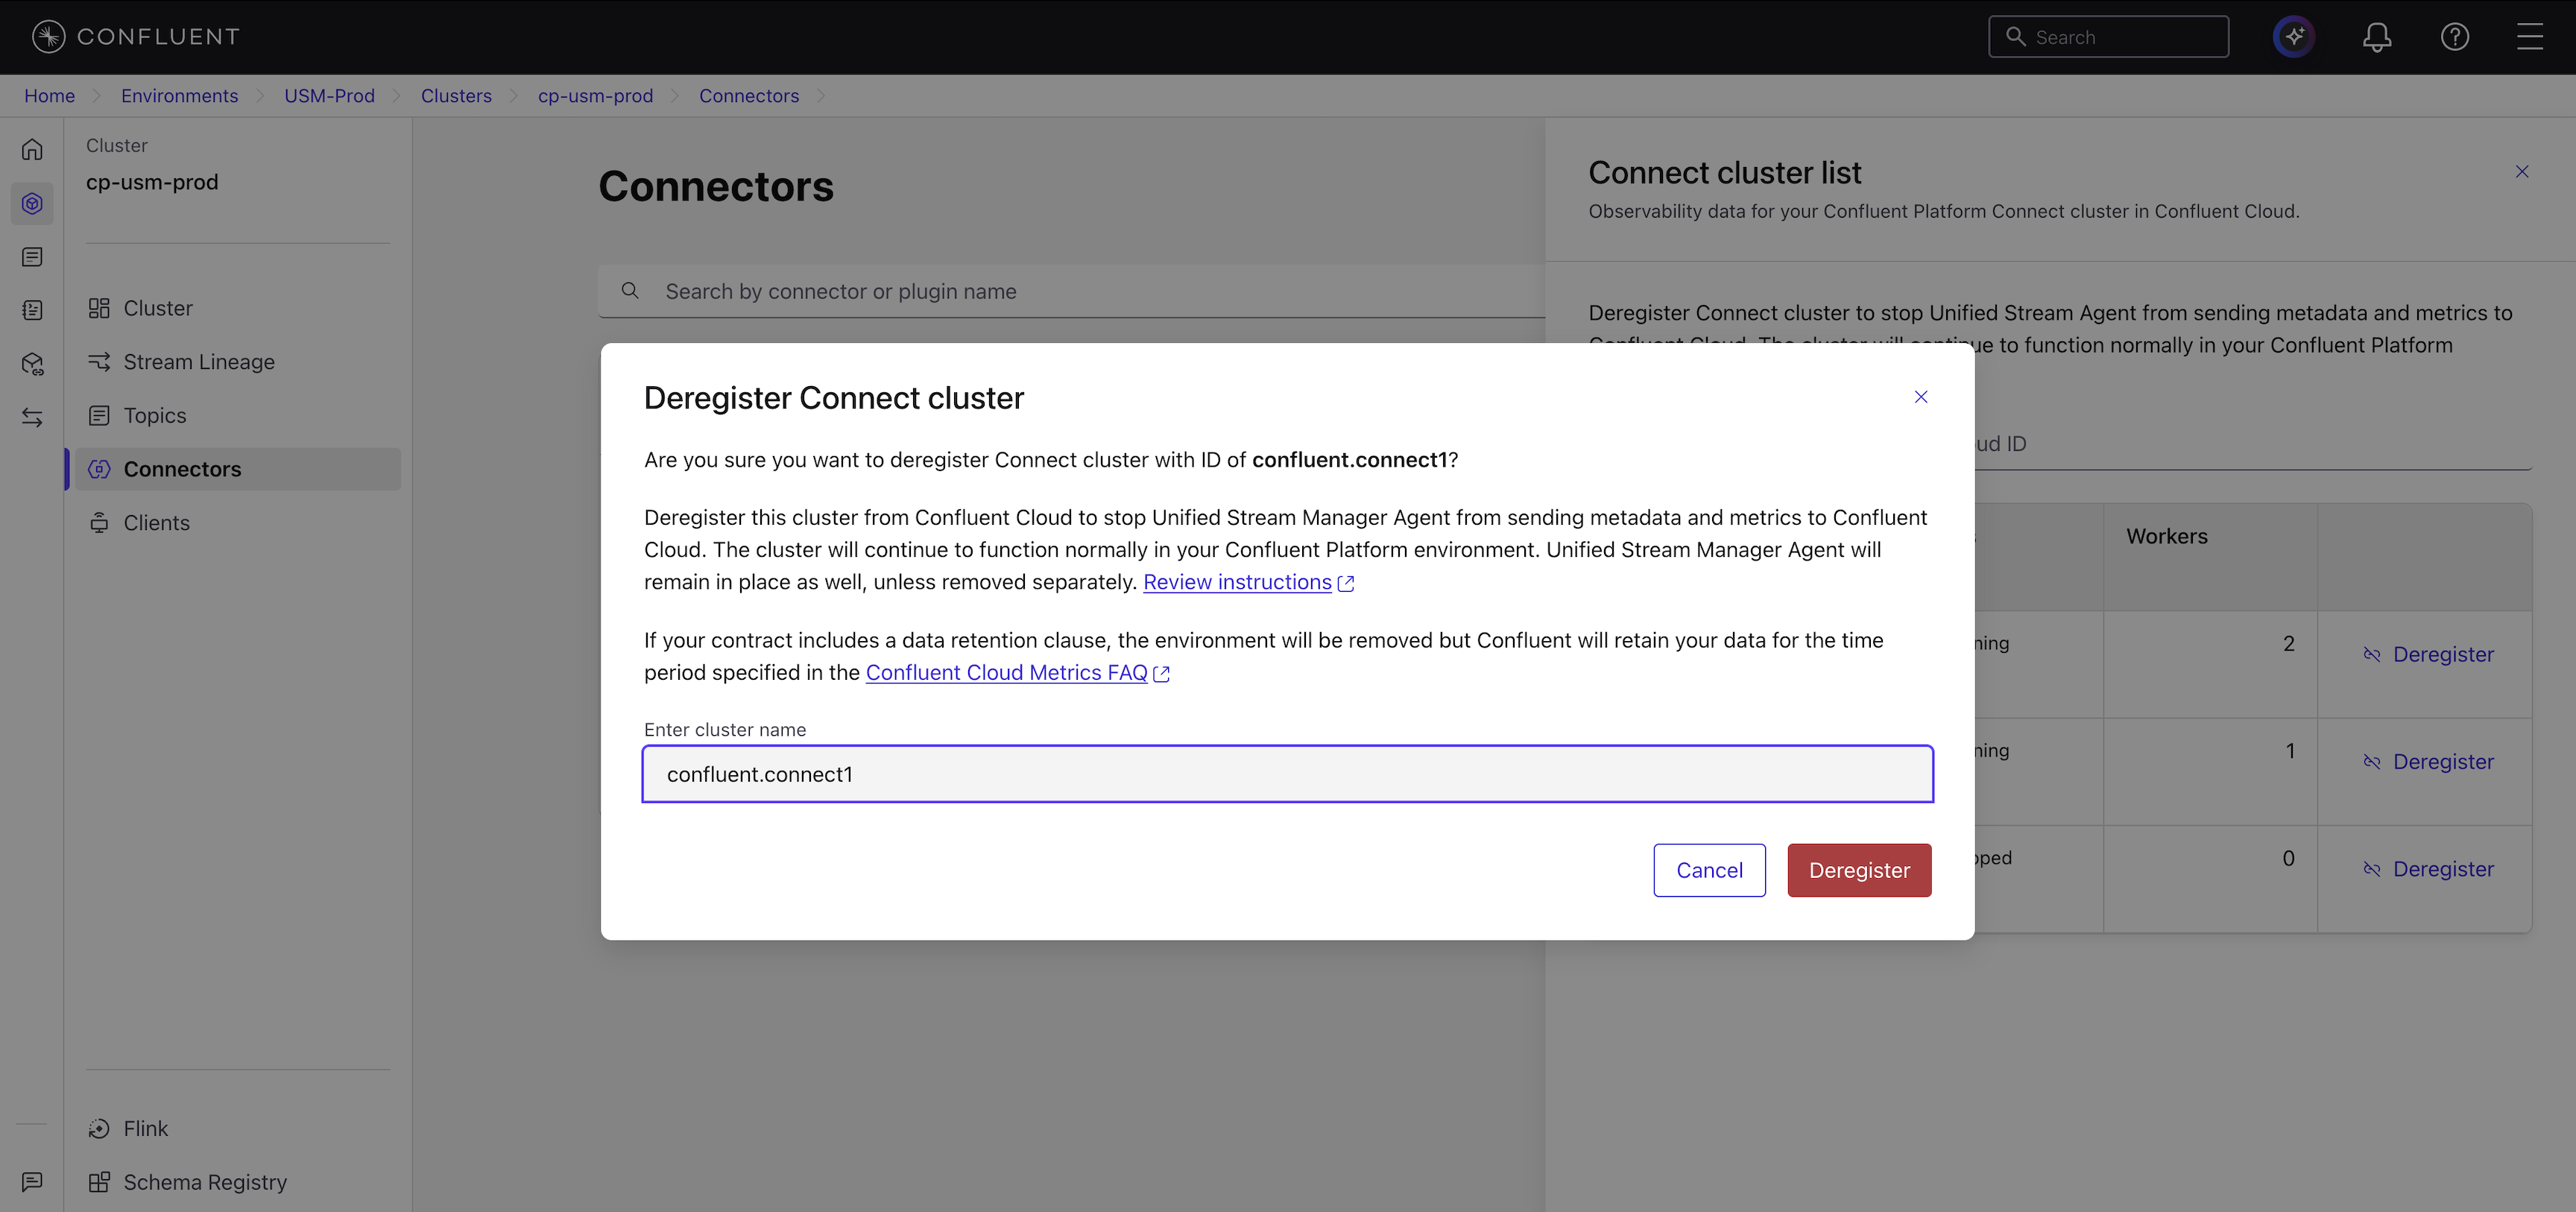
Click Deregister.
The cluster is removed from the Connect cluster list.
Log in to the Confluent CLI.
confluent loginGet the Environment ID using the following steps:
In the Confluent Cloud Console, navigate to the Environments page and select your environment.
Click the Details tab and copy the ID from the About section.
Run the list command to see all USM registered Connect clusters in your environment. This allows you to find the specific
USM_CONNECT_CLUSTER_IDrequired for deregistration.confluent unified-stream-manager connect list --environment <YOUR_ENVIRONMENT_ID>
From the output, identify the Connect cluster you want to remove and copy its ID. A
USM_CONNECT_CLUSTER_IDalways starts with the prefixusmcc-.Use the
confluent unified-stream-manager connect deregistercommand with theusmcc-ID you copied.confluent unified-stream-manager connect deregister <USM_CONNECT_CLUSTER_ID> --environment <YOUR_ENVIRONMENT_ID>
The following example deregisters a Connect cluster with the ID
usmcc-abc123in the environmentenv-12345.confluent unified-stream-manager connect deregister usmcc-abc123 --environment env-12345
The CLI prompts you for confirmation. Type
yand press Enter to proceed.Are you sure you want to deregister USM Connect cluster "usmcc-abc123"? (y/n): y Deregistered USM Connect cluster "usmcc-abc123".
After deregistration, the corresponding Connect cluster card is removed from the Confluent Cloud Console.
For a complete reference of related commands, see the confluent unified stream manager CLI documentation.