
Use Confluent Control Center with Confluent Manager for Apache Flink
Manage Apache Flink® environments and applications in Confluent Manager for Apache Flink (CMF) by using Confluent Control Center. Confluent Control Center is a web-based user interface that provides a graphical way to manage Flink environments and applications.
Important
The Flink pages in Confluent Control Center are deprecated as of Control Center 2.6 and are planned to be removed in a future release.
The visual user interface for managing Flink resources has moved to the new Confluent Manager for Apache Flink (CMF) user interface, available in CMF 2.4 and later. Start using the new CMF interface and see Migrate to the CMF UI for migration steps.
You can use Confluent Control Center to manage the following CMF resources:
Using Confluent Control Center, you can perform these actions, and more:
View Flink cluster details
Create a new Flink environment
Update or delete an existing Flink environment
Create a new Flink application
Update or delete an existing Flink application
Track the evolution of Flink applications over time through application instances
Monitor the health of an Flink application through lifecycle events
View and create savepoints for your Flink applications
Manage catalogs and databases for Flink SQL
Create and manage compute pools for SQL statement execution
Submit and monitor Flink SQL statements
Migrate to the CMF UI
The Flink management interface is moving from Confluent Control Center to the new CMF UI. The CMF UI is available in CMF 2.4 and later, and is the recommended way to manage Flink resources going forward.
No data migration is required. The CMF UI operates on the same underlying CMF resources that you manage today through Confluent Control Center, so all existing resources are immediately available. These resources include environments, applications, savepoints, catalogs, compute pools, and Flink SQL statements.
To migrate:
Upgrade to CMF 2.4 or later. See Confluent Manager for Apache Flink for installation and upgrade instructions.
Open the CMF UI in your browser. The UI is served at the root of your CMF REST endpoint, which is typically the same URL configured in
confluent.controlcenter.cmf.url.Update bookmarks, runbooks, and operator documentation to point to the CMF UI.
The CMF REST API, CLI, and Kubernetes operator are not affected by this change. Features that aren’t part of Flink continue to work as before in Confluent Control Center. These features include clusters, brokers, topics, schemas, Kafka Connect, ksqlDB, and alerts.
Prerequisites
Following are the prerequisites to view and manage Flink environments and applications in Confluent Control Center:
You must have Confluent Platform and CMF installed.
To install Confluent Platform, see Install Confluent Platform.
To install CMF, see Install Confluent Manager for Apache Flink.
You must have Confluent Control Center installed, which is a separate download from CMF and Confluent Platform. To install Confluent Control Center, see Confluent Control Center Deployment Overview.
You must set some Confluent Control Center configuration properties to view CMF environments in Confluent Control Center.
The following properties are required to view CMF environments in Confluent Control Center:
confluent.controlcenter.cmf.enable=true
confluent.controlcenter.cmf.url=<cmf-url>
For more information about the Confluent Control Center configuration properties, see Configure CMF.
You may need to set some CMF security properties for Confluent Control Center. For more information, see Security Properties for CMF.
Note
You can run Control Center in Kafka-less mode without a bootstrap Kafka cluster when operating in CMF-enabled management mode. This configuration allows Control Center to monitor Flink clusters without requiring Kafka-based state storage. For configuration details, see Kafka-less mode for Confluent Control Center.
View cluster details
In Confluent Control Center, you can view the details of a Flink cluster by accessing the Flink menu item. The overview page displays the details of the cluster, including the number of environments and applications.
The following image shows the Flink home page in Confluent Control Center:
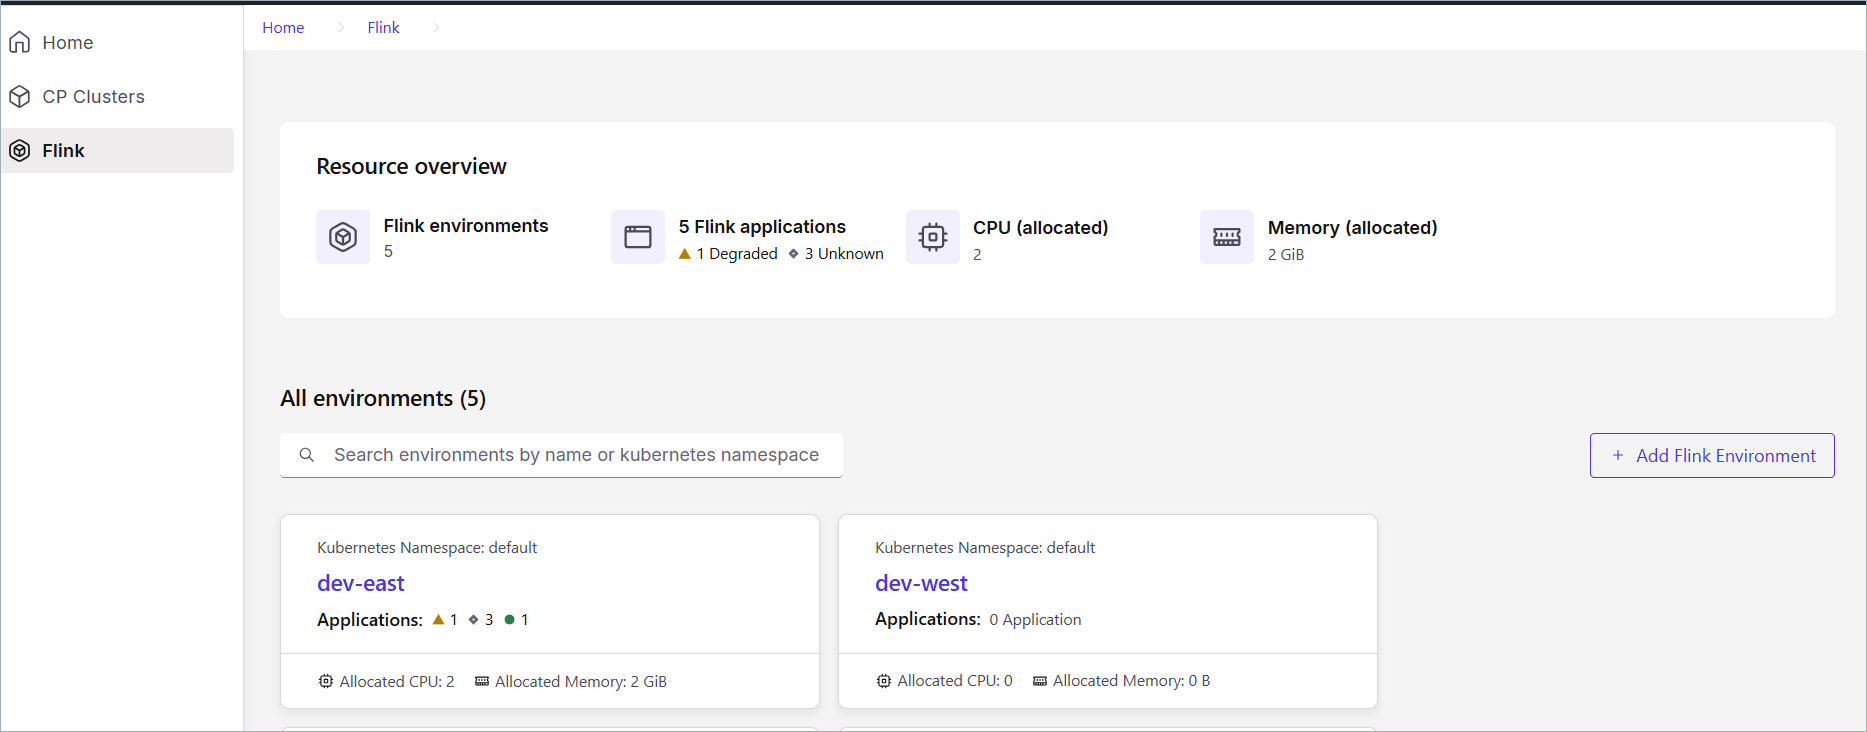
Following is a description of the displayed information:
Flink environment(s): The total number of Flink environments that are available in the cluster.
Flink application(s): The total number of Flink applications that are available in the cluster.
CPU (allocated): The total number of CPUs allocated to the cluster. This is calculated based on the number of applications and their specified default.
Memory (allocated): The total quantity of memory for the cluster. This is calculated based on the number of applications and their specified default.
The Flink environment details section lists the names of the Flink environments, which you can click through for more details.
Manage Flink environments
The environments page in Confluent Control Center allows you to view, create, update, and delete Flink environments. The environments page displays the list of environments with their name, Kubernetes namespace, number of applications, and allocated resources.
You can search for an environment by name, or filter by Kubernetes namespace.
The following sections describe how to create, update, and delete Flink environments in Confluent Control Center.
Create a new Flink environment
To create an environment:
Navigate to the Flink Environments overview page, and choose + Add Flink Environment.
In the Create Flink Environment page, enter the following information:
Name: The name of the environment.
Kubernetes namespace: In CMF, one Flink environment is attached to one Kubernetes namespace. To learn more about environments, see - Flink Environments.
Optionally click Edit Flink application defaults and paste or upload a JSON or YAML file with the application defaults that you prefer.
Click Create environment when you are finished.
Update an existing Flink environment
You can update the defaults for Flink applications in a Flink environment similar to how you create an environment.
Navigate to the Flink Environments overview page, and search for or choose a Flink Environment. You can search for an environment by name, or filter by Kubernetes namespace.
In the Application defaults section, choose Edit.
Choose YAML or JSON and paste in or upload a JSON or YAML file with the defaults that you prefer.
Click Save changes when you are finished.
Delete an Flink environment
You can easily delete an existing Flink environment if it is already empty.
Navigate to the Flink Resource overview page, and choose a Flink Environment.
In the Actions menu, choose Delete.
Select Delete.
A pop-up window appears that asks you to confirm the deletion. To confirm you will need to type the name of the environment.
Click Delete environment to delete the Flink environment.
Manage Flink applications
The next few sections describe how to create, update, and delete Flink applications in Confluent Control Center.
View Flink application details
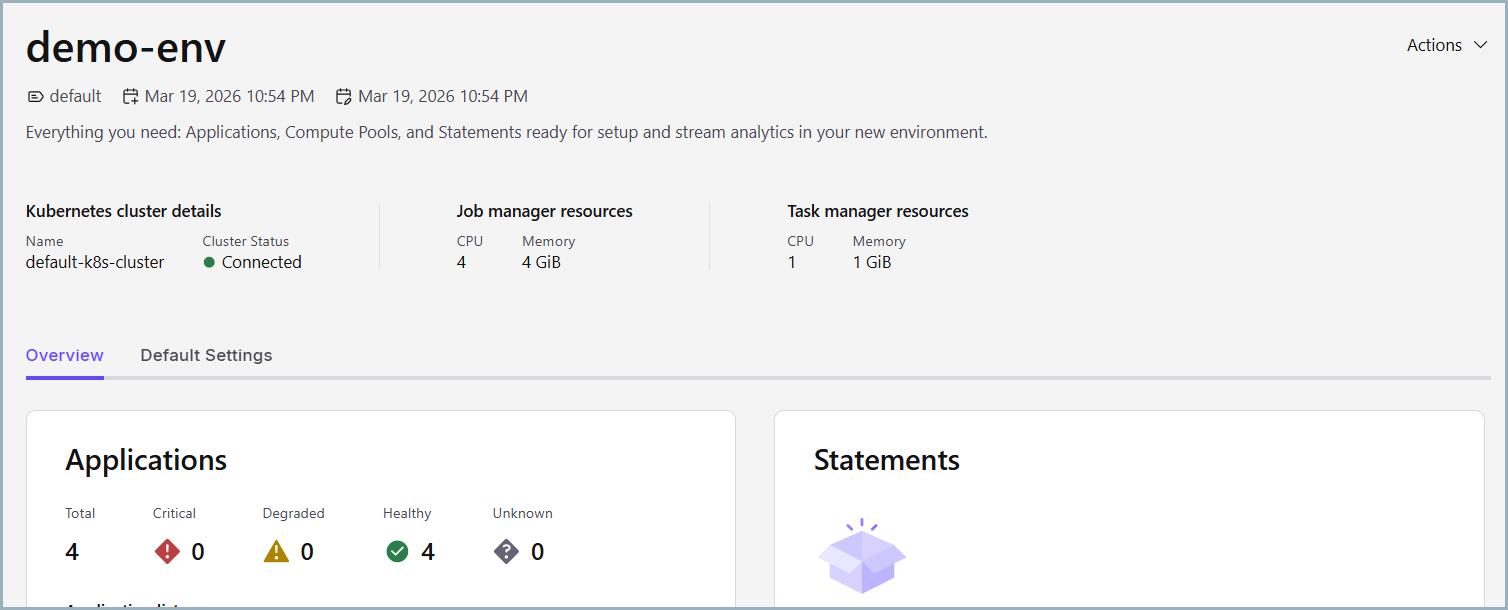
You can view all of the Flink applications for an environment by accessing the Flink menu item, choosing an environment, and selecting Applications in the menu.
The Flink applications will display. There is a maximum of 1000 applications displayed per environment and by default they are sorted by the order they are created. The following image shows the Applications page in Confluent Control Center:

Create a new application
To create a new application:
Navigate to the Flink Resource overview page, and choose a Flink Environment.
Select Application in menu, and choose + Add application.
In the Application defaults section, paste in or upload a JSON or YAML file with the application defaults for this application. For example, your JSON file might look like the following:
 {
    "apiVersion": "cmf.confluent.io/v1",
    "kind": "FlinkApplication",
    "metadata": {
       "name": "basic-example",
       "creationTimestamp": "2025-05-09T21:49:33.113Z",
       "updateTimestamp": "2025-05-09T21:51:33.881Z"
    },
    "spec": {
       "flinkConfiguration": {
          "metrics.reporter.prom.factory.class": "org.apache.flink.metrics.prometheus.PrometheusReporterFactory",
          "metrics.reporter.prom.port": "9249-9250",
          "taskmanager.numberOfTaskSlots": "1"
       },
       "flinkVersion": "v1_19",
       "image": "confluentinc/cp-flink:1.19.1-cp2",
       "job": {
          "jarURI": "local:///opt/flink/examples/streaming/StateMachineExample.jar",
          "parallelism": 3,
          "state": "running",
          "upgradeMode": "stateless"
       },
       "jobManager": {
          "resource": {
          "cpu": 1,
          "memory": "1024m"
          }
       },
       "serviceAccount": "flink",
       "taskManager": {
          "resource": {
          "cpu": 1,
          "memory": "1024m"
          }
       }
    }
}
Click Create application when you are finished.
Suspend or delete an Flink application
To suspend or delete an application:
Navigate to the Flink Resource overview page, and choose a Flink Environment, and an application.
In the Actions menu, select Suspend or Delete
If you choose Suspend, a pop-up appears and you must click Suspend again to pause your Flink application. You can also click Cancel if you change your mind.
If you choose Delete, a pop-up appears and you must type the name of the application to confirm the deletion and click Delete application.
You can also click Suspend instead if you want to pause the Flink application instead of deleting it.
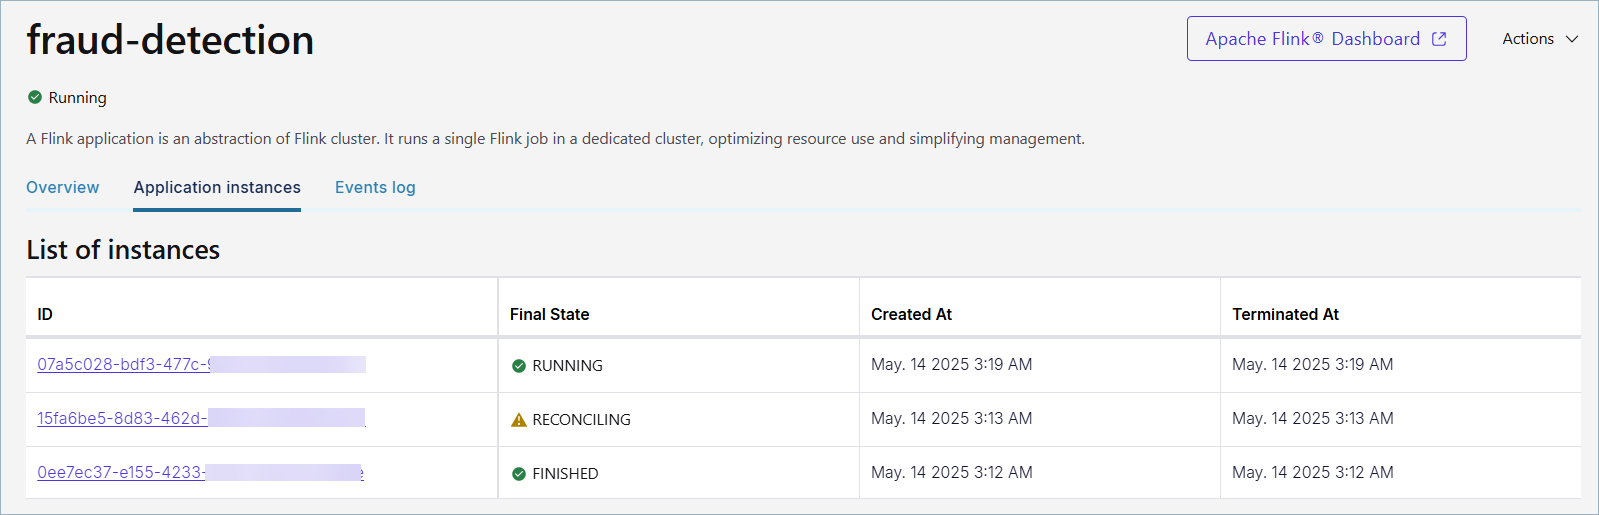
Check application instance details
You can check the effective configuration for every deployed Flink application version in the Application instances tab.
To view this tab, navigate to the Flink Resource overview page, and choose a Flink Environment.
Select an application, and click the Application instances tab. This will show you each instance of the application and its status.
The following image shows the Applications instances tab in Confluent Control Center:
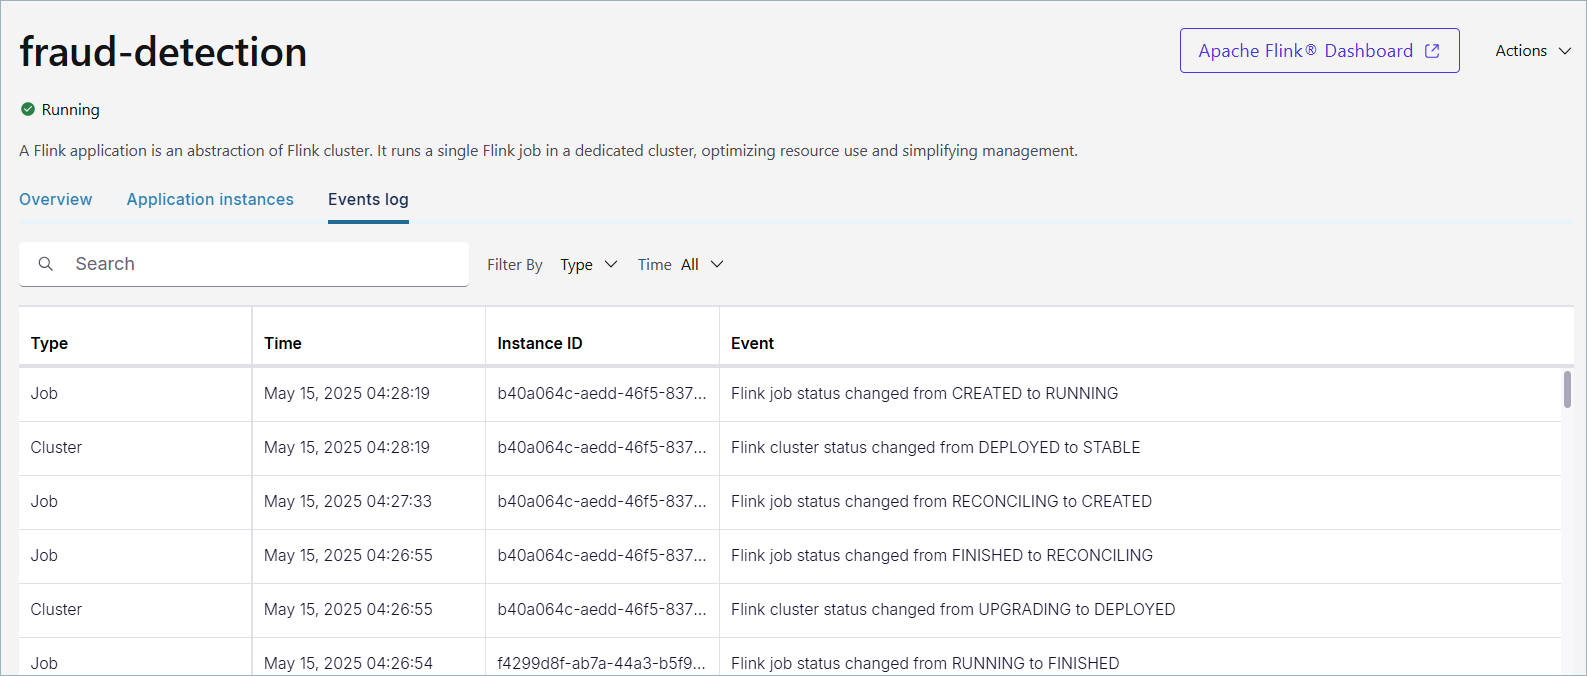
Check event logs for a Flink application
You can check the event logs for a Flink application in the Events log tab. Events help you track the status of your Flink applications and clusters. An event occurs:
When the CMF application is created or updated
When the cluster status changes
When the job status changes
To view events:
In Confluent Control Center, navigate to the Flink Resource overview page, and choose a Flink Environment.
Select a Flink application, and click the Events log tab.
The following image shows the Events log tab in Confluent Control Center:
Manage Flink savepoints
You can manage savepoints for your Flink applications in Confluent Control Center. Savepoints are a consistent snapshot of the state of a Flink application that you can use to restore or upgrade the application while preserving its state. Attached savepoints are savepoints that are currently attached to an application. Detached savepoints are savepoints that were created by the application but are not currently attached to any application.
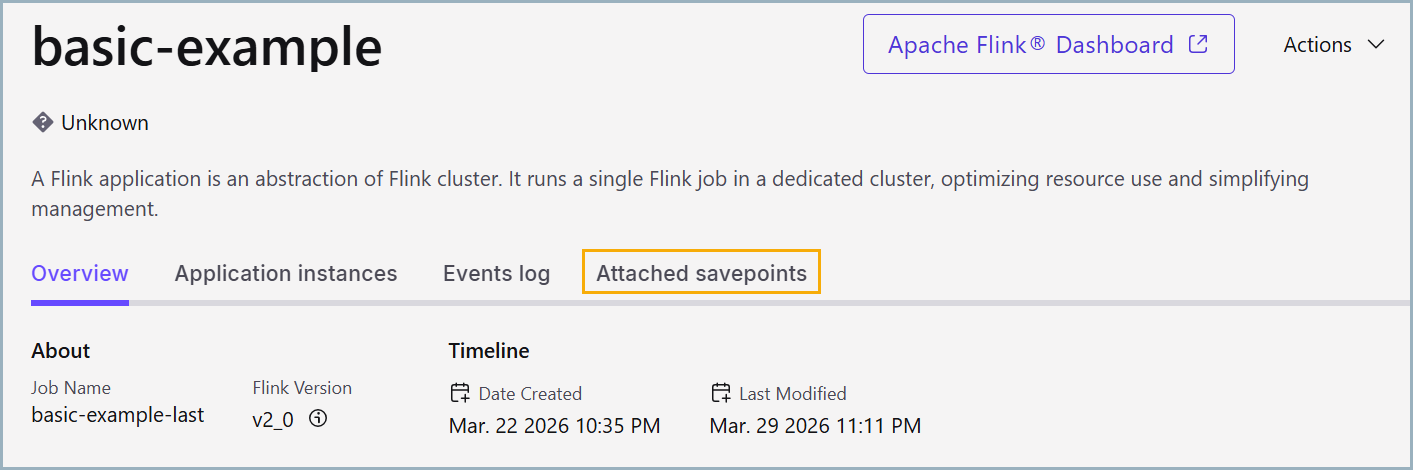
View attached savepoints
To view attached savepoints, choose a Flink environment and select an application. Savepoints are listed in the Attached savepoints tab, including the savepoint name, status, creation date, trigger time, and results time. You can search this list by savepoint name, or filter by status. To learn more about savepoints, see Savepoints.
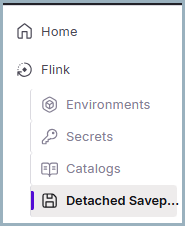
View detached savepoints
To view detached savepoints, navigate to the Flink overview page, and choose Detached savepoints in the navigation menu.
This page lists all detached savepoints with the savepoint name and creation date. You can search this list by savepoint name.
Create a new attached savepoint
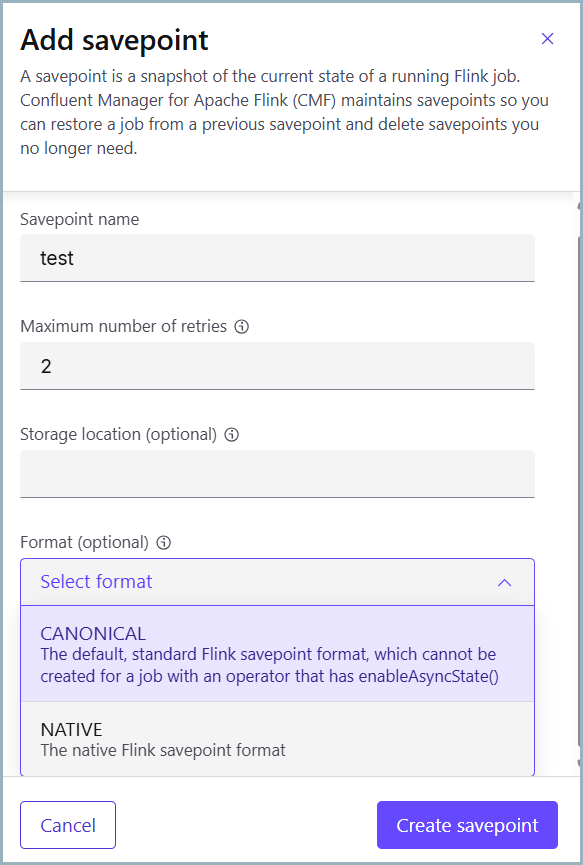
The application page allows you to create a new savepoint.
In the Attached savepoints tab, click + Add Savepoint.
Enter the following information in the Add savepoint panel:
Savepoint name
Number of retries for the savepoint. For unlimited retries, enter
-1.Storage location (optional)
Savepoint format, either CANONICAL or NATIVE:
CANONICAL: Backend-independent format that is highly portable
NATIVE: Backend-specific binary format, such as SST for RocksDB
When you are finished, click Create savepoint.
Manage Flink SQL
Confluent Control Center provides a graphical interface for working with Flink SQL. You can manage catalogs, compute pools, and SQL statements through the UI. This section describes how to use Confluent Control Center to perform common Flink SQL tasks that you would otherwise perform using the /platform/current/.
Manage catalogs
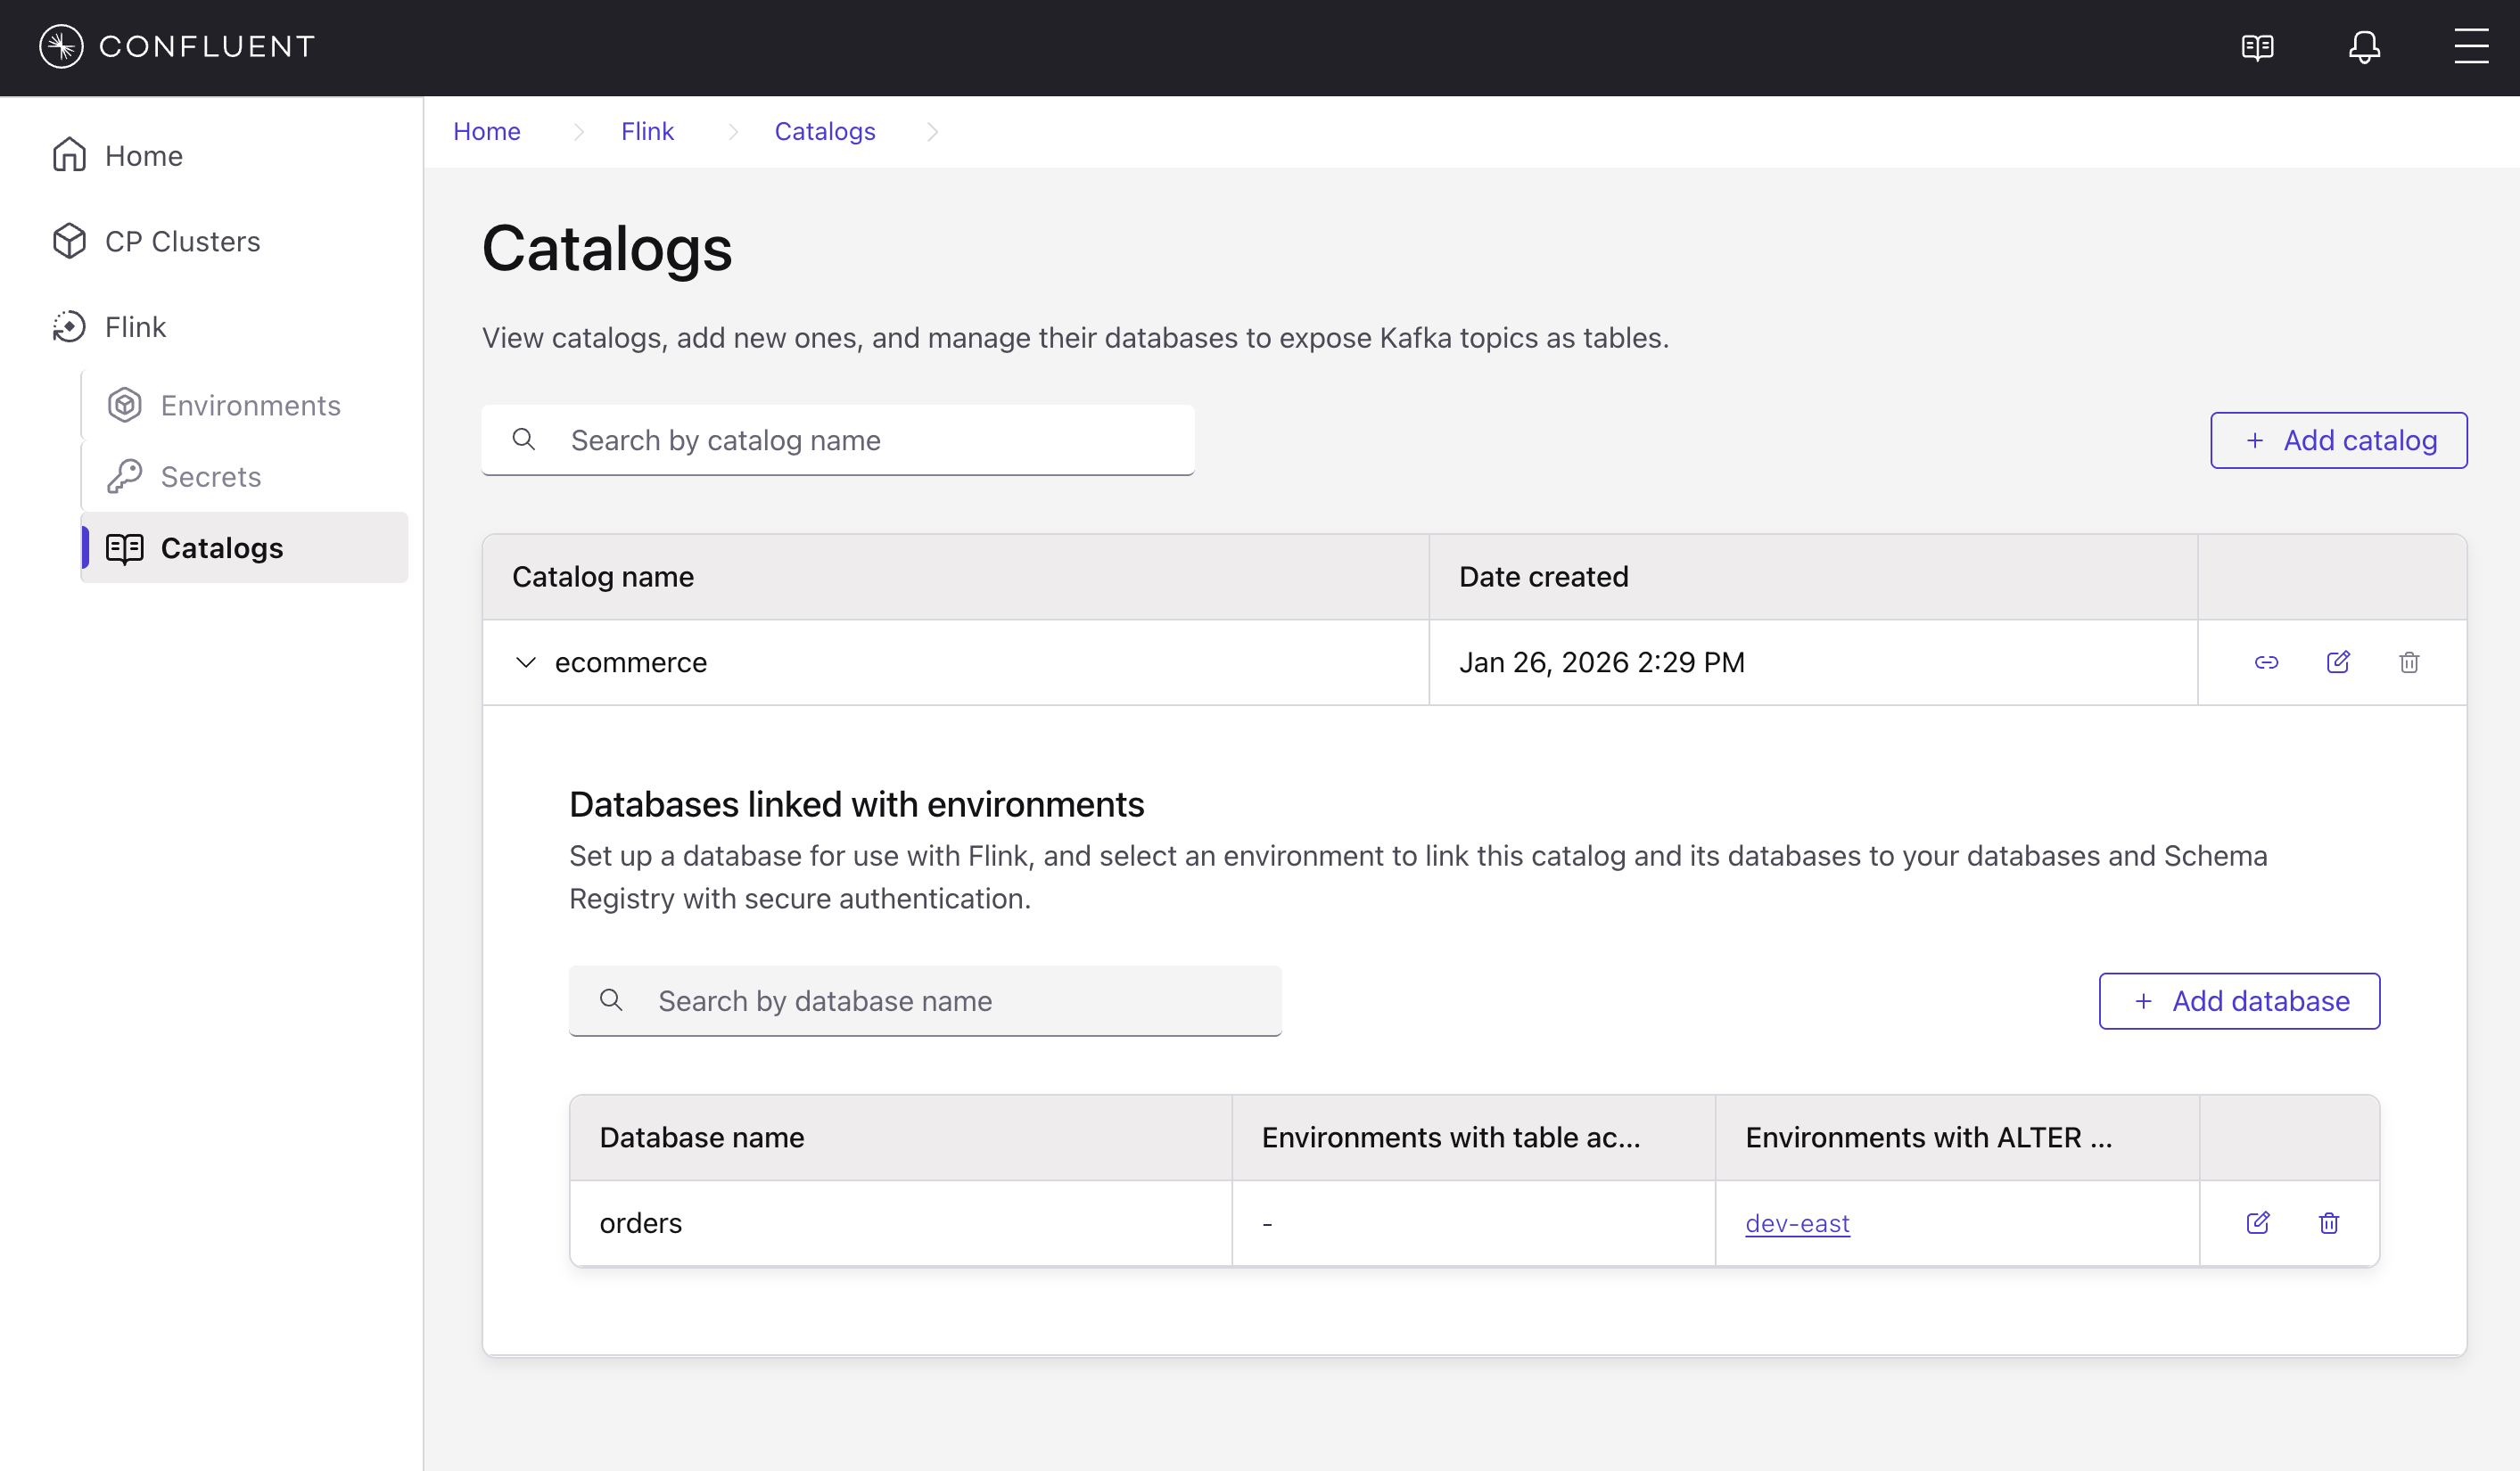
In Confluent Control Center, you can view catalogs, add new ones, and manage their databases to expose Kafka topics as tables. Catalogs in Flink SQL provide a way to organize and access metadata about your databases and tables.
To view and manage catalogs:
In Confluent Control Center, navigate to the Flink menu and select Catalogs.
The Catalogs page displays all available catalogs with their creation dates.
To add a new catalog, click + Add catalog.
The following image shows the Catalogs page in Confluent Control Center:
Manage compute pools
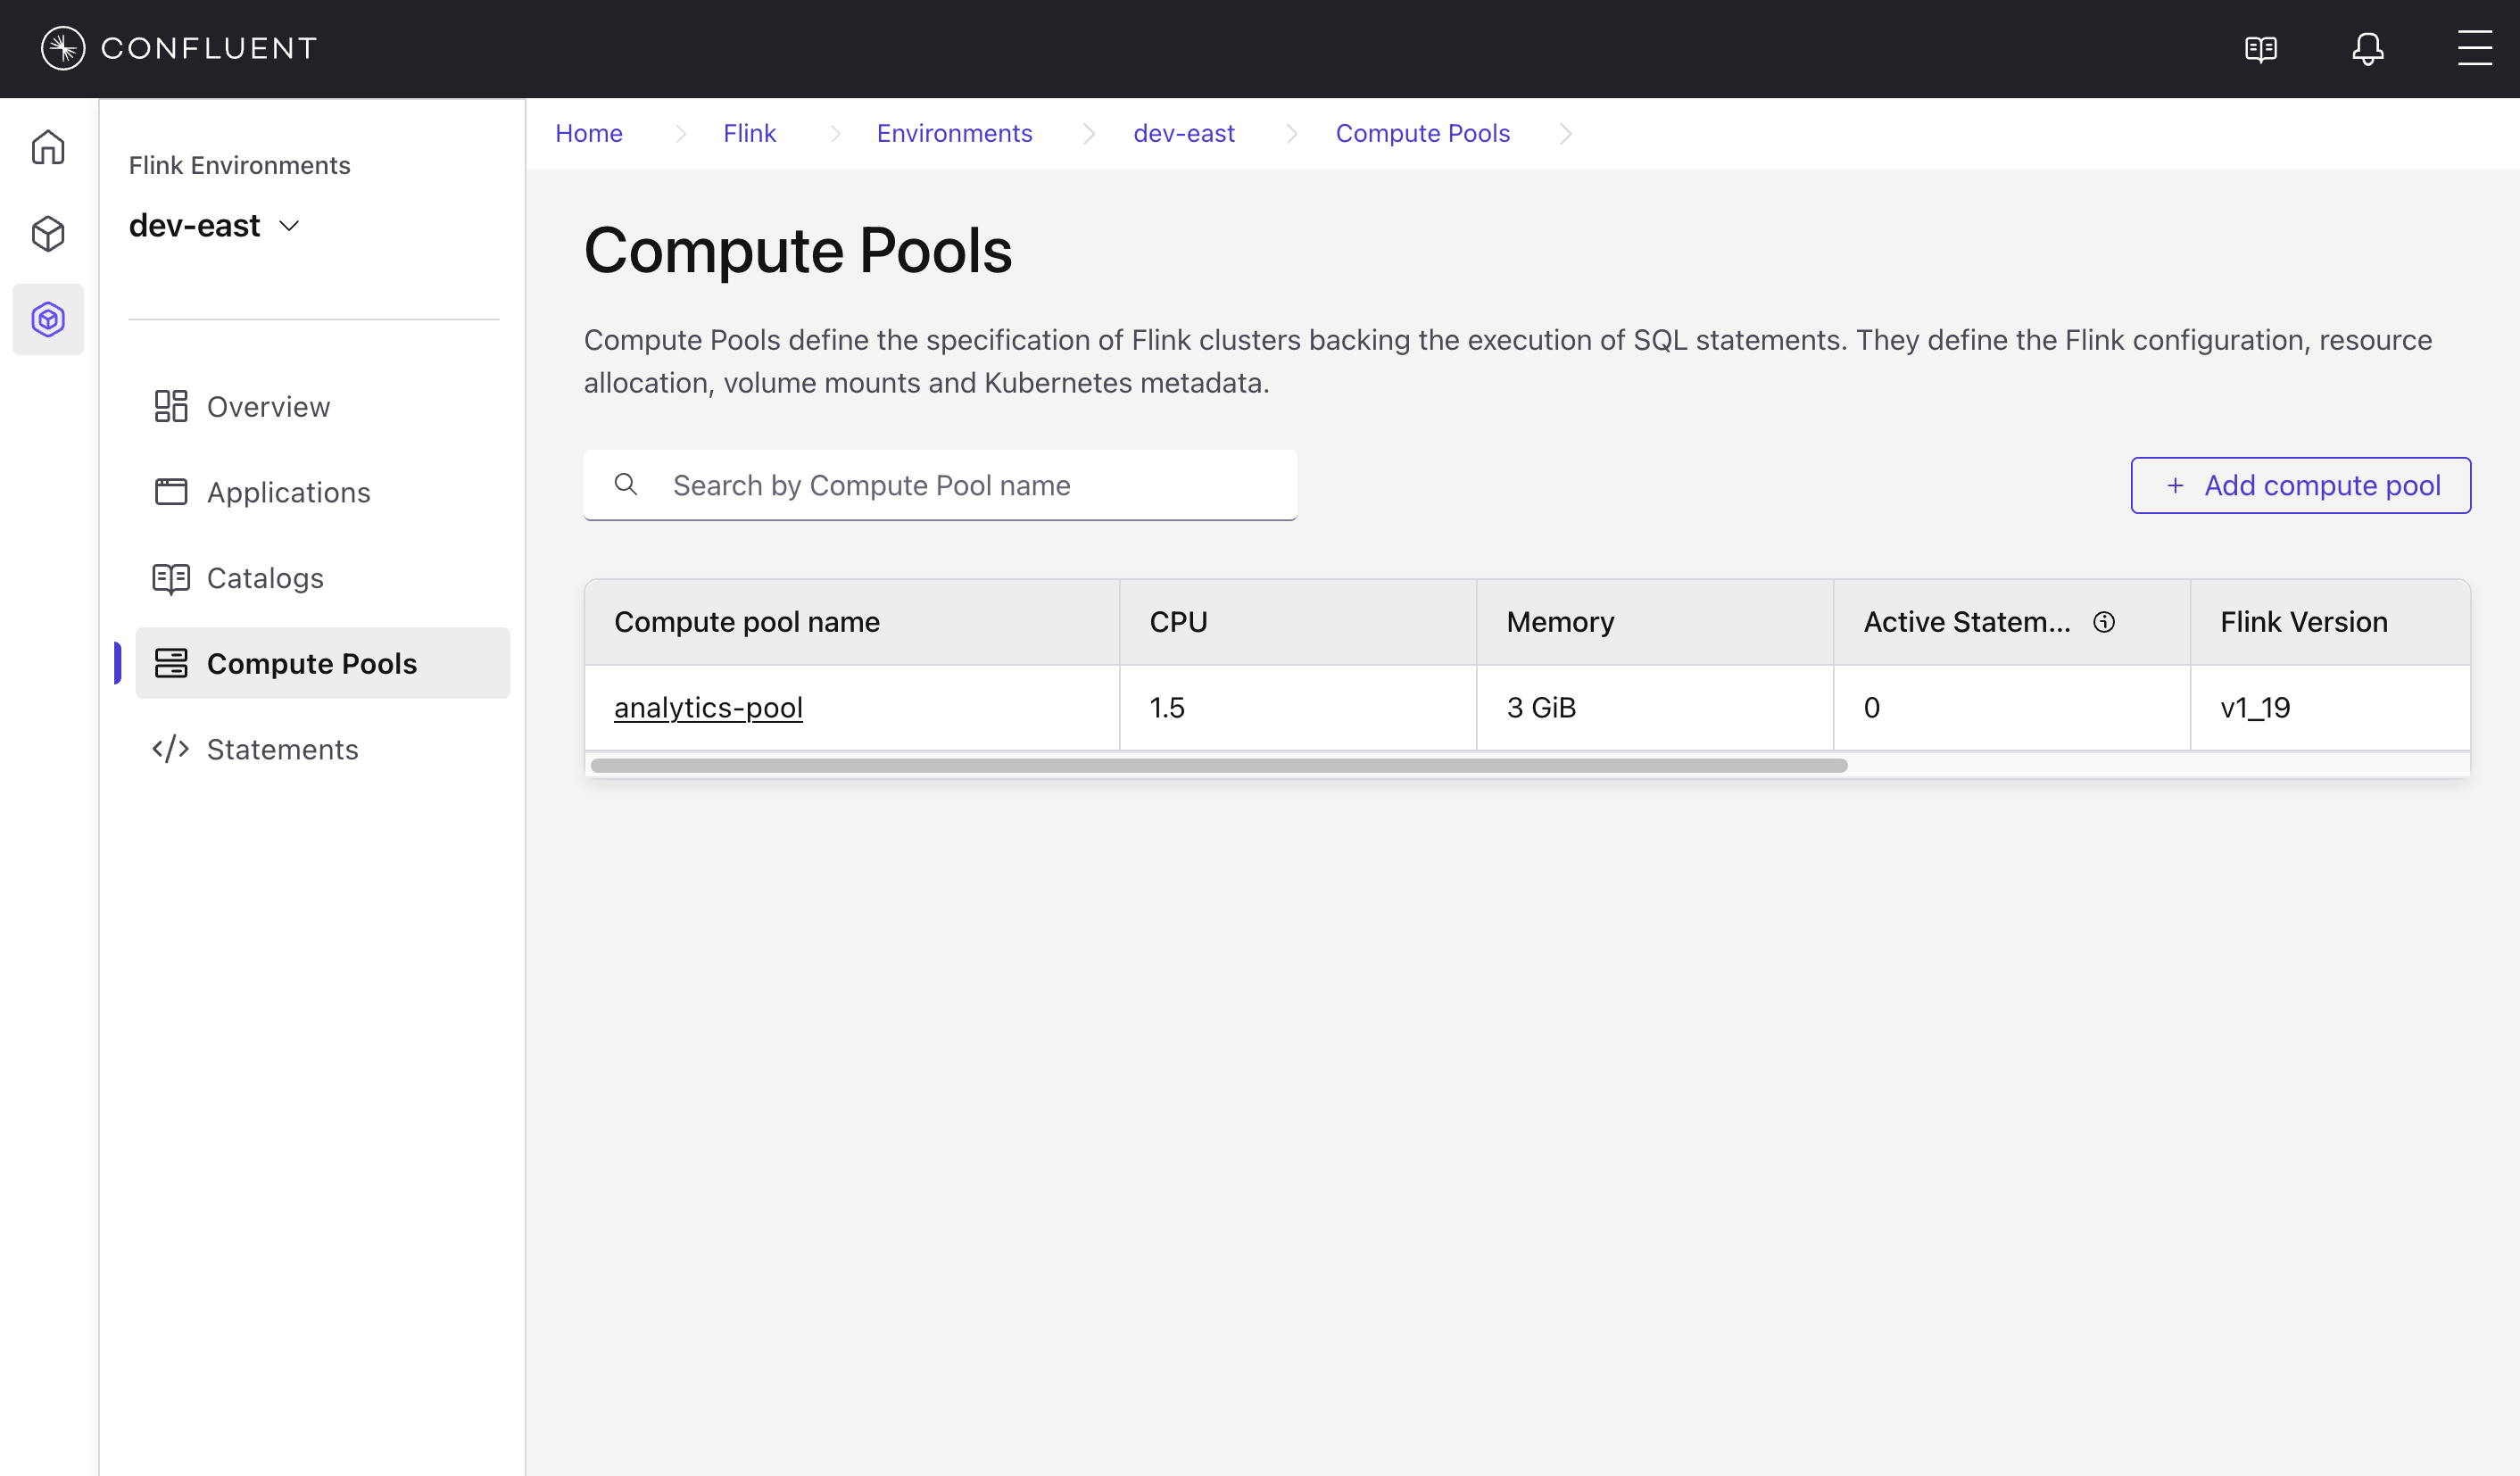
You can view compute pools, check their resource allocations, and create new pools in Confluent Control Center. Compute pools define the specification of Flink clusters that execute your SQL statements.
To view and manage compute pools:
In Confluent Control Center, navigate to the Flink menu, select an environment, and click Compute Pools.
The Compute Pools page displays all compute pools with their resource allocations (CPU, Memory), active statement count, and Flink version.
To create a new compute pool, click + Add compute pool.
The following image shows the Compute Pools page in Confluent Control Center:
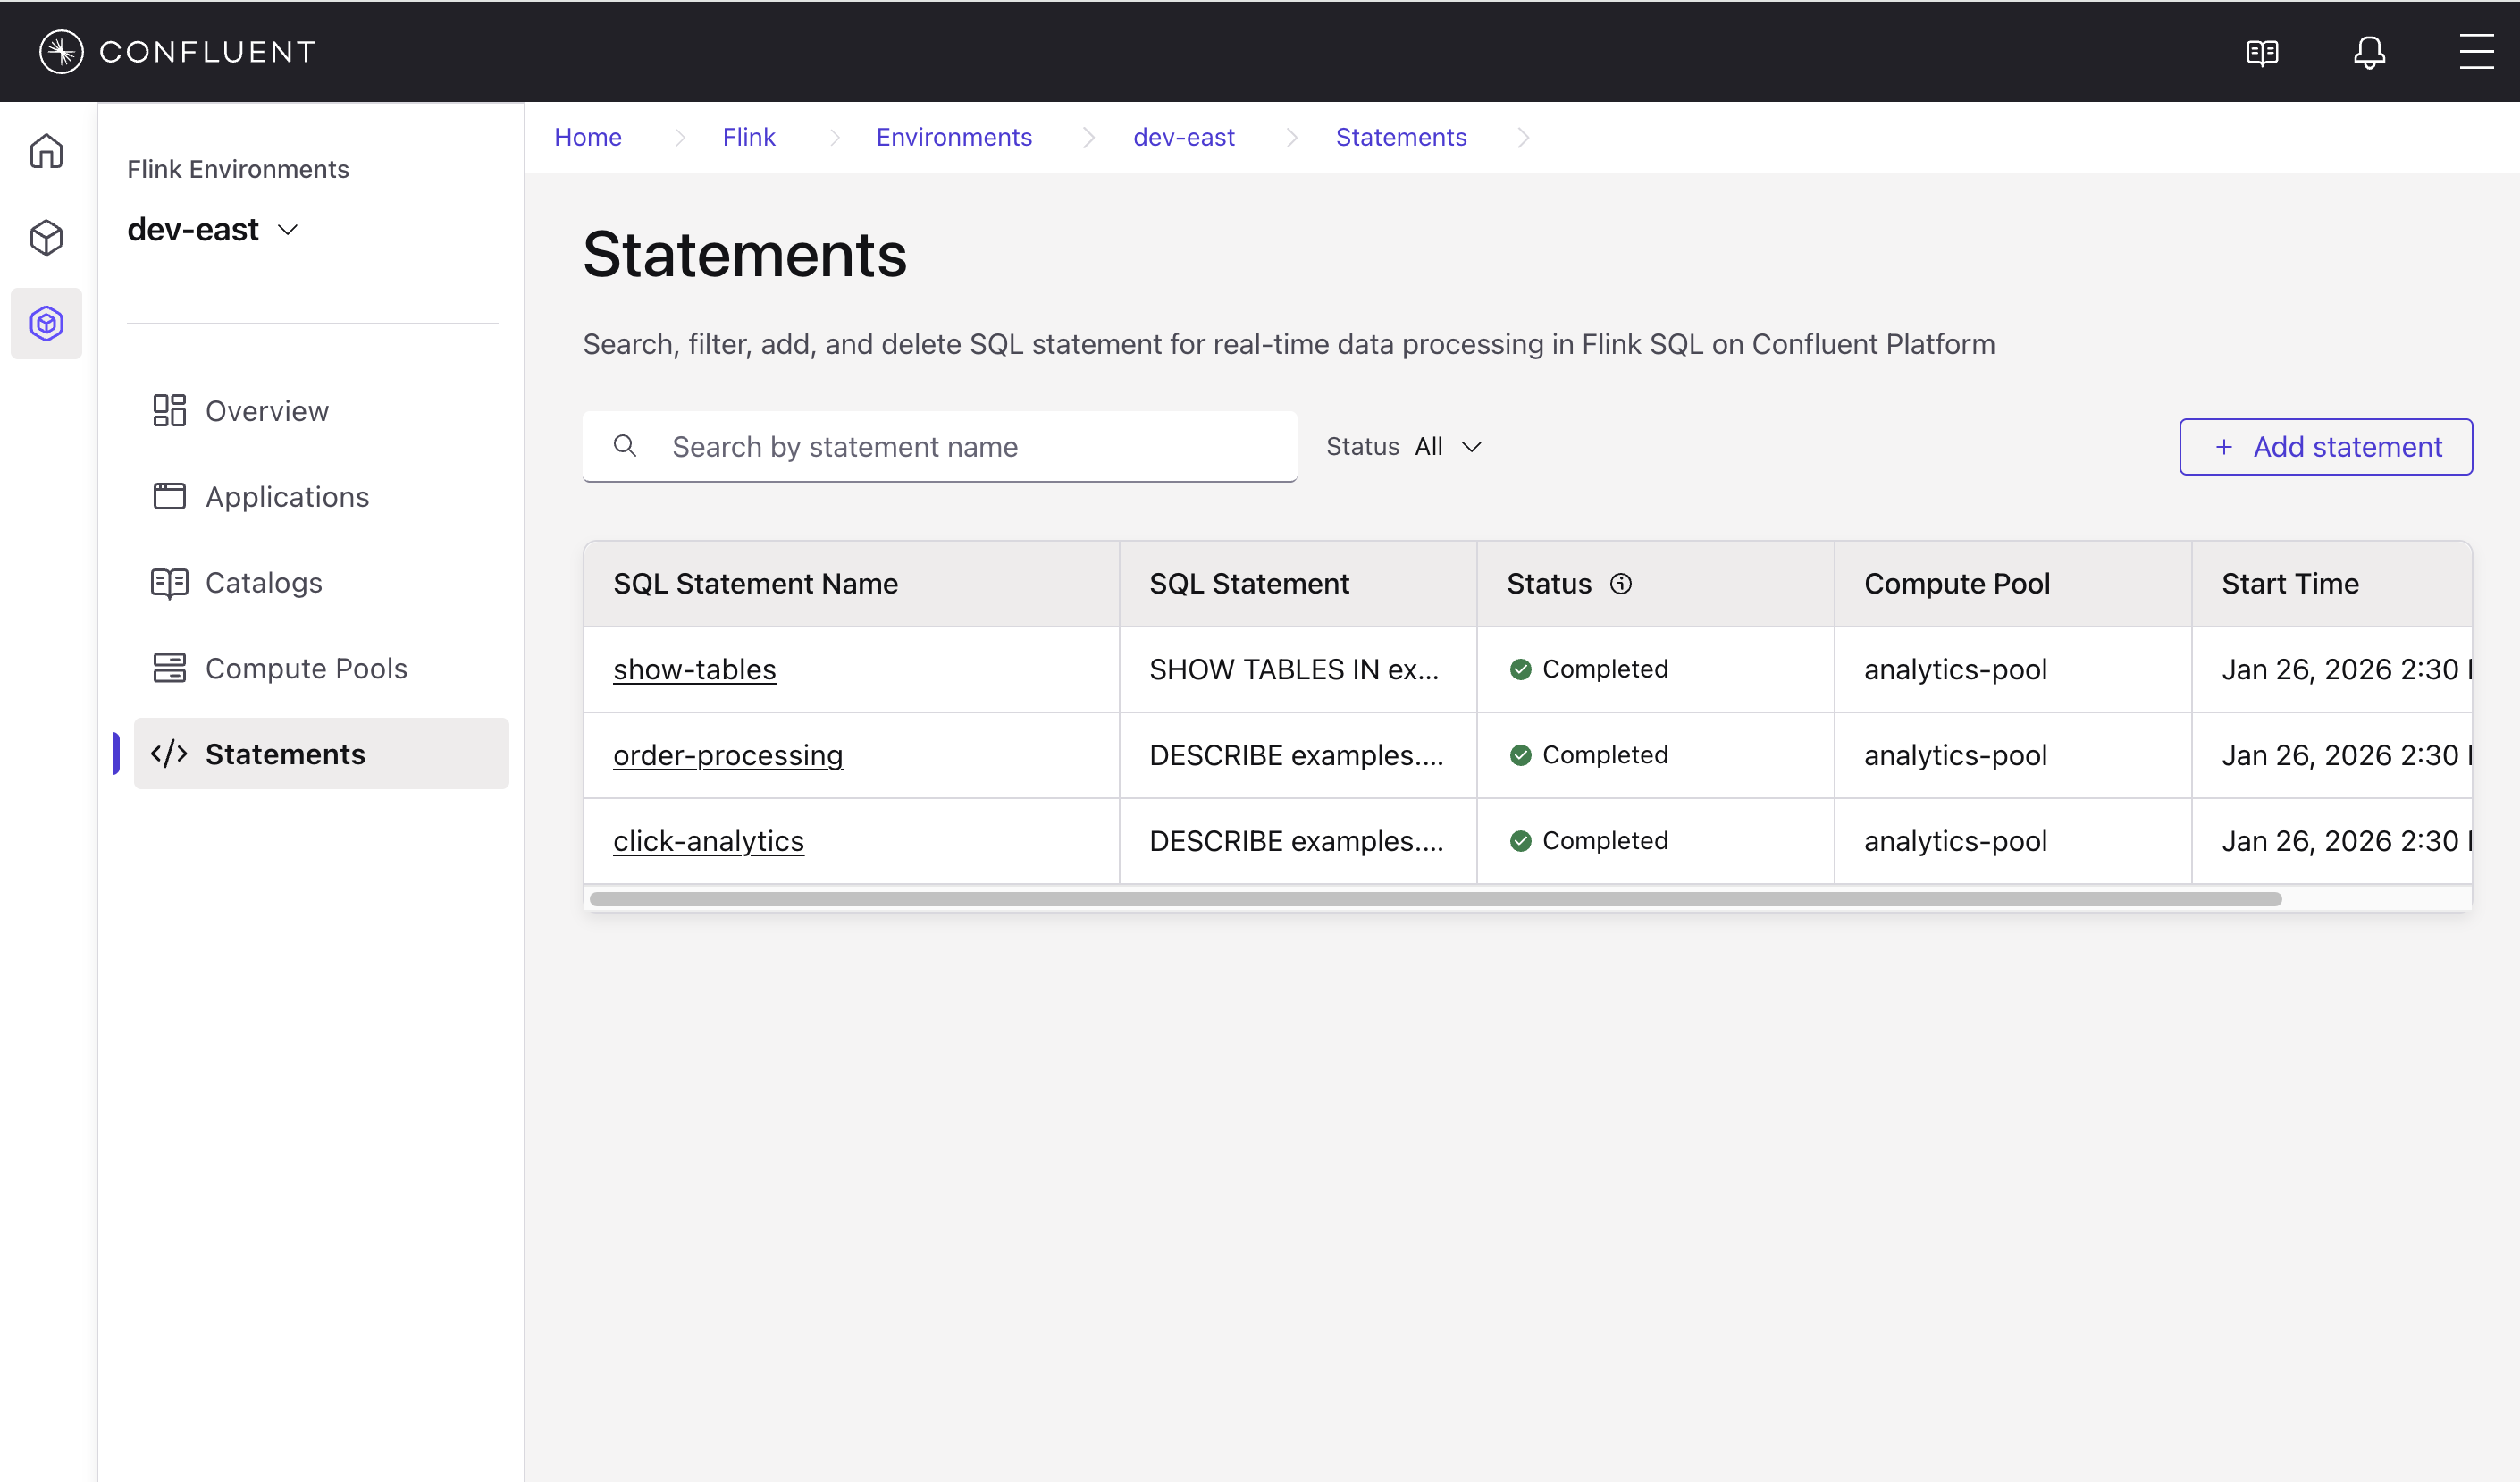
Manage Flink SQL statements
In Confluent Control Center, you can create, monitor, and manage SQL statements through the Statements page. Flink SQL statements allow you to define, manipulate, or query data within your streaming environment.
To view and manage statements:
In Confluent Control Center, navigate to the Flink menu, select an environment, and click Statements.
The Statements page displays all SQL statements with their status, compute pool, and start time.
To create a new statement, click + Add statement.
The following image shows the Statements page in Confluent Control Center:
View statement details
To view the details and results of a statement:
Navigate to the Statements page and select a statement.
The statement detail page shows the SQL statement, its status, and the results.
The following image shows a statement detail page in Confluent Control Center:
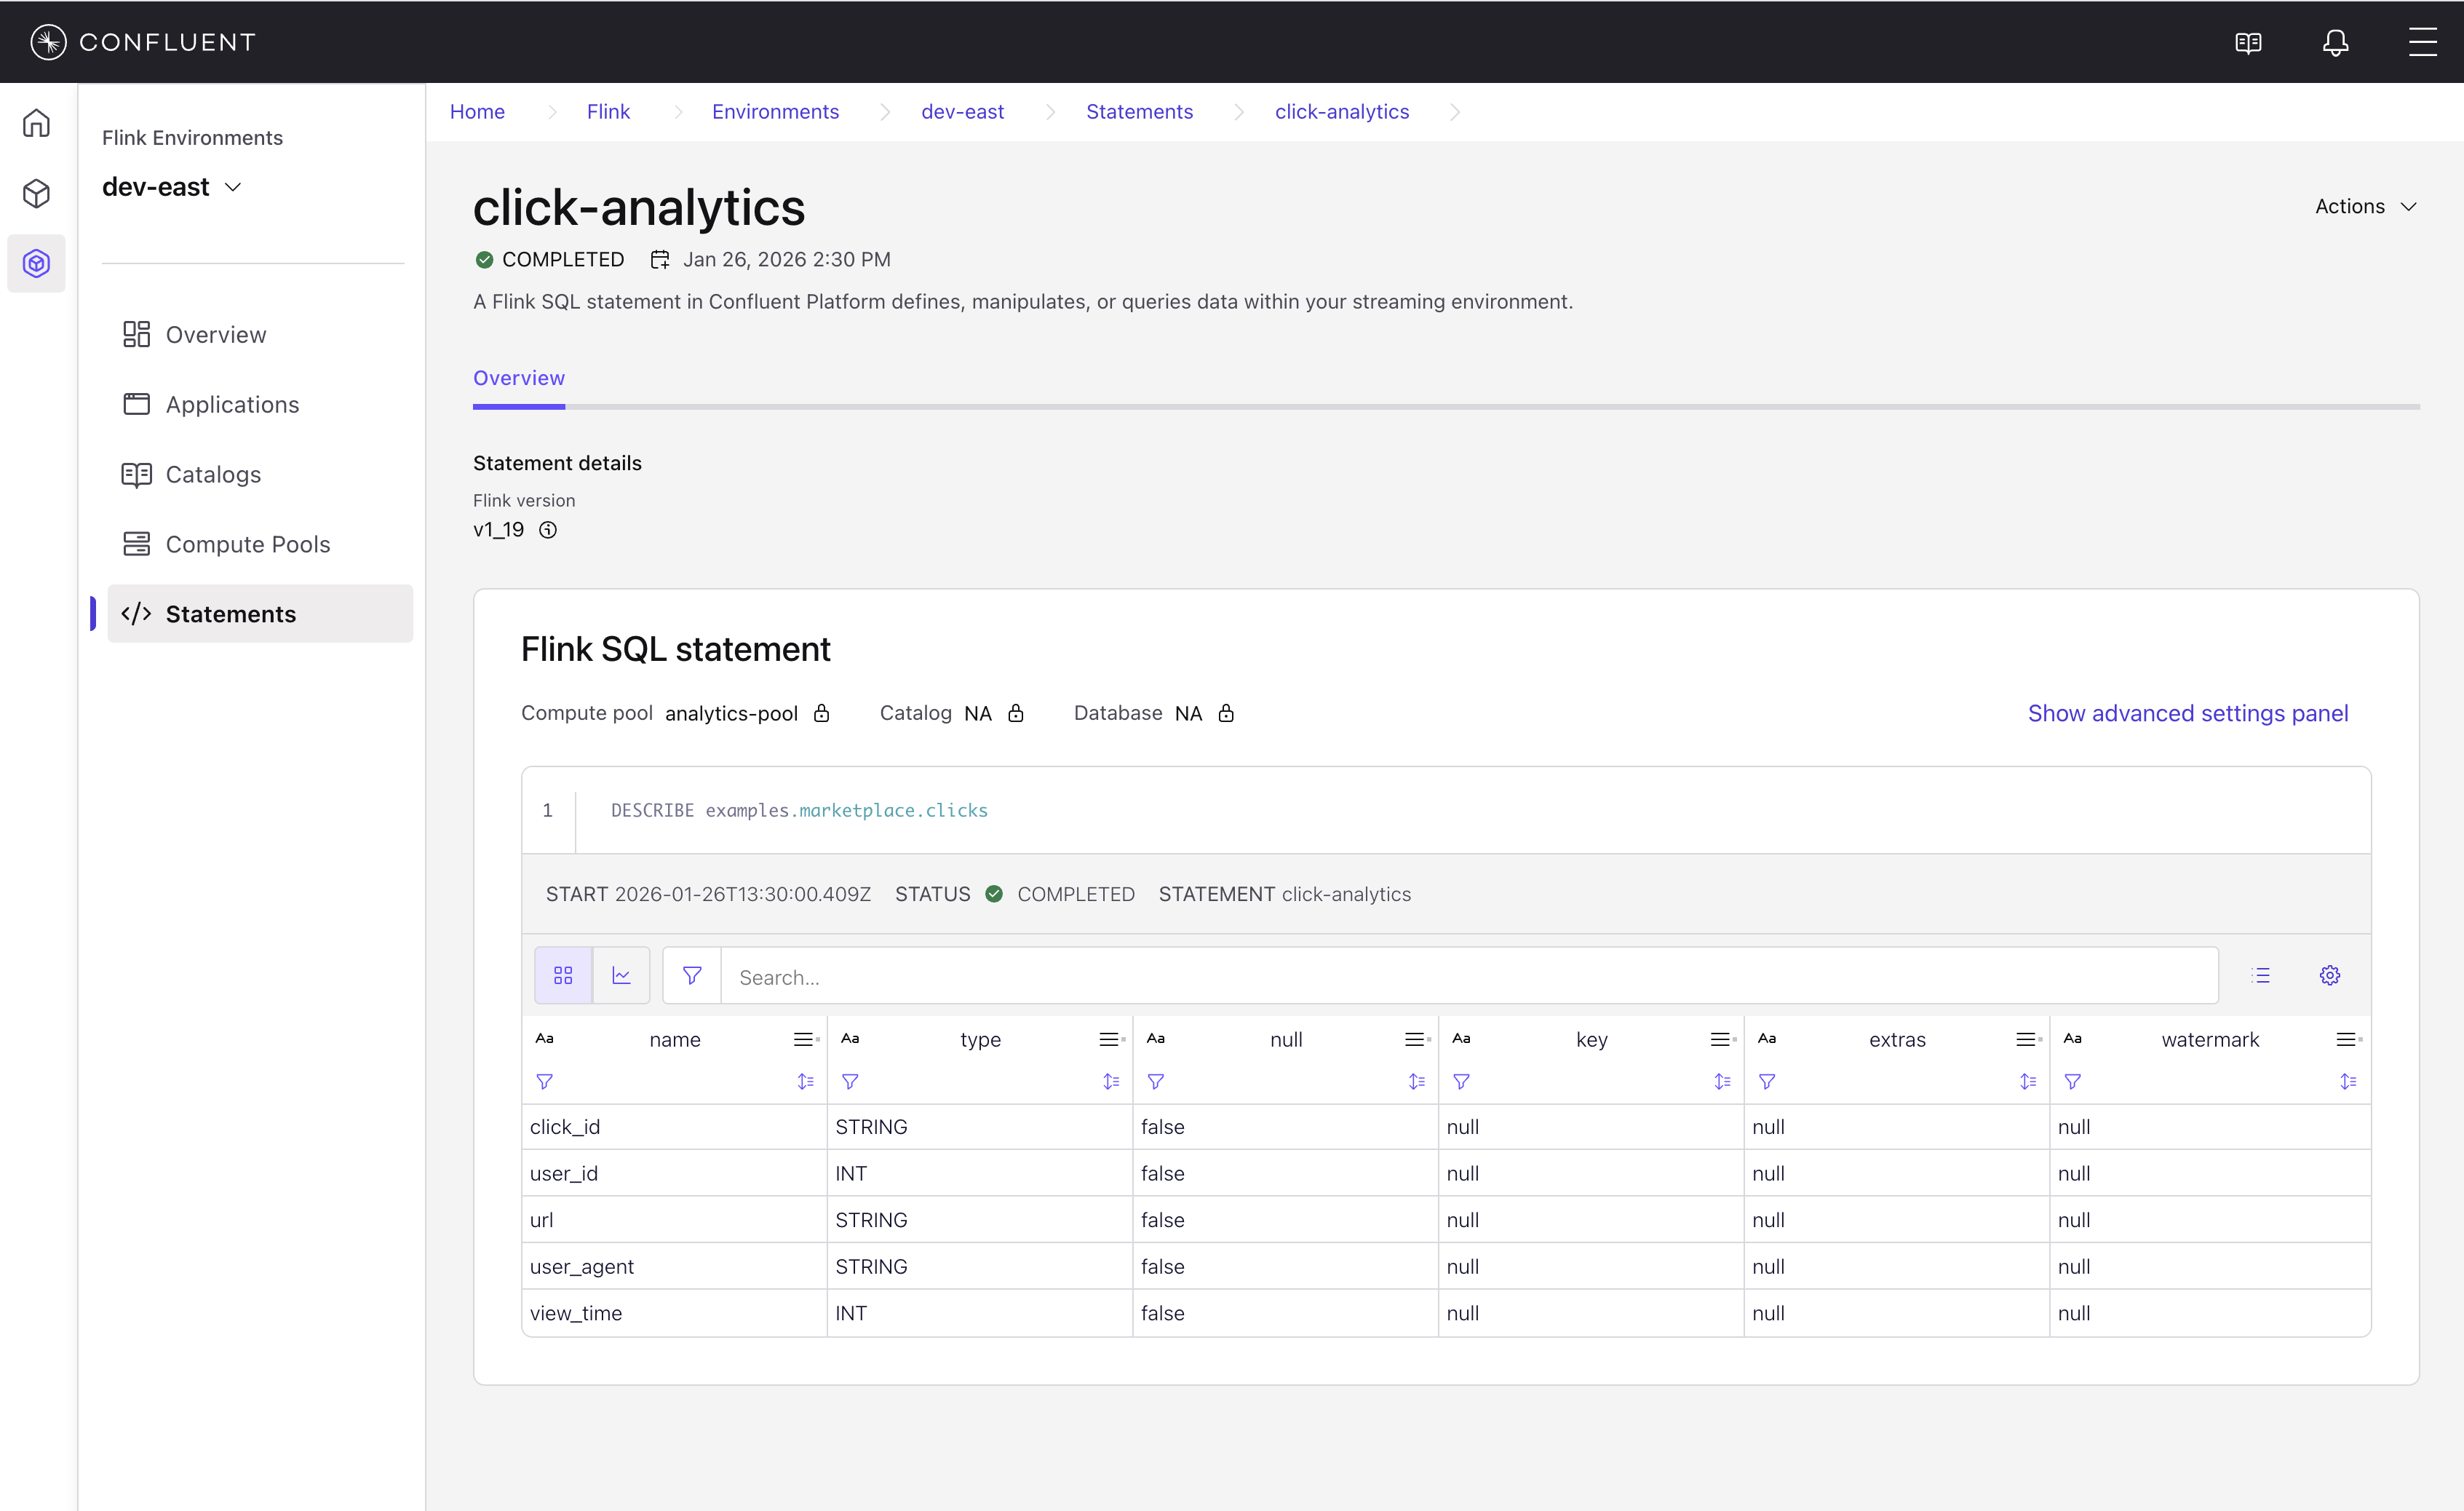
The statement detail page displays:
Status: Whether the statement is running, completed, or failed.
Statement details: The Flink version and compute pool used.
|flink-sql| statement: The SQL code that was executed.
Results: For metadata queries like
DESCRIBE, the results show the table schema including column names, types, nullability, and other properties.
For more information about Flink SQL syntax and capabilities, see /platform/current/Submit .