Important
You are viewing documentation for an older version of Confluent Platform. For the latest, click here.
Schema Validation
Schema Validation gives operators a centralized location to enforce data format correctness at the topic level.
Prerequisites and Setting Schema Registry URLs
Basic requirements to run these examples are generally the same as those described for the Schema Registry Tutorial with the exception of Maven, which is not needed here. Also, Confluent Platform version 5.4.0 or later is required here.
As an additional prerequisite to enable Schema Validation on the brokers, you must specify confluent.schema.registry.url in the Kafka server.properties file ($CONFLUENT_HOME/etc/kafka/server.properties) before you start Confluent Platform.
For example:
confluent.schema.registry.url=http://schema-registry:8081
This configuration accepts a comma-separated list of URLs for Schema Registry instances. This setting is required to make Schema Validation available both from the Confluent CLI and on the Confluent Control Center.
By default, Confluent Server uses the TopicNameStrategy to map topics with schemas in Schema Registry. This can be changed for
both the key and value with confluent.key.subject.name.strategy and confluent.value.subject.name.strategy.
Setting Schema Validation on a topic from the Confluent CLI
You can enable Schema Validation on a topic when you create a topic or modify an existing topic.
Creating a Topic with Schema Validation
To set Schema Validation on a topic when you create the topic, set confluent.value.schema.validation=true and confluent.key.schema.validation=true.
Value schema and key schema validation are independent of each other; you can enable either or both.
For example, this command creates a topic called my-topic-sv with schema validation enabled on the value schema:
kafka-topics --create --zookeeper localhost:2181 --replication-factor 1 \
--partitions 1 --topic my-topic-sv \
--config confluent.value.schema.validation=true
The output of this command is:
Created topic my-topic-sv.
With this configuration, if a message is produced to the topic my-topic-sv
that does not have a valid schema for the value of the message, an error is
returned to the producer, and the message is discarded.
If a batch of messages is sent and at least one is invalid, then the entire batch is discarded.
Tip
To learn more about value and key schemas, see Terminology Review in the Schema Registry Tutorial.
Adding Schema Validation to an Existing Topic
Create a new topic called my-first-topic:
kafka-topics --create --zookeeper localhost:2181 --replication-factor 1 --partitions 1 --topic my-first-topic
The output of this command is:
Created topic my-first-topic.
To change topic validation configuration on an existing topic (in this case from false to true), specify validation using the alter and --add-config
flags as shown in this example:
kafka-configs --zookeeper localhost:2181 --alter --entity-type topics --entity-name my-first-topic --add-config confluent.value.schema.validation=true
You should get this confirmation:
Completed updating config for entity: topic 'my-first-topic'.
To disable topic validation on this topic (from true to false), rerun the above command with --add-config confluent.value.schema.validation=false.
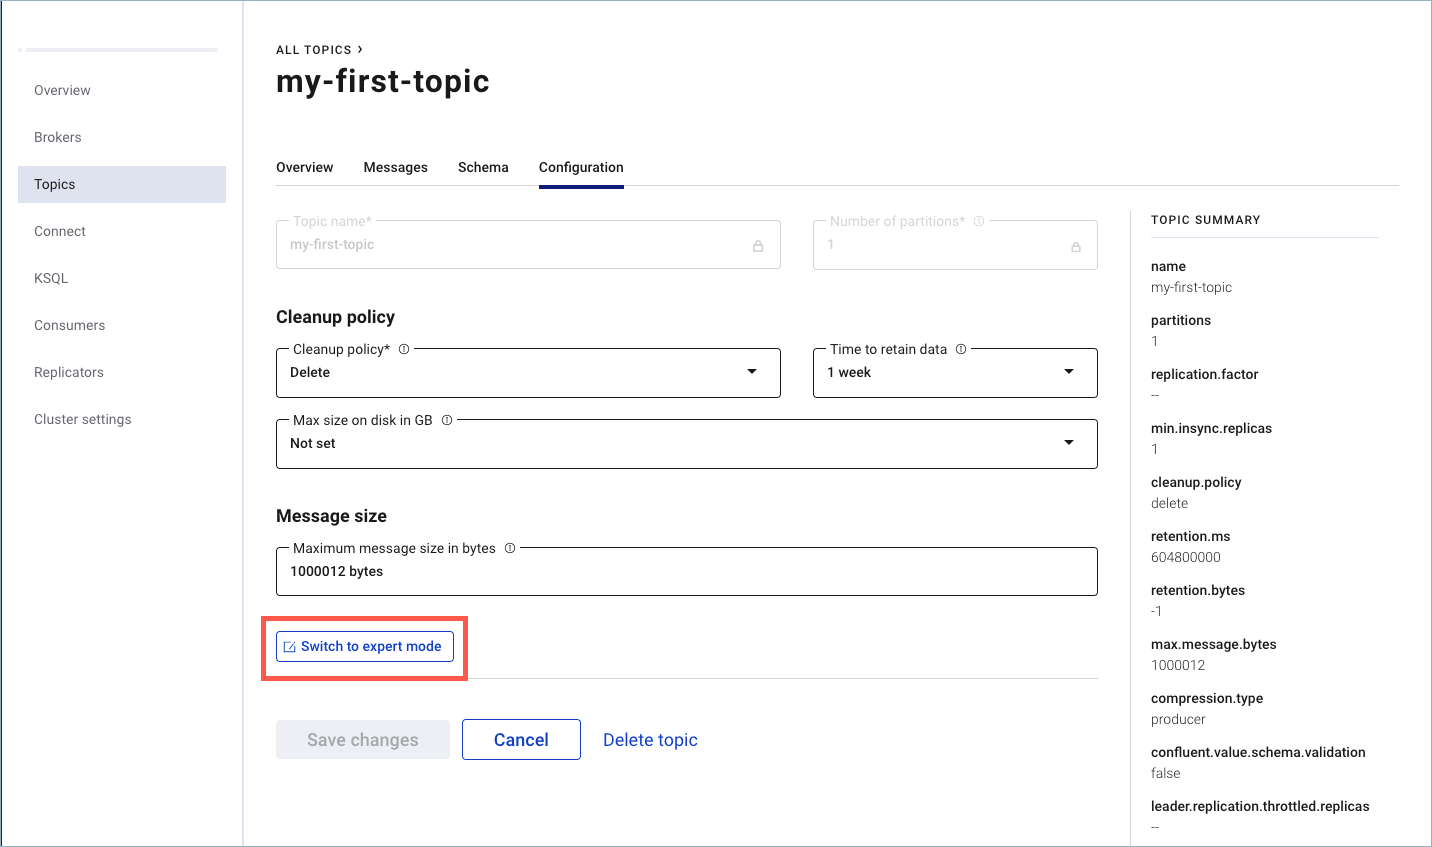
Enabling Schema Validation on a topic in Confluent Control Center
To view current configurations or enable Schema Validation on a topic from the Control Center (http://localhost:9021/):
Click the Configuration tab on an existing topic.
Click Switch to expert mode.
In Expert mode, change the settings for
confluent.value.schema.validationandconfluent.key.schema.validationfrom false to true.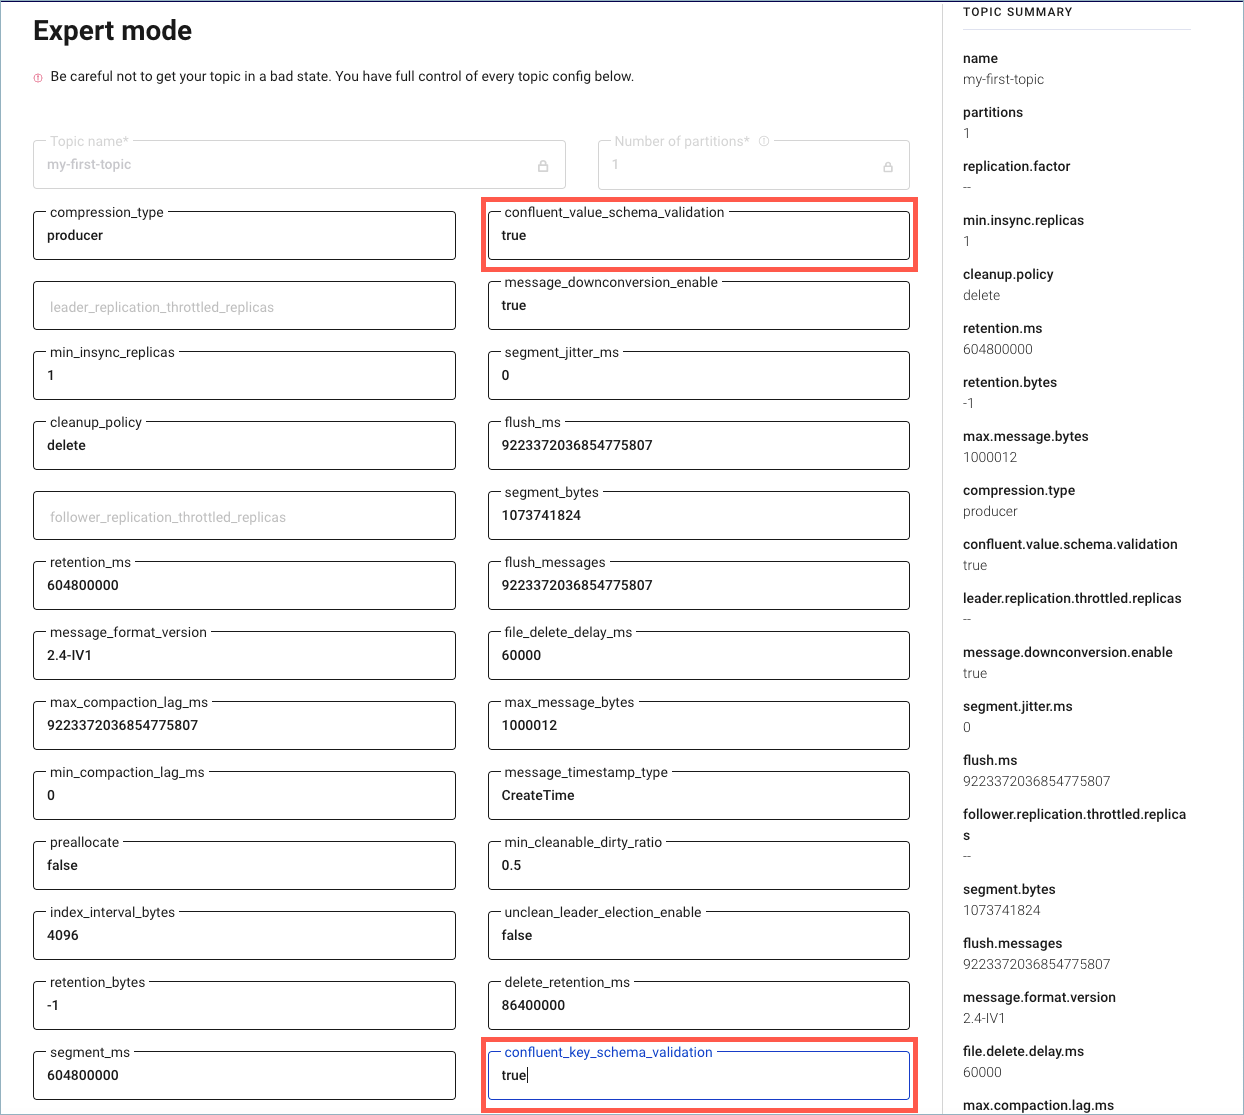
Click Save changes.
Demo: Enabling Schema Validation on a Topic at the Command Line
This short demo shows the effect of enabling or disabling schema validation on a topic.
If you are just getting started with Confluent Platform and Schema Registry, you might want to first work through the Schema Registry Tutorial, then return to this demo.
The examples make use of the kafka-console-producer and kafka-console-consumer, which are located in $CONFLUENT_HOME/bin.
On a local install of Confluent Platform version 5.4.0 or later, modify
$CONFLUENT_HOME/etc/kafka/server.propertiesto include the following configuration for the Schema Registry URL:############################## My Schema Validation Demo Settings ################ # Schema Registry URL confluent.schema.registry.url=http://localhost:8081
The example above includes two lines of comments, which are optional, to keep track of the configurations in the file.
Start Confluent Platform using the following command:
confluent local start
Tip
- Alternatively, you can simply run
confluent local schema-registrywhich also startskafkaandzookeeperas dependencies. This demo does not directly reference the other services, such as Connect and Control Center. That said, you may want to run the full stack anyway to further explore, for example, how the topics and messages display on Control Center. To learn more aboutconfluent local, see Confluent Platform Quick Start (Local) and confluent local in the Confluent CLI command reference. - The
confluent localcommands run in the background so you can re-use this command window. Separate sessions are required for the producer and consumer.
- Alternatively, you can simply run
Create a test topic called
test-schemaswithout specifying the Schema Validation setting so that it defaults tofalse.kafka-topics --zookeeper localhost:2181 --create --partitions 1 --replication-factor 1 --topic test-schemas
This creates a topic with no broker validation on records produced to the test topic, which is what you want for the first part of the demo. You can verify that the topic was created with
kafka-topics --bootstrap-server localhost:9092 --list.In a new command window for the producer, run this command to produce a serialized record (using the default string serializer) to the topic
test-schemas.kafka-console-producer --broker-list localhost:9092 --topic test-schemas --property parse.key=true --property key.separator=,
The command is successful because you currently have Schema Validation disabled for this topic. If broker Schema Validation had been enabled for this topic, the above command to produce to it would not be permitted.
The output of this command is a producer command prompt (
>), where you can type the messages you want to produce.Type your first message at the
>prompt as follows:1,my first record
Keep this session of the producer running.
Open a new command window for the consumer, and enter this command to read the messages:
kafka-console-consumer --bootstrap-server localhost:9092 --from-beginning --topic test-schemas --property print.key=true
The output of this command is
my first record.Keep this session of the consumer running.
Now in a separate command window, set Schema Validation for the topic
test-schemastotrue.kafka-configs --zookeeper localhost:2181 --alter --entity-type topics --entity-name test-schemas --add-config confluent.value.schema.validation=true
You should get a confirmation:
Completed updating config for topic test-schemas.Return to the producer session, and type a second message at the
>prompt.2,my second record
You will get an error because Schema Validation is enabled and the messages we are sending do not contain schema IDs:
This record has failed the validation on brokerIf you subsequently disable Schema Validation (use the same command to set it to
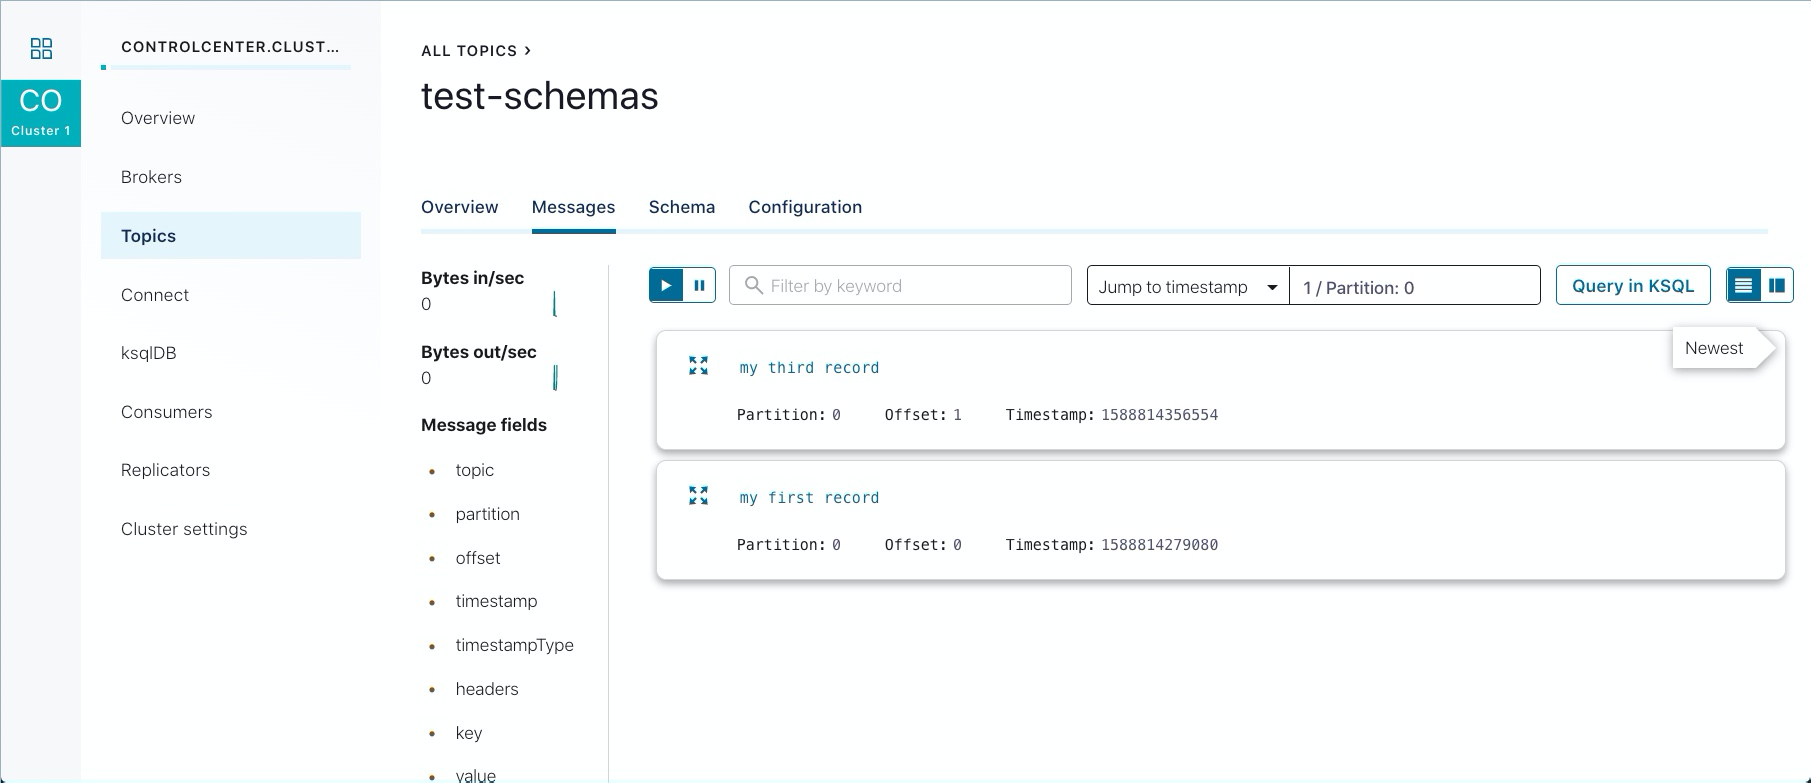
false), stop and restart the producer, then retry the producer and consumer steps to send and read messages in those open sessions, the messages will go through. (For example, produce3,my third record.)The messages that were successfully produced also show on Control Center (http://localhost:9021/ in your web browser) in Topics > test-schemas > messages. You may have to select a partition or jump to a timestamp to see messages sent earlier.
Run shutdown and cleanup tasks.
- You can stop the consumer and producer with Ctl-C in their respective command windows.
- To stop Confluent Platform, type
confluent local stop. - If you would like to clear out existing data (topics, schemas, and messages) before starting again with another test , type
confluent local destroy.