
Google Cloud Storage Sink Connector for Confluent Platform
The Kafka Connect Google Cloud Storage (GCS) Sink connector allows you to export data from Apache Kafka® topics to GCS objects in various formats. Additionally, for certain data layouts, the GCS connector exports data by guaranteeing exactly-once delivery semantics to consumers of the GCS objects it produces.
Features
Exactly once delivery
Records that are exported using a deterministic partitioner are delivered with exactly-once semantics. For more details, see Exactly-once delivery on top of eventual consistency.
Dead Letter Queue
This connector supports the Dead Letter Queue (DLQ) functionality. For information about accessing and using the DLQ, see Confluent Platform Dead Letter Queue.
Multiple tasks
The Google Cloud Storage Sink connector supports running one or more tasks. You can specify the number of tasks in the tasks.max configuration parameter. This can lead to performance gains when multiple files need to be parsed.
Input data formats
The Google Cloud Storage Sink connector supports the following input data formats:
Bytes
Avro
JSON
JSON_SR
Protobuf
Note that you need to have Confluent Cloud Schema Registry configured if using a schema-based message format like Avro, JSON_SR, and Protobuf. If no schema is defined, values are encoded as plain strings.
Output data formats
The Google Cloud Storage Sink connector supports the following output data formats:
ByteArray
Avro
JSON
Parquet
Client-side encryption
This connector supports Client-Side Field Level Encryption (CSFLE) and Client-Side Payload Encryption (CSPE). For more information, see Manage Client-Side Encryption.
Limitations
The connector does not currently support Single Message Transformations (SMTs) that modify the topic name. Additionally, the following transformations are not allowed:
io.debezium.transforms.ByLogicalTableRouterio.debezium.transforms.outbox.EventRouterorg.apache.kafka.connect.transforms.RegexRouterorg.apache.kafka.connect.transforms.TimestampRouterio.confluent.connect.transforms.MessageTimestampRouterio.confluent.connect.transforms.ExtractTopic$Keyio.confluent.connect.transforms.ExtractTopic$Value
The connector does not currently support buckets or objects with object locks enabled.
Relation to the AWS S3 Sink Connector
See Amazon S3 Sink connector for Confluent Platform for details on generic properties of cloud storage sink connectors, such as exactly once delivery, pluggable data formats, schema evolution, basic configuration, writing raw message values, and pluggable partitioners.
Install the GCS Sink Connector
You can install this connector by using the confluent connect plugin install command, or by manually downloading the ZIP file.
Prerequisites
You must install the connector on every machine where Connect will run.
An installation of the latest (
latest) connector version.To install the
latestconnector version, navigate to your Confluent Platform installation directory and run the following command:confluent connect plugin install confluentinc/kafka-connect-gcs:latest
You can install a specific version by replacing
latestwith a version number as shown in the following example:confluent connect plugin install confluentinc/kafka-connect-gcs:5.0.1
Install the connector manually
Download and extract the ZIP file for your connector and then follow the manual connector installation instructions.
Streaming ETL Demo
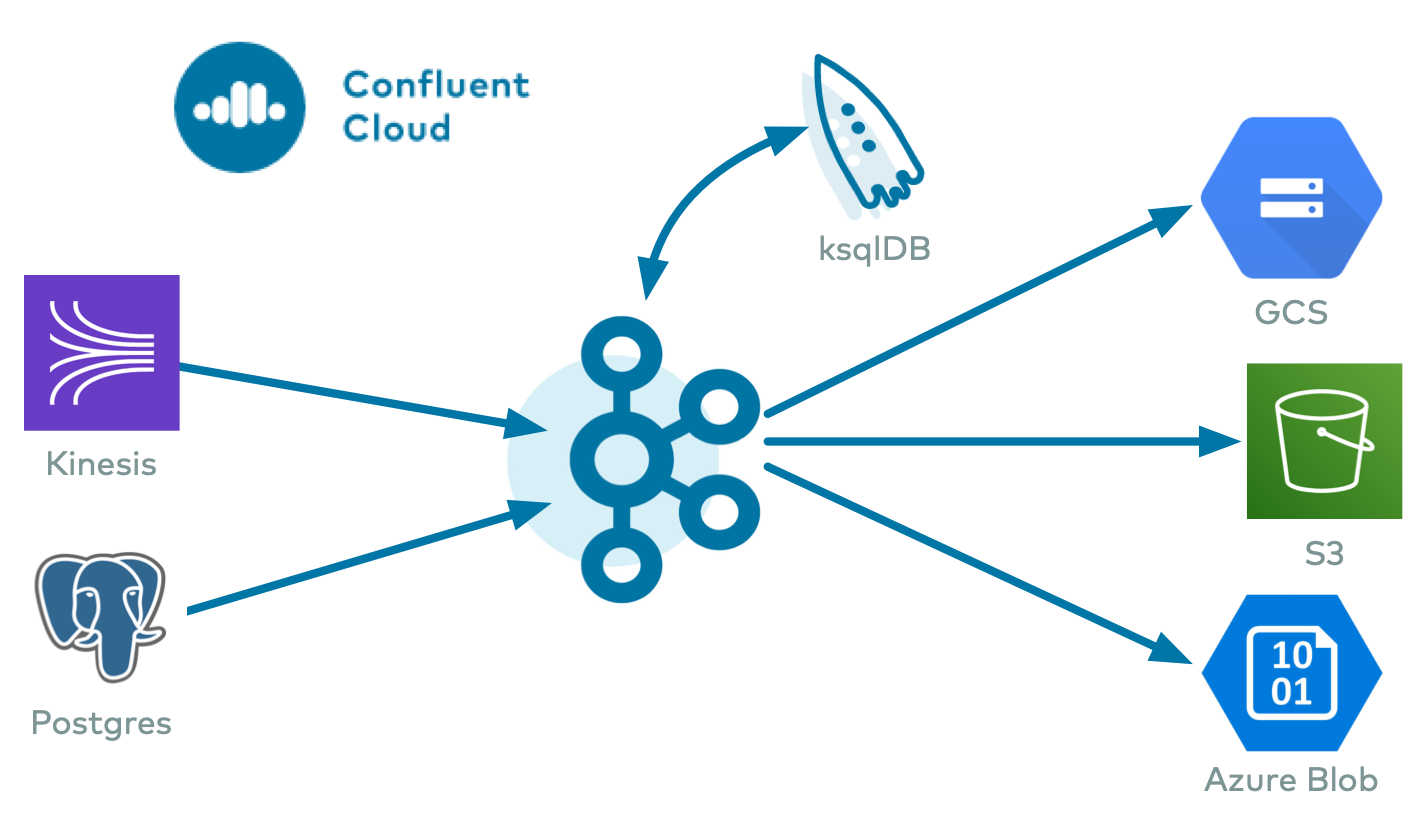
To evaluate the Kafka Connect Kinesis Source Connector, AWS S3 Sink Connector, Azure Blob Sink Connector, and Google Cloud GCS Sink Connector in an end-to-end streaming deployment, refer to the Cloud ETL demo. This demo also allows you to evaluate the real-time data processing capabilities of ksqlDB.
License
You can use this connector for a 30-day trial period without a license key.
After 30 days, you must purchase a connector subscription which includes Confluent enterprise license keys to subscribers, along with enterprise-level support for Confluent Platform and your connectors. If you are a subscriber, you can contact Confluent Support for more information.
See Confluent Platform license for license properties and Confluent License Properties for information about the license topic.
Configuration Properties
For a complete list of configuration properties for this connector, see Configuration Reference for Google Cloud Storage Sink Connector for Confluent Platform.
Custom Credentials Provider
Credential provider or provider chain to use for authentication to Google. This is a java class that implements the com.google.api.gax.core.CredentialsProvider interface. By default this uses an internal implementation that uses the credentials specified in the gcs.credentials.path or gcs.credentials.json configuration. Users may provide their custom implementation by specifying the fully qualified class name here and ensuring that the jar is available in the plugin.path or classpath. Any connector configuration prefixed by gcs.credentials.provider. will be passed to the custom provider if it also implements the org.apache.kafka.common.Configurable interface, after removing the prefix.
Complete the following steps to use a custom credentials provider:
Set a custom credentials provider class: Set the
gcs.credentials.provider.classproperty to a class that implements thecom.google.api.gax.core.CredentialsProviderinterface. Configure the class to the fully qualified name of your custom credentials provider class.Configure additional settings (Optional): For additional configuration, prefix the configuration keys with
gcs.credentials.provider.If your custom credentials provider needs to accept additional configuration, implement theorg.apache.kafka.common.Configurableinterface that lets the connector receive configurations that are prefixed withgcs.credentials.provider.. Note that the prefix is removed from the configuration passed the credentials provider.Ensure a public no-args constructor: Your custom credentials provider class must have a public no-argument constructor. This is necessary because the connector creates an instance of the provider using this constructor.
Package your provider: Once your custom credentials provider class is implemented, package it into a JAR file.
Copy the JAR file to Connect Worker: Copy the built JAR file to the installation path of the gcs sink connector. This step ensures that the GCS connector can access and use your custom credentials provider.
Rotation Schedule
Use the following properties to set up a rotation schedule.
rotate.schedule.interval.ms(Scheduled rotation): This property allows you to configure a regular schedule for when files are closed and uploaded to storage. The default value is-1(disabled). For example, when this is set for 600000 ms, you will see files available in the storage bucket at least every 10 minutes.rotate.schedule.interval.msdoes not require a continuous stream of data.Note
Using the
rotate.schedule.interval.msproperty results in a non-deterministic environment and invalidates exactly-once guarantees.rotate.interval.ms(Rotation interval): This property allows you to specify the maximum time span (in milliseconds) that a file can remain open for additional records. When using this property, the time span interval for the file starts with the timestamp of the first record added to the file. The connector closes and uploads the file to storage when the timestamp of a subsequent record falls outside the time span set by the first file’s timestamp. The minimum value is 600000 ms (10 minutes). This property defaults to the interval set by thetime.intervalproperty.rotate.interval.msrequires a continuous stream of data.Important
The start and end of the time span interval is determined using file timestamps. For this reason, a file could potentially remain open for a long time if a record does not arrive with a timestamp falling outside the time span set by the first file’s timestamp.
Mapping Records to GCS Objects
The GCS connector consumes records from the specified topics, organizes them into different partitions, writes batches of records in each partition to an file, and then uploads those files to the GCS bucket. It uses GCS object paths that include the Kafka topic and partition, the computed partition, and the filename. The GCS connector offers several ways to customize this behavior, including:
GCS object names
The GCS data model is a flat structure: each bucket stores objects, and the name of each GCS object serves as the unique key. However, a logical hierarchy can be inferred when the GCS object names uses directory delimiters, such as /. The GCS connector allows you to customize the names of the GCS objects it uploads to the GCS bucket.
In general, the names of the GCS object uploaded by the GCS connector follow this format:
<prefix>/<topic>/<encodedPartition>/<topic>+<kafkaPartition>+<startOffset>.<format>
where:
<prefix>is specified with the connector’stopics.dirconfiguration property, which defaults to the literal valuetopicsand helps create uniquely named GCS objects that don’t clash with existing GCS objects in the same bucket.<topic>corresponds to the name of the Kafka topic from which the records in this GCS object were read.<encodedPartition>is generated by the GCS connector’s partitioner (see Partitioning records into GCS Objects).<kafkaPartition>is the Kafka partition number from which the records in this GCS object were read.<startOffset>is the Kafka offset of the first record written to this GCS object.<format>is the extension identifying the format in which the records are serialized in this GCS object.
If desired, the / and + characters can be changed using the connector’s directory.delim and file.delim configuration properties.
Partitioning records into GCS Objects
The GCS connector’s partitioner determines how records read from a Kafka topic are partitioned into GCS objects. The partitioner determines the <encodedPartition> portion of the GCS object names (see GCS object names).
The partitioner is specified in the connector configuration with the partitioner.class configuration property. The GCS connector comes with the following partitioners:
Default Partitioner: The
io.confluent.connect.storage.partitioner.DefaultPartitionerpreserves the same topic partitions as in Kafka, and records from each topic partition ultimately end up in GCS objects with names that include the Kafka topic and Kafka partitions. The<encodedPartition>is always<topicName>/partition=<kafkaPartition>, resulting in GCS object names such as<prefix>/<topic>/partition=<kafkaPartition>/<topic>+<kafkaPartition>+<startOffset>.<format>.Field Partitioner: The
io.confluent.connect.storage.partitioner.FieldPartitionerdetermines the partition from the field within each record identified by the connector’spartition.field.nameconfiguration property, which has no default. This partitioner requiresSTRUCTrecord type values. The<encodedPartition>is always<topicName>/<fieldName>=<fieldValue>, resulting in GCS object names of the form<prefix>/<topic>/<fieldName>=<fieldValue>/<topic>+<kafkaPartition>+<startOffset>.<format>. Thepartition.field.nameproperty now supports nested field paths using dot-separated notation. This allows the partitioner to traverse hierarchicalSTRUCTrecords to locate a value deep within the record schema. It has the following limitations:The partitioner does not support fields that contain a literal dot (
.) in their name, as the dot is strictly interpreted as a path separator.Partitioning is not supported for fields located within or under an
ARRAYelement. The partitioner can only traverse through nestedSTRUCTtypes.
Time Based Partitioner: The
io.confluent.connect.storage.partitioner.TimeBasedPartitionerdetermines the partition from the year, month, day, hour, minutes, and/or seconds. This partitioner requires the following connector configuration properties:The
path.formatconfiguration property specifies the pattern used for the<encodedPartition>portion of the GCS object name. For example, whenpath.format='year'=YYYY/'month'=MM/'day'=dd/'hour'=HH, GCS object names will have the form<prefix>/<topic>/year=YYYY/month=MM/day=dd/hour=HH/<topic>+<kafkaPartition>+<startOffset>.<format>.The
partition.duration.msconfiguration property defines the maximum granularity of the GCS objects within a single encoded partition directory. For example, settingpartition.duration.ms=600000(10 minutes) will result in each GCS object in that directory having no more than 10 minutes of records.The
localeconfiguration property specifies the JDK’s locale used for formatting dates and times. For example, useen-USfor US English,en-GBfor UK English, andfr-FRfor French (in France). These may vary by Java version; see the available locales.The
timezoneconfiguration property specifies the current timezone in which the dates and times will be treated. Use standard short names for timezones such asUTCor (without daylight savings)PST,EST, andECT, or longer standard names such asAmerica/Los_Angeles,America/New_York, andEurope/Paris. These may vary by Java version; see the available timezones within each locale, such as those within the “en_US” locale.The
timestamp.extractorconfiguration property determines how to obtain a timestamp from each record. Values can includeWallclock(the default) to use the system time when the record is processed,Recordto use the timestamp of the Kafka record denoting when it was produced or stored by the broker,RecordFieldto extract the timestamp from one of the fields in the record’s value as specified by thetimestamp.fieldconfiguration property.
Daily Partitioner: The
io.confluent.connect.storage.partitioner.DailyPartitioneris equivalent to the TimeBasedPartitioner withpath.format='year'=YYYY/'month'=MM/'day'=ddandpartition.duration.ms=86400000(one day, for one GCS object in each daily directory). This partitioner always results in GCS object names of the form<prefix>/<topic>/year=YYYY/month=MM/day=dd/<topic>+<kafkaPartition>+<startOffset>.<format>. This partitioner requires the following connector configuration properties:The
localeconfiguration property specifies the JDK’s locale used for formatting dates and times. For example, useen-USfor US English,en-GBfor UK English, andfr-FRfor French (in France). These may vary by Java version; see the available locales.The
timezoneconfiguration property specifies the current timezone in which the dates and times will be treated. Use standard short names for timezones such asUTCor (without daylight savings)PST,EST, andECT, or longer standard names such asAmerica/Los_Angeles,America/New_York, andEurope/Paris. These may vary by Java version; see the available timezones within each locale, such as those within the “en_US” locale.The
timestamp.extractorconfiguration property determines how to obtain a timestamp from each record. Values can includeWallclock(the default) to use the system time when the record is processed,Recordto use the timestamp of the Kafka record denoting when it was produced or stored by the broker,RecordFieldto extract the timestamp from one of the fields in the record’s value as specified by thetimestamp.fieldconfiguration property.
Hourly Partitioner: The
io.confluent.connect.storage.partitioner.HourlyPartitioneris equivalent to the TimeBasedPartitioner withpath.format='year'=YYYY/'month'=MM/'day'=dd/'hour'=HHandpartition.duration.ms=3600000(one hour, for one GCS object in each hourly directory). This partitioner always results in GCS object names of the form<prefix>/<topic>/year=YYYY/month=MM/day=dd/hour=HH/<topic>+<kafkaPartition>+<startOffset>.<format>. This partitioner requires the following connector configuration properties:The
localeconfiguration property specifies the JDK’s locale used for formatting dates and times. For example, useen-USfor US English,en-GBfor UK English,fr-FRfor French (in France). These may vary by Java version; see the available locales.The
timezoneconfiguration property specifies the current timezone in which the dates and times will be treated. Use standard short names for timezones such asUTCor (without daylight savings)PST,EST, andECT, or longer standard names such asAmerica/Los_Angeles,America/New_York, andEurope/Paris. These may vary by Java version; see the available timezones within each locale, such as those within the “en_US” locale.The
timestamp.extractorconfiguration property determines how to obtain a timestamp from each record. Values can includeWallclock(the default) to use the system time when the record is processed,Recordto use the timestamp of the Kafka record denoting when it was produced or stored by the broker,RecordFieldto extract the timestamp from one of the fields in the record’s value as specified by thetimestamp.fieldconfiguration property.
As noted below, the choice of timestamp.extractor affects whether the GCS connector can support exactly once delivery.
You can also choose to use a custom partitioner by implementing the io.confluent.connect.storage.partitioner.Partitioner interface, packaging your implementation into a JAR file, and then:
Place the JAR file into the
share/java/kafka-connect-gcsdirectory of your Confluent Platform installation on each worker node.Restart all of the Connect worker nodes.
Configure GCS connectors to use your fully-qualified partitioner class name.
GCS object formats
The GCS connector can serialize multiple records into each GCS object using a number of formats. The connector’s format.class configuration property identifies the name of the Java class that implements the io.confluent.connect.storage.format.Format interface. The GCS connector comes with several implementations:
Avro: Use
format.class=io.confluent.connect.gcs.format.avro.AvroFormatto write the GCS object as an Avro container file and will include the Avro schema in the container file followed by one or more records. The connector’savro.codecconfiguration property specifies the Avro compression code, and values can benull(the default) for no Avro compression,deflateto use the deflate algorithm as specified in RFC 1951,snappyto use Google’s Snappy compression library, andbzip2for BZip2 compression. Optionally setenhanced.avro.schema.support=trueto enable enum symbol preservation and package name awareness.JSON: Use
format.class=io.confluent.connect.gcs.format.json.JsonFormatto write the GCS object as a file containing one JSON serialized record per line. The connector’sgcs.compression.typeconfiguration property can be set tonone(the default) for no compression orgzipfor GZip compression.Parquet: Use
format.class=io.confluent.connect.gcs.format.parquet.ParquetFormatto write the GCS object as an Parquet file. The connector’sparquet.codecconfiguration property specifies the Parquet compression code, and values can benone(the default) for no Parquet compression,snappyto use Google’s Snappy compression library,gzip,brotli,lz4,lzo,zstd.Important
You must use the AvroConverter,
ProtobufConverter, orJsonSchemaConverterwithParquetFormatfor this connector. Attempting to use theJsonConverter(with or without schemas) results in a NullPointerException and a StackOverflowException.The Google Cloud Storage Sink connector does not allow recursive schema types. Writing to Parquet output format with a recursive schema type results into a StackOverflowError.
Raw Bytes: Use
format.class=io.confluent.connect.gcs.format.bytearray.ByteArrayFormatto write the raw serialized record values delimited with the JDK’s line separator to the GCS object. This requires using thevalue.converter=org.apache.kafka.connect.converters.ByteArrayConverterwith the connector. Use a different delimiter by specifying the connect’sformat.bytearray.separatorconfiguration property.
You can also choose to use a custom partitioner by implementing the io.confluent.connect.storage.format.Format interface, packaging your implementation into a JAR file, and then:
Place the JAR file into the
share/java/kafka-connect-gcsdirectory of your Confluent Platform installation on each worker node.Restart all of the Connect worker nodes.
Configure GCS connectors with
format.classset to the fully-qualified class name of your format implementation.
GCS object uploads
As the GCS connector processes each record, it uses the partitioner to determine into which encoded partition that record should be written. This continues for each partition until the connector determines that a partition has enough records and should be uploaded to the GCS bucket using the GCS object name for that partition. This technique of knowing when to flush a partition file and upload it to GCS is called the rotation strategy, and there are a number of ways to control this behavior:
Maximum number of records: The connector’s
flush.sizeconfiguration property specifies the maximum number of records that should be written to a single GCS object. There is no default for this setting.Maximum span of record time: The connector’s
rotate.interval.msspecifies the maximum timespan in milliseconds a file can remain open and ready for additional records. The timestamp for each file starts with the record timestamp of the first record written to the file, as determined by the partitioner’stimestamp.extractor. As long as the next record’s timestamp fits within the timespan specified by therotate.interval.ms, the record will be written to the file; if a record’s timestamp does not fit within the timespan of the file, the connector will flush the file, uploaded it to GCS, commit the offsets of the records in that file, and then create a new file with a timespan that starts with the first record and writes the first record to the file.Scheduled rotation: The connector’s
rotate.schedule.interval.msspecifies the maximum timespan in milliseconds a file can remain open and ready for additional records. Unlike withrotate.interval.ms, with scheduled rotation the timestamp for each file starts with the system time that the first record is written to the file. As long as a record is processed within the timespan specified byrotate.schedule.interval.ms, the record will be written to the file. As soon as a record is processed after the timespan for the current file, the file is flushed, uploaded to GCS, and the offset of the records in the file are committed. A new file is created with a timespan that starts with the current system time, and the record is written to the file. The commit will be performed at the scheduled time, regardless of the previous commit time or number of messages. This configuration is useful when you have to commit your data based on current server time, for example at the beginning of every hour. The default value-1means that this feature is disabled.
These strategies can be combined as needed, and rotation occurs whenever any of the strategies signals a rotation.
The first strategy will cause a rotation as soon as enough records have been written to the file, and can be calculated after each record has been written to the file. In other words, the file can be closed and uploaded to GCS as soon as it is full.
When using rotate.interval.ms, the connector only closes and uploads a file to GCS when the next record does not belong based upon that record’s timestamp. In other words, if the connector has no more records to process, the connector may keep the file open for a significant period of time – until the connector can process another record.
Scheduled rotation uses rotate.schedule.interval.ms to close the file and upload to GCS on a regular basis using the current time, rather than the record time. Even if the connector has no more records to process, Connect will still call the connector at least every offset.flush.interval.ms as defined in the Connect worker’s configuration file. And every time this occurs, the connector uses the current time to determine if the currently opened file should be closed and uploaded to GCS.
Note
Not all rotation strategy are compatible with the GCS connector’s ability to deliver GCS objects exactly once with eventual consistency. See the Exactly Once section below for details.
The GCS object uploaded by the connector can be quite large, and the connector supports using a multi-part upload mechanism. The gcs.part.size configuration property defaults to 26214400 bytes (25MB), and specifies the maximum size of each GCS object part used to upload a single GCS object.
Additionally, the schema.compatibility setting (see Schema Evolution) will also affect when one file is closed and uploaded to an GCS object. If a record cannot be written to one file because its schema has changed relative to the records already in the file, the connector will rotate by closing the file, uploading it to GCS, committing offsets for the records in the file, creating a new file and writing the new record.
Exactly-once delivery on top of eventual consistency
The GCS connector is able to provide exactly-once semantics to consumers of the objects it exports to GCS, under the condition that the connector is supplied with a deterministic partitioner.
Currently, out of the available partitioners, the default and field partitioners are always deterministic. TimeBasedPartitioner can be deterministic with some configurations, discussed below. This implies that, when any of these partitioners is used, splitting of files always happens at the same offsets for a given set of Kafka records. These partitioners take into account flush.size and schema.compatibility to decide when to roll and save a new file to GCS. The connector always delivers files in GCS that contain the same records, even under the presence of failures. If a connector task fails before an upload completes, the file does not become visible to GCS. If, on the other hand, a failure occurs after the upload has completed but before the corresponding offset is committed to Kafka by the connector, then a re-upload will take place. However, such a re-upload is transparent to the user of the GCS bucket, who at any time will have access to the same records made eventually available by successful uploads to GCS.
To guarantee exactly-once semantics with the TimeBasedPartitioner, the connector must be configured to use a deterministic implementation of TimestampExtractor and a deterministic rotation strategy. The deterministic timestamp extractors are Kafka records (timestamp.extractor=Record) or record fields (timestamp.extractor=RecordField). The deterministic rotation strategy configuration is rotate.interval.ms (setting rotate.schedule.interval.ms is nondeterministic and will invalidate exactly-once guarantees).
Schema Evolution
Important
Schema evolution only works if the records are generated with the default naming strategy, which is TopicNameStrategy. An error may occur if other naming strategies are used. This is because records are not compatible with each other. schema.compatibility should be set to NONE if other naming strategies are used. This may result in small object files because the sink connector creates a new file every time the schema ID changes between records. See Subject Name Strategy for more information about naming strategies.
The GCS connector supports schema evolution and reacts to schema changes of data according to the schema.compatibility configuration. This section describes how the connector reacts to schema evolution under different values of schema.compatibility. The schema.compatibility can be set to NONE, BACKWARD, FORWARD and FULL, which means NO compatibility, BACKWARD compatibility, FORWARD compatibility and FULL compatibility respectively.
NO Compatibility: By default, the
schema.compatibilityis set toNONE. In this case, the connector ensures that each file written to GCS has the proper schema. When the connector observes a schema change in data, it commits the current set of files for the affected topic partitions and writes the data with new schema in new files.BACKWARD Compatibility: If a schema is evolved in a backward compatible way, you can always use the latest schema to query all the data uniformly. For example, removing fields is backward compatible change to a schema, since when you encounter records written with the old schema that contain these fields, you can just ignore them. Adding a field with a default value is also backward compatible.
If
BACKWARDis specified in theschema.compatibility, the connector keeps track of the latest schema used in writing data to GCS, and if a data record with a schema version larger than current latest schema arrives, the connector commits the current set of files and writes the data record with new schema to new files. For data records arriving at a later time with schema of an earlier version, the connector projects the data record to the latest schema before writing to the same set of files in GCS.FORWARD Compatibility: If a schema is evolved in a forward compatible way, you can always use the oldest schema to query all the data uniformly. Removing a field that had a default value is forward compatible, since the old schema will use the default value when the field is missing.
If
FORWARDis specified in theschema.compatibility, the connector projects the data to the oldest schema before writing to the same set of files in GCS.FULL Compatibility: Full compatibility means that old data can be read with the new schema and new data can also be read with the old schema.
If
FULLis specified in theschema.compatibility, the connector performs the same action asBACKWARD.
Schema evolution in the GCS connector works in the same way as in the HDFS 2 Sink connector for Confluent Platform and Amazon S3 Sink connector for Confluent Platform.
Automatic Retries
The GCS connector may experience problems writing to the GCS bucket, due to network partitions, interruptions, or even AWS throttling limits. In many cases, the connector will retry the request a number of times before failing. To prevent from further overloading the network or GCS service, the connector uses an exponential backoff technique to give the network and/or service time to recover. The technique adds randomness, called jitter, to the calculated backoff times to prevent a thundering herd, where large numbers of requests from many tasks are submitted concurrently and overwhelm the service. Randomness spreads out the retries from many tasks and should reduce the overall time required to complete all outstanding requests compared to simple exponential backoff. The goal is to spread out the requests to GCS as much as possible.
The maximum number of retry attempts is dictated by the gcs.part.retries GCS connector configuration property, which defaults to three attempts. The delay for retries is dependent upon the connector’s gcs.retry.backoff.ms configuration property, which defaults to 200 milliseconds. The actual delay is randomized, but the maximum delay can be calculated as a function of the number of retry attempts with ${gcs.retry.backoff.ms} * 2 ^ (retry-1), where retry is the number of attempts taken so far in the current iteration. In order to keep the maximum delay within a reasonable duration, it is capped at 24 hours. For example, the following table shows the possible wait times before submitting each of the three retry attempts.
Retry | Minimum Backoff (sec) | Maximum Backoff (sec) | Total Potential Delay from First Attempt (sec) |
|---|---|---|---|
1 | 0.0 | 0.2 | 0.2 |
2 | 0.0 | 0.4 | 0.6 |
3 | 0.0 | 0.8 | 1.4 |
Increasing the maximum number of retries adds more backoff:
Retry | Minimum Backoff (sec) | Maximum Backoff (sec) | Total Potential Delay from First Attempt (sec) |
|---|---|---|---|
4 | 0.0 | 1.6 | 3.0 |
5 | 0.0 | 3.2 | 6.2 |
6 | 0.0 | 6.4 | 12.6 |
7 | 0.0 | 12.8 | 25.4 |
8 | 0.0 | 25.6 | 51.0 |
9 | 0.0 | 51.2 | 102.2 |
10 | 0.0 | 102.4 | 204.6 |
At some point, maximum backoff time will reach saturation and will be capped at 24 hours. From the example below, all attempts starting with 20 will have maximum backoff time as 24 hours:
Retry | Minimum Backoff (sec) | Maximum Backoff (sec) | Total Potential Delay from First Attempt (sec) |
|---|---|---|---|
15 | 0.0 | 3276.8 | 6553.4 |
16 | 0.0 | 6553.6 | 13107.0 |
17 | 0.0 | 13107.2 | 26214.2 |
18 | 0.0 | 26214.4 | 52428.6 |
19 | 0.0 | 52428.8 | 104857.4 |
20 | 0.0 | 86400.0 | 191257.4 |
21 | 0.0 | 86400.0 | 277657.4 |
It’s not advised to set gcs.part.retries too high since making more attempts after reaching a cap of 24 hours isn’t practical. You can adjust both the gcs.part.retries and gcs.retry.backoff.ms connector configuration properties to achieve the desired retry and backoff characteristics.
Quick Start
In this quick start, the GCS connector exports data produced by the Avro console producer to GCS. This quick start assumes you installed the connector using the confluent-hub command-line tool as described in the previous section.
For an example of how to get Kafka Connect connected to Confluent Cloud, see Connect Self-Managed Kafka Connect to Confluent Cloud.
Prepare a bucket
Important
Your Google Cloud service account role must have permission to get, create, and delete objects in the GCS bucket. For example, the Storage Admin role can be selected for this purpose. If you are concerned about security and do not want to use the Storage Admin role, only use the storage.objects.get, storage.objects.create, and storage.objects.delete roles. Also, note that the Storage Object Admin role does not work for this purpose.
Before you begin, you will need to create a GCS destination bucket.
To use the web interface, navigate to the Google Cloud Platform console web site, and use the GUI to create a bucket. To download credentials for the newly-created bucket, navigate to APIs & Services -> Credentials. From the Credentials page, you can select Create credentials, then select Service Account Key. Select the appropriate account, and download the JSON file. The downloaded JSON file is used in your connector configuration.
To use the gsutil mb (make buckets) CLI command, see Install gsutil for installation and usage details.
Convert the JSON content and add it to the Connector configuration
Note
The following steps use the GCS connector as an example. These steps can be used for any of the Google platform connectors requiring a JSON configuration file.
The downloaded JSON credentials must be converted to a string before it can be used.
Convert the JSON file contents into string format. You can use an online converter tool to do this. For example: JSON to String Online Converter.
Tip
A script is available that converts the credentials to a string and also adds additional
\characters where needed. See Stringify GCP Credentials.Create a file named
gcs-sink.jsonand add the GCS configuration details to it. Make sure to changegcs.bucket.nameto your bucket name.{ "name": "gcs", "config": { "connector.class": "io.confluent.connect.gcs.GcsSinkConnector", "tasks.max": "1", "topics": "gcs_topic", "gcs.bucket.name": "<YOUR-GCS-BUCKET>", "gcs.part.size": "5242880", "flush.size": "3", "storage.class": "io.confluent.connect.gcs.storage.GcsStorage", "format.class": "io.confluent.connect.gcs.format.avro.AvroFormat", "partitioner.class": "io.confluent.connect.storage.partitioner.DefaultPartitioner", "value.converter": "io.confluent.connect.avro.AvroConverter", "value.converter.schema.registry.url": "http://localhost:8081", "schema.compatibility": "NONE", "confluent.topic.bootstrap.servers": "localhost:9092", "confluent.topic.replication.factor": "1", "name": "gcs" } }
Add the converted string content to the
gcs-sink.jsonGCS configuration file. The following example shows how the string content should be added to the configuration.Important
Add
\before all\nentries in the Private Key section so that each section begins with\\n(see the highlighted lines below). The example below has been formatted so that the\\nentries are easier to see. Most of the Private Key has been omitted.Tip
A script is available that converts the credentials to a string and also adds additional
\characters where needed. See Stringify GCP Credentials.{ "name": "gcs", "config": { "connector.class": "io.confluent.connect.gcs.GcsSinkConnector", "tasks.max": "1", "topics": "gcs_topic", "gcs.bucket.name": "confluent-avro", "gcs.part.size": "5242880", "flush.size": "3", "gcs.credentials.json": "{\"type\":\"service_account\",\"project_id\":\"connect- 1234567\",\"private_key_id\":\"omitted\", \"private_key\":\"-----BEGIN PRIVATE KEY----- \\nMIIEvAIBADANBgkqhkiG9w0BA \\n6MhBA9TIXB4dPiYYNOYwbfy0Lki8zGn7T6wovGS5\opzsIh \\nOAQ8oRolFp\rdwc2cC5wyZ2+E+bhwn \\nPdCTW+oZoodY\\nOGB18cCKn5mJRzpiYsb5eGv2fN\/J \\n...rest of key omitted... \\n-----END PRIVATE KEY-----\\n\", \"client_email\":\"pub-sub@connect-123456789.iam.gserviceaccount.com\", \"client_id\":\"123456789\",\"auth_uri\":\"https:\/\/accounts.google.com\/o\/oauth2\/ auth\",\"token_uri\":\"https:\/\/oauth2.googleapis.com\/ token\",\"auth_provider_x509_cert_url\":\"https:\/\/ www.googleapis.com\/oauth2\/v1\/ certs\",\"client_x509_cert_url\":\"https:\/\/www.googleapis.com\/ robot\/v1\/metadata\/x509\/pub-sub%40connect- 123456789.iam.gserviceaccount.com\"}", "storage.class": "io.confluent.connect.gcs.storage.GcsStorage", "format.class": "io.confluent.connect.gcs.format.avro.AvroFormat", "partitioner.class": "io.confluent.connect.storage.partitioner.DefaultPartitioner", "value.converter": "io.confluent.connect.avro.AvroConverter", "value.converter.schema.registry.url": "http://localhost:8081", "schema.compatibility": "NONE", "confluent.topic.bootstrap.servers": "localhost:9092", "confluent.topic.replication.factor": "1", "name": "gcs" } }
Start Confluent Platform
Next, start the services with one command using the Confluent CLI.
confluent local start
Every service will start in order, printing a message with its status:
Starting Zookeeper
Zookeeper is [UP]
Starting Kafka
Kafka is [UP]
Starting Schema Registry
Schema Registry is [UP]
Starting Kafka REST
Kafka REST is [UP]
Starting Connect
Connect is [UP]
Starting KSQL Server
KSQL Server is [UP]
Starting Control Center
Control Center is [UP]
To import a few records with a simple schema in Kafka, start the Avro console producer as follows:
kafka-avro-console-producer --broker-list localhost:9092 --topic gcs_topic \
--property value.schema='{"type":"record","name":"myrecord","fields":[{"name":"f1","type":"string"}]}'
Then, in the console producer, type in:
{"f1": "value1"}
{"f1": "value2"}
{"f1": "value3"}
{"f1": "value4"}
{"f1": "value5"}
{"f1": "value6"}
{"f1": "value7"}
{"f1": "value8"}
{"f1": "value9"}
The nine records entered are published to the Kafka topic gcs_topic in Avro format.
Start the connector
Before starting the connector, create a config file. For example, save the following properties file as quickstart-gcs.propreties, or edit the file that is included in the connector archive (under the “etc” directory):
name=gcs-sink
connector.class=io.confluent.connect.gcs.GcsSinkConnector
tasks.max=1
topics=gcs_topic

gcs.bucket.name=#bucket-name
gcs.part.size=5242880
flush.size=3

gcs.credentials.path=#/path/to/credentials/keys.json

storage.class=io.confluent.connect.gcs.storage.GcsStorage
format.class=io.confluent.connect.gcs.format.avro.AvroFormat
partitioner.class=io.confluent.connect.storage.partitioner.DefaultPartitioner

schema.compatibility=NONE

confluent.topic.bootstrap.servers=localhost:9092
confluent.topic.replication.factor=1

# Uncomment and insert license for production use
# confluent.license=
Fill in appropriate values for gcs.bucket.name and gcs.credentials.path. It is recommended to use absolute paths.
Then start the GCS connector by loading its configuration with the following command:
Caution
You must include a double dash (--) between the topic name and your flag. For more information, see this post.
 confluent local load gcs -c quickstart-gcs.properties
 {
  "name": "gcs",
  "config": {
    "connector.class": "io.confluent.connect.gcs.GcsSinkConnector",
    "tasks.max": "1",
    "topics": "gcs_topic",
    "gcs.bucket.name": "#bucket-name",
    "gcs.part.size": "5242880",
    "flush.size": "3",
    "gcs.credentials.path": "#/path/to/credentials/keys.json",
    "storage.class": "io.confluent.connect.gcs.storage.GcsStorage",
    "format.class": "io.confluent.connect.gcs.format.avro.AvroFormat",
    "partitioner.class": "io.confluent.connect.storage.partitioner.DefaultPartitioner",
    "schema.compatibility": "NONE",
    "confluent.topic.bootstrap.servers": "localhost:9092",
    "confluent.topic.replication.factor": "1",
    "name": "gcs"
  },
  "tasks": [],
  "type": null
}
Towards the end of the log you should see that the connector starts, logs a few messages, and then uploads data from Kafka to GCS. Once the connector has ingested some records check that the data is available in GCS, for instance by viewing the bucket in the GCS web browser console.
You should see three objects with keys:
topics/gcs_topic/partition=0/gcs_topic+0+0000000000.avro
topics/gcs_topic/partition=0/gcs_topic+0+0000000003.avro
topics/gcs_topic/partition=0/gcs_topic+0+0000000006.avro
Each file name is encoded as <topic>+<kafkaPartition>+<startOffset>.<format>.
To verify the contents and print records, use avro-tools-1.8.2.jar (available in the Apache Archives):
java -jar avro-tools-1.8.2.jar tojson gcs_topic+0+0000000000.avro
For the previous file, you should see the following output with the rest of the records contained in the other two files:
{"f1":"value1"}
{"f1":"value2"}
{"f1":"value3"}
Finally, stop the Connect worker as well as all the rest of the Confluent services by running:
confluent local stop
Or, stop all the services and wipe out any data generated during this quick start by running:
confluent local destroy