Important
You are viewing documentation for an older version of Confluent Platform. For the latest, click here.
Cluster settings
You can view and edit cluster properties and broker configurations in the Cluster settings pages. When you click the Cluster settings submenu for a cluster, the Kafka tab appears by default.
Edit a cluster name
You can edit the cluster name and view the host details. The host field lock icon indicates it cannot be changed.
To change the cluster name:
Click the cluster from the cluster navigation bar.
Click the Cluster settings menu.
Edit the cluster name in Cluster Name field. The default cluster name is the cluster GUID. Enter a human-friendly name for the cluster. The cluster name you enter here is not exposed externally from Control Center.
Click Save changes to apply your changes.

View-only broker configuration
View the cluster broker configuration.
Note
If broker configuration editing is disabled, the view is read-only and the Edit Settings feature is not available.
Important
If RBAC is enabled for Control Center, it takes precedence over Access Control settings. The privileges associated with your assigned roles determine what you can view and access.
To view a broker configuration:
- Click the cluster from the cluster navigation bar.
- Click the Cluster settings menu.
- Click the Brokers tab. A read-only view of the broker configuration is displayed. The Edit Settings button is not shown on the page.
Edit dynamic broker configuration settings
The dynamic broker configuration option is enabled by
default. The feature allows editing broker
configurations within Control Center that do not require a restart. Any
configuration option that has a per-broker or cluster-wide Dynamic
Update Mode can be edited. Any options designated as read-only for the
dynamic update mode requires a restart and cannot be edited dynamically.
For information about available broker configuration options, including the dynamic update mode per option, see Broker Configurations.
Legend:
Green-filled bullet: Indicates non-default configuration options. An option had its value changed from the default.
Empty-fill bullet: Indicates default configuration options.
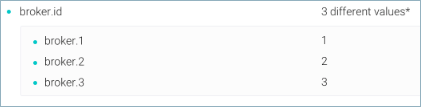
Asterisk*: Indicates a possible issue with configuration options that have n different values* (asterisk) between brokers.
Important
Review any brokers flagged with different configuration values to ensure they are all set as intended. In the example below, broker IDs are expected to be unique values.
To edit the broker configuration:
Click the cluster from the cluster navigation bar.
Click the Cluster settings menu.
Click the Brokers tab.
To compare and edit settings for multiple brokers, select two or more brokers in the broker IDs pane.
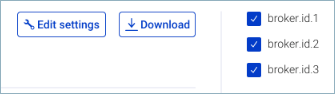
Tip
If you have a large number of brokers, use the Deselect all and Select all check boxes to quickly work with the brokers you want.
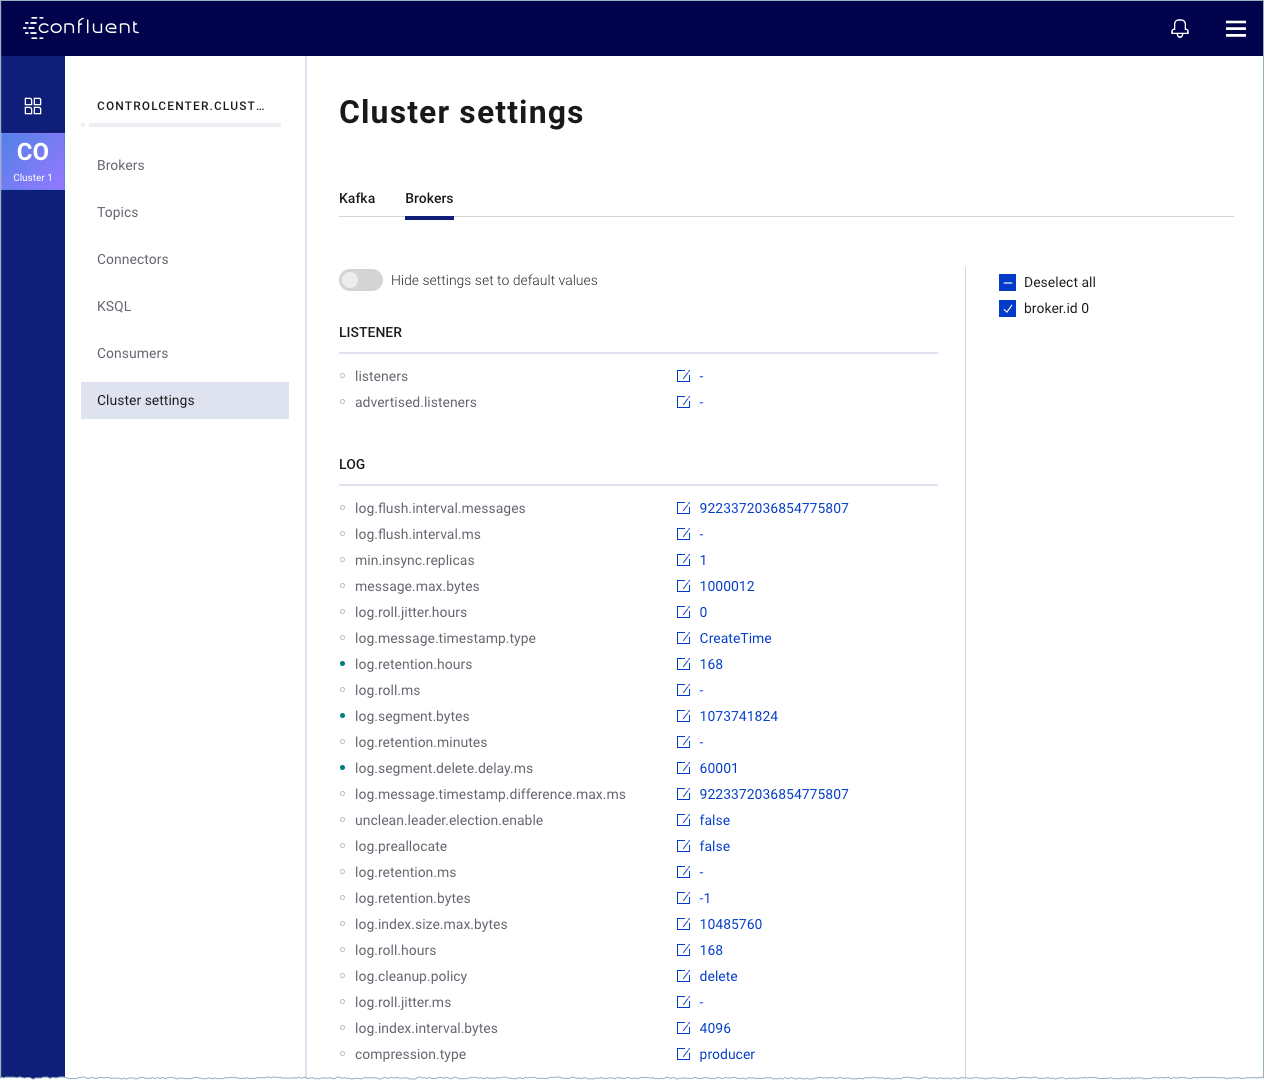
Click the Hide settings set to default value toggle to toggle it off and show all configuration options, including those options set to their default values:

Click Edit Settings. The broker settings appear with edit icons:
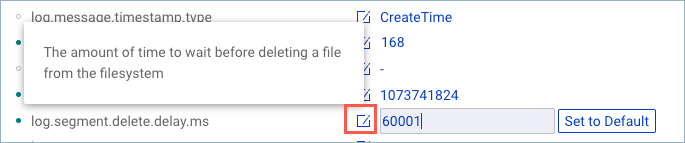
- Hover over any option to view its description.
- Click the edit icon to make changes to a configuration option.
- Click Set to Default to reset an option back to its original default. The bullet changes from green to empty.
Click Save Settings. Click Discard Settings to discard edits to settings.
To see examples of changing broker configurations dynamically using the Kafka command line kafka-configs tool, see Changing Broker Configurations Dynamically.
Download broker configuration settings
Click the cluster from the cluster navigation bar.
Click the Cluster settings menu.
Click the Brokers tab.
Select a broker if there is more than one.
Click Download. A file that contains the broker configuration settings is downloaded into your downloads directory in JSON file format. The filename is based on the Kafka cluster ID.
Example filename:
iKGixtHySCa0ANeH43pWHA.jsonExample contents snippet:
{"0":{"entries":[{"name":"log.cleaner.min.compaction.lag.ms","value":"0","source":"DEFAULT_CONFIG","synonyms":[{"name":"log.cleaner.min.compaction.lag.ms","value":"0","source":"DEFAULT_CONFIG"}],"isReadOnly":false,"isSensitive":false},{"name":"offsets.topic.num.partitions","value":"50","source":"DEFAULT_CONFIG","synonyms":[{"name":"offsets.topic.num.partitions","value":"50","source":"DEFAULT_CONFIG"}],"isReadOnly":true,"isSensitive":false},{"name":"confluent.support.metrics.enable","value":null,"source":"STATIC_BROKER_CONFIG","synonyms" ...
Enable and disable dynamic editing of broker configurations
The Dynamic Broker Configuration feature that allows editing settings without a restart is enabled by default. The feature can be disabled in Control Center if an organization does not want any users to access the feature. After disabling the feature, the Edit Settings button in the Brokers tab in the Control Center UI is no longer visible.
Important
If RBAC is enabled for Control Center, it takes precedence over Access Control settings.
To disable the edit broker config settings feature in Control Center:
Set the
confluent.controlcenter.broker.config.edit.enableoption in yourcontrol-center.propertiesfile tofalse.... confluent.controlcenter.broker.config.edit.enable=false ...
Note
Make the change in the appropriate Control Center properties files configured for your environments, including
control-center-dev.propertiesorcontrol-center-production.properties. The properties files are located in/path-to-confluent/etc/confluent-control-center/.Restart Control Center and pass in the properties file for the configuration to take effect.
Local (dev) environment:
Important
Do not use confluent local for production use.
confluent local stop --path <path-to-confluent>
confluent local start --path <path-to-confluent> ../etc/confluent-control-center/control-center.properties
Production environment:
./bin/control-center-stop
./bin/control-center-start ../etc/confluent-control-center/control-center.properties
To enable the feature again, set the option back to true and restart Control Center with the updated properties file.