
ServiceNow Sink Connector for Confluent Platform
The Kafka Connect ServiceNow Sink connector is used to capture Apache Kafka® records and sink them to a ServiceNow Table in real-time. Data is consumed using the ServiceNow Table API.
Features
The ServiceNow Sink connector includes the following features:
At least once delivery
This connector guarantees that records are delivered at least once from the Kafka topic.
Dead Letter Queue
This connector supports the Dead Letter Queue (DLQ) functionality. For information about accessing and using the DLQ, see Confluent Platform Dead Letter Queue.
Multiple tasks
The ServiceNow Sink connector supports running one or more tasks. You can specify the number of tasks in the tasks.max configuration parameter. This can lead to performance gains when multiple files need to be parsed.
Multiple HTTP request methods
The connector supports POST, DELETE, and PUT HTTP request methods. Note that this connector does not support PATCH as PUT and PATCH behave exactly the same in the ServiceNow Table API. The requests method used for each specific record is chosen dynamically:
POST is chosen when the record key is a tombstone value (null) or if no
sysIdfield exists in the case that the key is a structDELETE is chosen when the record value is a tombstone value (null)
PUT is chosen when there is both a valid key and value in the record
Supports HTTPS proxy
The connector can connect to ServiceNow using an HTTPS proxy server.
Result reporting
The connector supports result reporting. For the ServiceNow Sink connector, in the case of a successful HTTP response, the connector will report to the configured success topic a record with key as sysId of the newly created ServiceNow table record and value as a Struct object with fields requestMethod, statusCode, and responseString, where responseString is the response body parsed as a string. In the case of a non-successful HTTP response, the report record’s key will be the original sysId provided and the value will be a Struct object with the above described schema. Note that in the case of a failed POST request, there will be no sysId to report.
HTTP Basic and Mutual TLS authentication
The ServiceNow Sink connector supports both HTTP Basic Authentication and mutual TLS (mTLS).
Client-side encryption
This connector supports Client-Side Field Level Encryption (CSFLE) and Client-Side Payload Encryption (CSPE). For more information, see Manage Client-Side Encryption.
License
You can use this connector for a 30-day trial period without a license key.
After 30 days, you must purchase a connector subscription which includes Confluent enterprise license keys to subscribers, along with enterprise-level support for Confluent Platform and your connectors. If you are a subscriber, you can contact Confluent Support for more information.
For license properties, see Confluent Platform license. For information about the license topic, see License topic configuration.
Configuration Properties
For a complete list of configuration properties for this connector, see Configuration Reference for ServiceNow Sink Connector for Confluent Platform.
For an example of how to get Kafka Connect connected to Confluent Cloud, see Connect Self-Managed Kafka Connect to Confluent Cloud.
Install the ServiceNow Sink Connector
You can install this connector by using the Confluent Hub client installation instructions or by manually downloading the ZIP file.
Prerequisites
Important
You must install the connector on every machine where Connect will run.
Kafka Broker: Confluent Platform 3.3.0 or later, or Kafka 0.11.0 or later.
Connect: Confluent Platform 4.1.0 or later, or Kafka 1.1.0 or later.
An installation of the Confluent Hub Client. This is installed by default with Confluent Enterprise.
An installation of the latest (
latest) connector version.To install the
latestconnector version, navigate to your Confluent Platform installation directory and run the following command:confluent-hub install confluentinc/kafka-connect-servicenow:latest
You can install a specific version by replacing
latestwith a version number as shown in the following example:confluent-hub install confluentinc/kafka-connect-servicenow:2.6.0
Install the connector manually
Download and extract the ZIP file for your connector and then follow the manual connector installation instructions.
Quick Start
The quick start guide uses ServiceNow Sink connector to consume records from Kafka and send them to a ServiceNow table. This guide assumes multi-tenant environment is used. For local testing, refer to Running Connect in standalone mode.
Create a table called
test_tablein ServiceNow.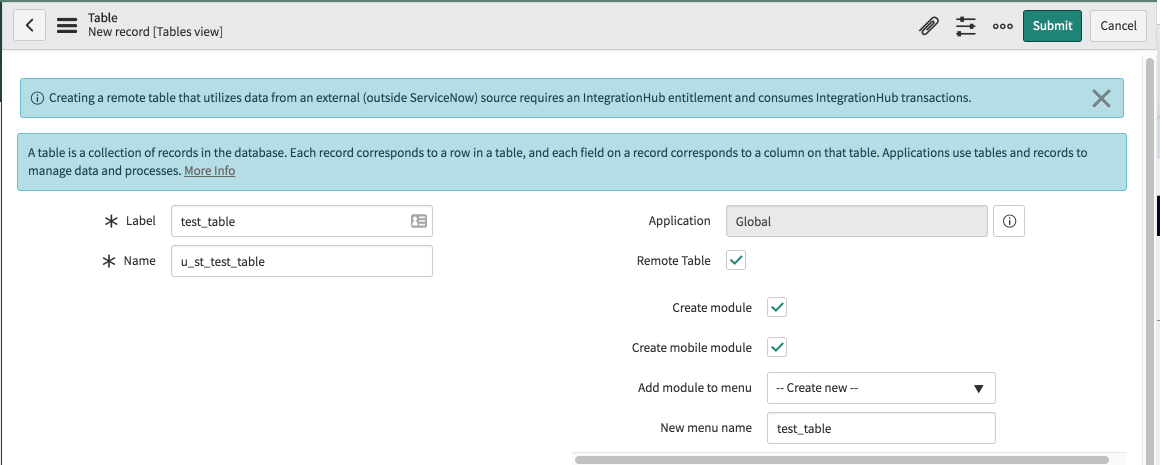
Define three columns in the table.

Install the connector through the Confluent Hub Client.
# run from your confluent platform installation directory
confluent-hub install confluentinc/kafka-connect-servicenow:latest
Start the Confluent Platform.
Tip
The command syntax for the Confluent CLI development commands changed in 5.3.0. These commands have been moved to
confluent local. For example, the syntax forconfluent startis nowconfluent local services start. For more information, see confluent local.confluent local start
Check the status of all services.
confluent local services status
Create a
servicenow-sink.jsonfile with the following contents:Note
All user-defined tables in ServiceNow start with
u_,// substitute <> with your config { "name": "ServiceNowSinkConnector", "config": { "connector.class": "io.confluent.connect.servicenow.ServiceNowSinkConnector", "topics": "test_table", "servicenow.url": "https://<endpoint>.service-now.com/", "tasks.max": "1", "servicenow.table": "u_test_table", "servicenow.user": "<username>", "servicenow.password": "<password>", "key.converter": "io.confluent.connect.avro.AvroConverter", "key.converter.schema.registry.url": "http://localhost:8081", "value.converter": "io.confluent.connect.avro.AvroConverter", "value.converter.schema.registry.url": "http://localhost:8081", "confluent.topic.bootstrap.servers": "localhost:9092", "confluent.license": "<license>", // leave it empty for evaluation license "confluent.topic.replication.factor": "1", "reporter.bootstrap.servers": "localhost:9092", "reporter.error.topic.name": "test-error", "reporter.error.topic.replication.factor": 1, "reporter.error.topic.key.format": "string", "reporter.error.topic.value.format": "string", "reporter.result.topic.name": "test-result", "reporter.result.topic.key.format": "string", "reporter.result.topic.value.format": "string", "reporter.result.topic.replication.factor": 1 } }
Note
For details about using this connector with Kafka Connect Reporter, see Connect Reporter.
Load the ServiceNow Sink connector by posting configuration to Connect REST server.
Caution
You must include a double dash (
--) between the topic name and your flag. For more information, see this post.confluent local load ServiceNowSinkConnector --config servicenow-sink.json
Confirm that the connector is in a
RUNNINGstate.confluent local status ServiceNowSinkConnector
To produce some records into the
test_tabletopic, first start a Kafka producer.Note
All user-defined columns in ServiceNow start with
u_kafka-avro-console-producer \ --broker-list localhost:9092 --topic test_table \ --property value.schema='{"type":"record","name":"myrecord","fields":[{"name":"u_name","type":"string"}, {"name":"u_price", "type": "float"}, {"name":"u_quantity", "type": "int"}]}'
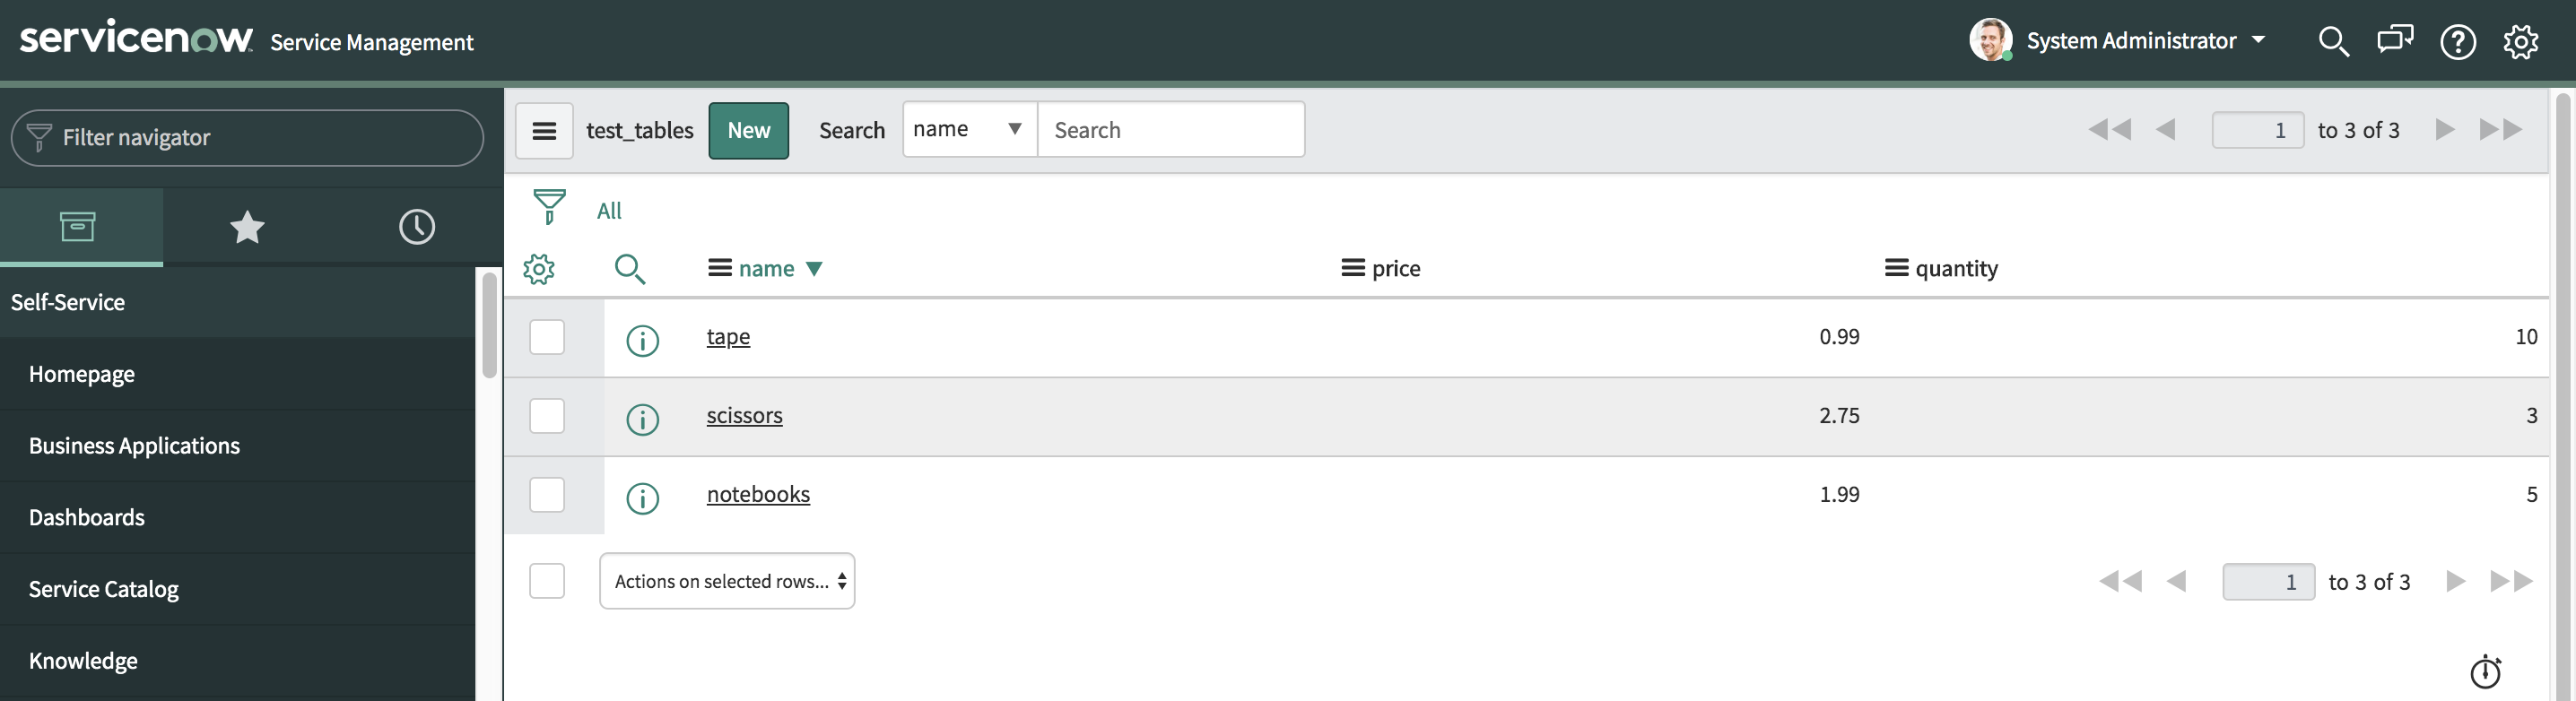
The console producer is now waiting for input, so you can go ahead and insert some records into the topic.
{"u_name": "scissors", "u_price": 2.75, "u_quantity": 3}
{"u_name": "tape", "u_price": 0.99, "u_quantity": 10}
{"u_name": "notebooks", "u_price": 1.99, "u_quantity": 5}
Confirm the messages were delivered to the ServiceNow table by using the ServiceNow user interface.
Write JSON message values into ServiceNow
The example settings file is shown below.
Create a
servicenow-sink-json.jsonfile with the following contents.Note
All user-defined tables in ServiceNow start with
u_// substitute <> with your config { "name": "ServiceNowSinkJSONConnector", "config": { "connector.class": "io.confluent.connect.servicenow.ServiceNowSinkConnector", "topics": "test_table_json", "servicenow.url": "https://<endpoint>.service-now.com/", "tasks.max": "1", "servicenow.table": "u_test_table", "servicenow.user": "<username>", "servicenow.password": "<password>", "key.converter":"org.apache.kafka.connect.storage.StringConverter", "value.converter":"org.apache.kafka.connect.json.JsonConverter", "value.converter.schemas.enable": "true", "confluent.topic.bootstrap.servers": "localhost:9092", "confluent.license": "<license>", // leave it empty for evaluation license "confluent.topic.replication.factor": "1", "reporter.bootstrap.servers": "localhost:9092", "reporter.error.topic.name": "test-error", "reporter.error.topic.replication.factor": 1, "reporter.error.topic.key.format": "string", "reporter.error.topic.value.format": "string", "reporter.result.topic.name": "test-result", "reporter.result.topic.key.format": "string", "reporter.result.topic.value.format": "string", "reporter.result.topic.replication.factor": 1 } }
Note
For details about using this connector with Kafka Connect Reporter, see Connect Reporter.
Load the ServiceNow Sink connector by posting configuration to Connect REST server.
Caution
You must include a double dash (
--) between the topic name and your flag. For more information, see this post.confluent local load ServiceNowSinkJSONConnector --config servicenow-sink-json.json
Confirm that the connector is in a
RUNNINGstate.confluent local status ServiceNowSinkJSONConnector
To produce some records into the
test_table_jsontopic, first start a Kafka producer.Note
All user-defined columns in ServiceNow start with
u_kafka-console-producer \ --broker-list localhost:9092 \ --topic test_table_json
The console producer is now waiting for input, so you can go ahead and insert some records into the topic.
{"schema": {"type": "struct", "fields": [{"type": "string", "optional": false, "field": "u_name"},{"type": "float", "optional": false, "field": "u_price"}, {"type": "int64","optional":false,"field": "u_quantity"}],"optional": false,"name": "products"}, "payload": {"u_name": "laptop", "u_price": 999.50, "u_quantity": 3}}
{"schema": {"type": "struct", "fields": [{"type": "string", "optional": false, "field": "u_name"},{"type": "float", "optional": false, "field": "u_price"}, {"type": "int64","optional":false,"field": "u_quantity"}],"optional": false,"name": "products"}, "payload": {"u_name": "pencil", "u_price": 0.99, "u_quantity": 10}}
{"schema": {"type": "struct", "fields": [{"type": "string", "optional": false, "field": "u_name"},{"type": "float", "optional": false, "field": "u_price"}, {"type": "int64","optional":false,"field": "u_quantity"}],"optional": false,"name": "products"}, "payload": {"u_name": "pen", "u_price": 1.99, "u_quantity": 5}}