Azure Blob Storage Sink Connector for Confluent Cloud with Azure Egress Access Point
This topic presents the steps for configuring the Azure Blob Storage Sink connector in Confluent Cloud with Azure Private Link and Egress Access Point.
Prerequisites
The following is a list of prerequisites for configuring the Azure Blob Storage Sink connector with an Egress Access Point:
- A Confluent Cloud Dedicated cluster was set up and is running within an Azure Private Link network.
- A Storage Container was created to sink data into and is running within the same region and cloud as the Confluent Cloud cluster.
- A source topic was created to sink data into Azure Blob Storage.
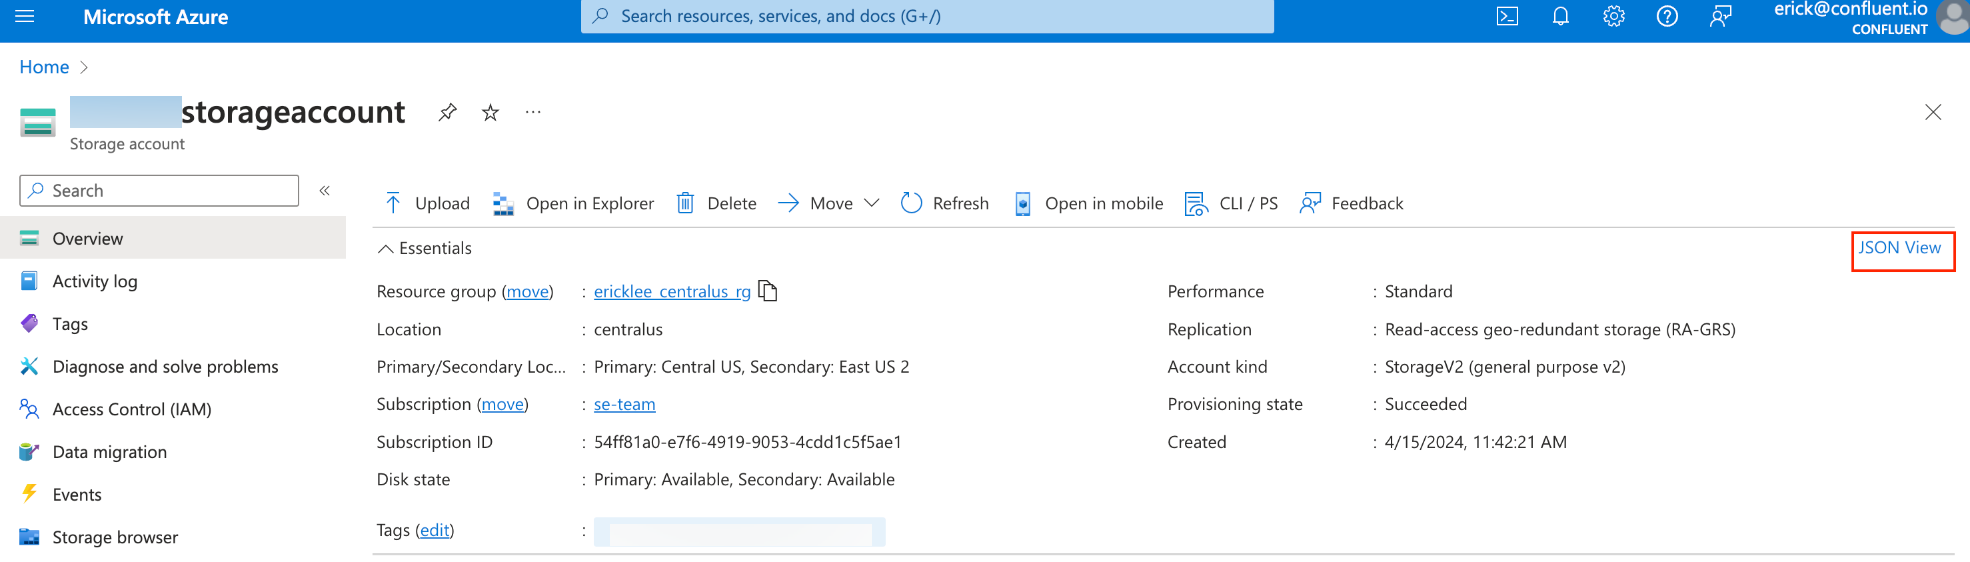
Step 1. Retrieve your Azure Resource ID
In Azure, go to your storage accounts overview section, and click JSON View.

Step 2. Create an Egress Access Point
In the Confluent Cloud Console, in the Network management tab, click the associated Private Link network.
In the Egress access points tab, click Create access point.
Specify the following:
- Name: A name for this access point.
- Azure Resource ID: Azure Resource ID that you retrieved in the first step.
- Sub-resource name: Select blob.
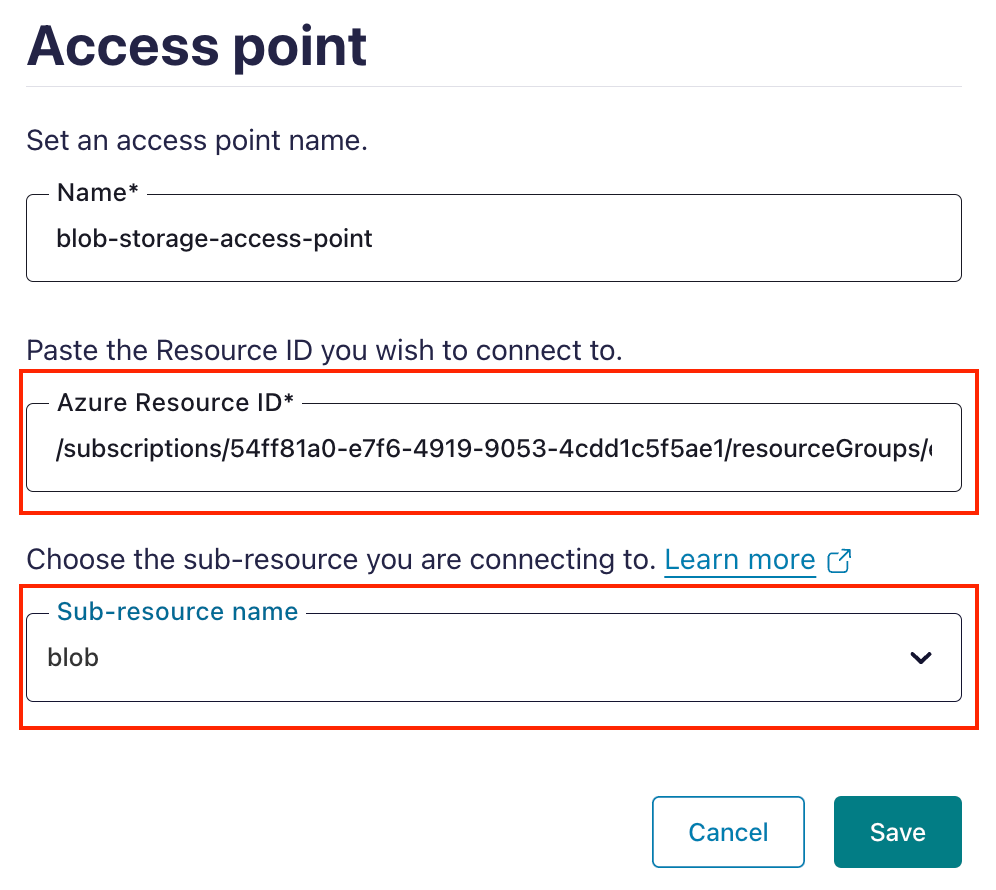
Click Save, and wait for the status to become “Pending Accept”.
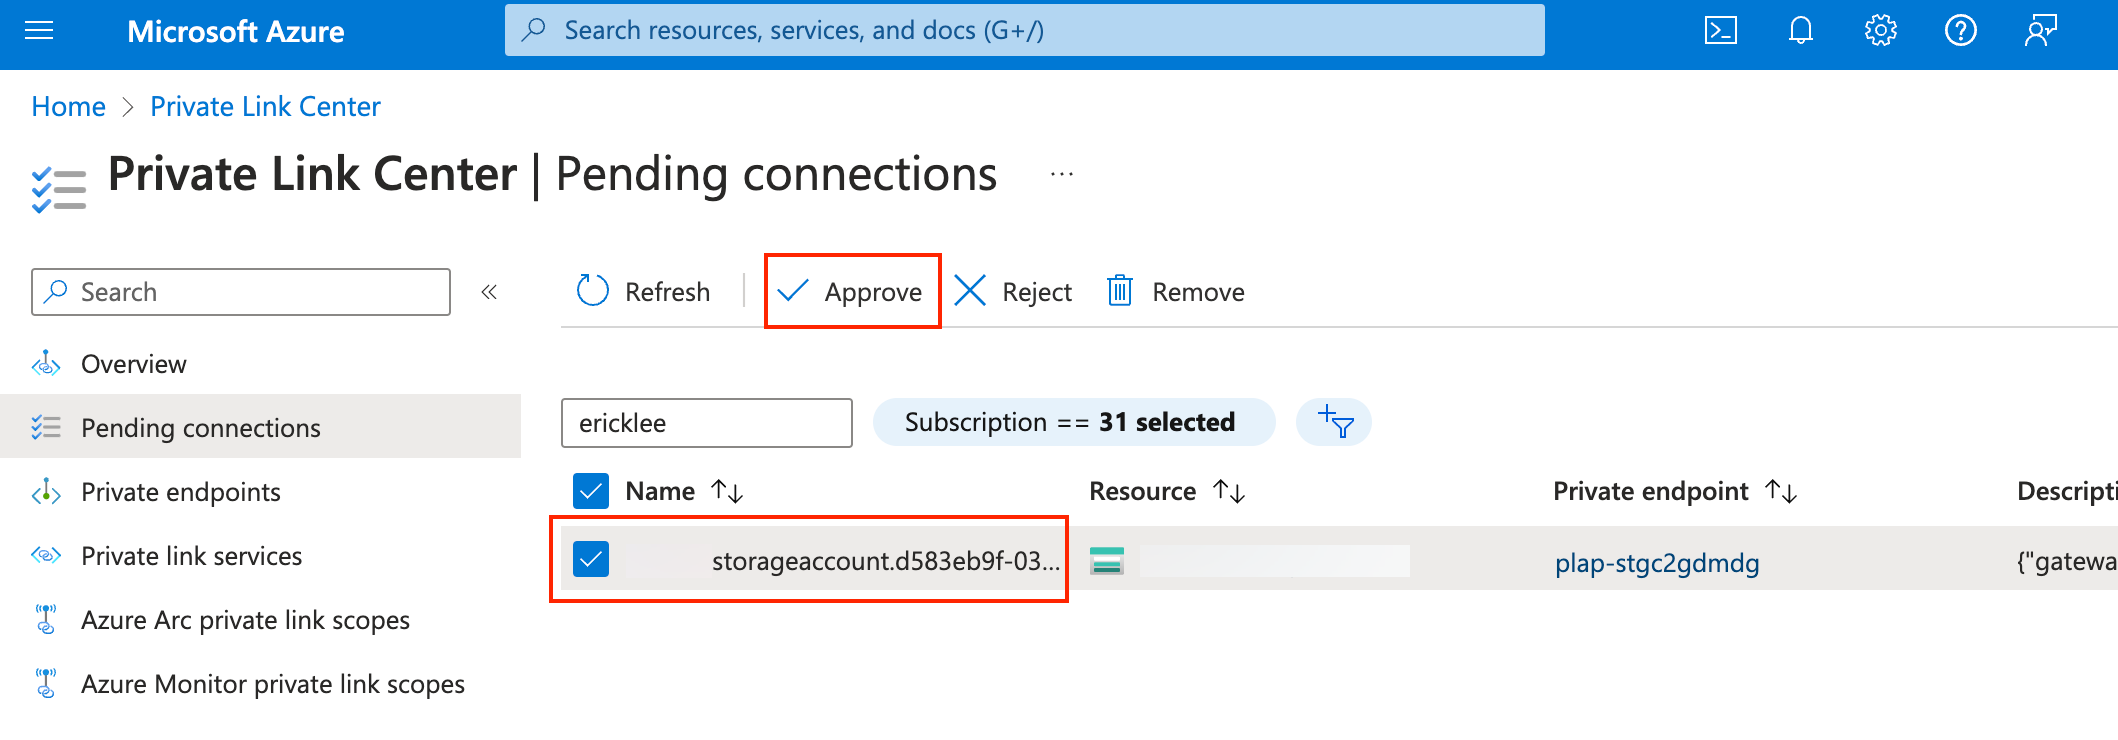
Step 3. Accept the connection request
In the Azure portal, in the Pending Connections page, approve the associated connection request.
Step 4. Create a DNS record
In the Confluent Cloud Console, when the status of the Egress Access Point becomes “Ready”, click Create record.
In Domain, specify the domain name record in the format:
<storage-account-name>.blob.core.windows.net
Click Save, and wait until the status of the DNS record becomes “Ready”.
Step 5. Create the Azure Blob Storage Sink connector
- In the Confluent Cloud Console, go to your associated Dedicated cluster. In Connectors, click Azure Blob Storage Sink.
- Select the source topic, and click Continue.
- Specify the Kafka authentication mechanism, and click Continue.
- Specify the authentication details for Azure Storage Account.
- Specify configuration details for the connector.
- Specify sizing (number of tasks) for the connector.
- Review and launch the connector.
When the connector is successfully launched, the connector status becomes “Running”.