MongoDB Atlas Sink Connector for Confluent Cloud with Azure Egress Access Point
This topic presents the steps for configuring the MongoDB Atlas Sink connector in Confluent Cloud with Azure Private Link and Egress Access Point.
Prerequisites
The following is a list of prerequisites for configuring the MongoDB Altas connector with an Egress Access Point:
- A Confluent Cloud Dedicated cluster was set up and is running within an Azure Private Link network.
- A Dedicated MongoDB Atlas database was created to sink data into and is running within the same region and cloud as the Confluent Cloud cluster.
- A source topic was created to sink data into MongoDB Atlas.
Step 1. Create a MongoDB Private Endpoint
In MongoDB, create a Private Endpoint for for your Dedicated MongoDB Atlas database:
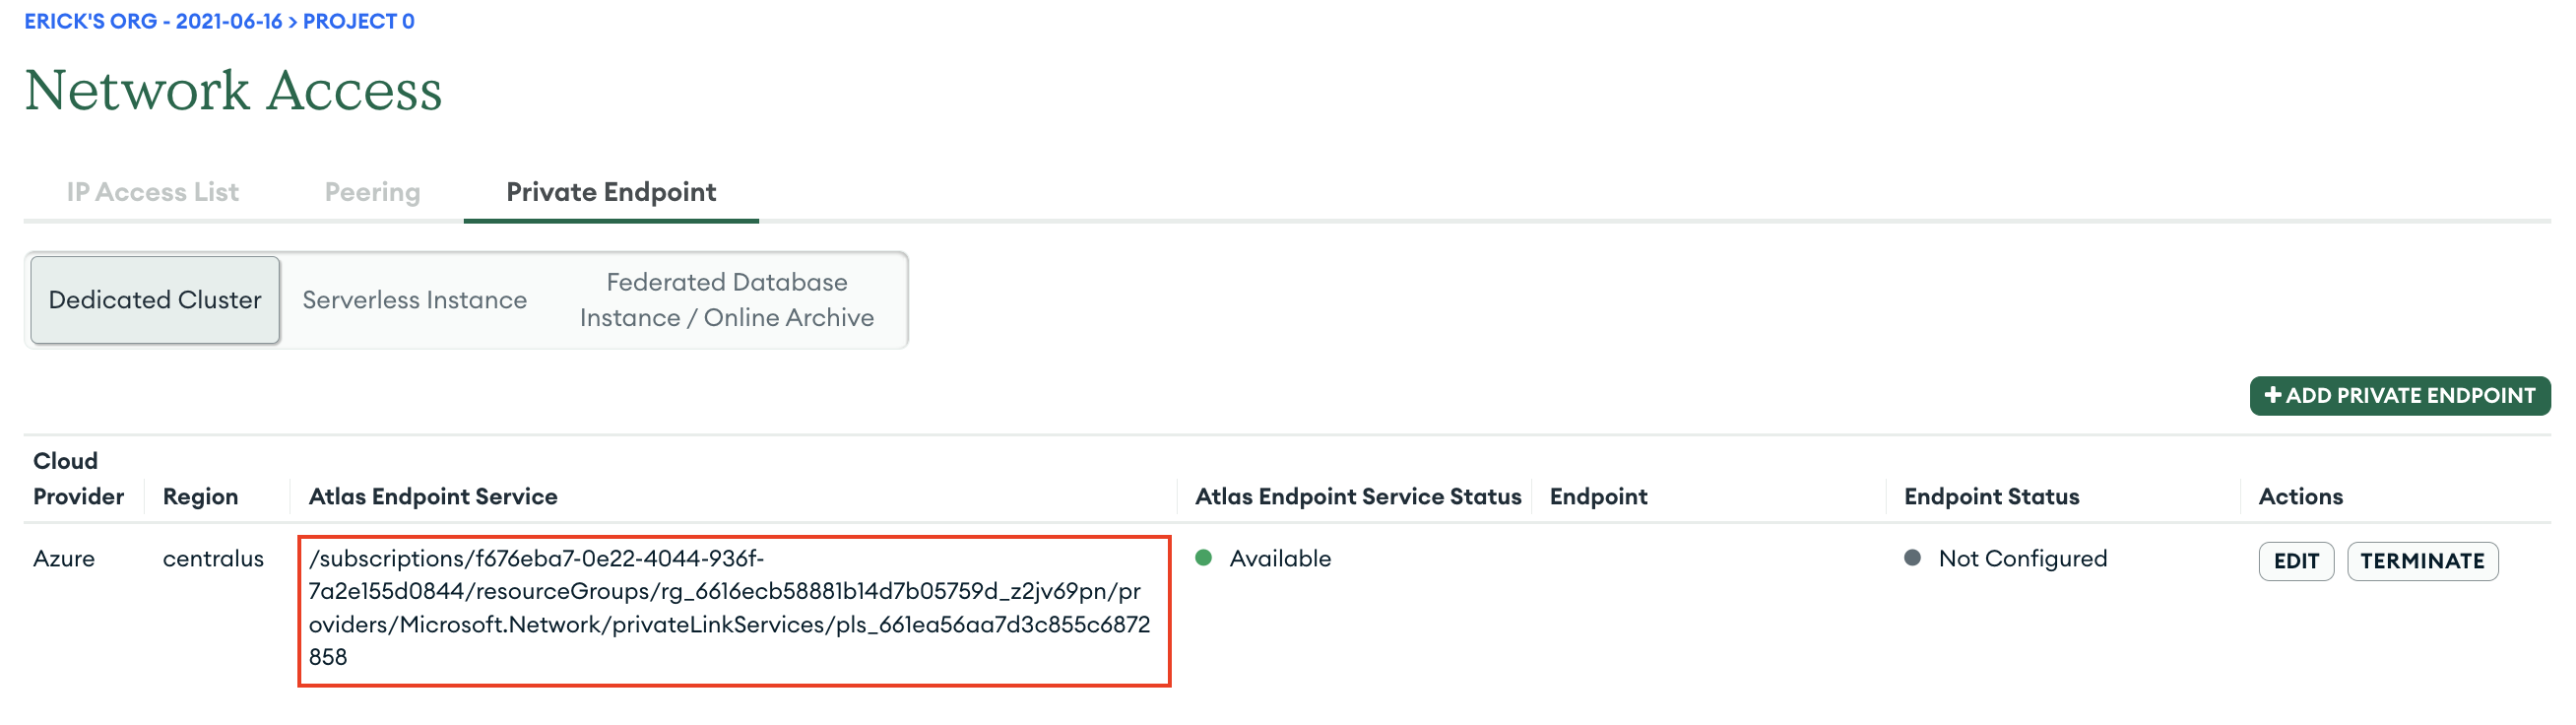
Go to Network Access → Private Endpoint → Dedicated Cluster.
Click Add Private Endpoint.
Select the applicable cloud provider and region of your Dedicated MongoDB Atlas database.
Make a note of the Atlas Endpoint Service value which is required for creating a Confluent Cloud Egress Access Point.
You can close the workflow for now. You will edit the rest of the configuration after you create a VPC endpoint ID in Confluent Cloud.
Step 2. Create an Egress Access Point
In the Confluent Cloud Console, in the Network management tab, click the associated Private Link network.
In the Egress access points tab, click Create access point.
Specify the following:
- Name: Specify a name for this access point.
- Azure Resource ID: Specify the MongoDB Atlas Service value from the first step above.
- Sub-resource name: Leave it blank as it is only applicable for the 1st party Azure services.
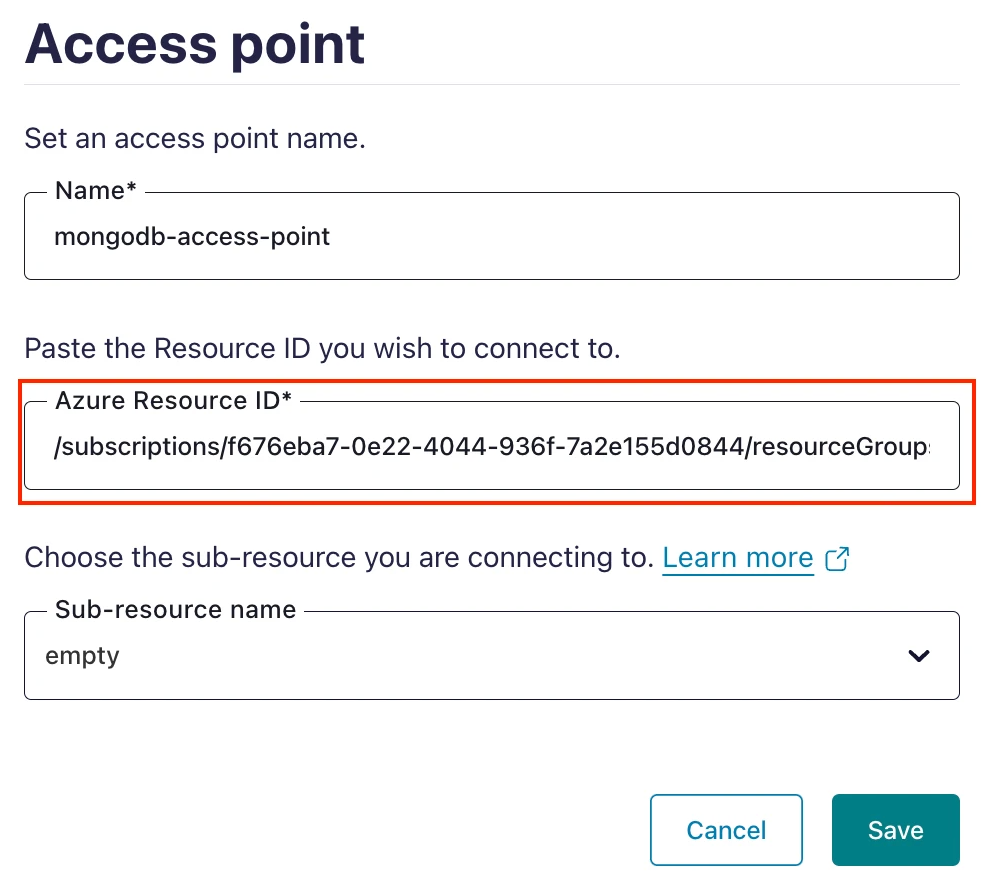
Click Save.
Once the status of the Egress Access Point changes from “Provisioning” to “Pending”, make a note of the Resource ID and IP Address values. The values are required to finish setting up a private endpoint for MongoDB Atlas.

Step 3. Configure the MongoDB private endpoint
In the MongoDB console, click Edit for the previously created MongoDB private endpoint.
Click Next.
Specify the Endpoint Resource ID and Private Endpoint IP Address associated with your Confluent Cloud Egress Access point. Click Create.

Once Endpoint Status changes to “Available”, you are ready to create the Confluent Cloud MongoDB Sink connector.
Step 4. Create the MongoDB Atlas Sink connector
In the Confluent Cloud Console, go to your associated Dedicated cluster. In Connectors, click MongoDB Atlas Sink.
Select the source topic, and click Continue.
Specify the Kafka authentication mechanism, and click Continue.
Specify the authentication details for MongoDB.
In the MongoDB Atlas console, click Database under Deployment.
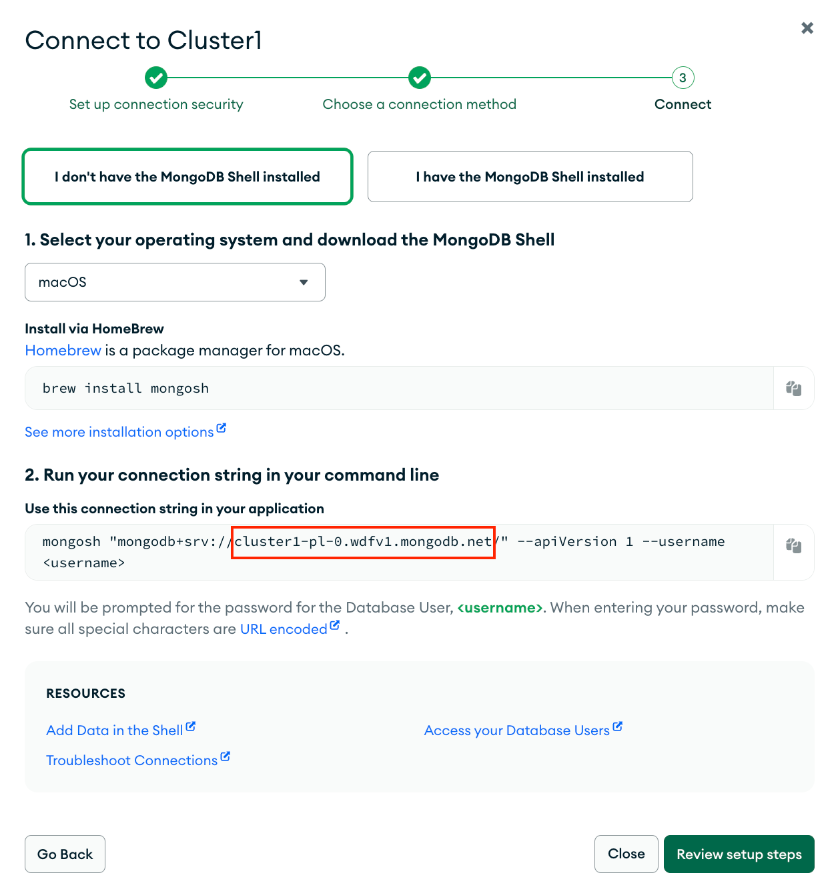
Click Connect for the associated database → Private Endpoint → Shell.
Get the endpoint as shown.
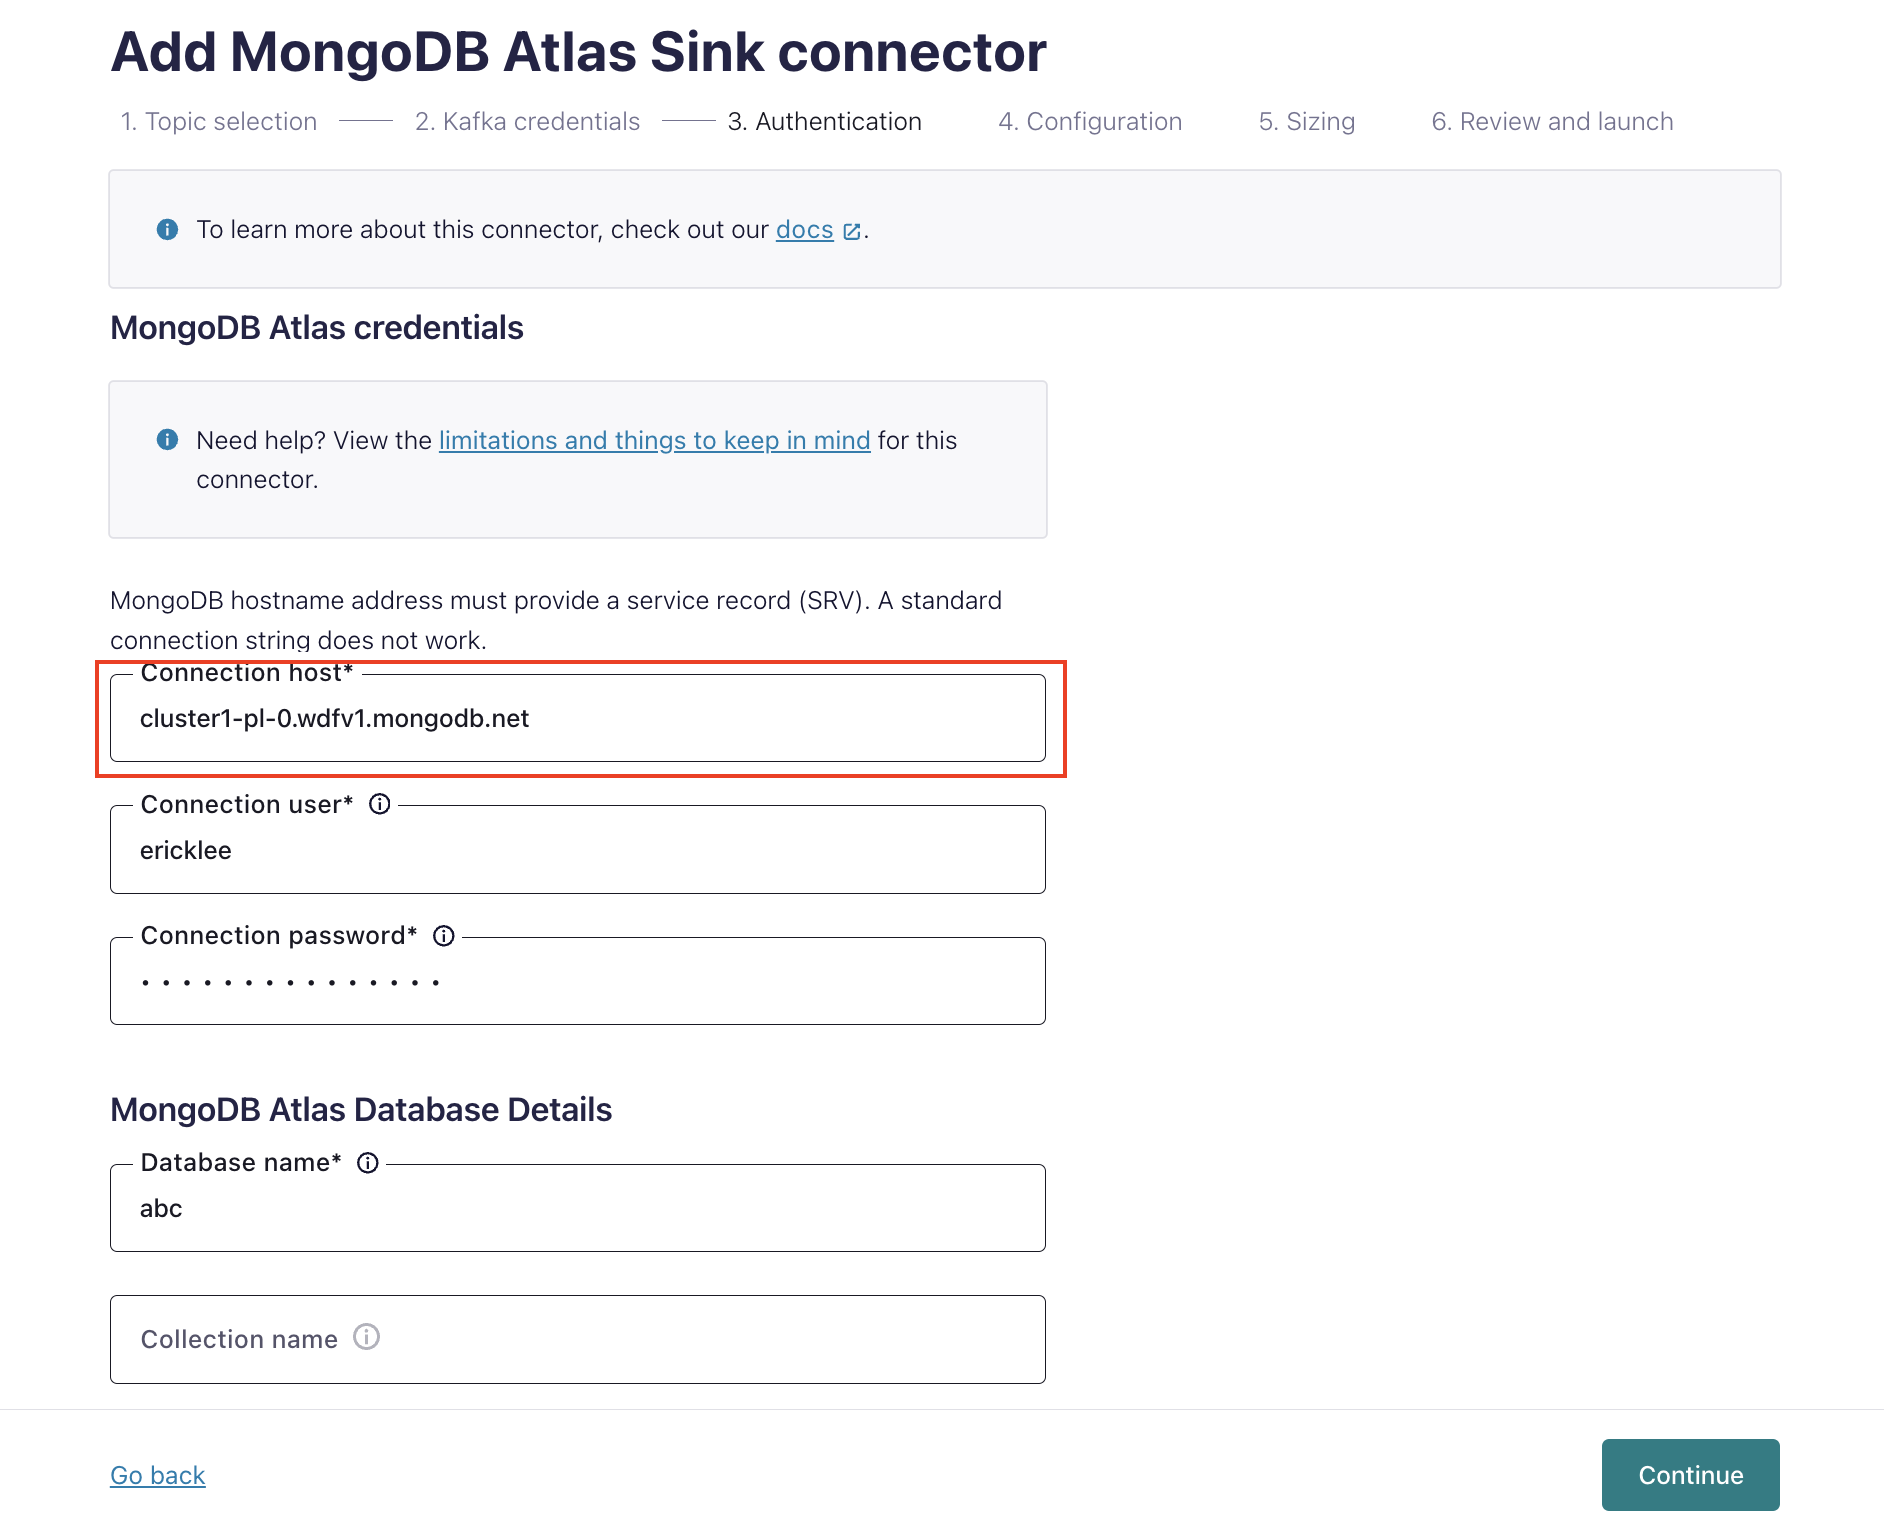
In Confluent Cloud, specify the MongoDB credentials during the connector creation steps.
In the Connection host field, specify the endpoint you retrieved in the previous step.
Specify configuration details for the connector.
Specify sizing (number of tasks) for the connector.
Review and launch the connector.
When the connector is successfully launched, the connector status becomes “Running”.