Important
You are viewing documentation for an older version of Confluent Platform. For the latest, click here.
Kafka Connect
The Control Center interface allows you to configure Kafka Connect. Control Center uses the Kafka Connect API to get information on running connectors; if no connectors are running you may see an empty list when you first open the application.
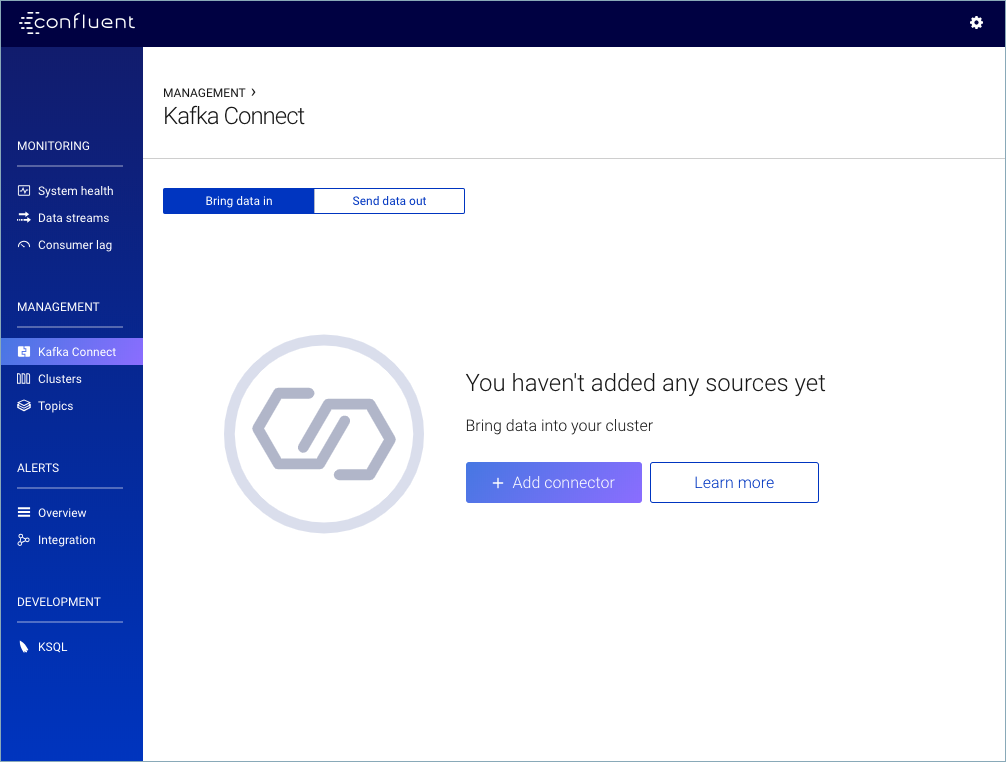
Initial Kafka Connect configuration screen
Creating new Connectors
To create a new source, click the Bring data in button. Likewise, to create a new sink, click the Send data out button while on the Sinks tab.
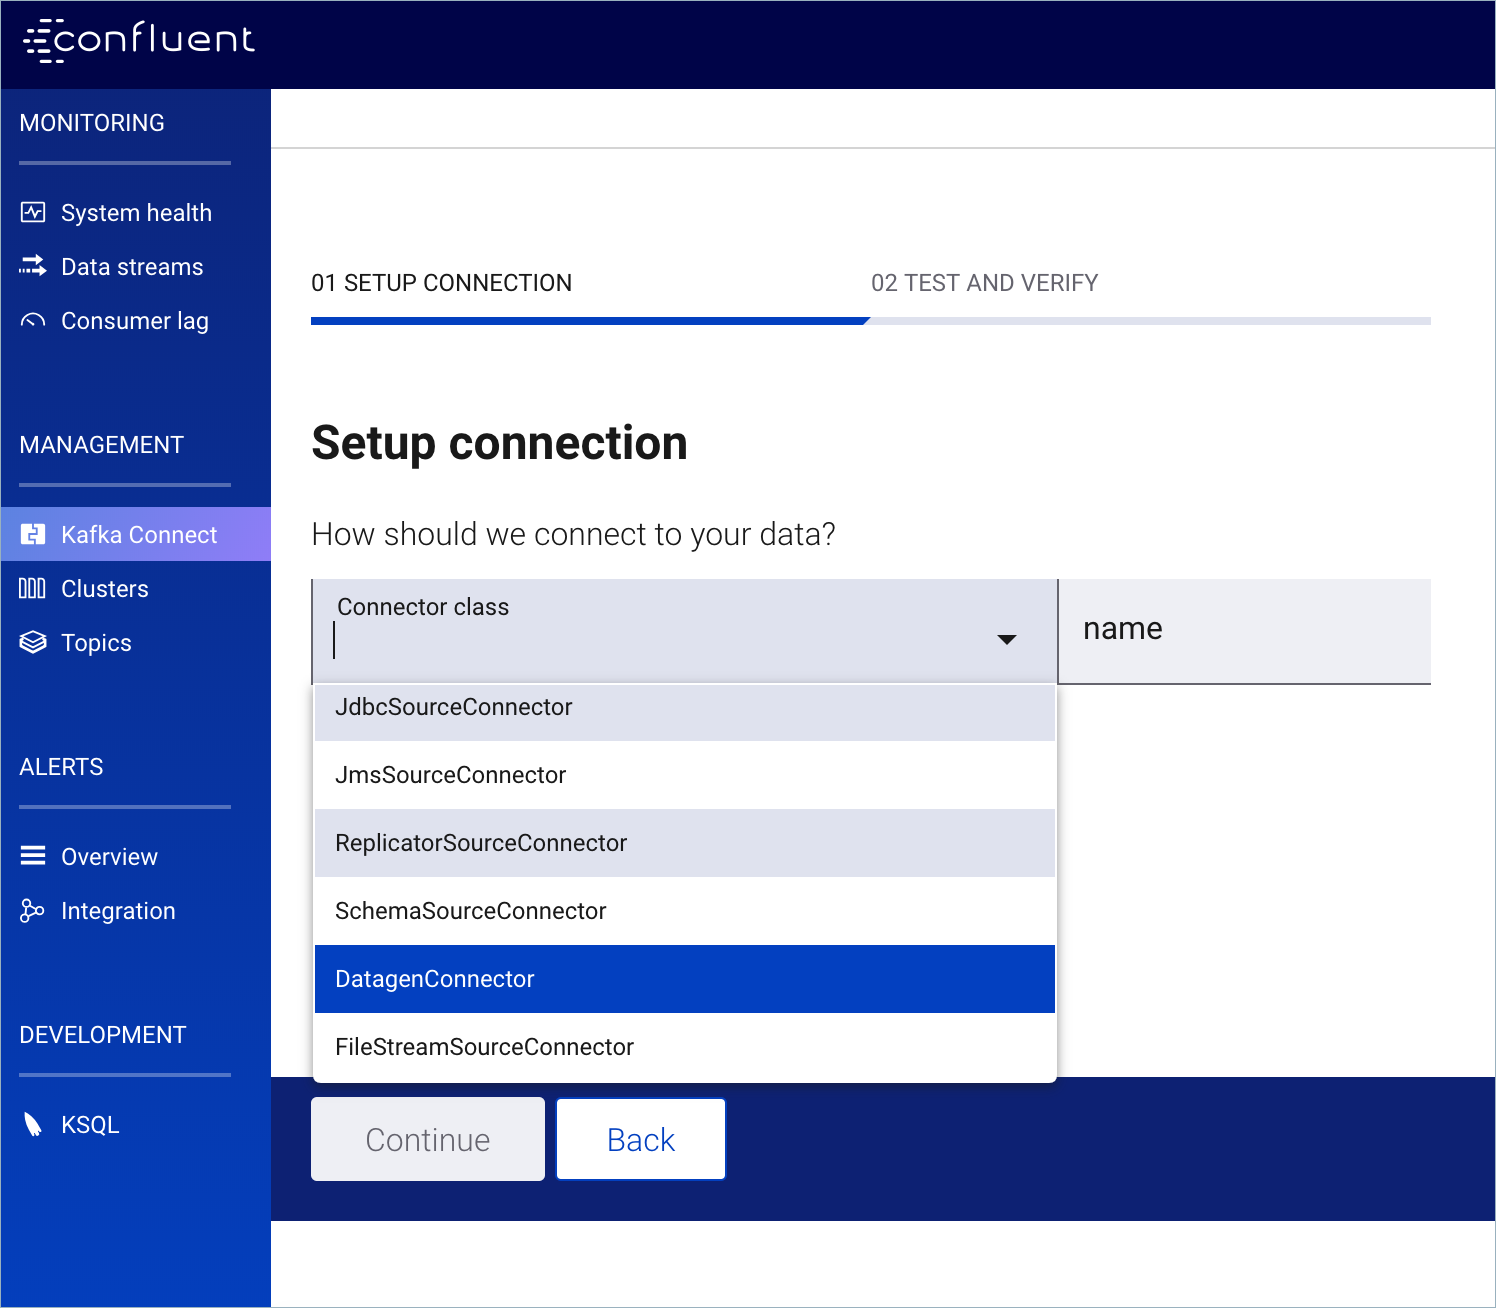
Creating a new file source
When you click the Add connector button, you will see a form with settings for the connector. All sources the following three settings to be specified:
- Connection Class
- This is the Java class name for the connector. In this example, we picked the FileStreamSourceConnector that ships with Apache Kafka®.
- Connection Name
- This is a unique name for the connector. This is shown in the list of active sources and sinks. We recommend entering an intuitive, easy to understand name.
- Tasks max
- This controls the number of connector tasks that are created.
Most sources allow you to specify other settings. Typically these include information needed to connect to external systems, information about what data to include or exclude, and instructions on how to map external data to topics. In this example, you are required to specify a file name and a topic. Most sources require you to specify a topic (or describe a set of topics) to which messages are written.
When you have entered all the required parameters and click “Continue,” you will be shown a summary of the settings that you entered. (This is the information that will be sent to the Connect REST API.) If everything looks OK, you can click Launch.
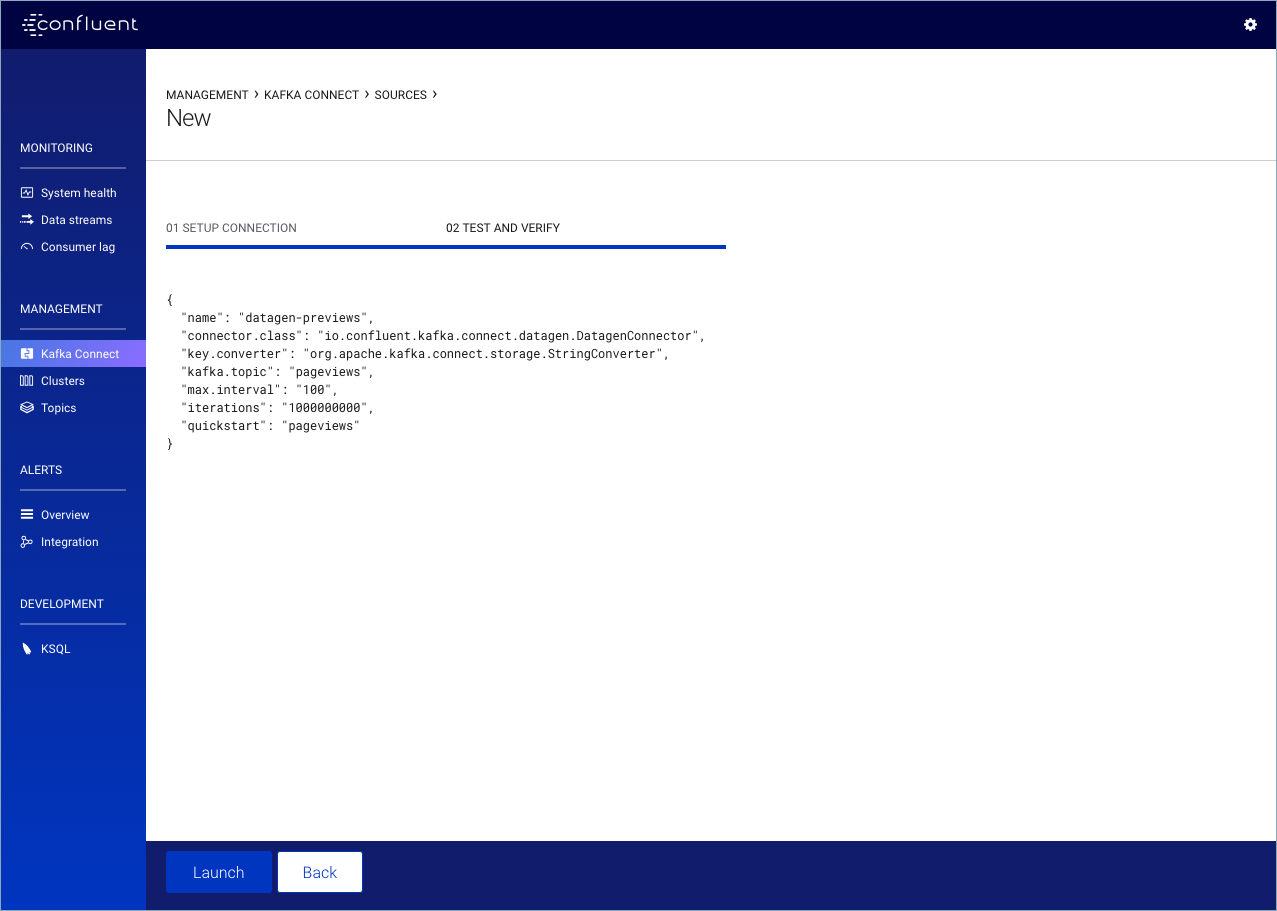
Creating a new file source
After you have saved the settings, the new source will appear in the list of sources. A colored indicator on the left will show the status of the source: blue indicates that the source is working, red indicates an error. On the right hand side of the line, there is a wrench icon next to the words “Edit Source.” You can click this icon to edit or remove an existing source.
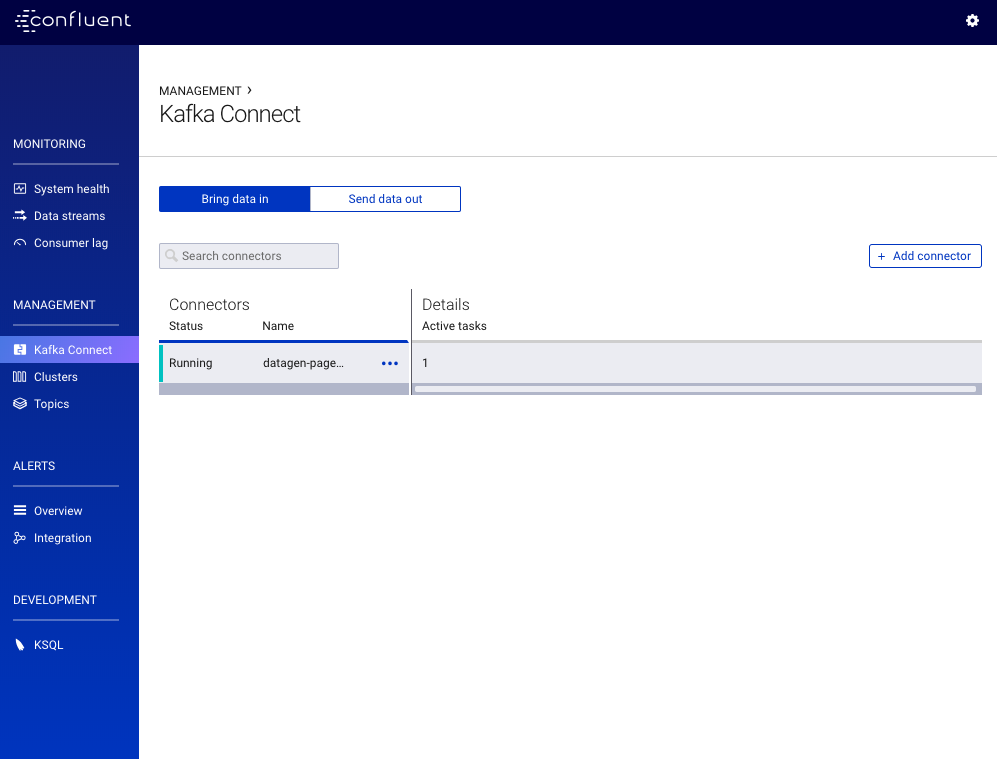
List of sources after creating a new source
Creating a sink follows a similar process. When you create a sink, you will first be prompted to enter a set of topics that you would like to feed to the sink. After you have entered the topics, you will see additional fields that prompt you for more information.
Similar to sources, you are required to select a connection class, a connection name, and set the maximum number of tasks. In most cases, you will also be asked to configure other settings to connect to external systems, filter data, or otherwise control the behavior of the sink. Confirmation works the same way with sinks as it does with sources. Additionally, the list of sinks behaves the same way: a colored indicator shows status, and you click the “Edit Sink” link to edit the connector.
Editing Sources and Sinks
To edit a source or sink, click the “Edit Source” or “Edit Sink” button shown in the list. You can edit almost all parameters for a source or sink except for the name and connector class.