モジュール 2: Confluent Cloud へのハイブリッドデプロイのチュートリアル
Confluent Cloud へのハイブリッドデプロイ
In a hybrid Apache Kafka® deployment scenario, you can have both an on-prem Confluent Platform deployment as well as a Confluent Cloud deployment. In this module, you will use Cluster Linking and Schema Linking to send data and schemas to Confluent Cloud, and monitor both deployments with Confluent Health+ and the Confluent Cloud Metrics API.

Before you begin this module, make sure the cp-demo start.sh script successfully completed and Confluent Platform is already running (see the on-prem module).
実行のコスト
注意
Confluent Cloud のすべてのサンプルでは、課金される可能性のある実際の Confluent Cloud リソースを使用しています。サンプルで、新しい Confluent Cloud 環境、Kafka クラスター、トピック、ACL、サービスアカウントに加えて、コネクターや ksqlDB アプリケーションのように時間で課金されるリソースを作成する場合があります。想定外の課金を避けるために、慎重に リソースのコストを確認 してから開始してください。Confluent Cloud のサンプルの実行を終了したら、サービスへの時間単位の課金を回避するためにすべての Confluent Cloud リソースを破棄し、リソースが削除されたことを確認します。
Confluent Cloud および CLI のセットアップ
https://confluent.cloud で Confluent Cloud アカウントを作成します。
Confluent Cloud アカウントのお支払い方法を設定し、オプションで Confluent Cloud UI の Billing and payment セクションでプロモーションコード
CPDEMO50を入力すると、$50 相当を無料で使用できます。Go to https://confluent.cloud/environments and click "+ Add cloud environment". Name the environment cp-demo-env.
Inside the "cp-demo-env" environment, create a Dedicated Confluent Cloud cluster named cp-demo-cluster in the cloud provider and region of your choice with default configurations. Wait until your cluster is in a running state before proceeding.
注釈
Cluster Linking requires a dedicated cluster
Create a Schema Registry for the "cp-demo-env" environment in the same region as your cluster.
Set Up Confluent CLI and variables
Confluent CLI v2.3.1 以降をインストールします。
curl -sL --http1.1 https://cnfl.io/cli | sh -s -- latest \
&& alias confluent="$PWD/bin/confluent"
Verify the installation was successful.
confluent version
CLI を使用して、コマンド
confluent loginで、Confluent Cloud のユーザー名とパスワードを使用して Confluent Cloud にログインします。--save引数により、Confluent Cloud ユーザーログイン資格情報が保存されるか、ローカルのnetrcファイルに対してトークン(SSO の場合)が更新されます。confluent login --save
Use the demo Confluent Cloud environment.
CC_ENV=$(confluent environment list -o json \
         | jq -r '.[] | select(.name | contains("cp-demo")) | .id') \
&& echo "Your Confluent Cloud environment: $CC_ENV" \
&& confluent environment use $CC_ENV
Get the Confluent Cloud cluster ID and use the cluster.
CCLOUD_CLUSTER_ID=$(confluent kafka cluster list -o json \
                  | jq -r '.[] | select(.name | contains("cp-demo")) | .id') \
&& echo "Your Confluent Cloud cluster ID: $CCLOUD_CLUSTER_ID" \
&& confluent kafka cluster use $CCLOUD_CLUSTER_ID
Get the bootstrap endpoint for the Confluent Cloud cluster.
CC_BOOTSTRAP_ENDPOINT=$(confluent kafka cluster describe -o json | jq -r .endpoint) \
&& echo "Your Cluster's endpoint: $CC_BOOTSTRAP_ENDPOINT"
Create a Confluent Cloud service account for CP Demo and get its ID.
confluent iam service-account create cp-demo-sa --description "service account for cp-demo" \
&& SERVICE_ACCOUNT_ID=$(confluent iam service-account list -o json \
                     | jq -r '.[] | select(.name | contains("cp-demo")) | .id') \
&& echo "Your cp-demo service account ID: $SERVICE_ACCOUNT_ID"
Get the cluster ID and endpoint URL for your Schema Registry
CC_SR_CLUSTER_ID=$(confluent sr cluster describe -o json | jq -r .cluster_id) \
&& CC_SR_ENDPOINT=$(confluent sr cluster describe -o json | jq -r .endpoint_url) \
&& echo "Schema Registry Cluster ID: $CC_SR_CLUSTER_ID" \
&& echo "Schema Registry Endpoint: $CC_SR_ENDPOINT"
ワイルドカードを使用するサービスアカウント用 ACL を作成する。
confluent api-key create \
   --service-account $SERVICE_ACCOUNT_ID \
   --resource $CC_SR_CLUSTER_ID \
   --description "SR key for cp-demo schema link"
以下のように出力されることを確認します。
It may take a couple of minutes for the API key to be ready.
Save the API key and secret. The secret is not retrievable later.
+---------+------------------------------------------------------------------+
| API Key | SZBKJLD67XK5NZNZ                                                 |
| Secret  | NTqs/A3Mt0Ohkk4fkaIsC0oLQ5Q/F0lLowYo/UrsTrEAM5ozxY7fjqxDdVwMJz99 |
+---------+------------------------------------------------------------------+
前の手順で返されたこれらの認証情報を参照するようにパラメーターを設定します。
SR_API_KEY=SZBKJLD67XK5NZNZ
SR_API_SECRET=NTqs/A3Mt0Ohkk4fkaIsC0oLQ5Q/F0lLowYo/UrsTrEAM5ozxY7fjqxDdVwMJz99
ワイルドカードを使用するサービスアカウント用 ACL を作成する。
confluent api-key create \
   --service-account $SERVICE_ACCOUNT_ID \
   --resource $CCLOUD_CLUSTER_ID \
   --description "Kafka key for cp-demo cluster link"
以下のように出力されることを確認します。
It may take a couple of minutes for the API key to be ready.
Save the API key and secret. The secret is not retrievable later.
+---------+------------------------------------------------------------------+
| API Key | SZBKLMG61XK9NZAB                                                 |
| Secret  | QTpi/A3Mt0Ohkk4fkaIsGR3ATQ5Q/F0lLowYo/UrsTr3AMsozxY7fjqxDdVwMJz02 |
+---------+------------------------------------------------------------------+
前の手順で返されたこれらの認証情報を参照するようにパラメーターを設定します。
CCLOUD_CLUSTER_API_KEY=SZBKLMG61XK9NZAB
CCLOUD_CLUSTER_API_SECRET=QTpi/A3Mt0Ohkk4fkaIsGR3ATQ5Q/F0lLowYo/UrsTr3AMsozxY7fjqxDdVwMJz02
We will also need the cluster ID for the on-prem Confluent Platform cluster.
CP_CLUSTER_ID=$(curl -s https://localhost:8091/v1/metadata/id \
               --tlsv1.2 --cacert ./scripts/security/snakeoil-ca-1.crt \
               | jq -r ".id") \
&& echo "Your on-prem Confluent Platform cluster ID: $CP_CLUSTER_ID"
注釈
For security purposes, you may be automatically logged out of the confluent CLI at some point. If this happens,
run the following command:
confluent login && \
confluent env use $CC_SR_CLUSTER_ID && \
confluent kafka cluster use $CCLOUD_CLUSTER_ID
Export Schemas to Confluent Cloud with Schema Linking
Confluent Schema Registry is critical for evolving schemas alongside your business needs and ensuring high data quality.
With Schema Linking
, you can easily export your schemas from your on-prem Schema Registry to Confluent Cloud.
In this section, you will export the schema subjects wikipedia.parsed-value and wikipedia.parsed.count-by-domain-value
from Confluent Platform to Confluent Cloud with schema linking.
These schema subjects will be exported to a new schema context
called "cp-demo", so their qualified subject names in Confluent Cloud will be :.cp-demo:wikipedia.parsed-value and :.cp-demo:wikipedia.parsed.count-by-domain-value.
From here, we will switch back and forth between using Confluent Cloud and Confluent Platform. We can streamline this "context switching" with the
confluent contextCLI subcommand. Here let's create a context called "ccloud" from the current context.confluent context update --name ccloud
Next, log into Confluent Platform and create a context called "cp". To create a cluster link, the CLI user must have
ClusterAdminprivileges. For simplicity, sign in as a super user using the username superUser and password superUserconfluent login --save --url https://localhost:8091 \ --ca-cert-path scripts/security/snakeoil-ca-1.crtand create a CLI context called "cp".
confluent context update --name cp
Inspect the schema exporter configuration file.
# Copy the contents of this file to schema-link.properties and
# add your Confluent Cloud Schema Registry credentials

# *****DO NOT***** add schema-link.properties to version control
# with your Confluent Cloud credentials

schema.registry.url=<destination sr url>
basic.auth.credentials.source=USER_INFO
basic.auth.user.info=<destination api key>:<destination api secret>
Run the following command copy the contents of the configuration file to a new file called
schema-link.propertesthat includes your Schema Registry credentials.sed -e "s|<destination sr url>|${CC_SR_ENDPOINT}|g" \ -e "s|<destination api key>|${SR_API_KEY}|g" \ -e "s|<destination api secret>|${SR_API_SECRET}|g" \ scripts/ccloud/schema-link-example.properties > scripts/ccloud/schema-link.properties
Create a schema exporter called "cp-cc-schema-exporter" for the on-prem Schema Registry.
confluent schema-registry exporter create cp-cc-schema-exporter \
   --subjects "wikipedia.parsed*" \
   --context-name cp-demo \
   --context-type CUSTOM \
   --sr-endpoint https://localhost:8085 \
   --ca-location scripts/security/snakeoil-ca-1.crt \
   --config-file scripts/ccloud/schema-link.properties
Notice we can use a wildcard
*to export multiple subjects.注釈
Whether using the REST API or the CLI, the user making the request needs permission to create the schema exporter and to read the schema subjects.
For educational purposes, here is an equivalent command that uses
curlon Confuent Server's embedded REST API with theschemaregistryUserprincipal:curl -X POST -H "Content-Type: application/json" \ -d @<(cat <<-EOF { "name": "cp-cc-schema-exporter", "contextType": "CUSTOM", "context": "cp-demo", "subjects": ["wikipedia.parsed*"], "config": { "schema.registry.url": "${CC_SR_ENDPOINT}", "basic.auth.credentials.source": "USER_INFO", "basic.auth.user.info": "${SR_API_KEY}:${SR_API_SECRET}" } } EOF ) \ --user schemaregistryUser:schemaregistryUser \ --cacert scripts/security/snakeoil-ca-1.crt \ https://localhost:8085/exporters
Verify the schema exporter is running.
confluent schema-registry exporter get-status cp-cc-schema-exporter \
   --sr-endpoint https://localhost:8085 \
   --ca-location scripts/security/snakeoil-ca-1.crt
Switch back to the
ccloudCLI context (not to be confused with Schema Registry context!).confluent context use ccloud
Verify that the schema subjects are being exported to Confluent Cloud.
confluent sr subject list \
   --api-key $SR_API_KEY --api-secret $SR_API_SECRET \
   --prefix ":.cp-demo:"
以下のように出力されることを確認します。
                           Subject
----------------------------------------------------
:.cp-demo:wikipedia.parsed-value
:.cp-demo:wikipedia.parsed.count-by-domain-value
Schema subjects have been successfully exported from Confluent Platform to Confluent Cloud with schema linking! As schemas evolve on-prem, those changes will automatically propagate to Confluent Cloud as long as the exporter is running.
Mirror Data to Confluent Cloud with Cluster Linking
In this section, you will create a source-initiated cluster link
to mirror the topic wikipedia.parsed from Confluent Platform to Confluent Cloud.
For security reasons, most on-prem datacenters don't
allow inbound connections,
so Confluent recommends source-initiated cluster linking to easily and securely
mirror Kafka topics from your on-prem cluster to Confluent Cloud.
Verify that you're still using the
ccloudCLI context.confluent context list
Give the cp-demo service account the
CloudClusterAdminrole in Confluent Cloud to authorize it to create cluster links and mirror topics in Confluent Cloud.confluent iam rbac role-binding create \ --principal User:$SERVICE_ACCOUNT_ID \ --role CloudClusterAdmin \ --cloud-cluster $CCLOUD_CLUSTER_ID --environment $CC_ENV
Verify that the role-binding was created. The output should show the role has been created.
confluent iam rbac role-binding list \
   --principal User:$SERVICE_ACCOUNT_ID \
   -o json | jq
Inspect the file
scripts/ccloud/cluster-link-ccloud.properties# This is the Confluent Cloud half of the cluster link # Confluent Cloud dedicated cluster is the destination link.mode=DESTINATION # Link connection comes in from Confluent Platform so you don't have to open your on-prem firewall connection.mode=INBOUND
Create the Confluent Cloud half of the cluster link with the name cp-cc-cluster-link.
confluent kafka link create cp-cc-cluster-link \
   --cluster $CCLOUD_CLUSTER_ID \
   --source-cluster-id $CP_CLUSTER_ID \
   --config-file ./scripts/ccloud/cluster-link-ccloud.properties
Inspect the file
scripts/ccloud/cluster-link-cp-example.propertiesand read the comments to understand what each property does.# Configuration for the Confluent Platform half of the cluster link # Copy the contents of this file to cluster-link-cp.properties and # add your Confluent Cloud credentials # *****DO NOT***** add cluster-link-cp.properties to version control # with your Confluent Cloud credentials # Confluent Platform is the source cluster link.mode=SOURCE # The link is initiated at the source so you don't have to open your firewall connection.mode=OUTBOUND # Authenticate to Confluent Cloud bootstrap.servers=<confluent cloud bootstrap endpoint> ssl.endpoint.identification.algorithm=https security.protocol=SASL_SSL sasl.mechanism=PLAIN sasl.jaas.config=org.apache.kafka.common.security.plain.PlainLoginModule required \ username='<confluent cloud cluster link api key>' \ password='<confluent cloud cluster link api secret>'; # We are using the CP's SASL OAUTHBEARER token listener local.listener.name=TOKEN local.sasl.mechanism=OAUTHBEARER local.sasl.login.callback.handler.class=io.confluent.kafka.clients.plugins.auth.token.TokenUserLoginCallbackHandler local.sasl.jaas.config=org.apache.kafka.common.security.oauthbearer.OAuthBearerLoginModule required \ username="connectorSA" \ password="connectorSA" \ metadataServerUrls="https://kafka1:8091,https://kafka2:8092";Run the following command to copy the file to
scripts/ccloud/cluster-link-cp.propertieswith credentials and bootstrap endpoint for your own Confluent Cloud cluster.sed -e "s|<confluent cloud cluster link api key>|${CCLOUD_CLUSTER_API_KEY}|g" \ -e "s|<confluent cloud cluster link api secret>|${CCLOUD_CLUSTER_API_SECRET}|g" \ -e "s|<confluent cloud bootstrap endpoint>|${CC_BOOTSTRAP_ENDPOINT}|g" \ scripts/ccloud/cluster-link-cp-example.properties > scripts/ccloud/cluster-link-cp.properties
Next, use the
cpCLI context to log into Confluent Platform. To create a cluster link, the CLI user must haveClusterAdminprivileges. For simplicity, we are continuing to use a super user instead of aClusterAdmin.confluent context use cp
The cluster link itself needs the
DeveloperReadandDeveloperManageroles for any topics it plans to mirror, as well as theClusterAdminrole for the Kafka cluster. Our cluster link uses theconnectorSAprincipal, which already hasResourceOwnerpermissions on thewikipedia.parsedtopic, so we just need to add theClusterAdminrole.confluent iam rbac role-binding create \ --principal User:connectorSA \ --role ClusterAdmin \ --kafka-cluster-id $CP_CLUSTER_ID
Create the Confluent Platform half of the cluster link, still called cp-cc-cluster-link.
confluent kafka link create cp-cc-cluster-link \
   --destination-bootstrap-server $CC_BOOTSTRAP_ENDPOINT \
   --destination-cluster-id $CCLOUD_CLUSTER_ID \
   --config-file ./scripts/ccloud/cluster-link-cp.properties \
   --url https://localhost:8091/kafka --ca-cert-path scripts/security/snakeoil-ca-1.crt
Switch contexts back to "ccloud" and create the mirror topic for
wikipedia.parsedin Confluent Cloud.confluent context use ccloud \ && confluent kafka mirror create wikipedia.parsed --link cp-cc-cluster-link
Consume records from the mirror topic using the schema context "cp-demo". Press
Ctrl+Cto stop the consumer when you are ready.confluent kafka topic consume \ --api-key $CCLOUD_CLUSTER_API_KEY \ --api-secret $CCLOUD_CLUSTER_API_SECRET \ --sr-endpoint $CC_SR_ENDPOINT/contexts/:.cp-demo: \ --sr-api-key $SR_API_KEY --sr-api-secret $SR_API_SECRET \ --value-format avro \ wikipedia.parsed | jq
You successfully created a source-initiated cluster link to seamlessly move data from on-prem to cloud in real time. Cluster linking opens up real-time hybrid cloud, multi-cloud, and disaster recovery use cases. See the Cluster Linking documentation for more information.
Confluent Cloud ksqlDB
In this section, you will create a Confluent Cloud ksqlDB cluster to processes data from the wikipedia.parsed mirror topic.
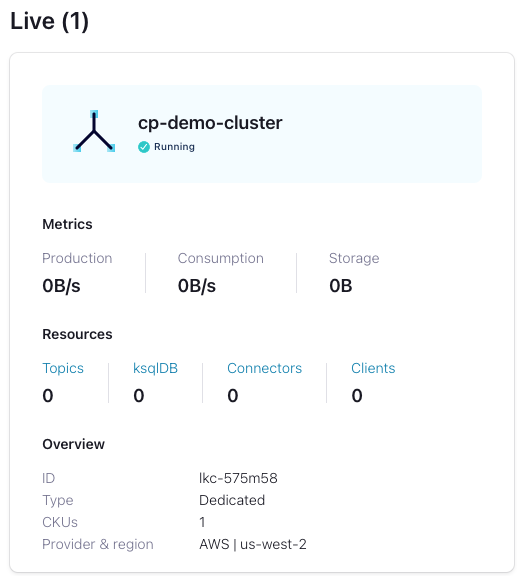
Log into the Confluent Cloud Console at https://confluent.cloud and navigate to the cp-demo-env environment and then to the cp-demo-cluster cluster within that environment.
Select "ksqlDB" from the left side menu, click "Create cluster myself". Select "Global access". Name the cluster cp-demo-ksql and choose a cluster size of 1 CKU. It will take a minute or so to provision.
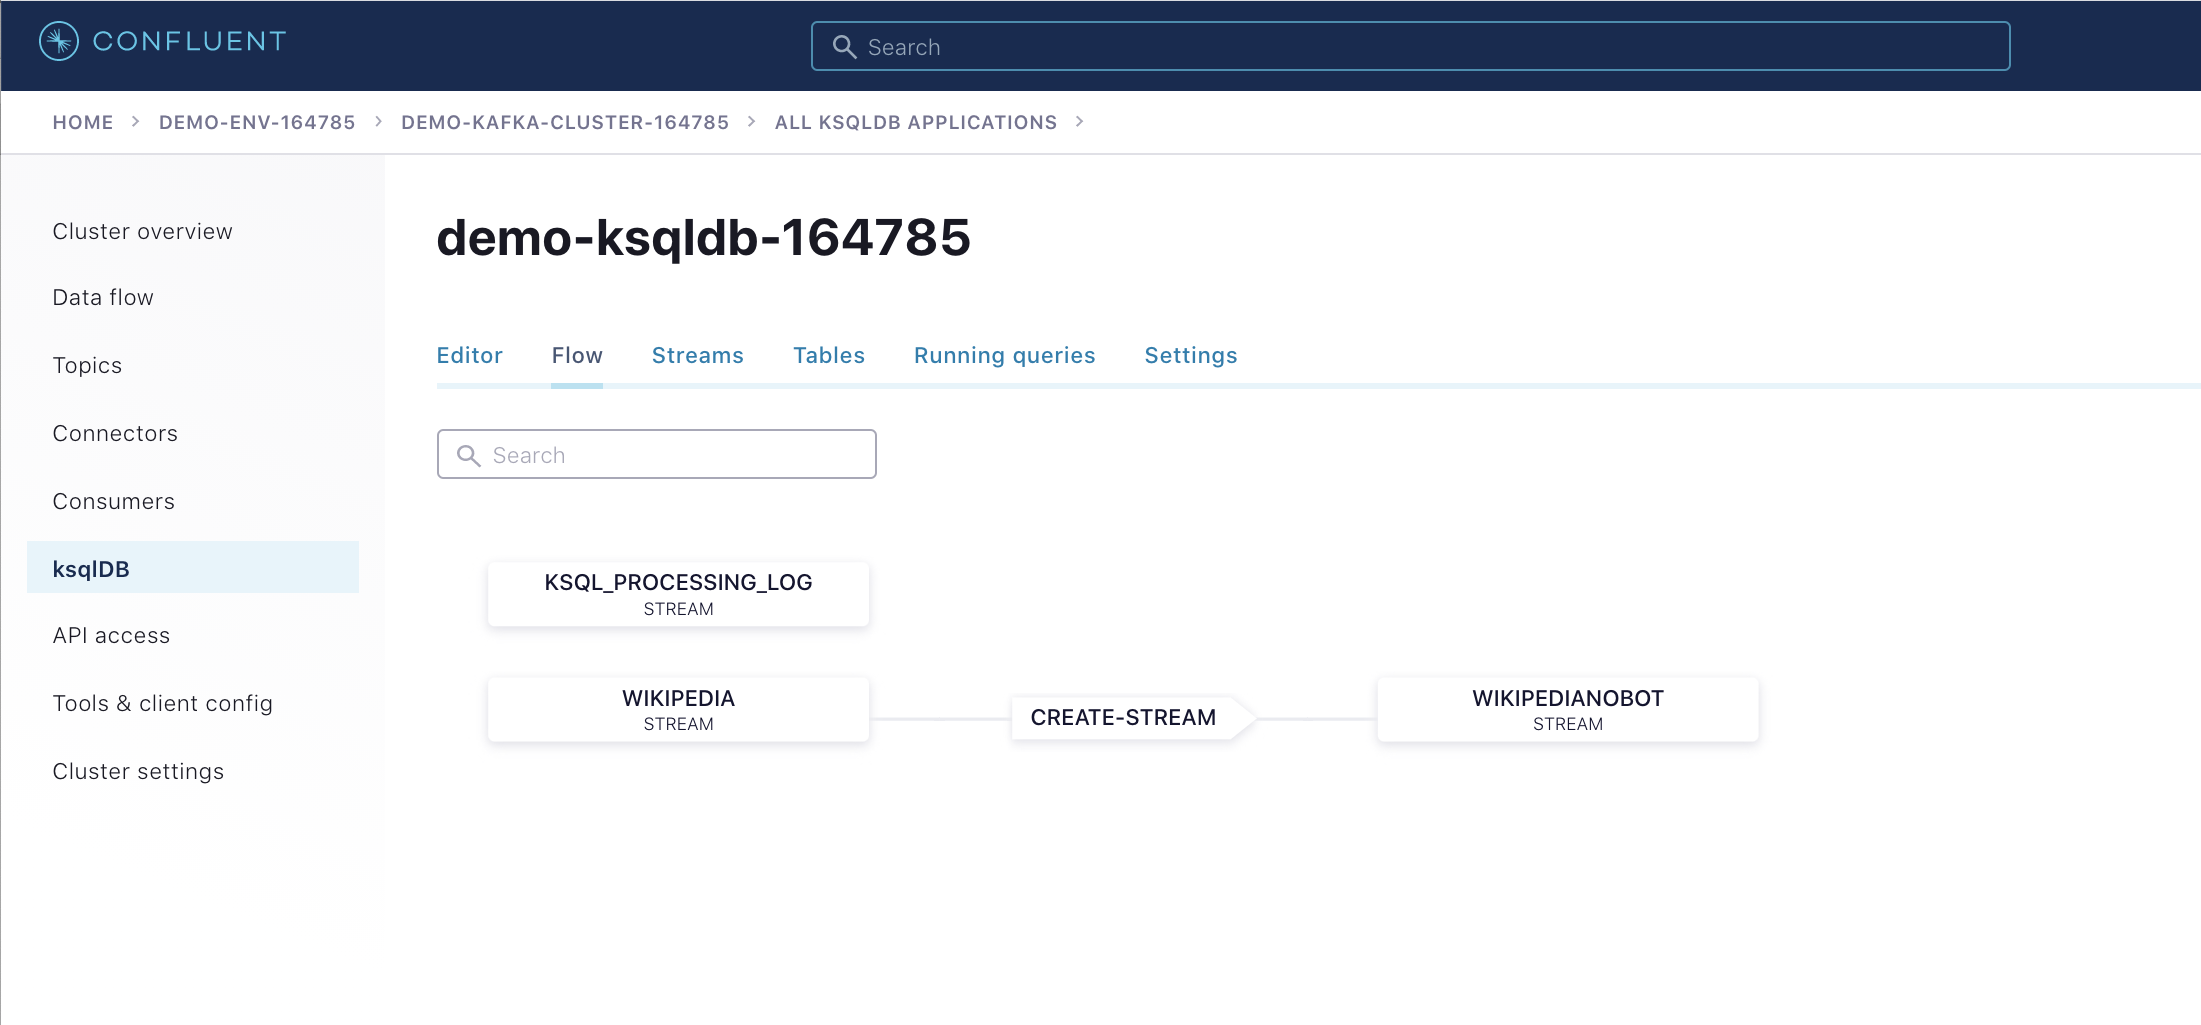
Once the ksqlDB cluster is provisioned, click into it and enter these query statements into the editor:
CREATE STREAM wikipedia WITH (kafka_topic='wikipedia.parsed', value_format='AVRO');
CREATE STREAM wikipedianobot AS
   SELECT *, (length->new - length->old) AS BYTECHANGE
   FROM wikipedia
      WHERE bot = false
         AND length IS NOT NULL
         AND length->new IS NOT NULL
         AND length->old IS NOT NULL;
Click the "Flow" tab to see the stream processing topology.
View the events in the ksqlDB streams in Confluent Cloud by pasting in
SELECT * FROM WIKIPEDIANOBOT EMIT CHANGES;and clicking "Run query". Stop the query when you are finished.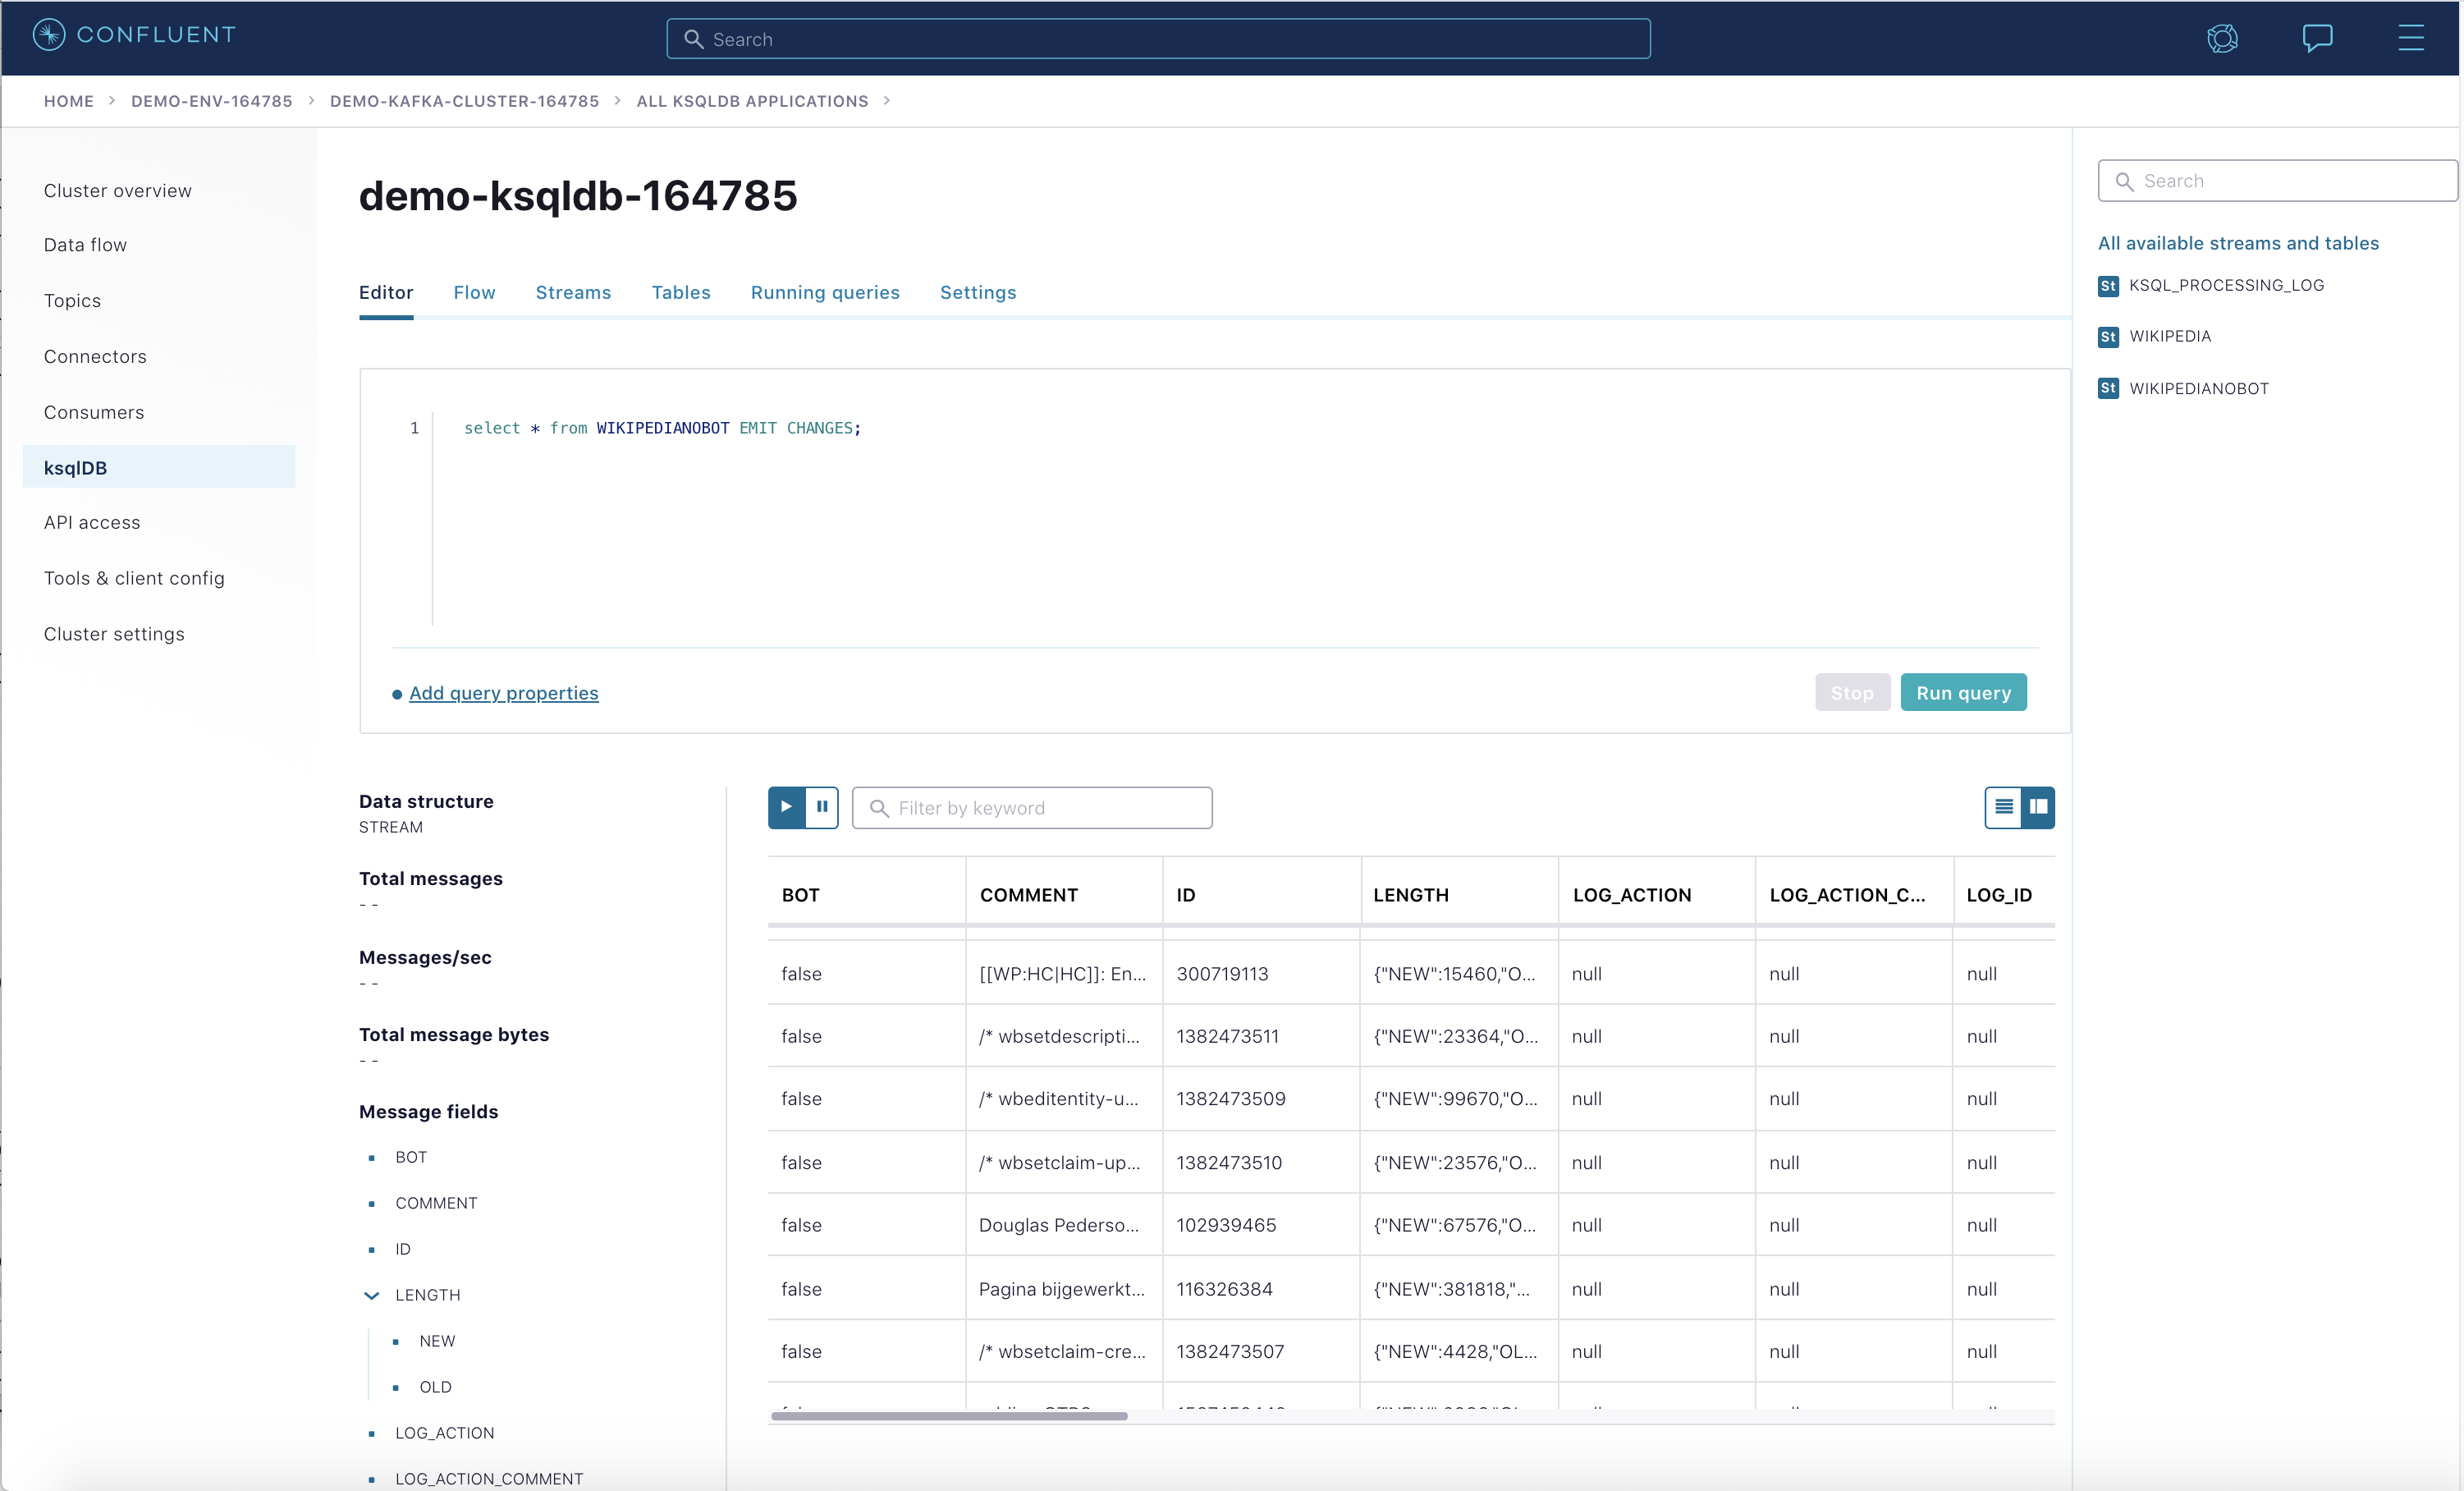
重要
The ksqlDB cluster in Confluent Cloud has hourly charges even if you are not actively using it. Make sure to go to Tear Down Confluent Cloud in the Teardown module to destroy all cloud resources when you are finished.
Metrics API
The Confluent Cloud Metrics API is a REST API you can use to query timeseries metrics. You can use the Metrics API to get telemetry data for both the on-prem Confluent Platform cluster as well as the Confluent Cloud cluster.
- エンドポイント https://api.telemetry.confluent.cloud/v2/metrics/hosted-monitoring/query を使用するオンプレミスのメトリクス(Telemetry Reporter により有効化)(これはプレビュー版で、API は変更される可能性があります)
注釈
エンドポイント https://api.telemetry.confluent.cloud/v2/metrics/cloud/query を使用する Confluent Cloud メトリクス
- エンドポイント https://api.telemetry.confluent.cloud/v2/metrics/cloud/query を使用する Confluent Cloud メトリクス
- See the Confluent Cloud Metrics API Reference for more information.
The Metrics API and Telemetry Reporter powers Health+, the fully-managed monitoring solution for Confluent Platform. You can enable Health+ for free and add premium capabilities as you see fit.
Popular third-party monitoring tools like Datadog and Grafana Cloud integrate with the Metrics API out-of-the-box, or if you manage your own Prometheus database, the Metrics API can also export metrics in Prometheus format.

Configure Confluent Health+ with the Telemetry Reporter
Verify that you're still using the
ccloudCLI context.confluent context list
Confluent Cloud に対する認証用の新しい
CloudAPI キーとシークレットを作成します。これらの認証情報は Telemetry Reporter を構成するために使用され、Metrics API によって使用されます。confluent api-key create --resource cloud -o json \ --service-account $SERVICE_ACCOUNT_ID \ --description "cloud api key for cp-demo"
以下のように出力されることを確認します。
{ "key": "QX7X4VA4DFJTTOIA", "secret": "fjcDDyr0Nm84zZr77ku/AQqCKQOOmb35Ql68HQnb60VuU+xLKiu/n2UNQ0WYXp/D" }実際の出力では、API キーの値(この場合は
QX7X4VA4DFJTTOIA)と API シークレット(この場合はfjcDDyr0Nm84zZr77ku/AQqCKQOOmb35Ql68HQnb60VuU+xLKiu/n2UNQ0WYXp/D)が異なります。前の手順で返されたこれらの認証情報を参照するようにパラメーターを設定します。
METRICS_API_KEY=QX7X4VA4DFJTTOIA
METRICS_API_SECRET=fjcDDyr0Nm84zZr77ku/AQqCKQOOmb35Ql68HQnb60VuU+xLKiu/n2UNQ0WYXp/D
Telemetry Reporter を使用するように、
cp-demoクラスターを 動的に構成 します。この Telemetry Reporter から Confluent Cloud にメトリクスが送信されます。それには、3 つの構成パラメーター(confluent.telemetry.enabled=true、confluent.telemetry.api.key、confluent.telemetry.api.secret)を設定する必要があります。docker-compose exec kafka1 kafka-configs \ --bootstrap-server kafka1:12091 \ --alter \ --entity-type brokers \ --entity-default \ --add-config confluent.telemetry.enabled=true,confluent.telemetry.api.key=${METRICS_API_KEY},confluent.telemetry.api.secret=${METRICS_API_SECRET}ブローカーのログをチェックして、ブローカーが動的に構成されたことを確認します。
docker logs --since=5m kafka1 | grep confluent.telemetry.api
出力は次のようになります。ただし、
confluent.telemetry.api.keyの値は環境によって異なります。... confluent.telemetry.api.key = QX7X4VA4DFJTTOIA confluent.telemetry.api.secret = [hidden] ...
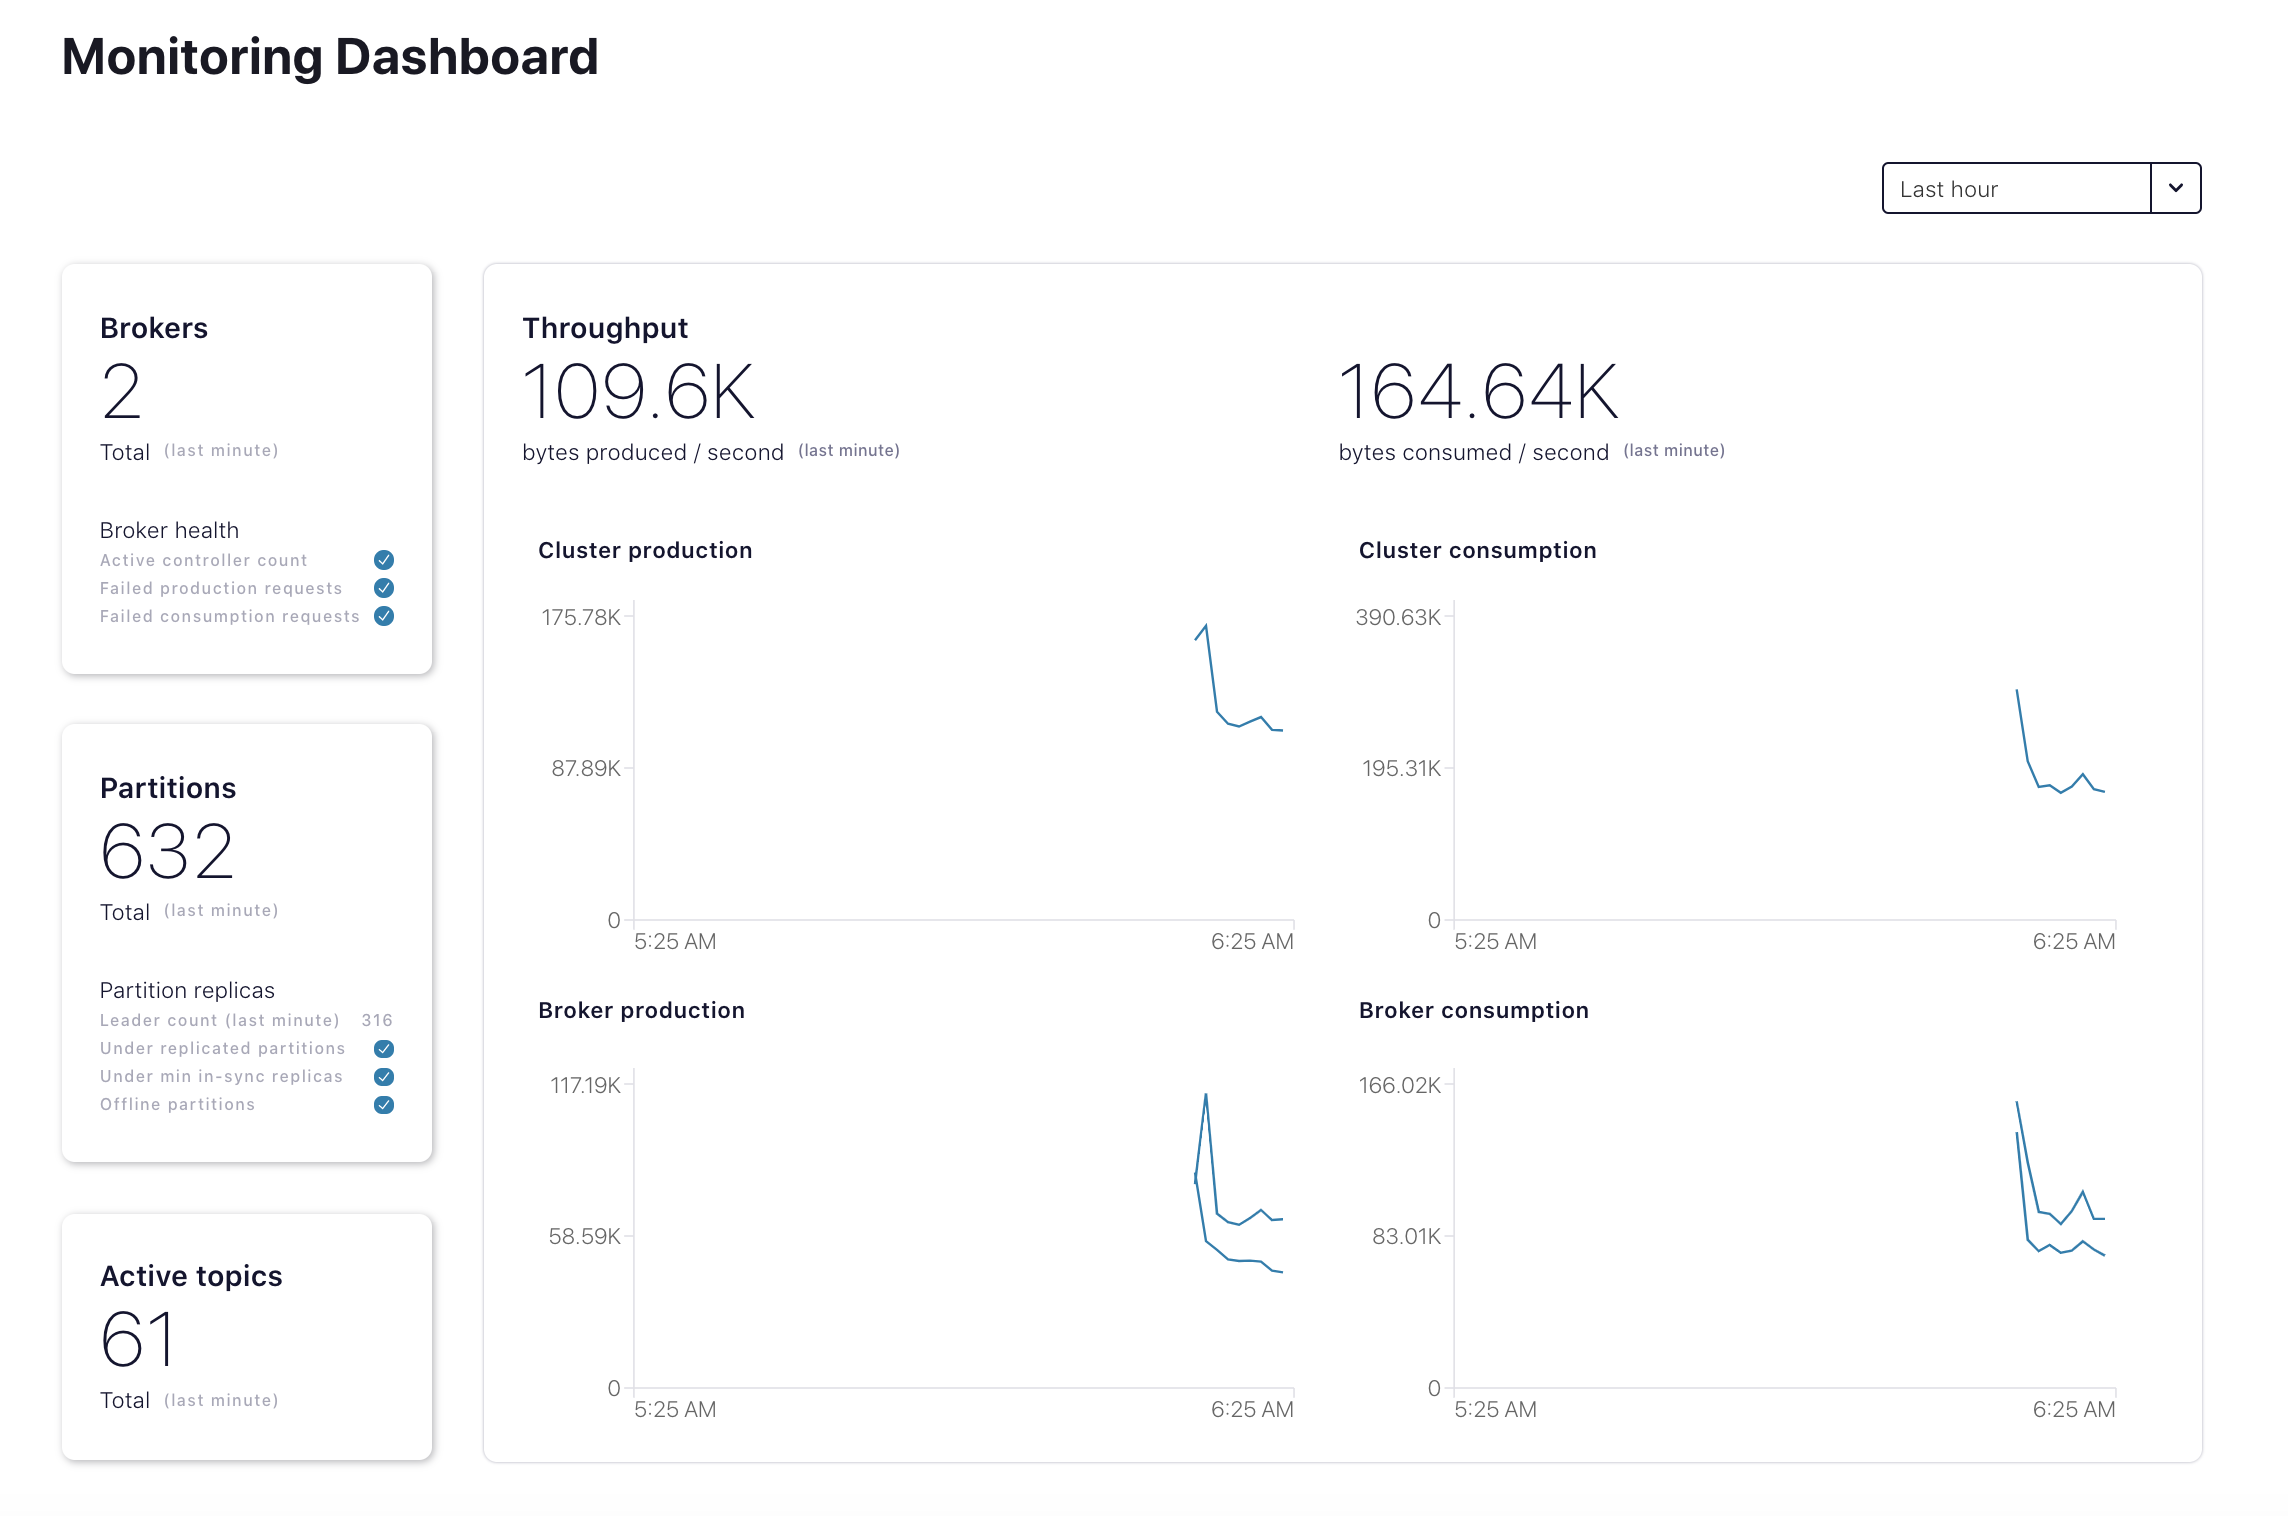
Navigate to the Health+ section of the Confluent Cloud Console at https://confluent.cloud/health-plus and verify you see your cluster's Health+ dashboard.
Query Metrics
オンプレミスのメトリクスの場合: メトリクスクエリファイル を表示します。このファイルは、オンプレミスのクラスターのトピック
wikipedia.parsedについてio.confluent.kafka.server/received_bytesをリクエストします(すべてのクエリ可能なメトリクスの例については、「Metrics API」を参照してください。{ "aggregations": [ { "agg": "SUM", "metric": "io.confluent.kafka.server/received_bytes" } ], "filter": { "filters": [ { "field": "metric.topic", "op": "EQ", "value": "wikipedia.parsed" } ], "op": "AND" }, "intervals": ["now-1h/now+1h"], "granularity": "PT1M", "group_by": [ "metric.topic" ], "limit": 5 }エンドポイント https://api.telemetry.confluent.cloud/v2/metrics/cloud/query を使用する Confluent Cloud メトリクス
curl -s -u ${METRICS_API_KEY}:${METRICS_API_SECRET} \ --header 'content-type: application/json' \ --data @scripts/ccloud/metrics_query_onprem.json \ https://api.telemetry.confluent.cloud/v2/metrics/hosted-monitoring/query \ | jq .出力は、以下の出力例のようになり、オンプレミスのトピック
wikipedia.parsedのメトリクスが表示されます。{ "data": [ { "timestamp": "2020-12-14T20:52:00Z", "value": 1744066, "metric.topic": "wikipedia.parsed" }, { "timestamp": "2020-12-14T20:53:00Z", "value": 1847596, "metric.topic": "wikipedia.parsed" } ] }For the Confluent Cloud metrics: view the metrics query file, which requests
io.confluent.kafka.server/cluster_link_mirror_topic_bytesfor the cluster linkcp-cc-cluster-linkin Confluent Cloud, which includes metrics for thewikipedia.parsedmirror topic.{ "aggregations": [ { "metric": "io.confluent.kafka.server/cluster_link_mirror_topic_bytes" } ], "filter": { "filters": [ { "field": "metric.link_name", "op": "EQ", "value": "cp-cc-cluster-link" }, { "field": "resource.kafka.id", "op": "EQ", "value": "<CCLOUD_CLUSTER_ID>" } ], "op": "AND" }, "intervals": ["now-1h/now+1h"], "granularity": "PT1H", "group_by": [ "metric.topic" ], "limit": 5 }エンドポイント https://api.telemetry.confluent.cloud/v2/metrics/cloud/query を使用する Confluent Cloud メトリクス
sed "s/<CCLOUD_CLUSTER_ID>/${CCLOUD_CLUSTER_ID}/g" scripts/ccloud/metrics_query_ccloud.json \ | curl -s -u ${METRICS_API_KEY}:${METRICS_API_SECRET} \ --header 'content-type: application/json' \ --data @- \ https://api.telemetry.confluent.cloud/v2/metrics/cloud/query \ | jq .出力は、以下の出力例のようになり、Confluent Cloud のトピック
wikipedia.parsed.ccloud.replicaのメトリクスが表示されます。{ "data": [ { "timestamp": "2020-12-14T20:00:00Z", "value": 1690522, "metric.topic": "wikipedia.parsed" } ] }
ちなみに
See Metrics and Monitoring for Cluster Linking for more information about monitoring cluster links, including how to monitor mirror lag.
クリーンアップ
Confluent Cloud のすべてのサンプルでは、実際の Confluent Cloud リソースを使用しています。Confluent Cloud のサンプルの実行を終了したら、予定外の課金を回避するために、すべての Confluent Cloud リソースが破棄されていることを直接確認してください。
想定外の Confluent Cloud の課金を避けるために、「Tear Down Confluent Cloud」のクリーンアップの手順を実行します。