重要
このページの日本語コンテンツは古くなっている可能性があります。最新の英語版コンテンツをご覧になるには、こちらをクリックしてください。
Databricks Delta Lake(AWS)のセットアップ
"厳密に 1 回" のセマンティクスをサポートするには、Databricks Delta Lake へのデリバリー前にデータをステージングできる個別の Amazon S3 バケットを作成する必要があります。以下は、新しい Databricks ワークスペースを作成し、必要な S3 ステージングバケットを追加する手順を示しています。これらの手順は、Databricks および AWS CloudFormation の操作について知識があることを前提としています。Databricks Delta Lake の詳細については、Databricks のドキュメント を参照してください。
注釈
以下の手順は、Databricks のドキュメント に記載されている情報に基づいています。
ステップ 1: Databricks ワークスペースの作成
次の手順に従ってワークスペースを作成します。
重要
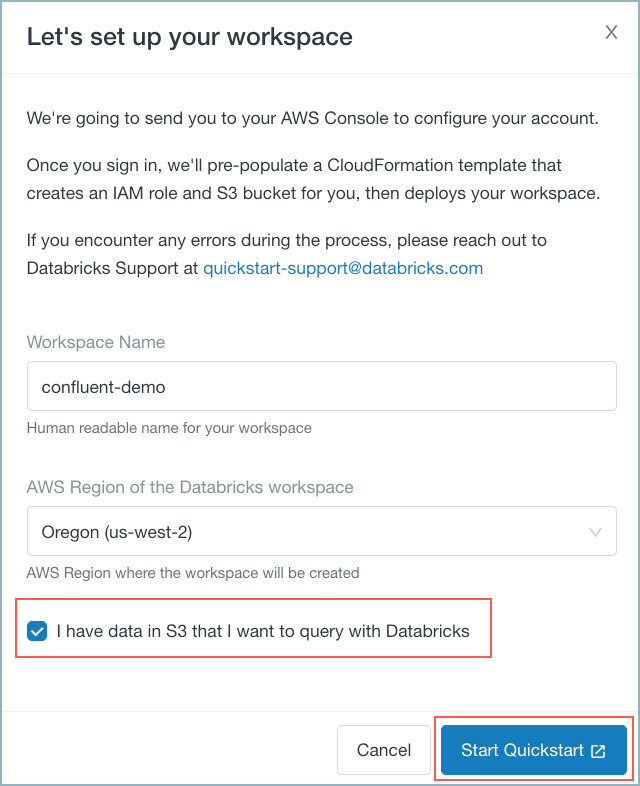
Databricks Delta Lake ワークスペースのリソースは、必ず Kafka クラスターを実行しているリージョンと同じリージョンに作成してください。
I have data in S3... チェックボックスをオンにして Start Quickstart をクリックします。
Databricks ワークスペースのクイックスタート
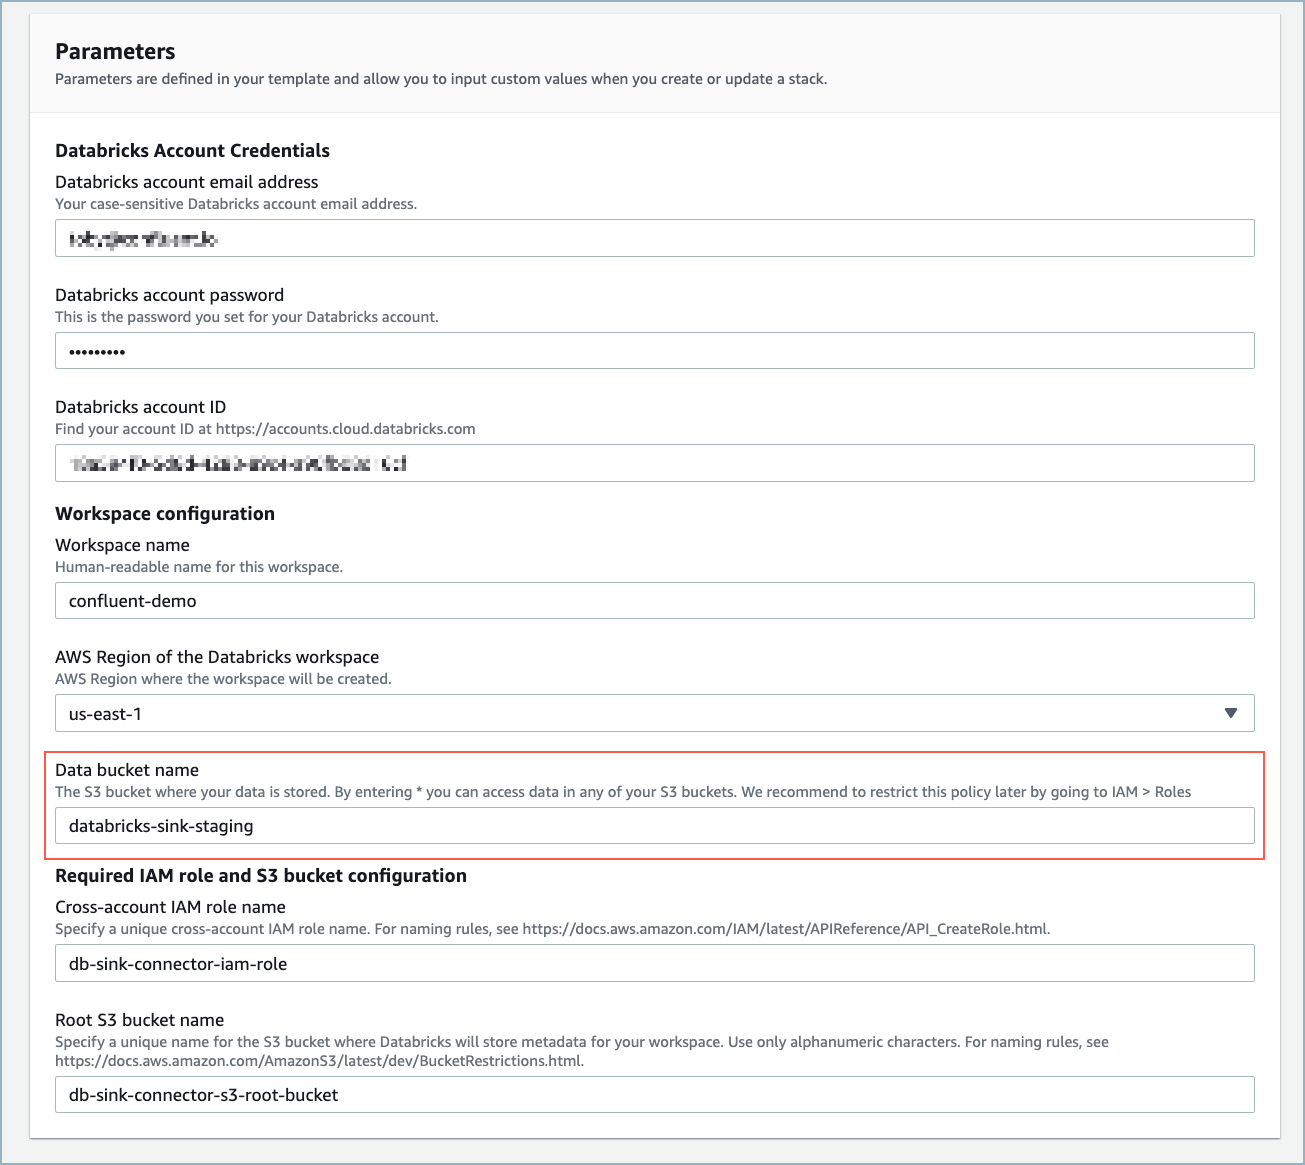
Databricks によって AWS CloudFormation が起動され、情報があらかじめ入力されたテンプレートが表示されます。
Quick create stack ウェブフォームに必要事項を入力します。大部分の必須フィールドは事前に入力されています。Data bucket name にデータバケットの名前を必ず入力してください。この名前は、AWS で S3 バケットを作成するときに使用します。
ちなみに
事前に入力されている IAM および S3 ルートバケット名を使用する必要はありません。ただ、これらの名前を使用すると、リソースが重複して作成されることがありません。
AWS CloudFormation のウェブフォーム
リソースが作成されたら、Databricks コンソールでワークスペースを利用できます。

ワークスペース
ちなみに
Databricks ダイアログボックスは自動的に閉じません。Cancel をクリックしてダイアログボックスを閉じてから、ブラウザーをリフレッシュする必要がある場合があります。
Databricks コンソールで Open をクリックします。

ワークスペースのオープン
Databricks コンソールを開いたままで、アマゾンウェブサービス に移動します。
ステップ 2: S3 ステージングバケットとポリシーの作成
S3 ステージングバケットを作成し、AWS の IAM ロールを確認してバケットポリシーを作成するには、以下の手順に従います。
前の手順で Data bucket name に指定した情報を使用して S3 ステージングバケットを作成します。S3 バケットを作成するときは、デフォルト設定を使用します。
AWS IAM ダッシュボードでデータバケットにアクセスするための IAM ロール を確認します。命名規則
<workspace-name>-access-data-bucketsのロールを探します。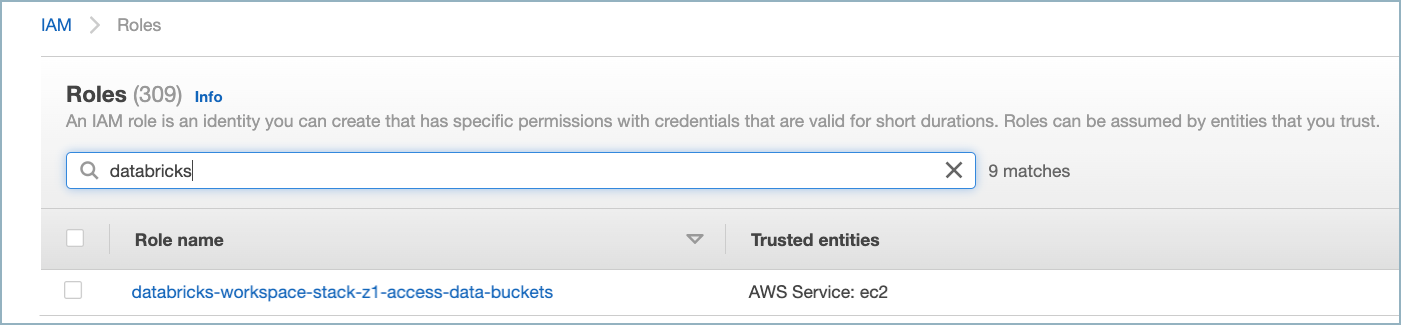
S3 バケットの IAM ロール
IAM ロールのポリシーを確認します。次の例のようなものです。
{
    "Statement": [
        {
            "Action": [
                "s3:ListBucket",
                "s3:PutObject",
                "s3:GetObject",
                "s3:DeleteObject",
                "s3:PutObjectAcl"
            ],
            "Resource": [
                "arn:aws:s3:::<data-bucket-name>/*",
                "arn:aws:s3:::<data-bucket-name>"
            ],
            "Effect": "Allow"
        }
    ]
}
対象のデータバケットのバケットポリシーを作成します。以下の JSON を使用して インラインポリシー を追加します。
{
  "Version": "2012-10-17",
  "Statement": [
    {
      "Sid": "Example permissions",
      "Effect": "Allow",
      "Principal": {
        "AWS": "arn:aws:iam::<aws-account-id-databricks>:role/<iam-role-for-data-bucket-access>"
      },
      "Action": [
        "s3:GetBucketLocation",
        "s3:ListBucket"
      ],
      "Resource": "arn:aws:s3:::<data-bucket-name>"
    },
    {
      "Effect": "Allow",
      "Principal": {
        "AWS": "arn:aws:iam::<aws-account-id-databricks>:role/<iam-role-for-data-bucket-access>"
      },
      "Action": [
        "s3:PutObject",
        "s3:GetObject",
        "s3:DeleteObject",
        "s3:PutObjectAcl"
      ],
      "Resource": "arn:aws:s3:::<data-bucket-name>/*"
    }
  ]
}
詳細については、Databricks の AWS に関するドキュメント を参照してください。
ステップ 3: ワークスペース構成のロールポリシーの確認
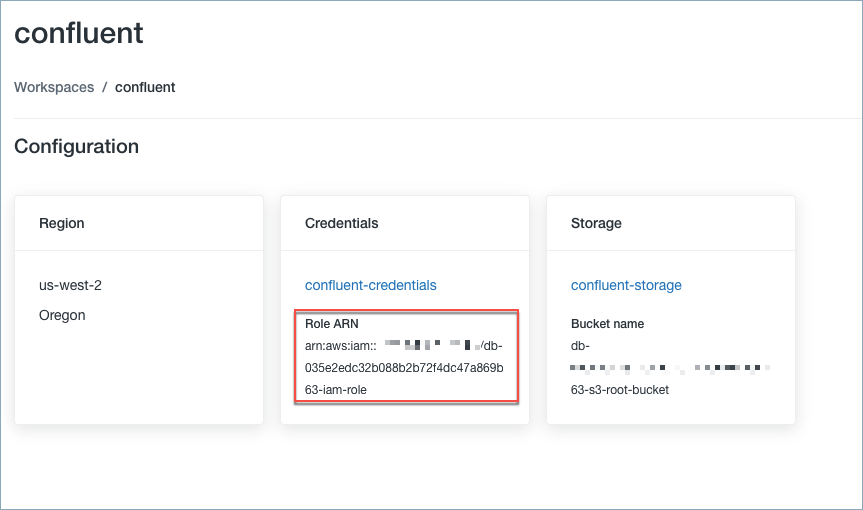
Databricks デプロイの作成に使用される IAM ロールを見つけます。ロールを探すには、Databricks ワークスペース名をクリックします。
ワークスペース名
Role ARN に、次の手順で確認するロールの ARN があります。
ロールの ARN
AWS IAM ダッシュボード に移動し、ポリシーが次の例のようなものであることを確認します。
{
    "Version": "2012-10-17",
    "Statement": [
        {
            "Action": [
                "ec2:AllocateAddress",
                "ec2:AssociateDhcpOptions",
                "ec2:AssociateIamInstanceProfile",
                "ec2:AssociateRouteTable",
                "ec2:AttachInternetGateway",
                "ec2:AttachVolume",
                "ec2:AuthorizeSecurityGroupEgress",
                "ec2:AuthorizeSecurityGroupIngress",
                "ec2:CancelSpotInstanceRequests",
                "ec2:CreateDhcpOptions",
                "ec2:CreateInternetGateway",
                "ec2:CreateKeyPair",
                "ec2:CreateNatGateway",
                "ec2:CreatePlacementGroup",
                "ec2:CreateRoute",
                "ec2:CreateRouteTable",
                "ec2:CreateSecurityGroup",
                "ec2:CreateSubnet",
                "ec2:CreateTags",
                "ec2:CreateVolume",
                "ec2:CreateVpc",
                "ec2:CreateVpcEndpoint",
                "ec2:DeleteDhcpOptions",
                "ec2:DeleteInternetGateway",
                "ec2:DeleteKeyPair",
                "ec2:DeleteNatGateway",
                "ec2:DeletePlacementGroup",
                "ec2:DeleteRoute",
                "ec2:DeleteRouteTable",
                "ec2:DeleteSecurityGroup",
                "ec2:DeleteSubnet",
                "ec2:DeleteTags",
                "ec2:DeleteVolume",
                "ec2:DeleteVpc",
                "ec2:DeleteVpcEndpoints",
                "ec2:DescribeAvailabilityZones",
                "ec2:DescribeIamInstanceProfileAssociations",
                "ec2:DescribeInstanceStatus",
                "ec2:DescribeInstances",
                "ec2:DescribeInternetGateways",
                "ec2:DescribeNatGateways",
                "ec2:DescribePlacementGroups",
                "ec2:DescribePrefixLists",
                "ec2:DescribeReservedInstancesOfferings",
                "ec2:DescribeRouteTables",
                "ec2:DescribeSecurityGroups",
                "ec2:DescribeSpotInstanceRequests",
                "ec2:DescribeSpotPriceHistory",
                "ec2:DescribeSubnets",
                "ec2:DescribeVolumes",
                "ec2:DescribeVpcs",
                "ec2:DetachInternetGateway",
                "ec2:DisassociateIamInstanceProfile",
                "ec2:DisassociateRouteTable",
                "ec2:ModifyVpcAttribute",
                "ec2:ReleaseAddress",
                "ec2:ReplaceIamInstanceProfileAssociation",
                "ec2:ReplaceRoute",
                "ec2:RequestSpotInstances",
                "ec2:RevokeSecurityGroupEgress",
                "ec2:RevokeSecurityGroupIngress",
                "ec2:RunInstances",
                "ec2:TerminateInstances"
            ],
            "Resource": [
                "*"
            ],
            "Effect": "Allow",
            "Sid": "Stmt1403287045000"
        },
        {
            "Action": "iam:PassRole",
            "Resource": "arn:aws:iam::<aws-account-id-databricks>:role/<iam-role-for-s3-access>",
            "Effect": "Allow"
        },
        {
            "Condition": {
                "StringLike": {
                    "iam:AWSServiceName": "spot.amazonaws.com"
                }
            },
            "Action": [
                "iam:CreateServiceLinkedRole",
                "iam:PutRolePolicy"
            ],
            "Resource": [
                "arn:aws:iam::*:role/aws-service-role/spot.amazonaws.com/AWSServiceRoleForEC2Spot"
            ],
            "Effect": "Allow"
        }
    ]
}
ステップ 4: AWS のクラスターと新規ユーザーの作成
Create a cluster in Databricks using the Instance Profile created by AWS CloudFormations. To get the Instance Profile name, go to Settings > Instance Profiles in Databricks.
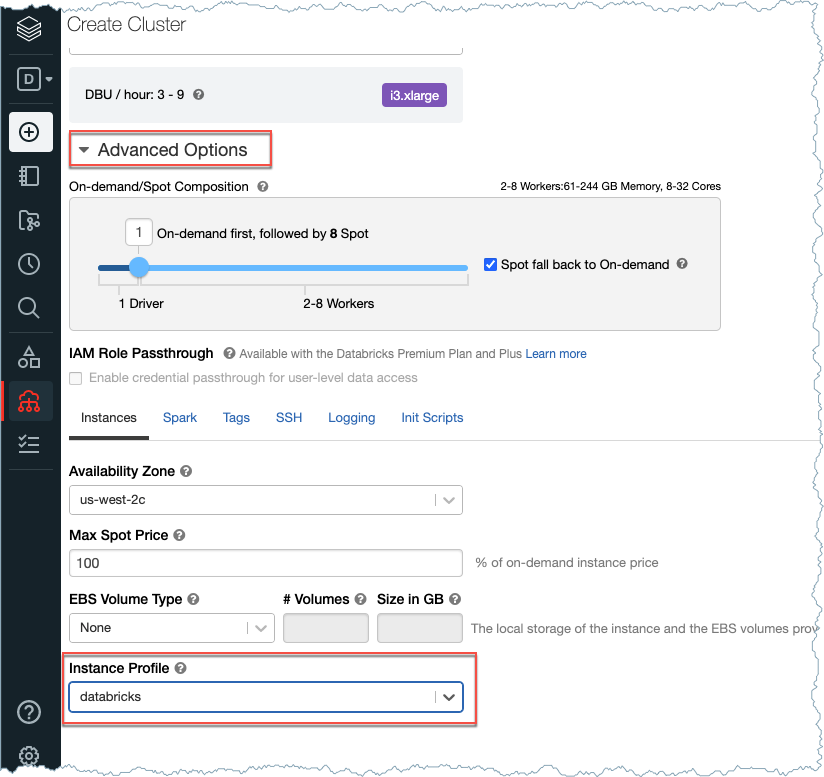
Create Cluster
新しい AWS ユーザーを作成します。ユーザー(コネクター)にプログラムによるアクセス権を付与します。
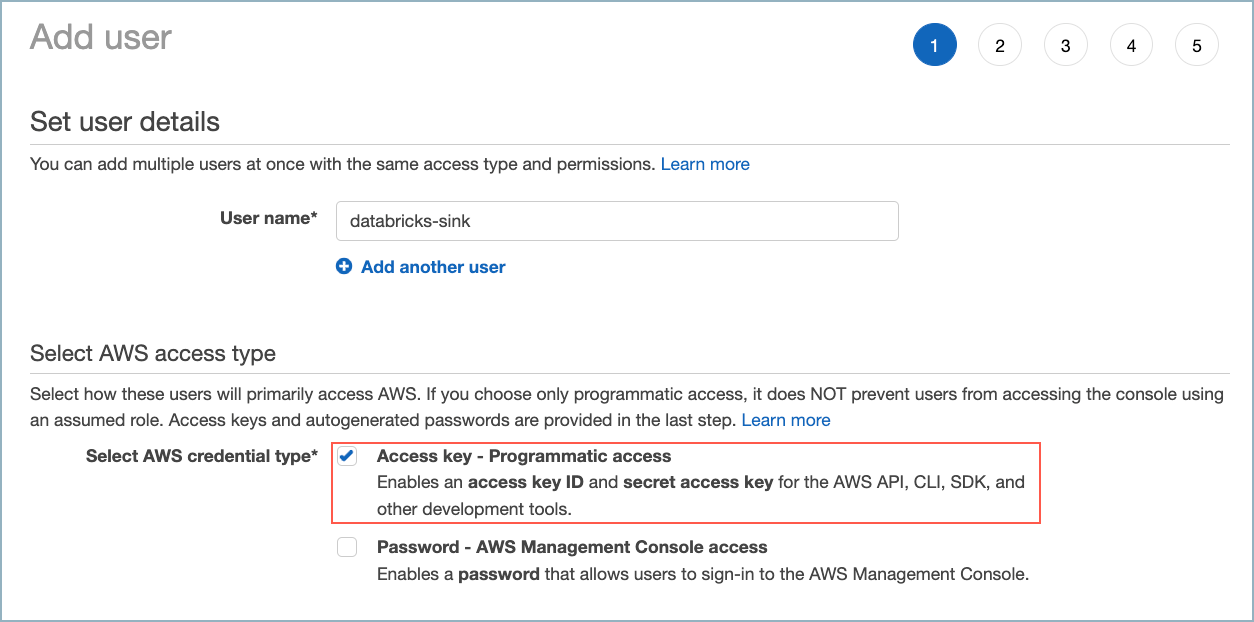
新しい AWS ユーザーの作成
Set permissions ダイアログで、Attach existing policies directly を選択します。
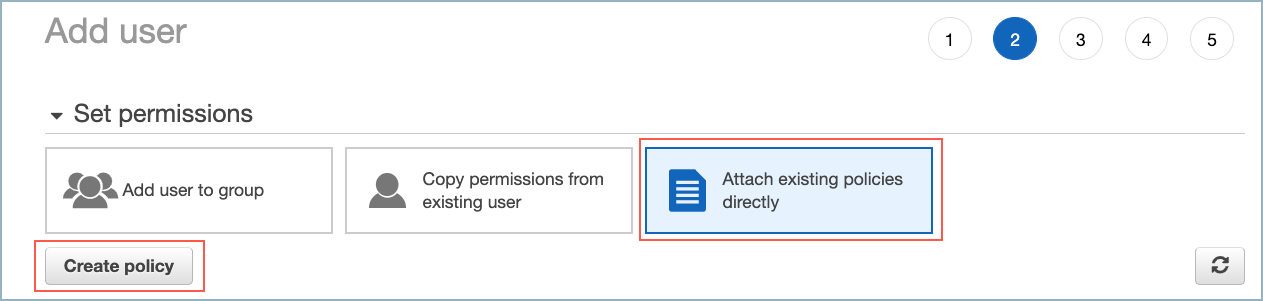
ユーザーポリシーの追加
このポリシーは Amazon S3 Sink Connector に使用したものと同じポリシーに "s3:PutObjectTagging"、"s3:GetObjectTagging"、"s3:DeleteObject" を追加したものです。このコネクターでは DeleteObject が必須です。これは、ステージング S3 バケット内のファイルを、Delta Lake テーブルにコピーした後に削除するためです。
{
       "Version": "2012-10-17",
       "Statement": [
           {
               "Effect": "Allow",
               "Action": [
                   "s3:ListAllMyBuckets"
               ],
               "Resource": "arn:aws:s3:::*"
           },
           {
               "Effect": "Allow",
               "Action": [
                   "s3:ListBucket",
                   "s3:GetBucketLocation"
               ],
               "Resource": "arn:aws:s3:::<bucket-name>"
           },
           {
               "Effect": "Allow",
               "Action": [
                   "s3:PutObject",
                   "s3:GetObject",
                   "s3:AbortMultipartUpload",
                   "s3:ListMultipartUploadParts",
                   "s3:ListBucketMultipartUploads",
                   "s3:PutObjectTagging",
                   "s3:GetObjectTagging",
                   "s3:DeleteObject"
               ],
               "Resource": "arn:aws:s3:::<bucket-name>/*"
           }
       ]
}
ステップ 5: テーブルの作成
Databricks Notebook を使用してテーブルを作成します。テーブルの作成には、以下の例を使用します。この例には、pageviews Kafka トピックと Datagen Source Connector for Confluent Cloud のスキーマ例が示されています。
{
  "connect.name": "ksql.pageviews",
  "fields": [
    {
      "name": "viewtime",
      "type": "long"
    },
    {
      "name": "userid",
      "type": "string"
    },
    {
      "name": "pageid",
      "type": "string"
    }
  ],
  "name": "pageviews",
  "namespace": "ksql",
  "type": "record"
}
%sql

CREATE TABLE pageviews (viewtime LONG, userid STRING, pageid STRING, partition INT) USING DELTA
partition という名前のフィールドが追加されるので、テーブルを定義する際に必ず partition INT を含めてください。ステップ 6: コネクターの構成情報の収集
重要
Confluent Cloud Console または CLI を使用してコネクター構成を完了するには、以下の情報が必要です。
Databricks サーバーのホスト名: たとえば、
dbc-12345df33-0e53.cloud.databricks.comです。ホスト名は、Databricks Create Cluster ページに表示されます。HTTP パス: たとえば、
sql/protocolv1/o/123456789101112/1004-123456-voice40です。パスは、Databricks Create Cluster ページに表示されます。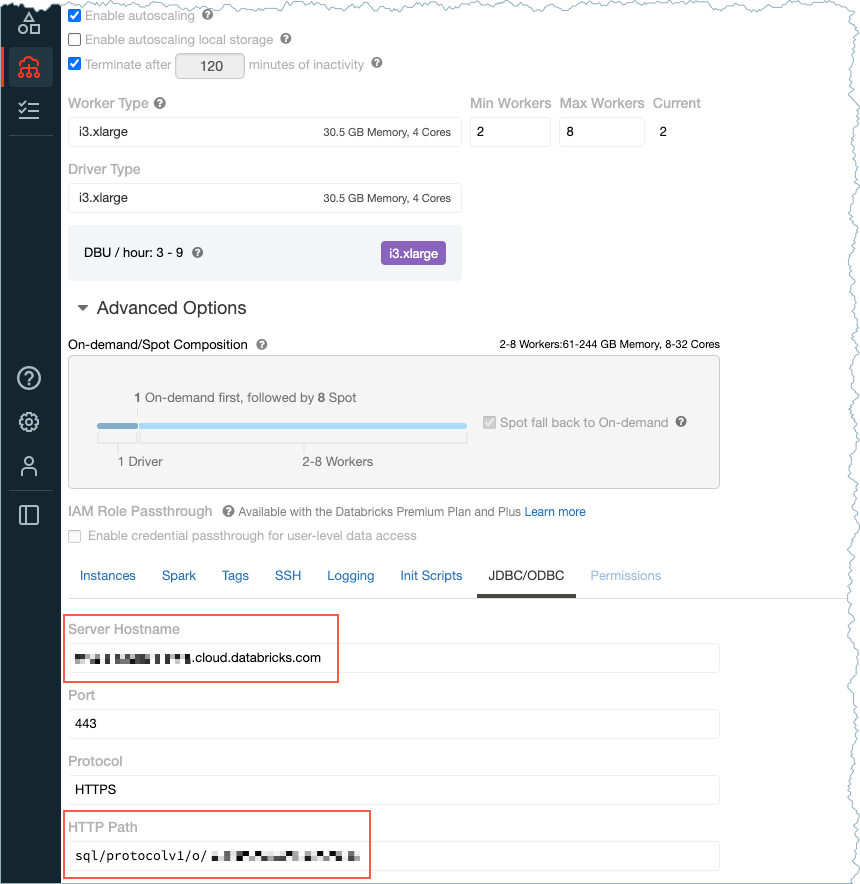
ホスト名と HTTP パス
Delta Lake トークン: トークンを探すか、新しいアクセストークンを生成できます。Settings、User Settings、Access Tokens の順に移動します。
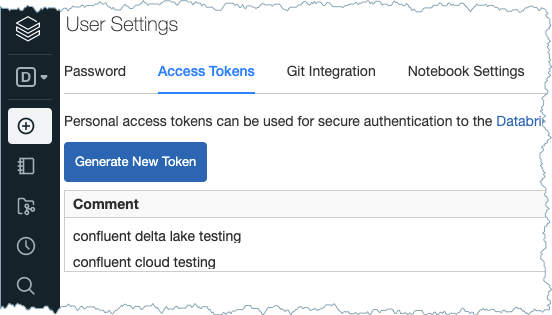
アクセストークン
Delta Lake テーブル名: この例の手順では、
pageviewsが使用されます。ユーザーの AWS アクセスキー ID と シークレットアクセスキー。詳細については、AWS のドキュメント を参照してください。
ステージング S3 バケット名: たとえば
confluent-databricksです。