
Egress Private Link Endpoint Setup: Snowflake on Azure for Confluent Cloud
The Snowflake Sink connector for Confluent Cloud supports Azure Private Link connectivity through Egress Private Link Endpoints. Use this guide to configure the connector and set up the required endpoints.
Prerequisites
The following is a list of prerequisites for configuring the Snowflake Sink connector with an Egress Private Link Endpoint:
In Confluent Cloud, one of the following cluster types was set up with the specified network resource:
A Dedicated cluster with a Confluent Cloud network
For the steps to create a Confluent Cloud network, see Create a Confluent Cloud network. The Connection type of the network needs to be “Private Link Access”.
A Enterprise cluster with a network gateway
For the steps to create a gateway, see Create a gateway for outbound connectivity in Confluent Cloud.
A source topic was created to sink data into the Snowflake database.
Snowflake instance was created to sink data into and is running within the same region and cloud as the Confluent Cloud cluster.
A database and a schema were created in Snowflake to sink data into.
Snowflake imposes restrictions on which DNS hostnames can be used to connect. Be sure to use the hostnames mentioned in Azure Private Link and Snowflake.
Note
For added security, you can set up a Network rule within Snowflake to restrict incoming traffic to the specific Private Endpoint setup as part of Egress Private Link Endpoints.
Step 1. Request the Private Link Service ID from Snowflake
Open a support case with Snowflake and request the Private Link Service ID associated with your Snowflake account. The ID should be in the following format:
/subscriptions/<subscription_ID>/resourceGroups/azure<region>-privatelink/providers/Microsoft.Network/privateLinkServices/sf-pvlinksvc-azure<region>
Note that you cannot use the Resource Alias for setting up an Egress Private Link Endpoint.
Leave the support ticket open as it will be required in a later step for Snowflake to allowlist Confluent’s Private Link Endpoint Resource ID.
Step 2. Create an Egress Private Link Endpoint
Confluent Cloud Egress Private Link Endpoints are Azure Private Endpoints used to connect to Azure Private Link Services.
In the Network management page or tab of the desired Confluent Cloud environment, click the Confluent Cloud network you want to add the Private Link Endpoint to. The Connection Type of the network needs to be “Private Link Access”.
Click Create endpoint in the Egress connections tab.
Click the service you want to connect to, specifically, Snowflake.
Follow the guided steps to specify the field values:
Name: The name of the Private Link Endpoint.
Resource ID: The resource ID of the Private Link service you retrieved from Snowflake Support in Step 1. Request the Private Link Service ID from Snowflake.
Note that the resource alias is not supported.
Sub-resource name: Leave blank.
Click Create to create the Private Link Endpoint.
If there are additional steps for the specific target service, follow the prompt to complete the tasks, and then click Finish.
In the Network management page or tab of the desired Confluent Cloud environment, click the For serverless products tab.
Click the gateway to which you want to add the Private Link Endpoint.
In the Access points tab, click Add access point.
Select the service you want to connect to.
Specific services are listed based on the cloud provider for the gateway.
Follow the guided steps to specify the field values:
Access point name: The name of the Private Link Endpoint.
Resource ID: The resource ID of the Private Link service you retrieved from Snowflake Support in Step 1. Request the Private Link Service ID from Snowflake.
Note that the resource alias is not supported.
Sub-resource name: Leave blank.
Click Create access point to create the Private Link Endpoint.
If there are additional steps for the specific target service, follow the prompt to complete the tasks, and then click Finish.
Step 3. Request Snowflake support to allow Confluent’s Private Link Endpoint Resource ID
When the PrivateLink Endpoint you created in the previous step transitions from “Provisioning” to “Pending Accept”, request that Snowflake allowlist Confluent’s Resource ID using the earlier support ticket opened with Snowflake.
When Snowflake support has approved this request, the status of the Access Point with transition from “Pending Accept” to “Ready”.
Step 4. Create a DNS record
Obtain the required Domain by running the following within query within Snowflake.
USE ROLE ACCOUNTADMIN;
SELECT KEY, VALUE::VARCHAR HOST
FROM TABLE(FLATTEN(INPUT=>PARSE_JSON(SYSTEM$GET_PRIVATELINK_CONFIG())));
Note down the HOST values for the
privatelink-account-urland theregionless-privatelink-account-urlKEY values. These are required based on how you want to connect:Connect using Snowflake’s Account Locator (Legacy) URL (
<account_name>.<region_id>.privatelink.snowflakecomputing.com)Connect using Account Name URL (
<org_name>-<account_name>.privatelink.snowflakecomputing.com)
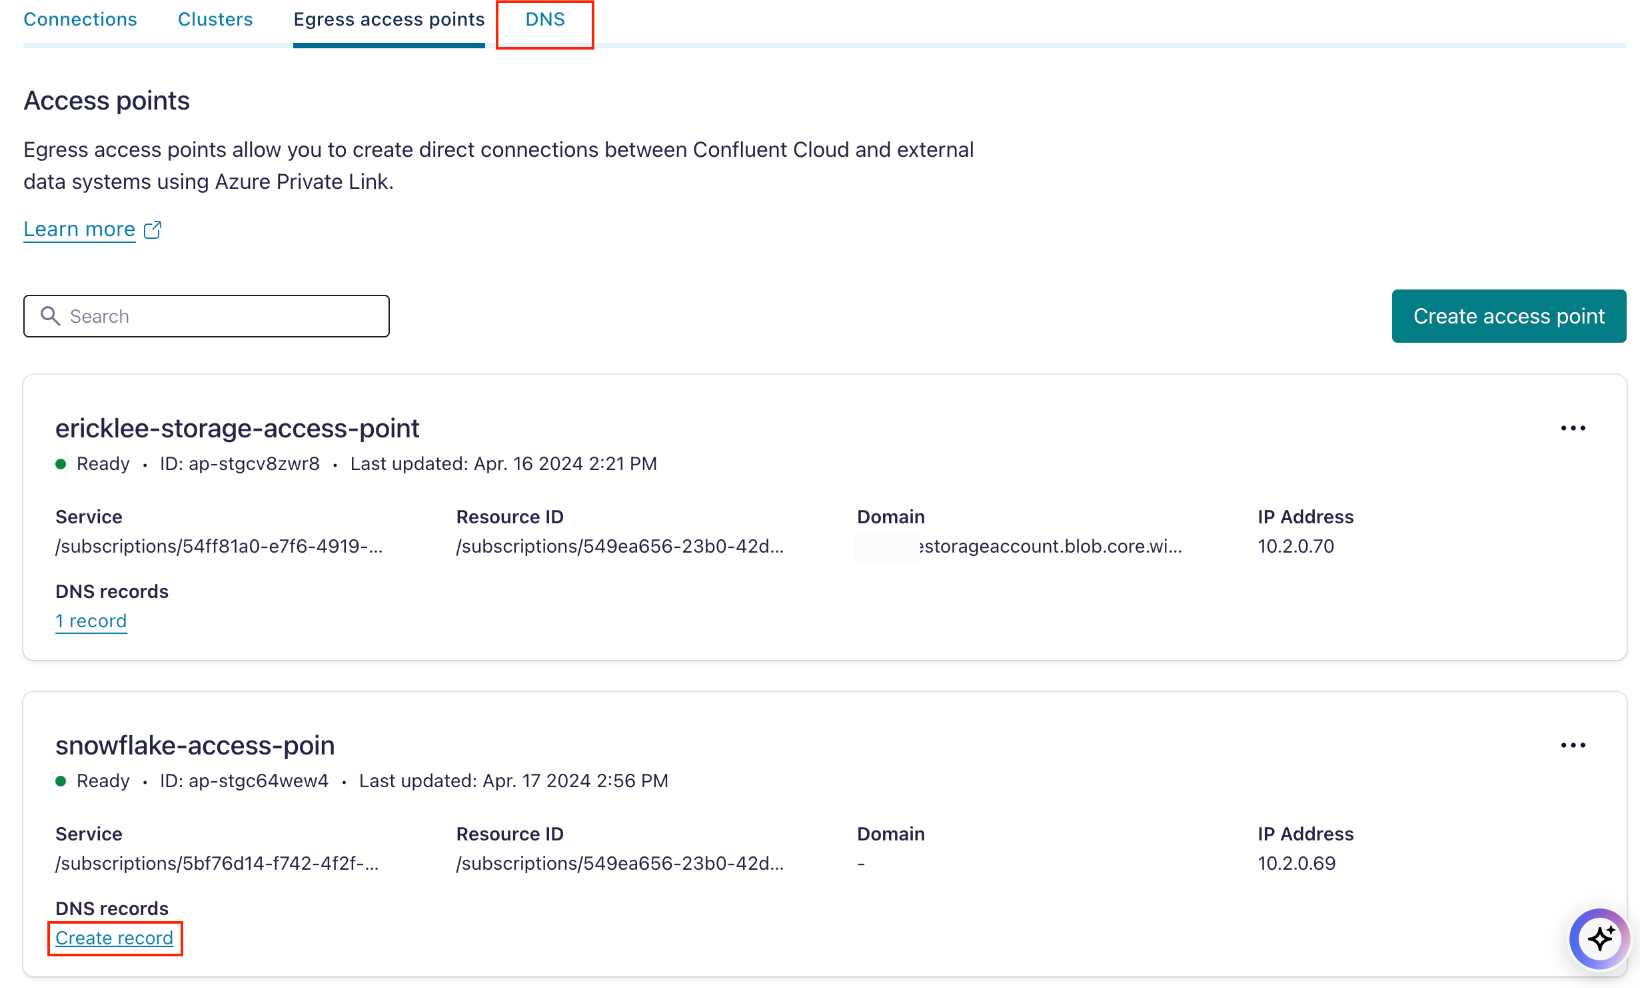
In the Confluent Cloud Console, in the DNS tab, click Create record on the associated PrivateLink Endpoint.
Specify the following:
Access point: Select the PrivateLink Endpoint you created in the Step 2. Create an Egress Private Link Endpoint section.
Domain: Specify the Domain you retrieved in Snowflake, using one of the below formats.
Account Locator (Legacy):
<account_name>.<region_id>.privatelink.snowflakecomputing.comAccount Name:
<org_name>-<account_name>.privatelink.snowflakecomputing.com
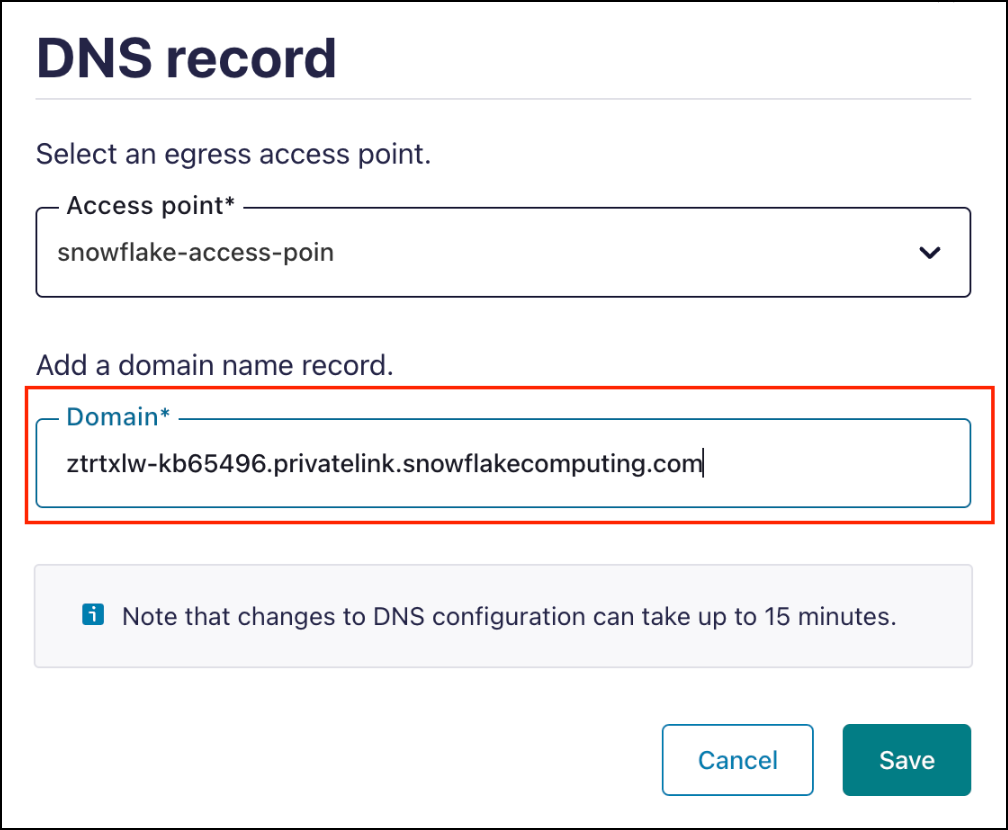
Click Save to create the record.
Obtain the required Domain by running the following within query within Snowflake.
USE ROLE ACCOUNTADMIN;
SELECT KEY, VALUE::VARCHAR HOST
FROM TABLE(FLATTEN(INPUT=>PARSE_JSON(SYSTEM$GET_PRIVATELINK_CONFIG())));
Note down the HOST values for the
privatelink-account-urland theregionless-privatelink-account-urlKEY values. These are required based on how you want to connect:Connect using Snowflake’s Account Locator (Legacy) URL (
<account_name>.<region_id>.privatelink.snowflakecomputing.com)Connect using Account Name URL (
<org_name>-<account_name>.privatelink.snowflakecomputing.com)
In the Network Management tab of your environment, click the Confluent Cloud gateway you want to add the DNS record to.
In the DNS tab, click Create DNS record.
Specify the following field values.
Access point: Select the PrivateLink Endpoint you created in the Step 2. Create an Egress Private Link Endpoint section.
Domain: Specify the Domain you retrieved in Snowflake, using one of the below formats.
Account Locator (Legacy):
<account_name>.<region_id>.privatelink.snowflakecomputing.comAccount Name:
<org_name>-<account_name>.privatelink.snowflakecomputing.com
Click Save.
Step 5. Create the Snowflake Sink connector
Specify the authentication details for Snowflake.
For Connection URL, specify the Snowflake’s private endpoint URL in one of the two possible formats:
Account Locator URL (Legacy):
https://<account_name>.<region_id>.privatelink.snowflakecomputing.comAccount Name URL :
https://<org_name>-<account_name>.privatelink.snowflakecomputing.com

Follow the steps to create the sink connector in Confluent Cloud.