Confluent Cloud API for Connect Usage Examples
The Confluent Cloud API allows you to interact with your fully-managed and custom connectors using the Confluent Cloud API. This is a queryable HTTP API. For instance, you can POST a query written in JSON and get back connector information specified by the query. Use the following examples to learn more about using the Confluent Cloud API for fully-managed and custom connectors.
Note
See the Confluent Cloud Connect API specification for the most recent APIs, a complete list of Connect API requests, all response codes, and other details.
For a hands-on course showing how this works for fully-managed connectors, see Hands On: Confluent Cloud Managed Connector API.
Prerequisites
Be sure to have the following prerequisites completed before running any of the examples.
Authorized access to Confluent Cloud.
The Confluent CLI installed and configured.
cURL and jq installed to use the API request examples in this document.
A Confluent Cloud API key to authenticate with the Confluent Cloud API. Every API request must include the resource key and secret encoded as Base64. Complete the following steps to create the keys and encode them in Base64.
Log in to your account.
confluent loginCreate the API key and secret for the
cloudresource.confluent api-key create --resource cloud
Important
You must create a Confluent Cloud API key for
--resource cloudto to interact with the Confluent Cloud resource management API. Using the API key created for your Confluent Cloud cluster (that is,--resource <cluster-ID>) results in an authentication error when running the API request.The Confluent Cloud API uses Basic access authentication. To use the API key and secret, you send them as a header in the form of
Authorization: Basic <Base64-credentials>. This form is shown in the curl examples. Enter the following command to display the Base64 encoding for the API key pair.echo -n "<api-key>:<secret>" | base64
For example:
echo -n "ABCDEFGPZROVP:z6yyH3LEEWdrAAamfue9mIeTAyocCMjO/oSKzg0UMoXA0x3CXjVglPJHYC/" | base64
HIJKLMNOPYRlBaUk9TNjVWUDp6Nnl5SDNMRUVXQmtQN1lkckFBYW1mdWU5bUllVEF5b2NDTWpPL29TS3pnMFVNb1hBMHgzQ1hq
You use the Base64 encoded result in the examples.
Managed and Custom Connector API Examples
The following examples show how to interact with your fully-managed and custom connectors using the Confluent Cloud Connect API. For plugin examples, see Fully-Managed and Custom Connector Plugin API Examples.
Before you run any examples, be sure to complete the prerequisites.
Note
Unless specified, the examples show how to use the API for both fully-managed and custom connectors.
The examples show using curl commands to work with the Confluent Cloud API.
For a hands-on course showing how this works, see Hands On: Confluent Cloud Managed Connector API.
Get a list of connectors
To return a list of all connectors in the cluster, use the following API request. Successful completion returns a list of fully-managed and custom connectors.
curl --request GET 'https://api.confluent.cloud/connect/v1/environments/<my-environment-ID>/clusters/<my-cluster-ID>/connectors' \
--header 'authorization: Basic <base64-encoded-key-and-secret>' | jq
For example:
curl --request GET 'https://api.confluent.cloud/connect/v1/environments/env-*****/clusters/lkc-*****/connectors' \
--header 'authorization: Basic HIJKLMNOPYRlB9TNjVWUDp6Nnl5SDNMRUVXQmtQN1dWU5bUllVEF5b2NDTWpPL29TS3pnMFVNb1hBMHgzQ1hqVmdsUEpIWUMv' | jq
The output displays a list of connectors. For example:
[
  "DatagenSourceConnector_0",
  "S3_SINKConnector_0"
  "custom-datagen_0"
]
Create a connector
When using the Confluent Cloud API to create or update a connector, you can either create a connector configuration JSON file to use as the payload or use the connector configuration JSON in the curl command itself. Successful completion returns the connector configuration.
The following curl command examples show two ways to provide the payload connector configuration. Note the following additional details when using these commands:
For configuration payload differences between fully-managed and custom connectors, see Custom connector configuration payload.
You use the Confluent Cloud Kafka cluster API key and secret in your JSON connector configuration. You use the base64 encoded
--resource cloudAPI key and secret in the API request.You must provide all required connector configuration properties.
Adhere to the connector naming conventions:
Do not exceed 64 characters.
A connector name can contain Unicode letters, numbers, marks, and the following special characters:
. , & _ + | [] -. Note that you can use spaces, but using dashes (-) makes it easier to reference the cluster in a programmatic way.
Custom connector configuration payload
There are a few configuration properties for custom connectors that are not required for fully-managed connector configurations. Note the following configuration property differences in the configuration payload when creating or updating custom connectors using the Confluent Cloud API.
confluent.connector.type(required): Accepts a string value. This property defines the type of connector. The property accepts two values:CUSTOMorMANAGED. The default isMANAGED. If creating a custom connector, this property is required to be set toCUSTOM.confluent.custom.plugin.id(required): Accepts a string value. This property provides the plugin ID for the custom connector. This is a unique ID assigned to the custom connector plugin uploaded to Confluent Cloud. This property is required for custom connectors. To get the plugin ID for a custom connector, see View a custom connector plugin ID.confluent.custom.plugin.version(optional): Accepts a string value. This property specifies the version of the custom plugin being used for the custom connector. For example,v1.2.3. If the plugin version is not defined, the latest version for that plugin would be used to create the connector. It is only applicable for the plugins created via the CCPM API. To create a plugin version, see Create a custom connector plugin version.confluent.custom.connection.endpoints(optional): Accepts a string value. This property provides an allowed static endpoint (or endpoints) for the custom connector to use when securely attaching to a sink or source data system. This is optional for a custom connector configuration. For more information and endpoint requirements, see egress endpoints.confluent.custom.schema.registry.auto(optional): Accepts a string value. When set toTRUE, this property automatically adds the required Schema Registry properties to the custom connector configuration, if Schema Registry is enabled for the Confluent Cloud cluster. Defaults toFALSE. For more information about Schema Registry integration with custom connectors, see Schema Registry integration.confluent.custom.connect.plugin.runtime(optional): Accepts a string value. This property specifies the Kafka runtime version that your custom connector uses. You can configure this setting during connector creation or updates. For example,3.6or3.9. If not specified, the connector defaults to the latest Kafka runtime version available in your environment.Note
The
confluent.custom.connect.plugin.runtimeproperty accepts the exact version specified in thecustom_connect_plugin_runtime_nameproperty. This is usually amajor.minorversion (for example,3.6,3.7). Confluent handles patch version and updates internally, and these updates are applied to the specified minor version.Existing connectors provisioned before September 12, 2025 use the runtime version of 3.6. To retrieve your connector’s runtime version, fetch its configuration. If no runtime information is specified in the configuration, the connector is using the 3.6 runtime.
confluent.custom.connect.java.version(optional): Accepts a string value. This property specifies the Java runtime version that your custom connector’s plugin uses. You can upgrade or downgrade the Java version independently of the Kafka runtime version. For example,11or17. If not specified, the connector defaults to the latest Java runtime version associated with the chosen Connect runtime in your environment.
Note
The following two configuration properties are not used when creating a custom connector configuration:
kafka.auth.mode: The current mode for authentication defaults to API key and secret. You do not need to set this configuration property.connector.class: The connector class is derived from the plugin used. You do not need to set this configuration property.
The following example configuration shows how these and other required properties are used to create a custom connector.
curl --request POST 'https://api.confluent.cloud/connect/v1/environments/<my-environment-ID>/clusters/<my-cluster-ID>/connectors' \
--header 'authorization: Basic <base64-encoded-key-and-secret>' \
--header 'Content-Type: application/json' \
--data-raw '{
  "name": "custom-datagen_0",
  "config": {
    "name": "custom-datagen_0",
    "confluent.connector.type": "CUSTOM",
    "confluent.custom.plugin.id": "custom-plugin-123456",
    "kafka.api.key": "<my-kafka-api-key>",
    "kafka.api.secret": "<my-kafka-api-secret>",
    "interval.ms": "10000",
    "kafka.topic": "pageviews",
    "task.max:": "1"
  }
}' | jq
In the example above, the optional properties confluent.custom.connection.endpoints and confluent.custom.schema.registry.auto are not used. An example of how these properties would look in a configuration is shown below:
"confluent.custom.schema.registry.auto": "true",
"confluent.custom.connection.endpoints": "mydatabase.abc123ecs2.us-west-2.rds.amazonaws.com:1433"
Raw JSON payload example
The following command uses the connector configuration in the curl command. The example shows an Amazon S3 Sink connector configuration.
curl --request POST 'https://api.confluent.cloud/connect/v1/environments/<my-environment-ID>/clusters/<my-cluster-ID>/connectors' \
--header 'authorization: Basic <base64-encoded-key-and-secret>' \
--header 'Content-Type: application/json' \
--data-raw '{
  "name": "S3_SINKConnector_0",
  "config": {
    "topics": "pageviews",
    "input.data.format": "AVRO",
    "connector.class": "S3_SINK",
    "name": "S3_SINKConnector_0",
    "kafka.api.key": "<my-kafka-api-key>",
    "kafka.api.secret" : "<my-kafka-api-secret>",
    "aws.access.key.id" : "<my-aws-access-key>",
    "aws.secret.access.key": "<my-aws-secret>",
    "s3.bucket.name": "<my-s3-bucket-name>",
    "output.data.format": "AVRO",
    "time.interval": "HOURLY",
    "flush.size": "1000",
    "tasks.max": "1"
  }
}' | jq
JSON file payload example
The following command uploads the connector configuration in a JSON file.
curl --request POST 'https://api.confluent.cloud/connect/v1/environments/<my-environment-ID>/clusters/<my-cluster-ID>/connectors' \
--header 'authorization: Basic <base64-encoded-key-and-secret>' \
--header 'Content-Type: application/json' \
--data "@<my-connector-config>.json" | jq
Note
The CLI section in each of the fully-managed connector docs provides an example of correctly formatted JSON to use in the payload file. For example, here is the JSON example provided in the Amazon S3 Sink connector documentation.
The following example command uploads a JSON file named my-s3-connector.json which is then used to create the Amazon S3 connector:
curl --request POST 'https://api.confluent.cloud/connect/v1/environments/env-*****/clusters/lkc-*****/connectors' \
--header 'authorization: Basic RUVSTEVYRlBaUk9TNjVWUDp6Nnl51lkckFBYW1mdWU5bUllVEF5b2NDTWpPL29TS3pnMFVNb1hBMHgzQ1hqVmdsUEpIWUMv' \
--header 'Content-Type: application/json' \
--data "@s3-connector-config.json" | jq
The output displays the connector configuration. For example:
{
  "name": "S3_SINKConnector_0",
  "type": "sink",
  "config": {
    "aws.access.key.id": "****************",
    "aws.secret.access.key": "****************",
    "cloud.environment": "prod",
    "cloud.provider": "aws",
    "connector.class": "S3_SINK",
    "flush.size": "1000",
    "input.data.format": "AVRO",
    "kafka.api.key": "****************",
    "kafka.api.secret": "****************",
    "kafka.dedicated": "false",
    "kafka.endpoint": "SASL_SSL://pkc-*****.us-west-2.aws.confluent.cloud:9092",
    "kafka.region": "us-west-2",
    "name": "S3_SINKConnector_0",
    "output.data.format": "AVRO",
    "s3.bucket.name": "datagen-to-s3",
    "schema.registry.url": "https://psrc-*****.us-east-2.aws.confluent.cloud",
    "tasks.max": "1",
    "time.interval": "HOURLY",
    "topics": "pageviews"
  },
  "tasks": []
}
Note
See the Confluent Cloud Connect API specification for the most recent APIs, a complete list of Connect API requests, all response codes, and other details.
List Java and Kafka runtimes
While creating a custom connector, you can specify the Kafka and Java runtime versions by defining the confluent.custom.connect.plugin.runtime and confluent.custom.connect.java.version properties respectively. Use the following API request to list all the currently available Kafka and Java runtime versions in descending order.
curl --location --request GET 'https://api.confluent.cloud/connect/v1/custom-connector-runtimes' --header 'Content-Type: application/json' --header 'Accept: application/json' --header 'Authorization: Basic <base64-encoded-key-and-secret>' | jq
Example response:
{
  "api_version": "connect/v1",
  "data": [
    {
      "api_version": "connect/v1",
      "custom_connect_plugin_runtime_name": "3.9",
      "description": "Custom connector runtime based on AK 3.9",
      "id": "ccrv-stgc1loxl",
      "kind": "CustomConnectorRuntime",
      "product_maturity": "GA",
      "runtime_ak_version": "3.9.0",
      "supported_java_versions": [
        "17"
      ]
    },
    {
      "api_version": "connect/v1",
      "custom_connect_plugin_runtime_name": "3.6",
      "description": "Custom connector runtime based on AK 3.6",
      "end_of_life_at": "2026-04-01T00:00:00Z",
      "id": "ccrv-stgc1ep54",
      "kind": "CustomConnectorRuntime",
      "product_maturity": "GA",
      "runtime_ak_version": "3.6.0",
      "supported_java_versions": [
        "17"
      ]
    }
  ],
  "kind": "CustomConnectorRuntimeList",
  "metadata": {}
}
Use the runtime versions obtained from the API response to define the Kafka and Java runtime version for your custom connector. The confluent.custom.connect.plugin.runtime configured in the connector should match the custom_connect_plugin_runtime_name from the runtime list API response.
Important
When a custom connector runtime version reaches End of Life (EOL), it automatically upgrades to the next supported version (for example, 3.9). This upgrade may introduce changes that could cause the connector to fail. Therefore, Confluent recommends testing the compatibility by manually upgrading to a higher version prior to the EOL date.
Confluent sends a notification about an upcoming runtime version’s End of Life (EOL) at least 60 days before the EOL date.
The table below shows the supported JDK versions and the End of Life of the available Kafka runtime versions:
Runtime Name | Runtime AK Version | Supported Java Versions | Product Maturity | End of Life (EOL) |
|---|---|---|---|---|
3.9 | 3.9.0 | 17 | GA | NA |
3.6 | 3.6.0 | 17 | GA | April 1, 2026 |
Update (or create) a connector
When using the Confluent Cloud API to update a connector configuration, you can either update a connector configuration JSON file to use as the payload or use the updated connector configuration JSON in the curl command itself. For examples showing how to construct the two types of curl commands, see Create a connector.
If the connector exists, the API request updates the existing connector configuration with the replacement configuration payload. If there is no connector at the location in the requested route, a new connector is created.
Note the following additional details when using these commands:
For configuration payload differences between fully-managed and custom connectors, see Custom connector configuration payload.
You use the Confluent Cloud Kafka cluster API key and secret in your JSON connector configuration. You use the base64 encoded
--resource cloudAPI key and secret in the API request.You must provide all required connector configuration properties.
Adhere to the connector naming conventions:
Do not exceed 64 characters.
A connector name can contain Unicode letters, numbers, marks, and the following special characters:
. , & _ + | [] -. Note that you can use spaces, but using dashes (-) makes it easier to reference the cluster in a programmatic way.
The following curl command example shows how to update the connector flush time interval property from HOURLY to DAILY. Successful completion returns the updated connector configuration.
The connector immediately begins using the new configuration.
curl --request PUT 'https://api.confluent.cloud/connect/v1/environments/<my-environment-ID>/clusters/<my-cluster-ID>/connectors/<my-connector-name>/config' \
--header 'authorization: Basic <base64-encoded-key-and-secret>' \
--header 'Content-Type: application/json' \
--data-raw '{
    "topics": "pageviews",
    "input.data.format": "AVRO",
    "connector.class": "S3_SINK",
    "name": "<my-connector-name>",
    "kafka.api.key": "<my-kafka-api-key>",
    "kafka.api.secret" : "<my-kafka-api-secret>",
    "aws.access.key.id" : "<my-aws-access-key>",
    "aws.secret.access.key": "<my-aws-secret>",
    "s3.bucket.name": "<my-s3-bucket-name>",
    "output.data.format": "AVRO",
    "time.interval": "DAILY",
    "flush.size": "1000",
    "tasks.max": "1"
}' | jq
You can also update the connector configuration by supplying a JSON file and using the following command:
curl --request PUT https://api.confluent.cloud/connect/v1/environments/<my-environment>/clusters/<my-cluster>/connectors/<my-connector-name>/config \
--header 'authorization: Basic <base64-encoded-key-and-secret>' \
--header 'Content-Type: application/json' \
--data "@s3-sink-update.json" | jq
Note
The CLI section in each of the fully-managed connector docs provides an example of correctly formatted JSON to use in the payload file. For example, here is the JSON example provided in the Amazon S3 Sink connector documentation.
For example:
curl --request PUT https://api.confluent.cloud/connect/v1/environments/env-*****/clusters/lkc-*****/connectors/S3_SINKConnector_5/config \
--header 'authorization: Basic ABCDEFGZaNjNPV0QzSlRNUjpHVll3UjmUwK3JRUk5HQi82YkdtZlRCb1lYMDZaSTJEMHNMSnBwalBocjNLN1JORWQ2VWo2' \
--header 'Content-Type: application/json' \
--data "@s3-sink-update.json" | jq
The output displays the updated connector configuration. For example:
{
  "name": "S3_SINKConnector_5",
  "type": "sink",
  "config": {
    "aws.access.key.id": "****************",
    "aws.secret.access.key": "****************",
    "cloud.environment": "prod",
    "cloud.provider": "aws",
    "connector.class": "S3_SINK",
    "flush.size": "1000",
    "input.data.format": "AVRO",
    "kafka.api.key": "****************",
    "kafka.api.secret": "****************",
    "kafka.dedicated": "false",
    "kafka.endpoint": "SASL_SSL://pkc-*****.us-west-2.aws.confluent.cloud:9092",
    "kafka.region": "us-west-2",
    "name": "S3_SINKConnector_1",
    "output.data.format": "AVRO",
    "s3.bucket.name": "datagen-to-s3",
    "schema.registry.url": "https://psrc-*****.us-east-2.aws.confluent.cloud",
    "tasks.max": "1",
    "time.interval": "DAILY",
    "topics": "pageviews"
  },
  "tasks": []
}
Note
See the Confluent Cloud Connect API specification for the most recent APIs, a complete list of Connect API requests, all response codes, and other details.
Read a connector configuration
Use the following API request to read a connector configuration. Successful completion returns the connector configuration.
curl --request GET 'https://api.confluent.cloud/connect/v1/environments/<my-environment-ID>/clusters/<my-cluster-ID>/connectors/<my-connector-name>/config' \
--header 'authorization: Basic <base64-encoded-key-and-secret>' | jq
For example:
curl --request GET 'https://api.confluent.cloud/connect/v1/environments/env-****/clusters/lkc-*****/connectors/S3_SINKConnector_0/config' \
--header 'authorization: Basic HIJKLMNOPYRlB9TNjVWUVXQmtQN1lkckFBYW1m5b2NDTWpPL29TS3pnMFVNb1hBMHgzQ1hqVmdsUEpIWUMv' | jq
The output displays the connector configuration. For example:
{
  "aws.access.key.id": "****************",
  "aws.secret.access.key": "****************",
  "cloud.environment": "prod",
  "cloud.provider": "aws",
  "connector.class": "S3_SINK",
  "flush.size": "1000",
  "input.data.format": "AVRO",
  "kafka.api.key": "****************",
  "kafka.api.secret": "****************",
  "kafka.dedicated": "false",
  "kafka.endpoint": "SASL_SSL://pkc-****.us-west-2.aws.confluent.cloud:9092",
  "kafka.region": "us-west-2",
  "name": "S3_SINKConnector_0",
  "output.data.format": "AVRO",
  "s3.bucket.name": "datagen-to-s3",
  "schema.registry.url": "https://psrc-*****.us-east-2.aws.confluent.cloud",
  "tasks.max": "1",
  "time.interval": "HOURLY",
  "topics": "pageviews"
}
Note
See the Confluent Cloud Connect API specification for the most recent APIs, a complete list of Connect API requests, all response codes, and other details.
Migrate a connector configuration
Use the following API request to translate a self-managed connector configuration to a fully-managed connector configuration. The API takes the self-managed connector configuration as input and returns the fully-managed connector configuration, including any errors and warnings.
Note
You must resolve all errors in the translated fully-managed connector configuration before creating the connector. You can ignore warnings.
curl -X PUT 'https://api.confluent.cloud/connect/v1/environments/{environment_id}/clusters/{kafka_cluster_id}/connector-plugins/{plugin_name}/config/translate' --header 'Content-Type: application/json' --data '{
    "<config1>": "<value1>",
     "<config2>": "<value2>"
     ...
     }' | jq
Example request:
curl -X PUT 'https://api.confluent.cloud/connect/v1/environments/env123/clusters/lkc12/connector-plugins/S3_SINK/config/translate' --header 'Content-Type: application/json' --data '{
    "connector.class": "io.confluent.connect.s3.S3SinkConnector",
    "tasks.max": "1",
    "topics": "input-topic",
    "s3.bucket.name": "",
    "storage.class": "io.confluent.connect.s3.storage.S3Storage",
    "confluent.topic.bootstrap.servers":"localhost:9092",
    "flush.size": "10000"
    }'
Example response: It returns the translated fully-managed connector configuration with errors and warnings.
{
  "config": {
    "connector.class": "S3_SINK",
    "tasks.max": "1",
    "topics": "input-topic",
    "s3.bucket.name": "",
    "storage.class": "io.confluent.connect.s3.storage.S3Storage",
    "flush.size": "10000"
    },
   "errors": [
     {
       "field": "s3.bucket.name",
       "message": "Bucket name must not be empty"
     }],
   "warnings": [
     {
       "field": "confluent.topic.bootstrap.servers",
       "message": "Customer given value is ignored. Default value is used"
     }]
 }
Query a sink connector for metrics
Complete the following steps to query a sink connector for metrics.
Create a JSON file named
query-connector-metrics.jsonto use as the payload for the API request. You can copy and paste the following example to get the number of records the connector received in a specific time interval. Be sure to enter the correct connector resource ID forvalueand a valid time interval forintervals.{ "aggregations": [ { "metric": "io.confluent.kafka.connect/received_records" } ], "filter": { "field": "resource.connector.id", "op": "EQ", "value": "lcc-k2q7v" }, "granularity": "PT1H", "intervals": [ "2021-03-02T00:00:00/2021-03-02T23:00:00" ] }
Enter the following POST query command:
curl --silent --request POST 'https://api.telemetry.confluent.cloud/v2/metrics/cloud/query' \
--header 'authorization: Basic <base64-encoded-key-and-secret>' \
--header 'Content-Type: application/json' \
--data "<my-json-filename>.json" | jq
For example:
curl --silent --request POST 'https://api.telemetry.confluent.cloud/v2/metrics/cloud/query' \
--header 'authorization: Basic ABCDEFGZaNjNPV0QzSeEZCemUwK3JRUk5HQi82YkdtZlRCb1lYMDZaSTJEMHNMSnBwalBocjNLN1JORWQ2VWo2' \
--header 'Content-Type: application/json' \
--data "@query-metrics.json" | jq
The request returns the number of records that connector
lcc-k2q7vreceived in the time interval specified. For example:{ "data": [ { "timestamp": "2021-03-02T18:00:00Z", "value": 44027, }, { "timestamp": "2021-03-02T19:00:00Z", "value": 7227, }, { "timestamp": "2021-03-02T20:00:00Z", "value": 7222, }, { "timestamp": "2021-03-02T21:00:00Z", "value": 7253, }, { "timestamp": "2021-03-02T22:00:00Z", "value": 7258, } ] }
For additional information about the Confluent Cloud Metrics API, see the Confluent Cloud Metrics documentation.
Delete a connector
Use the following API request to delete a connector.
curl --request DELETE https://api.confluent.cloud/connect/v1/environments/<my-environment-ID>/clusters/<my-cluster-ID>/connectors/<my-connector-name> \
--header 'authorization: Basic <base64-encoded-key-and-secret>' | jq
For example:
curl --request DELETE https://api.confluent.cloud/connect/v1/environments/env-*****/clusters/lkc-*****/connectors/S3_SINKConnector_1 \
--header 'authorization: Basic HIJKLMNOPQCSEFUNUJWNjdONjpOc3RyWE5kamlzZE05VTdOSk05T3FuSTcyQzlIb2ZRaWhURWtiOWlkVTFtdTB6' | jq
The following shows an output example where the connector was successfully deleted.
{
  "error": null
}
Note
See the Confluent Cloud Connect API specification for the most recent APIs, a complete list of Connect API requests, all response codes, and other details.
Fully-Managed and Custom Connector Plugin API Examples
The following examples show how to interact with your fully-managed and custom connector plugins using the Confluent Cloud Connect API. Before you run any examples, be sure to complete the prerequisites.
Fully-managed connector plugin examples
The following examples show API requests for fully-managed connector plugins.
List fully-managed plugins
Use the following API request to return a list of all connector plugins in the cluster. Successful completion returns a list of fully-managed connector plugins.
curl --request GET 'https://api.confluent.cloud/connect/v1/environments/<my-environment-ID>/clusters/<my-cluster-ID>/connector-plugins' --header 'authorization: Basic <base64-encoded-key-and-secret>' | jq
For example:
curl --request GET 'https://api.confluent.cloud/connect/v1/environments/env-a12b34/clusters/lkc-abc123/connector-plugins' --header 'authorization: Basic Uk1IWFE1MjNBRVFTRUJKVDphOFBn******************SlptcXd5aXNnBINnR3em1GVUw1bDVXQVNX' | jq
The output displays a list of connector plugins. For example:
[
   {
     "class": "MicrosoftSqlServerSink",
     "type": "sink",
     "version": "0.1.0"
   },
   {
     "class": "MySqlCdcSource",
     "type": "source",
     "version": "0.1.0"
   },
   {
     "class": "DataScienceBigQuerySink",
     "type": "sink",
     "version": "1"
   },
   {
     "class": "PubSubSource",
     "type": "source",
     "version": "0.1.0"
   },
   {...
   }
]
Validate a fully-managed plugin
Use the following API request to validate configuration values against the plugin configuration definition. The API validates the configuration and returns suggested values and validation error messages.
curl --request PUT 'https://api.confluent.cloud/connect/v1/environments/<my-environment-ID>/clusters/<my-cluster-ID/connector-plugins/<plugin-name>/config/validate' --header 'authorization: Basic <base64-encoded-key-and-secret>' --header 'Content-Type: application/json' --data '{
        "<config1>": "<value1>",
        "<config2>": "<value2>"
        ...
      }' | jq
For example:
curl --request PUT 'https://api.confluent.cloud/connect/v1/environments/env-a12b34/clusters/lkc-abc123/connector-plugins/DatagenSource/config/validate' --header 'authorization: Basic Uk1IWFE1MjNBRVFTRUJKVDphOFBn******************SlptcXd5aXNnBINnR3em1GVUw1bDVXQVNX' --header 'Content-Type: application/json' --data '{
     "connector.class": "io.confluent.kafka.connect.datagen.DatagenConnector",
     "kafka.topic": "pageviews",
     "quickstart": "pageviews",
     "key.converter": "org.apache.kafka.connect.storage.StringConverter",
     "value.converter": "org.apache.kafka.connect.json.JsonConverter",
     "value.converter.schemas.enable": "false",
     "max.interval": "100",
     "iterations": "10000000",
     "tasks.max": "1"
     }' | jq
The output returns suggested values and error messages. For example:
{
  "name": "io.confluent.kafka.connect.datagen.DatagenConnector",
  "groups": [
    "How should we connect to your data?",
    "Kafka Cluster credentials",
    "Which topic do you want to send data to?",
    "Schema Config",
    "Output messages",
    "Datagen Details",
    "Number of tasks for this connector",
    "Transforms",
    "Predicates"
  ],
  "error_count": 4,
  "configs": [
    {
      "definition": {
        "name": "connector.class",
        "type": "STRING",
        "required": true,
        "default_value": "",
        "importance": "HIGH",
        "documentation": "",
        "group": "How should we connect to your data?",
        "width": "NONE",
        "display_name": "Connector class",
        "dependents": [],
        "order": 1,
        "alias": ""
      },
      "value": {
        "name": "connector.class",
        "value": "DatagenSource",
        "recommended_values": [],
        "errors": [],
        "visible": true
      },
      "metadata": {}
    },
    {
      "definition": {
        "name": "name",
        "type": "STRING",
        "required": true,
        "default_value": "",
        "importance": "HIGH",
        "documentation": "Sets a name for your connector.",
        "group": "How should we connect to your data?",
        "width": "NONE",
        "display_name": "Connector name",
        "dependents": [],
        "order": 2,
        "alias": ""
      },
      "value": {
        "name": "name",
        "value": "{{.logicalClusterId}}",
        "recommended_values": [],
        "errors": [
          "\"name\" is required"
        ],
        "visible": true
      },
      "metadata": {}
    },
    { ...
    },
    { ...
    },
    { ...
    },
    {
      "definition": {
        "name": "predicates",
        "type": "LIST",
        "required": false,
        "default_value": "",
        "importance": "LOW",
        "documentation": "Aliases for the predicates used by transformations.",
        "group": "Predicates",
        "width": "LONG",
        "display_name": "Predicates",
        "dependents": [],
        "order": 8,
        "alias": ""
      },
      "value": {
        "name": "predicates",
        "value": "",
        "recommended_values": [],
        "errors": [],
        "visible": true
      },
      "metadata": {}
    }
  ]
}
Custom Connector Plugin API examples
Note
The Custom Connect Plugin Management (CCPM) APIs operate at the environment level, that means the resources are scoped and managed within individual Confluent Cloud environments, making plugin management more flexible and secure.
The CCPM APIs support plugin versioning, allowing you to:
Upload new versions of existing connector plugins.
Update running connectors to use these new versions.
This process ensures message offset continuity, leading to seamless version transitions where connectors resume exactly from the previous version’s last point. The CCPM APIs do not allow Cluster Admins to create plugins. For more information, see RBAC role mappings for custom connectors.
Confluent recommends you to use the CCPM APIs for future plugin management activities.
The following examples show API requests for custom connector plugins.
Important
Custom connector plugins are organization-level resources. The following admin roles can interact with custom connectors and plugins:
OrganizationAdmin
EnvironmentAdmin
CloudClusterAdmin
For more information, see RBAC role mappings.
Important
Viewing or editing settings of custom connectors created with CCPM APIs via Confluent Cloud Console leads to the following error.
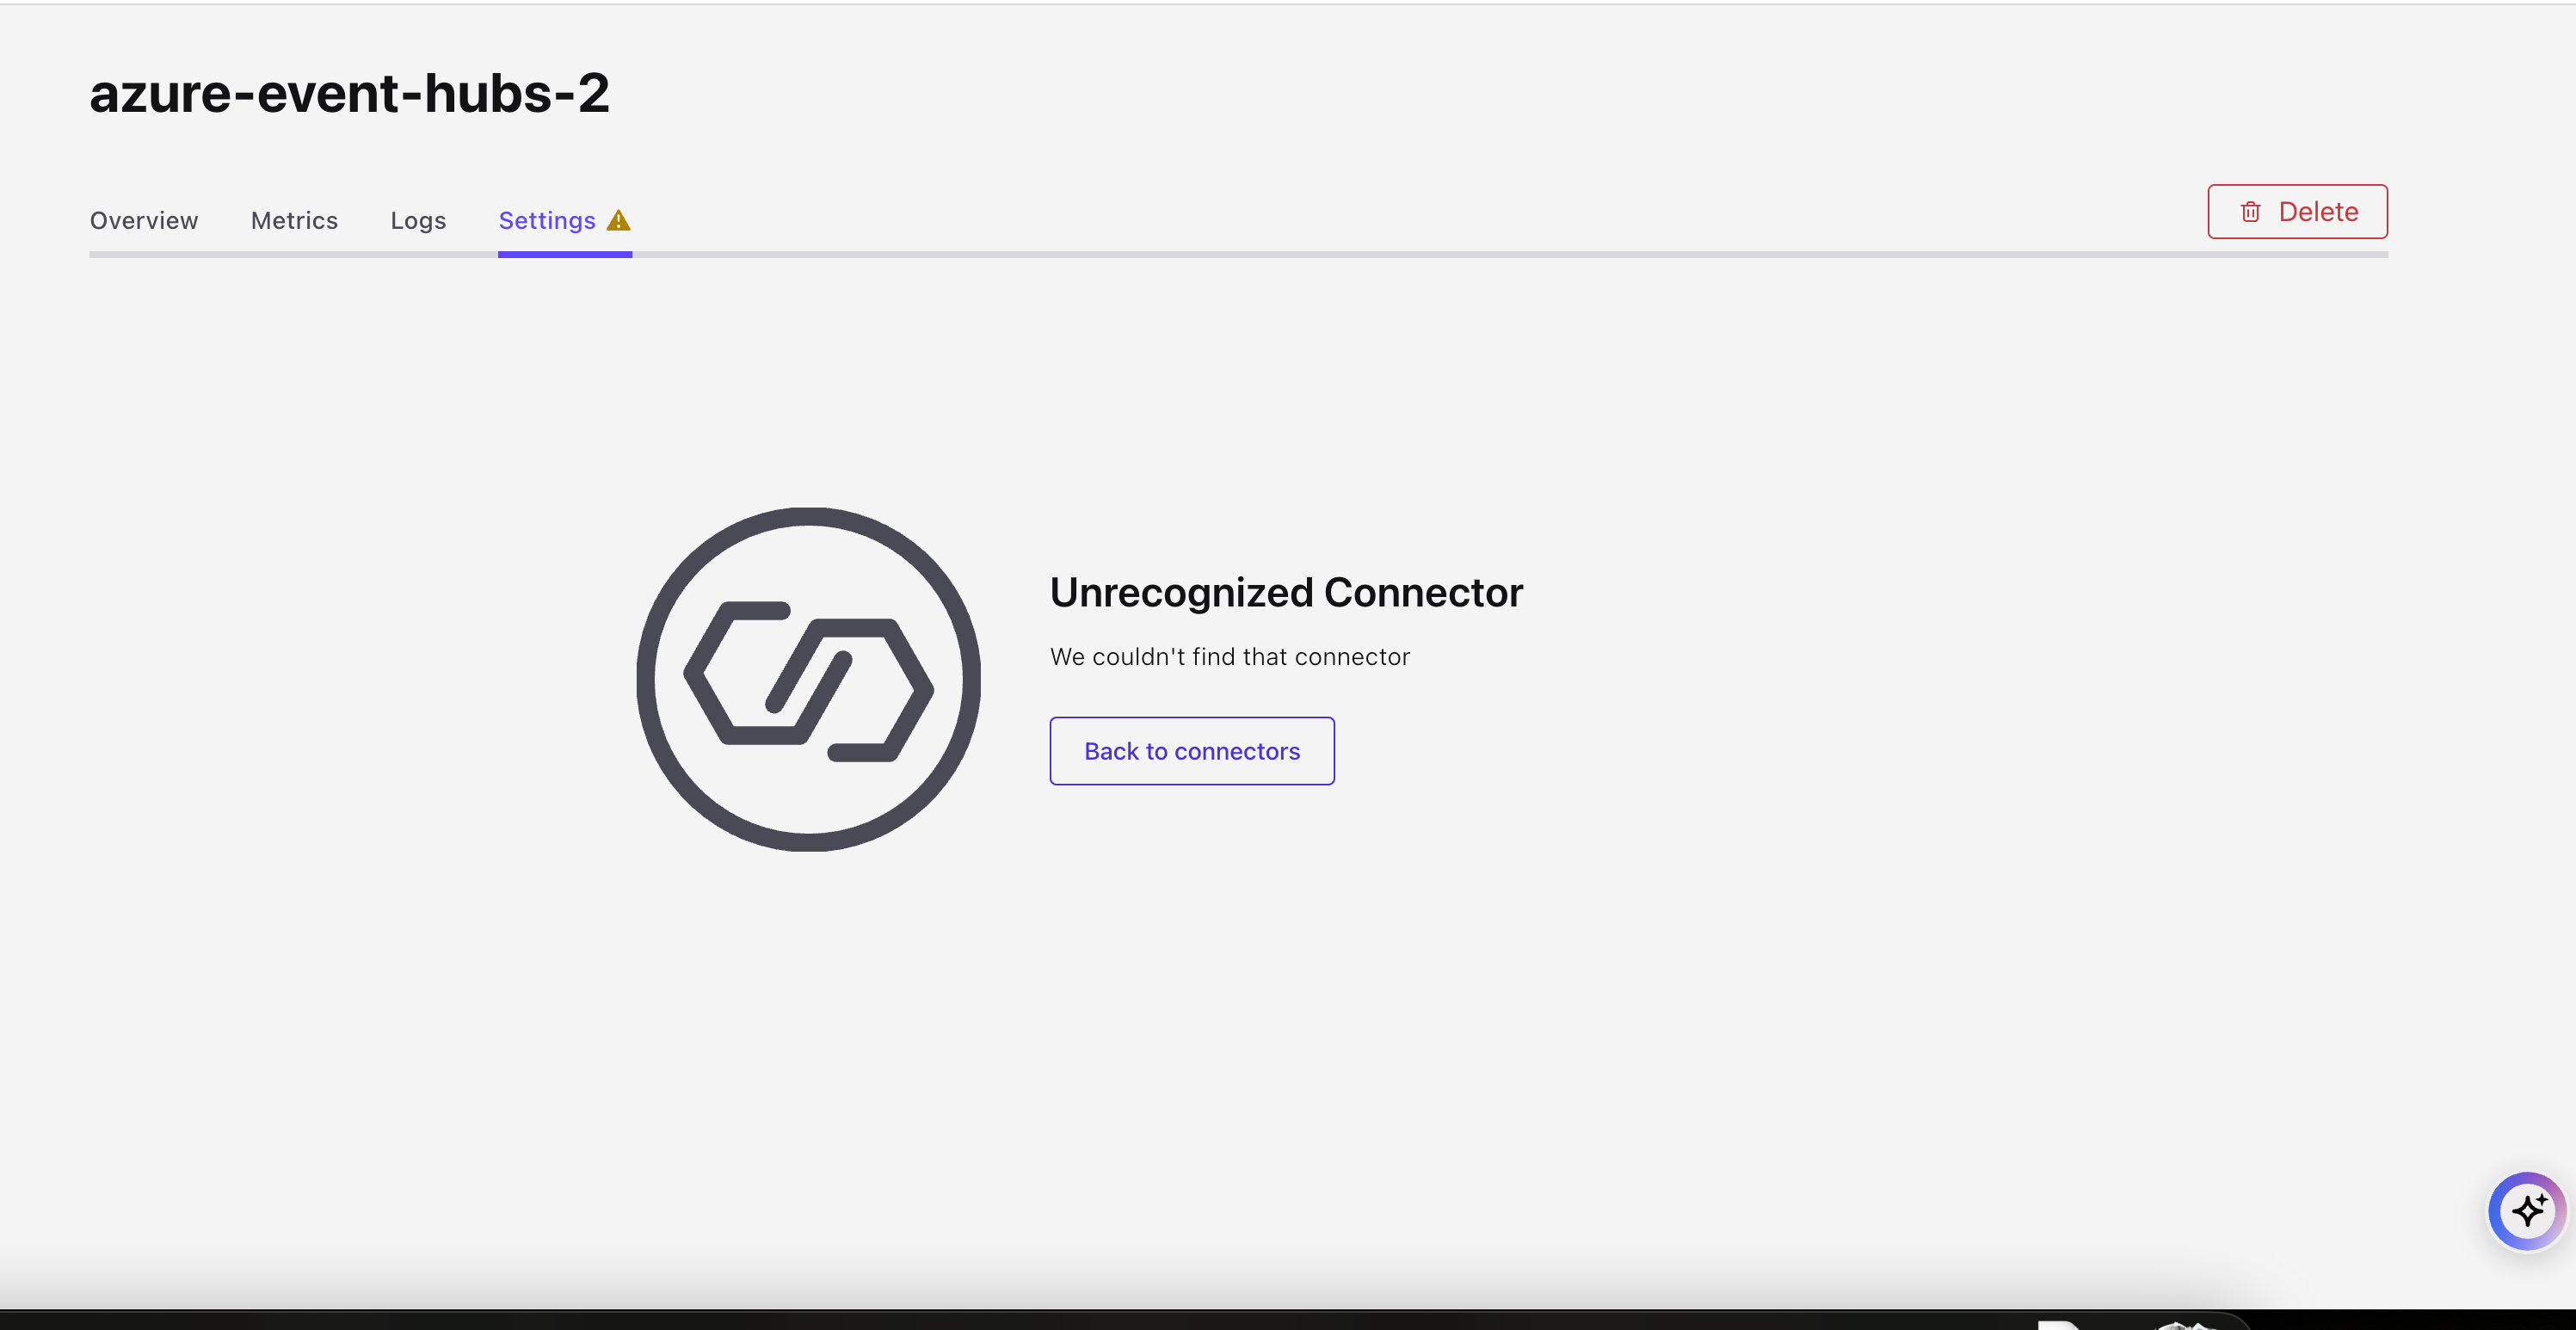
You can edit or view the settings through the Confluent CLI or Confluent Cloud APIs.
List custom plugins
Depending on the activity in your environment, there may be many pages of plugin results returned with this command. The APIs support pagination and so you can set a page size and use the "metadata":""next" URL to move forward.
Use the following API request to list the custom plugins. Define the following configuration properties:
cloud: Add your cloud provider -AWS,AzureorGCP. The default value isAWS.page_size: A pagination size for collection requests. the default value is10and the maximum allowed is100.page_token: An opaque pagination token for collection requests.
curl --request GET 'https://api.confluent.cloud/connect/v1/custom-connector-plugins?cloud=YOUR_CLOUD_PROVIDER' --header 'authorization: Basic <base64-encoded-key-and-secret>' | jq
Example request: To get a list of all custom connector plugins in the cluster
curl --request GET 'https://api.confluent.cloud/connect/v1/custom-connector-plugins?cloud=AWS' --header 'authorization: Basic Uk1IWFE1MjNBRVFTRUJKVDphOFBn******************SlptcXd5aXNnBINnR3em1GVUw1bDVXQVNX' | jq
Example response: The output displays custom connector plugin details.
 {
   "api_version": "connect/v1",
   "kind": "CustomConnectorPluginList",
   "metadata": {
     "first": "https://api.confluent.cloud/connect/v1/custom-connector-plugins",
     "last": "https://api.confluent.cloud/connect/v1/custom-connector-plugins?page_token=bcAOehAY8F16YD84Z1wT",
     "prev": "https://api.confluent.cloud/connect/v1/custom-connector-plugins?page_token=YIXRY97wWYmwzrax4dld",
     "next": "https://api.confluent.cloud/connect/v1/custom-connector-plugins?page_token=UvmDWOB1iwfAIBPj6EYb",
     "total_size": 123
    },
   "data": [
    {
      "api_version": "connect/v1",
      "kind": "CustomConnectorPlugin",
      "id": "dlz-f3a90de",
      "metadata": {
         "self": "https://api.confluent.cloud/connect/v1/custom-connector-plugins/ccp-12345",
         "resource_name": "crn://confluent.cloud/organization=9bb441c4-edef-46ac-8a41-c49e44a3fd9a/custom-connector-plugin=ccp-12345",
         "created_at": "2006-01-02T15:04:05-07:00",
         "updated_at": "2006-01-02T15:04:05-07:00",
         "deleted_at": "2006-01-02T15:04:05-07:00"
        },
      "display_name": "string",
      "content_format": "ZIP",
      "description": "string",
      "documentation_link": "https://github.com/confluentinc/kafka-connect-datagen",
      "connector_class": "io.confluent.kafka.connect.datagen.DatagenConnector",
      "connector_type": "SOURCE",
      "cloud": "AWS",
      "sensitive_config_properties": [
        "passwords",
        "keys",
        "tokens"
        ],
      "upload_source": {
         "location": "PRESIGNED_URL_LOCATION",
         "upload_id": "e53bb2e8-8de3-49fa-9fb1-4e3fd9a16b66"
        }
    }
    ]
}
The following API request returns a list of 20 plugins:
curl --request GET 'https://api.confluent.cloud/connect/v1/custom-connector-plugins\?page_size\=20' --header 'authorization: Basic <base64-encoded-key-and-secret>' | jq
The output of this command includes the following:
"metadata": {
    "first": "http://api.confluent.cloud/connect/v1/custom-connector-plugins",
    "next": "http://api.confluent.cloud/connect/v1/custom-connector-plugins?page_token=eyJpZCI6ImN1c3RvbS1wbHVnaW4tbDlvan**************************IwMjMtMDQtMjFUMTY6MTk6MjEuNzY2NTAyWiIsInNpemUiOjR9"
   }
Use the "next" URL to go to the next set of results.
Use the following API request to get a list of custom plugins. Define the following configuration properties:
spec.cloud: Add your cloud provider -AWS,AzureorGCP.environment(Required): Add your environment ID.page_size: A pagination size for collection requests. the default value is10and the maximum allowed is100.page_token: An opaque pagination token for collection requests.
curl --request GET \
  --url 'https://api.confluent.cloud/ccpm/v1/plugins?spec.cloud=<YOUR_CLOUD_PROVIDER>&environment=<YOUR_ENVIRONMENT_ID>' \
  --header 'Authorization: Basic YOUR_BASE64_ENCODED_API_KEY_AND_SECRET'
Example Request: The following API request returns a list of all custom connector plugins.
curl --request GET \
  --url 'https://api.confluent.cloud/ccpm/v1/plugins?spec.cloud=AWS&environment=env-00000' \
  --header 'Authorization: Basic REPLACE_BASIC_AUTH'
Example Response: The output displays custom connector plugin details.
{
  "api_version": "ccpm/v1",
  "kind": "CustomConnectPluginList",
  "metadata": {
    "first": "https://api.confluent.cloud/ccpm/v1/custom-connect-plugins",
    "last": "https://api.confluent.cloud/ccpm/v1/custom-connect-plugins?page_token=bcAOehAY8F16YD84Z1wT",
    "prev": "https://api.confluent.cloud/ccpm/v1/custom-connect-plugins?page_token=YIXRY97wWYmwzrax4dld",
    "next": "https://api.confluent.cloud/ccpm/v1/custom-connect-plugins?page_token=UvmDWOB1iwfAIBPj6EYb",
    "total_size": 123
   },
   "data": [
      {
        "api_version": "ccpm/v1",
        "kind": "CustomConnectPlugin",
        "id": "dlz-f3a90de",
        "metadata": {
          "self": "https://api.confluent.cloud/ccpm/v1/custom-connect-plugins/ccp-12345",
          "resource_name": "crn://confluent.cloud/organization=9bb441c4-edef-46ac-8a41-c49e44a3fd9a/custom-connect-plugin=ccp-12345",
          "created_at": "2006-01-02T15:04:05-07:00",
          "updated_at": "2006-01-02T15:04:05-07:00",
          "deleted_at": "2006-01-02T15:04:05-07:00"
         },
         "spec": {
           "cloud": "AWS",
           "display_name": "string",
           "description": "string",
           "runtime_language": "JAVA",
           "environment": {
             "id": "env-00000",
             "environment": "string",
             "related": "https://api.confluent.cloud/v2/environments/env-00000",
             "resource_name": "https://api.confluent.cloud/organization=9bb441c4-edef-46ac-8a41-c49e44a3fd9a/environment=env-00000"
            }
         }
      }
   ]
}
Request a presigned URL
Before you can upload a custom connector plugin to Confluent Cloud, you need to get a presigned URL and ID to use in the configuration. The presigned URL and ID include the correct bucket policy and security token for uploading the plugin. Note that the URL policy expires in one hour. If the policy expires, you can request a new presigned upload URL.
Use the following API request to get the upload URL and ID. The following are required configuration properties:
content-format: You can send a request forZIPandJARfile formats, depending on the plugin format.cloud: Add your cloud provider. For example,AWS. The default value isAWS.
curl --request POST 'https://api.confluent.cloud/connect/v1/presigned-upload-url' --header 'authorization: Basic <base64-encoded-key-and-secret>' --header 'content-type: application/json' --data '{"content_format":"YOUR_FILE_FORMAT","cloud":"YOUR_CLOUD_PROVIDER"}' | jq
The example below shows an API request for AWS and ZIP upload file.
Example Request
curl --request POST 'https://api.confluent.cloud/connect/v1/presigned-upload-url' --header 'authorization: Basic <base64-encoded-key-and-secret>' --header 'content-type: application/json' --data '{"content_format":"ZIP","cloud":"AWS"}' | jq
Example Response: The output displays the details for the presigned URL and upload ID.
{
  "api_version": "connect/v1",
  "content_format": "ZIP",
  "kind": "PresignedUrl",
  "upload_form_data": {
      "bucket": "confluent-custom-connectors-prod-us-west-2",
      "key": "staging/ccp/v1/.../custom-plugins/.../plugin.zip",
      "policy": "...",
      "x-amz-algorithm": "AWS4-HMAC-SHA256",
      "x-amz-credential": "ASIA3UFUYVKN2TJBCYPQ/20230911/us-west-2/s3/aws4_request",
      "x-amz-date": "20230911T210830Z",
      "x-amz-security-token": "..."
     },
   "upload_id": "...",
   "upload_url": "https://confluent-custom-connectors-prod-us-west-2.s3.dualstack.us-west-2.amazonaws.com/"
 }
The example below shows an API request for Azure and ZIP upload file.
Example Request
curl --request POST 'https://api.confluent.cloud/connect/v1/presigned-upload-url' --header 'authorization: Basic <base64-encoded-key-and-secret>' --header 'content-type: application/json' --data '{"content_format":"ZIP","cloud":"Azure"}' | jq
Example Response: The output displays the details for the presigned URL and upload ID.
{
  "api_version": "connect/v1",
  "cloud": "AZURE",
  "content_format": "zip",
  "kind": "PresignedUrl",
  "upload_form_data": {},
  "upload_id": "f055bfeb-8360-4134-a814-5018617df20b",
  "upload_url": "https://byocprodcentralus.blob.core.windows.net/byocprodcentralus/staging%2Fccp%2Fv1%2F885023e3-e315-4696-91bb-ac2c22b7bb29%2Fcustom-plugins%2Ff055bfeb-8360-4134-a814-5018617df20b%2Fplugin.zip?se=2025-06-24T17%3A30%3A28Z&sig=EUhuD%2BZUbQQaRMC87FVMz7Isso%2BGMWLHUkROkR2no4Y%3D&ske=2025-06-24T17%3A30%3A28Z&skoid=e67d6311-7267-45ec-a6f9-00fdf0b6b307&sks=b&skt=2025-06-24T17%3A15%3A28Z&sktid=0893715b-959b-4906-a185-2789e1ead045&skv=2023-11-03&sp=aw&spr=https&sr=b&st=2025-06-24T17%3A15%3A28Z&sv=2021-12-02"
 }
The example below shows an API request for GCP and ZIP upload file.
Example Request
curl --request POST 'https://api.confluent.cloud/connect/v1/presigned-upload-url' --header 'authorization: Basic <base64-encoded-key-and-secret>' --header 'content-type: application/json' --data '{"content_format":"ZIP","cloud":"GCP"}' | jq
Example Response: The output displays the details for the presigned URL and upload ID.
{
  "api_version": "connect/v1",
  "cloud": "GCP",
  "content_format": "zip",
  "kind": "PresignedUrl",
  "upload_form_data": {},
  "upload_id": "0c97c62e-a2fa-4aaa-98ec-4bf5834e1301",
  "upload_url": "https://storage.googleapis.com/scp-prod-us-central1/staging/ccp/v1/885023e3-e315-4696-91bb-ac2c22b7bb29/custom-plugins/0c97c62e-a2fa-4aaa-98ec-4bf5834e1301/plugin.zip?X-Goog-Algorithm=GOOG4-RSA-SHA256&X-Goog-Credential=control-plane-plugin-service%40connect-byoc-prod.iam.gserviceaccount.com%2F20250624%2Fauto%2Fstorage%2Fgoog4_request&X-Goog-Date=20250624T172106Z&X-Goog-Expires=899&X-Goog-Signature=98c5da1d2ef46d4d2453440a786ceb6fa7a8e4c55e9c70f11e65858aef49d51a8a5093c6276a0b4f8ecc9b069023f0abac705ef808e54f8d10298b676b7bbcfa5b03b0bab66fb0e5c2f289216803670a8fa99952ea26a98f1a9f2cb76cfc9bd3efc36395cea2f66abf910c44443de7f6f760b2f85f0afe75423ee10fceffd32f73d3c2fc9c325cb387db6fdf58eb97601ed0d7dcafcd2c1fb3aae1ab90a9fbdca6826973d69de81c65b59cc2bdb3a9ca4911d6bec0451dd25fadac50cfdf6fb40599cbc1b8adb8881ed134a2ceb21ddae0d6d7a9cbc4020c0439f7275bb315db4160a32a1641bf6f21e8e6c46e3e959c37e2983e57821bef41209195bdc29913&X-Goog-SignedHeaders=host"
 }
Use the returned details above when uploading the custom connector plugin.
Use the following API request to get the upload URL and ID. The following are required configuration properties:
content-format: You can send a request forZIPandJARfile formats, depending on the plugin format.cloud: Cloud provider where the Custom Connect Plugin archive is uploaded. For example,AWS.environment: The environment to which this belongs.id: ID of the referred resource.environment: Environment of the referred resource, if env-scoped.
curl --request POST \
--url https://api.confluent.cloud/ccpm/v1/presigned-upload-url \
--header 'Authorization: Basic YOUR_BASE64_ENCODED_API_KEY_AND_SECRET' \
--header 'content-type: application/json' \
--data '{"content_format":"YOUR_CONTENT_FORMAT","cloud":"YOUR_CLOUD_PROVIDER","environment":{"id":"YOUR_ENVIRONMENT_ID,"environment":"string""}}'
The example below shows an API request for AWS and ZIP upload file.
Example Request
curl --request POST \
  --url https://api.confluent.cloud/ccpm/v1/presigned-upload-url \
  --header 'Authorization: Basic REPLACE_BASIC_AUTH' \
  --header 'content-type: application/json' \
  --data '{"content_format":"ZIP","cloud":"AWS","environment":{"id":"env-00000","environment":"string"}}'
Example Response: The output displays the details for the presigned URL and upload ID.
{
  "api_version": "ccpm/v1",
  "kind": "PresignedUrl",
  "content_format": "ZIP",
  "cloud": "AWS",
  "upload_id": "<generated-upload-id>",
  "upload_url": "<generated-upload-url>",
  "upload_form_data": {
     "bucket": "confluent-custom-connectors",
     "key": "staging/custom-plugin/2f37f0b6-f8da/connect-e53bb2e8/plugin.zip",
     "policy": "string",
     "x-amz-algorithm": "AWS4-HMAC-SHA256",
     "x-amz-credential": "string",
     "x-amz-date": "20230725T013857Z",
     "x-amz-security-token": "string",
     "x-amz-signature": "string"
    },
  "environment": {
     "id": "env-00000",
     "environment": "string",
     "related": "https://api.confluent.cloud/v2/environments/env-00000",
     "resource_name": "https://api.confluent.cloud/organization=abcd/environment=env-00000"
    }
}
The example below shows an API request for Azure and ZIP upload file.
Example Request
curl --request POST \
  --url https://api.confluent.cloud/ccpm/v1/presigned-upload-url \
  --header 'Authorization: Basic REPLACE_BASIC_AUTH' \
  --header 'content-type: application/json' \
  --data '{"content_format":"ZIP","cloud":"Azure","environment":{"id":"env-00000","environment":"string"}}'
Example Response: The output displays the details for the presigned URL and upload ID.
{
  "api_version": "ccpm/v1",
  "kind": "PresignedUrl",
  "cloud": "AZURE",
  "content_format": "ZIP",
  "upload_form_data": {},
  "upload_id": "<generated-upload-id>",
  "upload_url": "<generated-upload-url>"
}
The example below shows an API request for GCP and ZIP upload file.
Example Request
curl --request POST \
  --url https://api.confluent.cloud/ccpm/v1/presigned-upload-url \
  --header 'Authorization: Basic REPLACE_BASIC_AUTH' \
  --header 'content-type: application/json' \
  --data '{"content_format":"ZIP","cloud":"GCP","environment":{"id":"env-00000","environment":"string"}}'
Example Response: The output displays the details for the presigned URL and upload ID.
{
  "api_version": "ccpm/v1",
  "cloud": "GCP",
  "content_format": "zip",
  "kind": "PresignedUrl",
  "upload_form_data": {},
  "upload_id": "<generated-upload-id>",
  "upload_url": "<generated-upload-url>"
}
Use the returned details above when uploading the custom connector plugin.
Upload a custom plugin
Once you have the presigned URL, ID, bucket policy and other security details, you upload your plugin to the bucket. The following examples provides the curl command you can use to upload your plugin ZIP or JAR file.
Note
When specifying the upload file, you must use the @ symbol at the start of the file path. For example, -F file=@</path/to/upload/file>. If the @ symbol is not used, you may see an error stating that Your proposed upload is smaller than the minimum allowed size.
curl -X POST '<upload_url from presigned url response>' \
-F "bucket=<upload_form_data.bucket from presigned url response>" \
-F "key=<upload_form_data.key from presigned url response>" \
-F "policy=<upload_form_data.policy from presigned url response>" \
-F "x-amz-algorithm=<upload_form_data.x-amz-algorithm from presigned url response>" \
-F "x-amz-credential=<upload_form_data.x-amz-credential from presigned url response>" \
-F "x-amz-date=<upload_form_data.x-amz-date from presigned url response>" \
-F "x-amz-security-token=<upload_form_data.x-amz-security-token from presigned url response>" \
-F "x-amz-signature=<upload_form_data.x-amz-signature from presigned url response>" \
-F "file=@plugin.zip"
A successful command returns the command prompt.
curl -X PUT -T plugin.zip -H "x-ms-blob-type: BlockBlob" "<upload_url from presigned url response>"
A successful command returns the command prompt.
curl -X PUT --upload-file plugin.zip "<upload_url from presigned url response>"
A successful command returns the command prompt.
Create a custom plugin
Use the following API request to create a custom connector plugin. The following are required configuration properties:
display_name: A meaningful plugin name to be displayed in the UI and CLI.connector_class: Java class or alias for connector. You can get connector class from connector documentation provided by developer.connector_type:SOURCEorSINK.upload_source: For this property, you use the values"PRESIGNED_URL_LOCATION"and the upload ID.
Optional configuration properties include the following:
cloud: Cloud provider where the Custom Connector Plugin archive is uploaded -AWS,AzureorGCP. The default value isAWS.description: A meaningful description for the plugin.documentation_link: You can include a URL for documentation users need to reference for the connector. This URL is displayed for users configuring a connector using the plugin.sensitive_properties: A sensitive property is a connector configuration property that must be hidden after a user enters the property value when setting up connector. For more information about sensitive properties, see Uploading and launching the connector.
curl --request POST \
  --url https://api.confluent.cloud/connect/v1/custom-connector-plugins \
  --header 'Authorization: Basic REPLACE_BASIC_AUTH' \
  --header 'content-type: application/json' \
  --data '{
    "display_name":"<PLUGIN_NAME>",
    "description":"string",
    "documentation_link":"<DOC_URL>",
    "connector_class":"<CONNECTOR_CLASS>",
    "connector_type":"SOURCE",
    "cloud":"<YOUR_CLOUD_PROVIDER>",
    "sensitive_config_properties": ["<property-1>", "<property-2>"],
    "upload_source":{"location":"PRESIGNED_URL_LOCATION","upload_id":"<UPLOAD_ID>"}
   }' | jq
Example Request:
curl --request POST \
  --url https://api.confluent.cloud/connect/v1/custom-connector-plugins \
  --header 'Authorization: Basic Uk1IWFE1MjNBRVFTRUJKVDphOFBn******************SlptcXd5aXNnBINnR3em1GVUw1bDVXQVNX' \
  --header 'content-type: application/json' \
  --data '{
    "display_name":"custom-datagen-2",
    "description":"A test connector providing mock source data.",
    "documentation_link":"https://github.com/confluentinc/kafka-connect-datagen",
    "connector_class":"io.confluent.kafka.connect.datagen.DatagenConnector",
    "connector_type":"SOURCE",
    "upload_source":{"location":"PRESIGNED_URL_LOCATION","upload_id":"<UPLOAD_ID>"}
   }' | jq
Example Response: Output displays the details for the plugin
{
  "api_version": "connect/v1",
  "kind": "CustomConnectorPlugin",
  "id": "ccp-12345",
  "metadata": {
    "self": "https://api.confluent.cloud/connect/v1/custom-connector-plugins/ccp-12345",
    "resource_name": "crn://confluent.cloud/organization=9bb441c4-edef-46ac-8a41-c49e44a3fd9a/custom-connector-plugin=ccp-12345",
    "created_at": "2006-01-02T15:04:05-07:00",
    "updated_at": "2006-01-02T15:04:05-07:00",
    "deleted_at": "2006-01-02T15:04:05-07:00"
   },
   "display_name": "custom-datagen-2",
   "content_format": "ZIP",
   "description": "A test connector providing mock source data.",
   "documentation_link": "https://github.com/confluentinc/kafka-connect-datagen",
   "connector_class": "io.confluent.kafka.connect.datagen.DatagenConnector",
   "connector_type": "SOURCE",
   "cloud": "AWS",
   "sensitive_config_properties": [
       "passwords",
       "keys",
       "tokens"
   ],
   "upload_source": {
     "location": "PRESIGNED_URL_LOCATION",
     "upload_id": "<UPLOAD_ID>"
   }
}
Use the following API request to create a custom connector plugin. The following are required configuration properties:
scope: The desired state of the Custom Connect Plugin.cloud: The cloud provider where the custom connector plugin archive is uploaded. For example,AWS.display_name: A meaningful plugin name to be displayed in the UI and CLI.description(Optional): A meaningful description for the plugin.environment: The environment to which this resource belongs.id: The unique ID of the environment resource.environment(Optional): Environment of the referred resource, if env-scoped.
curl --request POST \
  --url https://api.confluent.cloud/ccpm/v1/plugins \
  --header 'Authorization: Basic YOUR_BASE64_ENCODED_API_KEY_AND_SECRET' \
  --header 'content-type: application/json' \
  --data '{
    "spec": {
      "cloud": "YOUR_CLOUD_PROVIDER",
      "display_name": "YOUR_PLUGIN_DISPLAY_NAME",
      "description": "YOUR_PLUGIN_DESCRIPTION",
      "environment": {
        "id": "YOUR_ENVIRONMENT_ID",
        "environment": "YOUR_ENVIRONMENT_NAME_OR_TYPE"
      }
   }}'
Example Request:
curl --request POST \
  --url https://api.confluent.cloud/ccpm/v1/plugins \
  --header 'Authorization: Basic REPLACE_BASIC_AUTH' \
  --header 'content-type: application/json' \
  --data '{"spec":{"cloud":"AWS","display_name":"string","description":"string","environment":{"id":"env-00000","environment":"string"}}}'
Example Response:
{
  "api_version": "ccpm/v1",
  "kind": "CustomConnectPlugin",
  "id": "dlz-f3a90de",
  "metadata": {
    "self": "https://api.confluent.cloud/ccpm/v1/custom-connect-plugins/ccp-12345",
    "resource_name": "crn://confluent.cloud/organization=9bb441c4-edef-46ac-8a41-c49e44a3fd9a/custom-connect-plugin=ccp-12345",
    "created_at": "2006-01-02T15:04:05-07:00",
    "updated_at": "2006-01-02T15:04:05-07:00",
    "deleted_at": "2006-01-02T15:04:05-07:00"
   },
   "spec": {
     "cloud": "AWS",
     "display_name": "string",
     "description": "string",
     "runtime_language": "JAVA",
     "environment": {
       "id": "env-00000",
       "environment": "string",
       "related": "https://api.confluent.cloud/v2/environments/env-00000",
       "resource_name": "https://api.confluent.cloud/organization=9bb441c4-edef-46ac-8a41-c49e44a3fd9a/environment=env-00000"
      }
   }
}
Note
In the Connect API, JAR/ZIP file are a part of the plugin resource, but in the CCPM API, these files have been moved to plugin version resource. To use the JAR/ZIP file via CCPM API, you have to create a plugin version. To create a plugin version, see Create a custom connector plugin version
Read a custom plugin
Use the following API request to read a custom connector plugin:
curl --request GET \
  --url 'https://api.confluent.cloud/connect/v1/custom-connector-plugins/{id}' \
  --header 'Authorization: Basic REPLACE_BASIC_AUTH'
Example Request:
curl --request GET \
  --url 'https://api.confluent.cloud/connect/v1/custom-connector-plugins/ccp-abcdef' \
  --header 'Authorization: Uk1IWFE1MjNBRVFTRUJKVDphOFBn******************SlptcXd5aXNnBINnR3em1GVUw1bDVXQVNX' | jq
Example response: The output displays the details for the plugin
{
  "api_version": "connect/v1",
  "connector_class": "io.confluent.kafka.connect.datagen.DatagenConnector",
  "connector_type": "SOURCE",
  "content_format": "ZIP",
  "description": "A source connector for dev testing.",
  "display_name": "custom datagen 2",
  "documentation_link": "https://github.com/confluentinc/kafka-connect-datagen",
  "id": "ccp-abcdef",
  "kind": "CustomConnectorPlugin",
  "metadata": {
    "created_at": "2023-09-12T17:38:04.867797Z",
    "resource_name": "crn://confluent.cloud/organization=14383aee-1bc5-.............../custom-connector-plugins=ccp-abcdef",
    "self": "http://api.confluent.cloud/connect/v1/custom-connector-plugins/ccp-abcdef",
    "updated_at": "2023-09-12T17:38:05.812088Z"
   },
   "sensitive_config_properties": []
}
Use the following API request to read a custom connector plugin:
curl --request GET \
  --url 'https://api.confluent.cloud/ccpm/v1/plugins/YOUR_PLUGIN_ID?environment=YOUR_ENVIRONMENT_ID' \
  --header 'Authorization: Basic YOUR_BASE64_ENCODED_API_KEY_AND_SECRET'
Example Request:
curl --request GET \
  --url 'https://api.confluent.cloud/ccpm/v1/plugins/YOUR_PLUGIN_ID?environment=env-00000' \
  --header 'Authorization: Uk1IWFE1MjNBRVFTRUJKVDphOFBn******************SlptcXd5aXNnBINnR3em1GVUw1bDVXQVNX' | jq
Example response: The output displays the details for the plugin.
{
  "api_version": "ccpm/v1",
  "kind": "CustomConnectPlugin",
  "id": "dlz-f3a90de",
  "metadata": {
    "self": "https://api.confluent.cloud/ccpm/v1/custom-connect-plugins/ccp-12345",
    "resource_name": "crn://confluent.cloud/organization=9bb441c4-edef-46ac-8a41-c49e44a3fd9a/custom-connect-plugin=ccp-12345",
    "created_at": "2006-01-02T15:04:05-07:00",
    "updated_at": "2006-01-02T15:04:05-07:00",
    "deleted_at": "2006-01-02T15:04:05-07:00"
   },
   "spec": {
     "cloud": "AWS",
     "display_name": "string",
     "description": "string",
     "runtime_language": "JAVA",
     "environment": {
       "id": "env-00000",
       "environment": "string",
       "related": "https://api.confluent.cloud/v2/environments/env-00000",
       "resource_name": "https://api.confluent.cloud/organization=9bb441c4-edef-46ac-8a41-c49e44a3fd9a/environment=env-00000"
      }
   }
}
Update a custom plugin
Use the following PATCH API request to update a custom connector plugin. You need to only add properties in the --data section that has to be updated.
curl --request PATCH \
  --url 'https://api.confluent.cloud/connect/v1/custom-connector-plugins/{id}' \
  --header 'Authorization: Basic REPLACE_BASIC_AUTH' \
  --header 'content-type: application/json' \
  --data '{"display_name":"string","description":"string","documentation_link":"https://github.com/confluentinc/kafka-connect-datagen","connector_class":"io.confluent.kafka.connect.datagen.DatagenConnector","connector_type":"SOURCE","sensitive_config_properties":["passwords","keys","tokens"],"upload_source":{"location":"PRESIGNED_URL_LOCATION","upload_id":"e53bb2e8-8de3-49fa-9fb1-4e3fd9a16b66"}}' | jq
Example Request: Change the connector plugin display name
curl --request PATCH \
  --url 'https://api.confluent.cloud/connect/v1/custom-connector-plugins/ccp-abcdef' \
  --header 'Authorization: Basic Uk1IWFE1MjNBRVFTRUJKVDphOFBn******************SlptcXd5aXNnBINnR3em1GVUw1bDVXQVNX' \
  --header 'content-type: application/json' \
  --data '{"display_name":"custom-datagen-1"}' | jq
Example response: The output displays the details for the updated plugin
{
  "api_version": "connect/v1",
  "connector_class": "io.confluent.kafka.connect.datagen.DatagenConnector",
  "connector_type": "SOURCE",
  "content_format": "ZIP",
  "description": "A source connector for dev testing.",
  "display_name": "custom-datagen-1",
  "documentation_link": "https://github.com/confluentinc/kafka-connect-datagen",
  "id": "ccp-abcdef",
  "kind": "CustomConnectorPlugin",
  "metadata": {
    "created_at": "2023-09-12T17:38:04.867797Z",
    "resource_name": "crn://confluent.cloud/organization=14383aee-1bc5-.............../custom-connector-plugins=ccp-abcdef",
    "self": "http://api.confluent.cloud/connect/v1/custom-connector-plugins/ccp-abcdef",
    "updated_at": "2023-09-12T17:38:05.812088Z"
   },
   "sensitive_config_properties": []
}
Use the following PATCH API request to update a custom connector plugin. You need to only add properties in the --data section that has to be updated.
curl --request PATCH \
  --url 'https://api.confluent.cloud/ccpm/v1/plugins/{id}' \
  --header 'Authorization: Basic REPLACE_BASIC_AUTH' \
  --header 'content-type: application/json' \
  --data '{
    "spec": {
      "cloud": "YOUR_CLOUD_PROVIDER",
      "display_name": "UPDATED_PLUGIN_DISPLAY_NAME",
      "description": "YOUR_PLUGIN_DESCRIPTION",
      "environment": {
        "id": "YOUR_ENVIRONMENT_ID",
        "environment": "YOUR_ENVIRONMENT_NAME_OR_TYPE"
      }
   }}'
Example Request: Change the connector plugin display name
curl --request PATCH \
  --url 'https://api.confluent.cloud/ccpm/v1/plugins/{id}' \
  --header 'Authorization: Basic REPLACE_BASIC_AUTH' \
  --header 'content-type: application/json' \
  --data '{"spec":{"cloud":"AWS","display_name":"custom-datagen","description":"string","environment":{"id":"env-00000","environment":"string"}}}'
Example response: The output displays the details for the updated plugin
{
  "api_version": "ccpm/v1",
  "kind": "CustomConnectPlugin",
  "id": "dlz-f3a90de",
  "metadata": {
    "self": "https://api.confluent.cloud/ccpm/v1/custom-connect-plugins/ccp-12345",
    "resource_name": "crn://confluent.cloud/organization=9bb441c4-edef-46ac-8a41-c49e44a3fd9a/custom-connect-plugin=ccp-12345",
    "created_at": "2006-01-02T15:04:05-07:00",
    "updated_at": "2006-01-02T15:04:05-07:00",
    "deleted_at": "2006-01-02T15:04:05-07:00"
   },
   "spec": {
     "cloud": "AWS",
     "display_name": "string",
     "description": "string",
     "runtime_language": "JAVA",
     "environment": {
       "id": "env-00000",
       "environment": "string",
       "related": "https://api.confluent.cloud/v2/environments/env-00000",
       "resource_name": "https://api.confluent.cloud/organization=9bb441c4-edef-46ac-8a41-c49e44a3fd9a/environment=env-00000"
      }
   }
}
Delete a custom plugin
Use the following API request to delete a custom connector plugin:
curl --request DELETE \
  --url 'https://api.confluent.cloud/connect/v1/custom-connector-plugins/{id}' \
  --header 'Authorization: Basic REPLACE_BASIC_AUTH'
Example request:
curl --request DELETE \
  --url 'https://api.confluent.cloud/connect/v1/custom-connector-plugins/ccp-abcdef' \
  --header 'Authorization: Uk1IWFE1MjNBRVFTRUJKVDphOFBn******************SlptcXd5aXNnBINnR3em1GVUw1bDVXQVNX' | jq
A successful command returns the command prompt.
Use the following API request to delete a custom connector plugin:
curl --request DELETE \
  --url 'https://api.confluent.cloud/ccpm/v1/plugins/{plugin-id}?environment=<Environment-ID>' \
  --header 'Authorization: Basic REPLACE_BASIC_AUTH'
Example request:
curl --request DELETE \
  --url 'https://api.confluent.cloud/ccpm/v1/plugins/ccp-abc?environment=env-00000' \
  --header 'Authorization: Uk1IWFE1MjNBRVFTRUJKVDphOFBn******************SlptcXd5aXNnBINnR3em1GVUw1bDVXQVNX' | jq
A successful command returns the command prompt.
Note
See the Confluent Cloud Connect API specification for the most recent APIs, a complete list of Connect API requests, all response codes, and other details.
Custom Connector Plugin version API examples
Note
PLugin versions can be created only for the custom plugins created via the CCPM API.
Custom Connector plugin version API allow you to manage your custom connector plugin versions using the Confluent Cloud APIs. You can perform the following actions:
Create a custom connector plugin version
Use the following API request to create a custom connector plugin version. The following are required configuration properties:
plugin-id(required): The ID of the custom connector plugin for which the version is being created.environment(required): The ID of the environment where the plugin version should be created.version(required): The version identifier for the custom connector plugin (e.g., “1.2.3”).connector-classes(required): List of connector class objects as a JSON string, for example:[{"name": "com.example.MyConnectorClass", "type": "source"}].class_name(required): Java class or alias for connector. You can get connector class from connector documentation provided by developer.type: The connector type -SOURCEorSINK.
sensitive-config-properties(optional): Comma-separated list of sensitive property names.upload_source(required): Upload source of Custom Connect Plugin Version.location: Location of the Custom Connect Plugin source.upload_id: Upload ID returned by the/presigned-upload-url API. This field returns an empty string in all responses.
documentation-link(optional): Document link of Custom Connect Plugin.
curl --request POST \
  --url 'https://api.confluent.cloud/ccpm/v1/plugins/{plugin_id}/versions' \
  --header 'Authorization: Basic REPLACE_BASIC_AUTH' \
  --header 'content-type: application/json' \
  --data '{"spec":{"version":"<PLUGIN_VERSION>","sensitive_config_properties":["passwords","keys","tokens"],"documentation_link":"<DOC_LINK>","connector_classes":[{"class_name":"<CLASS_NAME>","type":"<CONNECTOR_TYPE>"}],"upload_source":{"location":"PRESIGNED_URL_LOCATION","upload_id":"<UPLOAD_ID>"},"environment":{"id":"env-00000","environment":"string"}}}'
Example:
curl --request POST \
  --url 'https://api.confluent.cloud/ccpm/v1/plugins/{plugin_id}/versions' \
  --header 'Authorization: Basic REPLACE_BASIC_AUTH' \
  --header 'content-type: application/json' \
  --data '{"spec":{"version":"string","sensitive_config_properties":["passwords","keys","tokens"],"documentation_link":"https://github.com/confluentinc/kafka-connect-datagen","connector_classes":[{"class_name":"io.confluent.kafka.connect.datagen.DatagenConnector","type":"SOURCE"}],"upload_source":{"location":"PRESIGNED_URL_LOCATION","upload_id":"e53bb2e8-8de3-49fa-9fb1-4e3fd9a16b66"},"environment":{"id":"env-00000","environment":"string"}}}'
Example response:
{
  "api_version": "ccpm/v1",
  "kind": "CustomConnectPluginVersion",
  "id": "dlz-f3a90de",
  "metadata": {
    "self": "https://api.confluent.cloud/ccpm/v1/plugins/ccp-12345/versions/ver-12345?environment=env-abc123",
    "resource_name": "crn://confluent.cloud/organization=9bb441c4-edef-46ac-8a41-c49e44a3fd9a/environment=env-abc123/custom-connect-plugin=ccp-12345/version=ver-12345",
    "created_at": "2006-01-02T15:04:05-07:00",
    "updated_at": "2006-01-02T15:04:05-07:00",
    "deleted_at": "2006-01-02T15:04:05-07:00"
  },
  "spec": {
    "version": "string",
    "sensitive_config_properties": [
      "passwords",
      "keys",
      "tokens"
    ],
    "documentation_link": "https://github.com/confluentinc/kafka-connect-datagen",
    "content_format": "ZIP",
    "connector_classes": [
      {
        "class_name": "io.confluent.kafka.connect.datagen.DatagenConnector",
        "type": "SOURCE"
      }
    ],
    "upload_source": {
      "location": "PRESIGNED_URL_LOCATION",
      "upload_id": "e53bb2e8-8de3-49fa-9fb1-4e3fd9a16b66"
    },
    "environment": {
      "id": "env-00000",
      "environment": "string",
      "related": "https://api.confluent.cloud/v2/environments/env-00000",
      "resource_name": "https://api.confluent.cloud/organization=9bb441c4-edef-46ac-8a41-c49e44a3fd9a/environment=env-00000"
    }
  },
  "status": {
    "phase": "PROCESSING",
    "error_message": "Version creation failed due to invalid plugin archive."
  }
}
List custom connector plugin version
Use the following API request to list a custom connector plugin versions in your environment. The following are required configuration properties:
environment(required): The ID of the environment to list plugin versions.plugin-id(required): The ID of the custom connector plugin whose versions are being listed.
curl --request GET \
  --url 'https://api.confluent.cloud/ccpm/v1/plugins/{PLUGIN_ID}/versions?environment=ENVIRONMENT_ID' \
  --header 'Authorization: Basic REPLACE_BASIC_AUTH'
Example:
curl --request GET \
  --url 'https://api.confluent.cloud/ccpm/v1/plugins/{plugin_id}/versions?environment=env-00000' \
  --header 'Authorization: Basic REPLACE_BASIC_AUTH'
Example response:
{
  "api_version": "ccpm/v1",
  "kind": "CustomConnectPluginVersionList",
  "metadata": {
    "first": "https://api.confluent.cloud/ccpm/v1/plugins/ccp-12345/versions",
    "last": "https://api.confluent.cloud/ccpm/v1/plugins/ccp-12345/versions?page_token=bcAOehAY8F16YD84Z1wT",
    "prev": "https://api.confluent.cloud/ccpm/v1/plugins/ccp-12345/versions?page_token=YIXRY97wWYmwzrax4dld",
    "next": "https://api.confluent.cloud/ccpm/v1/plugins/ccp-12345/versions?page_token=UvmDWOB1iwfAIBPj6EYb",
    "total_size": 123
  },
  "data": [
    {
      "api_version": "ccpm/v1",
      "kind": "CustomConnectPluginVersion",
      "id": "dlz-f3a90de",
      "metadata": {
        "self": "https://api.confluent.cloud/ccpm/v1/plugins/ccp-12345/versions/ver-12345?environment=env-abc123",
        "resource_name": "crn://confluent.cloud/organization=9bb441c4-edef-46ac-8a41-c49e44a3fd9a/environment=env-abc123/custom-connect-plugin=ccp-12345/version=ver-12345",
        "created_at": "2006-01-02T15:04:05-07:00",
        "updated_at": "2006-01-02T15:04:05-07:00",
        "deleted_at": "2006-01-02T15:04:05-07:00"
      },
      "spec": {
        "version": "string",
        "sensitive_config_properties": [
          "passwords",
          "keys",
          "tokens"
        ],
        "documentation_link": "https://github.com/confluentinc/kafka-connect-datagen",
        "content_format": "ZIP",
        "connector_classes": [
          {
            "class_name": "io.confluent.kafka.connect.datagen.DatagenConnector",
            "type": "SOURCE"
          }
        ],
        "upload_source": {
          "location": "PRESIGNED_URL_LOCATION",
          "upload_id": "e53bb2e8-8de3-49fa-9fb1-4e3fd9a16b66"
        },
        "environment": {
          "id": "env-00000",
          "environment": "string",
          "related": "https://api.confluent.cloud/v2/environments/env-00000",
          "resource_name": "https://api.confluent.cloud/organization=9bb441c4-edef-46ac-8a41-c49e44a3fd9a/environment=env-00000"
        }
      },
      "status": {
        "phase": "PROCESSING",
        "error_message": "Version creation failed due to invalid plugin archive."
      }
    }
  ]
}
Describe custom connector plugin version
Use the following API request to describe a custom connector plugin version in your environment. The following are required configuration properties:
environment(required): The ID of the environment where the plugin version details should be retrieved.plugin-id(required): The ID of the custom connector plugin for which the version details are being described.id(required): The unique ID for the custom connect plugin version.
curl --request GET \
  --url 'https://api.confluent.cloud/ccpm/v1/plugins/{PLUGIN_ID}/versions/{id}?environment=eENVIRONMENT_ID' \
  --header 'Authorization: Basic REPLACE_BASIC_AUTH'
Example Request:
curl --request GET \
  --url 'https://api.confluent.cloud/ccpm/v1/plugins/{plugin_id}/versions/{id}?environment=env-00000' \
  --header 'Authorization: Basic REPLACE_BASIC_AUTH'
Example response:
{
  "api_version": "ccpm/v1",
  "kind": "CustomConnectPluginVersion",
  "id": "dlz-f3a90de",
  "metadata": {
    "self": "https://api.confluent.cloud/ccpm/v1/plugins/ccp-12345/versions/ver-12345?environment=env-abc123",
    "resource_name": "crn://confluent.cloud/organization=9bb441c4-edef-46ac-8a41-c49e44a3fd9a/environment=env-abc123/custom-connect-plugin=ccp-12345/version=ver-12345",
    "created_at": "2006-01-02T15:04:05-07:00",
    "updated_at": "2006-01-02T15:04:05-07:00",
    "deleted_at": "2006-01-02T15:04:05-07:00"
  },
  "spec": {
    "version": "string",
    "sensitive_config_properties": [
      "passwords",
      "keys",
      "tokens"
    ],
    "documentation_link": "https://github.com/confluentinc/kafka-connect-datagen",
    "content_format": "ZIP",
    "connector_classes": [
      {
        "class_name": "io.confluent.kafka.connect.datagen.DatagenConnector",
        "type": "SOURCE"
      }
    ],
    "upload_source": {
      "location": "PRESIGNED_URL_LOCATION",
      "upload_id": "e53bb2e8-8de3-49fa-9fb1-4e3fd9a16b66"
    },
    "environment": {
      "id": "env-00000",
      "environment": "string",
      "related": "https://api.confluent.cloud/v2/environments/env-00000",
      "resource_name": "https://api.confluent.cloud/organization=9bb441c4-edef-46ac-8a41-c49e44a3fd9a/environment=env-00000"
    }
  },
  "status": {
    "phase": "PROCESSING",
    "error_message": "Version creation failed due to invalid plugin archive."
  }
}
Delete custom connector plugin version
Use the following CLI command to delete a custom connector plugin version in your environment. The following are required configuration properties:
environment(required): The ID of the environment where the plugin version is located.plugin-id(required): The ID of the custom connector plugin for which the version is being deleted.id(required): The ID of the plugin version to be deleted.
curl --request DELETE \
  --url 'https://api.confluent.cloud/ccpm/v1/plugins/{PLUGIN_ID}/versions/{id}?environment=ENVIRONMENT_ID' \
  --header 'Authorization: Basic REPLACE_BASIC_AUTH'
Example:
curl --request DELETE \
  --url 'https://api.confluent.cloud/ccpm/v1/plugins/{plugin_id}/versions/{id}?environment=env-00000' \
  --header 'Authorization: Basic REPLACE_BASIC_AUTH'
Example response:
Success (HTTP 204 No Content): When the plugin version is deleted successfully and no content is returned.
Next Steps
For an example that shows fully-managed Confluent Cloud connectors in action with Confluent Cloud for Apache Flink, see the Cloud ETL Demo. This example also shows how to use Confluent CLI to manage your resources in Confluent Cloud.