HTTP Source V2 Connector for Confluent Cloud
The fully-managed HTTP Source V2 connector for Confluent Cloud connects Apache Kafka® topics to HTTP or HTTPS APIs. It supports OpenAPI specification-based configuration for up to 15 API paths, reducing configuration time and improving performance over the HTTP Source Connector for Confluent Cloud.
Note
If you require private networking for fully-managed connectors, make sure to set up the proper networking beforehand. For more information, see Manage Networking for Confluent Cloud Connectors.
Features
The HTTP Source V2 connector includes the following features:
Multiple API path support: The connector allows you to configure up to 15 API paths per connector having the same base URL and authentication mechanism.
OpenAPI Specification-based configuration: The connector provides seamless configuration through an OpenAPI specification file.
Secure access and data exchange: The connector supports the following authentication mechanisms:
Basic
Bearer
OAuth 2.0 Client Credentials grant flow
API key (only supported in Confluent CLI)
Client-side field level encryption (CSFLE) support: The connector supports CSFLE for sensitive data. For more information about CSFLE setup, see the Manage CSFLE for connectors.
API error reporting management: You can configure the connector to notify you when an API error occurs through email or through the Confluent Cloud user interface. You also can configure the connector to ignore when an API error occurs.
API validation: The connector allows you to test the API using a test record and view the test API response in the Confluent Cloud user interface.
Template variables: The connector allows you to use the
${offset}template variable and gives you the ability to substitute template variables in parameters, headers, and body content.At-least-once delivery: The connector guarantees that records are delivered at-least-once to the Kafka topic.
Supported data formats: The connector supports Schema Registry-based formats: Avro, JSON Schema, and Protobuf data formats. Schema Registry must be enabled to use a Schema Registry-based format.
Schema Registry and Schema Context support: The connector allows you to map an API to a specific schema context so that you can use the schema context feature in different environments.
Schema evolution: Using the
api<#>.http.response.schema.enforceproperty, the connector supports schema evolution through theEVOLVEenforcement mode. InEVOLVEmode, the connector maintains a single evolving schema per topic in Schema Registry, adding newly seen fields as optional and emitting absent later fields as null. This reduces schema proliferation and helps pipelines tolerate additive response changes, but thebehavior.on.errorsetting still handles incompatible changes, such as required-field omissions or type conflicts. For more information, see Schema evolution.Configurable retry functionality: The connector allows you to customize retry settings based on your requirements.
For more information and examples to use with the Confluent Cloud API for Connect, see the Confluent Cloud API for Connect Usage Examples section.
Manage CSFLE
If you plan to enable CSFLE for the HTTP Source V2 connector, take care of the following sensitive information that may get written to your Kafka topics:
Warning
Error topic: The error topic may include sensitive data from the API response.
Limitations
Be sure to review the following information.
For connector limitations, see HTTP Source V2 Connector limitations.
If you plan to use one or more Single Message Transformations (SMTs), see SMT Limitations. If you also use
EVOLVEmode, see the SMT limitation under Schema evolution.
Manage custom offsets
You can manage the offsets for this connector. Offsets provide information on the point in the system from which the connector is accessing data. For more information, see Manage Offsets for Fully-Managed Connectors in Confluent Cloud.
To manage offsets:
Manage offsets using Confluent Cloud APIs. For more information, see Connect offsets API reference.
Chaining offset mode
This section describes the configuration used to apply chaining offset mode for all custom offset functionalities.
To get the current offset, make a GET request that specifies the environment, Kafka cluster, and connector name.
curl -X GET \
  'https://api.confluent.cloud/connect/v1/environments/<env-id>/clusters/<lkc-id>/connectors/<connector-name>/offsets' \
  -H 'Content-Type: application/json' \
  -H 'Authorization: Basic <base64(api key:api secret)>' | jq
Response
Successful calls return HTTP 200 with a JSON payload that describes the offset.
{
   "id": "lcc-devc61j0j6",
   "name": "HttpSourceV2ES",
   "offsets": [
      {
         "partition": {
           "url": "http://35.247.11.62:9200/inventory/_search"
         },
         "offset": {
           "offset": "1647948089985"
         }
      },
      {
         "partition": {
           "url": "http://35.247.11.62:9200/product/_search"
         },
         "offset": {
           "offset": "1647948089985"
         }
      },
      {
         "partition": {
           "url": "http://35.247.11.62:9200/order/_search"
         },
         "offset": {
           "offset": "1647948089985"
         }
      }
   ],
   "metadata": {
      "observed_at": "2024-04-09T09:59:36.678750446Z"
   }
}
Offset structure
Here, there are three partitions because three APIs are configured (three different topics for each API). partition is the key-value pair of url, which is a combination of http.api.base.url plus api[i].http.api.path from the connector configuration. offset is the key-value pair of offset and the value of the api[i].http.offset.json.pointer field for the source record value being processed.
For example, a source record looks similar to:
{
   "_index": "order",
   "_id": "1NSzDY4BSCpsoSyj5kz8",
   "_score": null,
   "_source": {
      "name": "Name2",
      "time": "1647948089985"
   },
   "sort": [
      1647948089985
   ]
}
The configured value of api[i].http.offset.json.pointer is /sort/0. In the source record, this value is 1647948089985 which is also the offset value in the GET connector API result.
To update the offset, make a POST request that specifies the environment, Kafka cluster, and connector name. Include a JSON payload that specifies new offset and a patch type.
curl -X POST \
  'https://api.confluent.cloud/connect/v1/environments/env-zpj85d/clusters/lkc-abcd123/connectors/HttpSourceV2ES/offsets/request' \
  -H 'Content-Type: application/json' \
  -H 'Authorization: Basic UlJDWU5NVkU1NlBGMk5DRjpCWHF0ZmZaRXF5eDFxbm56bGlYQmx5b21vMXFQQ1JGdHZXZzc3SlFvaTcwTVdRZnFtZ3hEdzJ2VEZ5MEFCbjQr' \
  -d '{
       "type":"PATCH",
       "offsets": [
           {
               "partition": {
                  "url": "http://35.247.11.62:9200/inventory/_search"
               },
               "offset": {
                  "offset": "1647948089979"
               }
         },
         {
               "partition": {
                  "url": "http://35.247.11.62:9200/product/_search"
               },
               "offset": {
                  "offset": "1647948089979"
               }
         },
         {
               "partition": {
                  "url": "http://35.247.11.62:9200/order/_search"
               },
               "offset": {
                  "offset": "1647948089979"
               }
         }
      ]
   }' | jq
Response
{
  "id": "lcc-devc61j0j6",
  "name": "HttpSourceV2ES",
  "offsets": [
    {
      "partition": {
      "url": "http://35.247.11.62:9200/inventory/_search"

      },
      "offset": {
        "offset": "1647948089979"
      }
    },
    {
      "partition": {
        "url": "http://35.247.11.62:9200/product/_search"

      },
      "offset": {
        "offset": "1647948089979"
      }
    },
    {
      "partition": {
      "url": "http://35.247.11.62:9200/order/_search"

      },
      "offset": {
        "offset": "1647948089979"
      }
    }
   ],
   "requested_at": "2024-04-10T07:47:35.999516104Z",
   "type": "PATCH"
}
Outcome
The connector sources the record from the source system again from the source offset 1647948089979. You can verify this in your Kafka topic.
To get the status of a previous offset request, make a GET request that specifies the environment, Kafka cluster, and connector name.
curl -X GET \
  'https://api.confluent.cloud/connect/v1/environments/env-zpj85d/clusters/lkc-abcd123/connectors/HttpSourceV2ES/offsets/request/status' \
  -H 'Content-Type: application/json' \
  -H 'Authorization: Basic UlJDWU5NVkU1NlBGMk5DRjpCWHF0ZmZaRXF5eDFxbm56bGlYQmx5b21vMXFQQ1JGdHZXZzc3SlFvaTcwTVdRZnFtZ3hEdzJ2VEZ5MEFCbjQr' | jq
Response
{
  "request": {
    "id": "lcc-devc61j0j6",
    "name": "HttpSourceV2ES",
    "offsets": [
      {
        "partition": {
          "url": "http://35.247.11.62:9200/inventory/_search"
        },
        "offset": {
          "offset": "1647948089979"
        }
      },
      {
        "partition": {
          "url": "http://35.247.11.62:9200/product/_search"
        },
        "offset": {
          "offset": "1647948089979"
        }
      },
      {
        "partition": {
          "url": "http://35.247.11.62:9200/order/_search"
        },
        "offset": {
          "offset": "1647948089979"
        }
      }
    ],
    "requested_at": "2024-04-10T07:47:35.999516104Z",
    "type": "PATCH"
  },
  "status": {
     "phase": "APPLIED",
     "message": "The Connect framework-managed offsets for this connector have been altered successfully. However, if this connector manages offsets externally, they will need to be manually altered in the system that the connector uses."
  },
  "previous_offsets": [
    {
      "partition": {
        "url": "http://35.247.11.62:9200/inventory/_search"
      },
      "offset": {
        "offset": "1647948089985"
      }
    },
    {
       "partition": {
         "url": "http://35.247.11.62:9200/product/_search"
       },
       "offset": {
         "offset": "1647948089985"
       }
    },
    {
      "partition": {
        "url": "http://35.247.11.62:9200/order/_search"
      },
      "offset": {
        "offset": "1647948089985"
      }
    }
  ],
  "applied_at": "2024-04-10T07:47:38.021730317Z"
}
Outcome
The status endpoint always shows the status of the most recent PATCH/DELETE operation.
To delete the offset, make a POST request that specifies the environment, Kafka cluster, and connector name. Include a JSON payload that specifies the delete type.
curl -X POST \
  'https://api.confluent.cloud/connect/v1/environments/env-zpj85d/clusters/lkc-abcd123/connectors/HttpSourceV2ES/offsets/request' \
  -H 'Content-Type: application/json' \
  -H 'Authorization: Basic UlJDWU5NVkU1NlBGMk5DRjpCWHF0ZmZaRXF5eDFxbm56bGlYQmx5b21vMXFQQ1JGdHZXZzc3SlFvaTcwTVdRZnFtZ3hEdzJ2VEZ5MEFCbjQr' \
  -d '{
         "type":"DELETE"
   }' | jq
Response
{
   "id": "lcc-devc61j0j6",
   "name": "HttpSourceV2ES",
   "offsets": [],
   "requested_at": "2024-04-10T08:02:28.847218614Z",
   "type": "DELETE"
}
Outcome
The connector starts sourcing records from the beginning. You can verify this in your Kafka topics. You will see an influx of the same messages as if the connector was created again with the same configurations. Note that you can also check the status of your DELETE request using the following command:
curl -X GET \
  'https://api.confluent.cloud/connect/v1/environments/env-zpj85d/clusters/lkc-abcd123/connectors/HttpSourceV2ES/offsets/request/status' \
  -H 'Content-Type: application/json' \
  -H 'Authorization: Basic UlJDWU5NVkU1NlBGMk5DRjpCWHF0ZmZaRXF5eDFxbm56bGlYQmx5b21vMXFQQ1JGdHZXZzc3SlFvaTcwTVdRZnFtZ3hEdzJ2VEZ5MEFCbjQr' | jq
The output should be similar to:
{
  "request": {
    "id": "lcc-devc61j0j6",
    "name": "HttpSourceV2ES",
    "offsets": [],
    "requested_at": "2024-04-10T08:02:28.847218614Z",
    "type": "DELETE"
  },
  "status": {
    "phase": "APPLIED",
    "message": "The Connect framework-managed offsets for this connector have been reset successfully. However, if this connector manages offsets externally, they will need to be manually reset in the system that the connector uses."
  },
  "previous_offsets": [
    {
      "partition": {
        "url": "http://35.247.11.62:9200/inventory/_search"
      },
      "offset": {
        "offset": "1647948089985"
      }
    },
    {
      "partition": {
        "url": "http://35.247.11.62:9200/product/_search"
      },
      "offset": {
        "offset": "1647948089985"
      }
    },
    {
      "partition": {
        "url": "http://35.247.11.62:9200/order/_search"
      },
      "offset": {
        "offset": "1647948089985"
      }
    }
  ],
  "applied_at": "2024-04-10T08:02:30.041866120Z"
}
Simple incrementing offset mode
This section describes the configuration used to apply simple incrementing offset mode for all custom offset functionalities.
To get the current offset, make a GET request that specifies the environment, Kafka cluster, and connector name.
curl -X GET \
  'https://api.confluent.cloud/connect/v1/environments/env-zpj85d/clusters/lkc-abcd123/connectors/HttpSourceV2SimpleIncrementing/offsets' \
  -H 'Content-Type: application/json' \
  -H 'Authorization: Basic UlJDWU5NVkU1NlBGMk5DRjpCWHF0ZmZaRXF5eDFxbm56bGlYQmx5b21vMXFQQ1JGdHZXZzc3SlFvaTcwTVdRZnFtZ3hEdzJ2VEZ5MEFCbjQr' | jq
Response
{
   "id": "lcc-devcoj89zo",
   "name": "HttpSourceV2SimpleIncrementing",
   "offsets": [
     {
       "partition": {
         "url": "https://api.github.com/repos/apache/kafka/issues/${offset}"
       },
       "offset": {
         "offset": "244"
       }
     },
     {
       "partition": {
         "url": "https://api.github.com/repos/apache/airflow/issues/${offset}"
       },
       "offset": {
         "offset": "244"
       }
     }
   ],
   "metadata": {
     "observed_at": "2024-04-10T10:18:50.218012085Z"
   }
}
Offset structure
In this example, there are two partitions since there are 2 APIs configured (two different topics for each API). partition is the key-value pair of url, which is a combination of http.api.base.url plus api[i].http.api.path from the connector configuration. offset is the key-value pair of offset and api[i].http.initial.offset plus the number of records processed incrementally minus one.
To update the offset, make a POST request that specifies the environment, Kafka cluster, and connector name. Include a JSON payload that specifies new offset and a patch type.
curl -X POST \
  'https://api.confluent.cloud/connect/v1/environments/env-zpj85d/clusters/lkc-abcd123/connectors/HttpSourceV2SimpleIncrementing/offsets/request' \
  -H 'Content-Type: application/json' \
  -H 'Authorization: Basic UlJDWU5NVkU1NlBGMk5DRjpCWHF0ZmZaRXF5eDFxbm56bGlYQmx5b21vMXFQQ1JGdHZXZzc3SlFvaTcwTVdRZnFtZ3hEdzJ2VEZ5MEFCbjQr' \
  -d '{
         "type":"PATCH",
         "offsets": [
            {
                  "partition": {
                     "url": "https://api.github.com/repos/apache/kafka/issues/${offset}"
                  },
                  "offset": {
                     "offset": "10"
                  }
            },
            {
                  "partition": {
                     "url": "https://api.github.com/repos/apache/airflow/issues/${offset}"
                  },
                  "offset": {
                     "offset": "10"
                  }
            }
         ]
   }' | jq
Response
{
   "id": "lcc-devcoj89j9",
   "name": "HttpSourceV2SimpleIncrementing",
   "offsets": [
      {
            "partition": {
               "url": "https://api.github.com/repos/apache/kafka/issues/${offset}"
            },
            "offset": {
               "offset": "10"
            }
      },
      {
            "partition": {
               "url": "https://api.github.com/repos/apache/airflow/issues/${offset}"
            },
            "offset": {
               "offset": "10"
            }
      }
   ],
   "requested_at": "2024-04-10T10:55:48.418477341Z",
   "type": "PATCH"
}
Outcome
The connector starts sourcing record from https://api.github.com/repos/apache/airflow/issues/10 and https://api.github.com/repos/apache/kafka/issues/10.
curl -X GET \
  'https://api.confluent.cloud/connect/v1/environments/env-zpj85d/clusters/lkc-abcd123/connectors/HttpSourceV2SimpleIncrementing/offsets/request/status' \
  -H 'Content-Type: application/json' \
  -H 'Authorization: Basic UlJDWU5NVkU1NlBGMk5DRjpCWHF0ZmZaRXF5eDFxbm56bGlYQmx5b21vMXFQQ1JGdHZXZzc3SlFvaTcwTVdRZnFtZ3hEdzJ2VEZ5MEFCbjQr' | jq
Response
{
   "request": {
      "id": "lcc-devcoj89j9",
      "name": "HttpSourceV2SimpleIncrementing",
      "offsets": [
            {
               "partition": {
                  "url": "https://api.github.com/repos/apache/kafka/issues/${offset}"
               },
               "offset": {
                  "offset": "10"
               }
            },
            {
               "partition": {
                  "url": "https://api.github.com/repos/apache/airflow/issues/${offset}"
               },
               "offset": {
                  "offset": "10"
               }
            }
      ],
      "requested_at": "2024-04-10T10:55:48.418477341Z",
      "type": "PATCH"
   },
   "status": {
      "phase": "APPLIED",
      "message": "The Connect framework-managed offsets for this connector have been altered successfully. However, if this connector manages offsets externally, they will need to be manually altered in the system that the connector uses."
   },
   "previous_offsets": [
      {
            "partition": {
               "url": "https://api.github.com/repos/apache/kafka/issues/${offset}"
            },
            "offset": {
               "offset": "128"
            }
      },
      {
            "partition": {
               "url": "https://api.github.com/repos/apache/airflow/issues/${offset}"
            },
            "offset": {
               "offset": "129"
            }
      }
   ],
   "applied_at": "2024-04-10T10:55:49.552437779Z"
}
To delete the offset, make a POST request that specifies the environment, Kafka cluster, and connector name. Include a JSON payload that specifies the delete type.
curl -X POST \
  'https://api.confluent.cloud/connect/v1/environments/env-zpj85d/clusters/lkc-abcd123/connectors/HttpSourceV2SimpleIncrementing/offsets/request' \
  -H 'Content-Type: application/json' \
  -H 'Authorization: Basic UlJDWU5NVkU1NlBGMk5DRjpCWHF0ZmZaRXF5eDFxbm56bGlYQmx5b21vMXFQQ1JGdHZXZzc3SlFvaTcwTVdRZnFtZ3hEdzJ2VEZ5MEFCbjQr' \
  -d '{
      "type":"DELETE"
   }' | jq
Response
{
   "id": "lcc-devcoj89zo",
   "name": "HttpSourceV2SimpleIncrementing",
   "offsets": [],
   "requested_at": "2024-04-10T10:45:10.890811731Z",
   "type": "DELETE"
}
Cursor pagination offset mode
This section describes the configuration used to apply cursor pagination offset mode for all custom offset functionalities.
To get the current offset, make a GET request that specifies the environment, Kafka cluster, and connector name.
curl -X GET \
  'https://api.confluent.cloud/connect/v1/environments/env-zpj85d/clusters/lkc-abcd123/connectors/HttpSourceV2Zendesk/offsets' \
  -H 'Content-Type: application/json' \
  -H 'Authorization: Basic UlJDWU5NVkU1NlBGMk5DRjpCWHF0ZmZaRXF5eDFxbm56bGlYQmx5b21vMXFQQ1JGdHZXZzc3SlFvaTcwTVdRZnFtZ3hEdzJ2VEZ5MEFCbjQr' | jq
Response
{
   "id": "lcc-devcxv93jq",
   "name": "HttpSourceV2Zendesk",
   "offsets": [
      {
            "partition": {
               "url": "https://example.com/api/v2/users/18266623893394/tickets/assigned"
            },
            "offset": {
               "offset": "eyJvIjoibmljZV9pZCIsInYiOiJhUmtBQUFBQUFBQUEifQ=="
            }
      }
   ],
   "metadata": {
      "observed_at": "2024-04-12T13:24:53.218799432Z"
   }
}
Offset structure
partition is the key-value pair of url, which is a combination of http.api.base.url plus api[i].http.api.path from the connector configuration. offset is the key-value pair of offset and api[i].http.next.page.json.pointer value of the source record.
The sample record looks similar to:
{
   "url": "https://example.com/api/v2/tickets/25.json",
   "id": 25,
   "external_id": null,
   "via": {
     "channel": "sample_ticket",
     "source": {
       "from": {},
       "to": {},
       "rel": null
      }
   },
   "created_at": "2024-04-12T04:56:46Z",
   "updated_at": "2024-04-12T04:56:46Z",
   "generated_timestamp": 1712897807,
   "type": null,
   "subject": "SAMPLE TICKET: Gift card expiring",
   "raw_subject": "SAMPLE TICKET: Gift card expiring",
   "description": "Hey there, I was lucky enough to receive a gift card from a friend as a housewarming gift. Small problem, I’ve been so swamped with the move I totally forgot about it until now and it expires in a week!\n\nCan you extend the expiration date?\n\nHelp,\nLuka Jensen",
   "priority": "normal",
   "status": "open",
   "recipient": null,
   "requester_id": 18266648849426,
   "submitter_id": 18266648849426,
   "assignee_id": 18266623893394,
   "organization_id": null,
   "group_id": 18266630261906,
   "collaborator_ids": [],
   "follower_ids": [],
   "email_cc_ids": [],
   "forum_topic_id": null,
   "problem_id": null,
   "has_incidents": false,
   "is_public": true,
   "due_at": null,
   "tags": [
     "gift_cards",
     "sample_ticket"
   ],
   "custom_fields": [
     {
       "id": 18266619894546,
       "value": null
     }
   ],
   "satisfaction_rating": null,
   "sharing_agreement_ids": [],
   "custom_status_id": 18266630258322,
   "followup_ids": [],
   "ticket_form_id": 18266615254674,
   "brand_id": 18266615288210,
   "allow_channelback": false,
   "allow_attachments": true,
   "from_messaging_channel": false,
   "meta": {
     "has_more": false,
     "after_cursor": "eyJvIjoibmljZV9pZCIsInYiOiJhUmtBQUFBQUFBQUEifQ==",
     "before_cursor": "eyJvIjoibmljZV9pZCIsInYiOiJhUUVBQUFBQUFBQUEifQ=="
   },
   "links": {
     "prev": "https://example.com/api/v2/users/18266623893394/tickets/assigned.json?page%5Bbefore%5D=eyJvIjoibmljZV9pZCIsInYiOiJhUUVBQUFBQUFBQUEifQ%3D%3D",
     "next": "https://example.com/api/v2/users/18266623893394/tickets/assigned.json?page%5Bafter%5D=eyJvIjoibmljZV9pZCIsInYiOiJhUmtBQUFBQUFBQUEifQ%3D%3D"
   }
}
http.next.page.json.pointer has been configured to /meta/after_cursor, which is also the offset value for each record.
To update the offset, make a POST request that specifies the environment, Kafka cluster, and connector name. Include a JSON payload that specifies new offset and a patch type.
curl -X POST \
  'https://api.confluent.cloud/connect/v1/environments/env-zpj85d/clusters/lkc-abcd123/connectors/HttpSourceV2Zendesk/offsets/request' \
  -H 'Content-Type: application/json' \
  -H 'Authorization: Basic UlJDWU5NVkU1NlBGMk5DRjpCWHF0ZmZaRXF5eDFxbm56bGlYQmx5b21vMXFQQ1JGdHZXZzc3SlFvaTcwTVdRZnFtZ3hEdzJ2VEZ5MEFCbjQr' \
  -d '{
         "type":"PATCH",
         "offsets": [
             {
               "partition": {
                  "url": "https://example.com/api/v2/users/18266623893394/tickets/assigned"
               },
               "offset": {
                  "offset": "eyJvIjoibmljZV9pZCIsInYiOiJhUUVBQUFBQUFBQUEifQ=="
               }
         }
      ]
   }' | jq
Response
{
  "id": "lcc-devcxv93jq",
  "name": "HttpSourceV2Zendesk",
  "offsets": [
    {
      "partition": {
        "url": "https://example.com/api/v2/users/18266623893394/tickets/assigned"
      },
      "offset": {
        "offset": "eyJvIjoibmljZV9pZCIsInYiOiJhUUVBQUFBQUFBQUEifQ=="
      }
    }
  ],
  "requested_at": "2024-04-12T13:39:48.497054666Z",
  "type": "PATCH"
}
Outcome
The connector starts sourcing from “https://example.com/api/v2/users/18266623893394/tickets/assigned?page[after]=eyJvIjoibmljZV9pZCIsInYiOiJhUUVBQUFBQUFBQUEifQ==”. You can verify this in your topic and see records being processed again.
curl -X GET \
  'https://api.confluent.cloud/connect/v1/environments/env-zpj85d/clusters/lkc-abcd123/connectors/HttpSourceV2Zendesk/offsets/request/status' \
  -H 'Content-Type: application/json' \
  -H 'Authorization: Basic UlJDWU5NVkU1NlBGMk5DRjpCWHF0ZmZaRXF5eDFxbm56bGlYQmx5b21vMXFQQ1JGdHZXZzc3SlFvaTcwTVdRZnFtZ3hEdzJ2VEZ5MEFCbjQr' | jq
Response
{
  "request": {
    "id": "lcc-devcxv93jq",
    "name": "HttpSourceV2Zendesk",
    "offsets": [
      {
        "partition": {
          "url": "https://example.com/api/v2/users/18266623893394/tickets/assigned"
        },
        "offset": {
          "offset": "eyJvIjoibmljZV9pZCIsInYiOiJhUUVBQUFBQUFBQUEifQ=="
        }
      }
    ],
    "requested_at": "2024-04-12T13:39:48.497054666Z",
    "type": "PATCH"
  },
  "status": {
    "phase": "APPLIED",
    "message": "The Connect framework-managed offsets for this connector have been altered successfully. However, if this connector manages offsets externally, they will need to be manually altered in the system that the connector uses."
  },
  "previous_offsets": [
    {
      "partition": {
        "url": "https://example.com/api/v2/users/18266623893394/tickets/assigned"
      },
      "offset": {
        "offset": "eyJvIjoibmljZV9pZCIsInYiOiJhUmtBQUFBQUFBQUEifQ=="
      }
    }
  ],
  "applied_at": "2024-04-12T13:39:51.574576416Z"
}
Outcome
Shows the status of the latest PATCH/DELETE operation on offsets.
To delete the offset, make a
POSTrequest that specifies the environment, Kafka cluster, and connector name. Include a JSON payload that specifies the delete type.curl -X POST \ 'https://api.confluent.cloud/connect/v1/environments/env-zpj85d/clusters/lkc-abcd123/connectors/HttpSourceV2Zendesk/offsets/request' \ -H 'Content-Type: application/json' \ -H 'Authorization: Basic UlJDWU5NVkU1NlBGMk5DRjpCWHF0ZmZaRXF5eDFxbm56bGlYQmx5b21vMXFQQ1JGdHZXZzc3SlFvaTcwTVdRZnFtZ3hEdzJ2VEZ5MEFCbjQr' \ -d '{ "type":"DELETE" }' | jqResponse
{
      "id": "lcc-devcxv93jq",
      "name": "HttpSourceV2Zendesk",
      "offsets": [],
      "requested_at": "2024-04-12T13:43:30.704714773Z",
      "type": "DELETE"
}
Outcome
Deletes the current offset and starts sourcing records again as if the connector was created again with the same configurations.
Cursor pagination with absolute URL as next page token
You can configure the HTTP Source V2 connector to work with APIs that return complete URLs as pagination tokens rather than relative cursors or page numbers.
Overview
When an API’s pagination response includes a full URL as the next page token, you can configure the connector to use that absolute URL directly for subsequent requests. To configure this, complete the following steps:
Set
http.api.base.urlto${offset}Set
api<N>.http.api.pathto an empty string ("")Provide the initial request URL in
api<N>.http.initial.offsetUse
CURSOR_PAGINATIONas the offset mode
When to use this feature
Use absolute URL mode when your target API:
Returns a complete URL (including protocol and domain) as the next page token.
Uses cursor-based pagination where the cursor is embedded in a URL.
Provides the full endpoint URL in a field like
next,next_page, or similar.
The following API response requires this configuration:
{
  "data": [...],
  "metadata": {
    "next": "https://api.example.com/v1/resource?page_token=eyJpZCI6..."
  }
}
Configuration
The following table describes the key configuration properties for absolute URL mode:
Property | Description | Example Value |
|---|---|---|
| Set to |
|
| Must be set to |
|
| The complete URL for the first API request, including any query parameters. |
|
| Must be set to an empty string to prevent path appending. |
|
| JSON pointer to the field containing the next page URL. |
|
| JSON pointer to the array containing the data records. |
|
Example configurations
Single API configuration
The following example shows a connector configuration for a single API endpoint that uses absolute URL pagination:
{
  "name": "http-source-absolute-url",
  "connector.class": "HttpSourceV2",
  "tasks.max": "1",
  "apis.num": "1",
  "http.api.base.url": "${offset}",
  "auth.type": "basic",
  "connection.user": "<username>",
  "connection.password": "<password>",
  "api1.topics": "my-topic",
  "api1.http.request.method": "GET",
  "api1.http.offset.mode": "CURSOR_PAGINATION",
  "api1.http.initial.offset": "https://api.example.com/v1/costs?start_date=2026-01-01&end_date=2026-01-05&page_size=100",
  "api1.http.api.path": "",
  "api1.http.response.data.json.pointer": "/data",
  "api1.http.next.page.json.pointer": "/metadata/next",
  "api1.max.retries": "20",
  "api1.request.interval.ms": "1000",
  "output.data.format": "JSON_SR",
  "kafka.auth.mode": "KAFKA_API_KEY",
  "kafka.api.key": "<kafka-api-key>",
  "kafka.api.secret": "<kafka-api-secret>"
}
Note
The first request is made to the URL specified in api1.http.initial.offset. Subsequent requests use the absolute URL from /metadata/next in the response.
Multiple API configuration
When configuring multiple APIs that use absolute URL pagination, each API requires its own http.initial.offset and related configurations:
{
  "name": "http-source-multiple-apis",
  "connector.class": "HttpSourceV2",
  "tasks.max": "2",
  "apis.num": "2",
  "http.api.base.url": "${offset}",
  "auth.type": "basic",
  "connection.user": "<username>",
  "connection.password": "<password>",
  "api1.topics": "topic-api1",
  "api1.http.request.method": "GET",
  "api1.http.offset.mode": "CURSOR_PAGINATION",
  "api1.http.initial.offset": "https://api.example.com/v1/costs?start_date=2026-01-01&end_date=2026-01-10&page_size=100",
  "api1.http.api.path": "",
  "api1.http.response.data.json.pointer": "/data",
  "api1.http.next.page.json.pointer": "/metadata/next",
  "api1.max.retries": "20",
  "api1.request.interval.ms": "1000",
  "api2.topics": "topic-api2",
  "api2.http.request.method": "GET",
  "api2.http.offset.mode": "CURSOR_PAGINATION",
  "api2.http.initial.offset": "https://api.example.com/v1/costs?start_date=2025-12-29&end_date=2025-12-30&page_size=100",
  "api2.http.api.path": "",
  "api2.http.response.data.json.pointer": "/data",
  "api2.http.next.page.json.pointer": "/metadata/next",
  "api2.max.retries": "20",
  "api2.request.interval.ms": "1000",
  "output.data.format": "JSON_SR",
  "kafka.auth.mode": "KAFKA_API_KEY",
  "kafka.api.key": "<kafka-api-key>",
  "kafka.api.secret": "<kafka-api-secret>"
}
Cursor pagination with Timestamp mode
Cursor pagination with timestamp mode combines cursor-based pagination with timestamp-based filtering. This mode is particularly useful for APIs that:
Use cursor tokens to paginate through results.
Support timestamp-based filtering parameters to fetch data within specific time windows.
Return timestamp metadata that can be used to construct subsequent requests.
The connector can handle pagination using the Absolute URL mode.
Absolute URL mode
When enabled (is.next.page.token.absolute.url=true), the connector treats the next page token as a complete, absolute URL that can be used directly for the next request. Absolute URL mode is only applicable with cursor pagination timestamp mode (enable.cursor.pagination.with.timestamp.mode=true).
Configuration payload
The following configuration properties are required for this mode:
api1.http.offset.mode: Indicates how offsets are computed and how requests are generated. For Absolute URL mode, this must be set toCURSOR_PAGINATION.enable.cursor.pagination.with.timestamp.mode: Specifies whether to use cursor pagination with timestamp mode.api1.is.next.page.token.absolute.url: Specifies whether the next page token from the API is a full URL (true) or a relative path (false). For Absolute URL mode, set this totrue.api1.http.next.page.json.pointer: The JSON pointer to the value in the response which corresponds to the next page reference (either a page token, or a full URL).initial.start.timestamp.value: Sets the initial start timestamp value used in place of${start_time}for the first request.initial.end.timestamp.value: Sets the initial end timestamp value used in place of${end_time}for the first request. Defaults to current time value (Instant.now().toEpochMilli()).http.timestamp.format: Timestamp format used by the API (format of${start_time}and${end_time}). Defaults toUNIX_TIMESTAMP_MILLISECONDS. If set toSIMPLE_DATE_FORMAT, the interval format must beDAYS.http.timestamp.interval.format: Specifies the timestamp format of the interval to define the gap between start time and end time parameters. Defaults toSECONDS.http.timestamp.interval: Timestamp interval between start time and end time parameters. The default value is86400seconds (24 hours).time.range.request.delay: The time, in milliseconds, to delay a timestamp-based pagination request to avoid potential time drift. Defaults to0; the maximum value is60seconds.
For more information, see Configuration Properties.
In this mode:
The connector uses a URL (For example,
https://api.example.com/abcd) from previous the HTTP response as the complete URl for the next request.No additional parameters are appended to this URL.
The configured request parameters are ignored for subsequent requests.
Chaining offset with Timestamp mode
Chaining offset with timestamp mode is particularly useful for APIs that:
Use chaining offset with timestamp to traverse through results sequentially.
Support timestamp-based filtering parameters to fetch data within specific time windows.
Return timestamp metadata that can be used to construct subsequent requests.
Provide either relative or global ordering guarantees for records.
Prerequisites
To use chaining offset with timestamp mode, you must configure the following properties:
Offset mode: Must be set to
CHAINING.Chaining offset with Timestamp Mode: Set chaining with timestamp mode to
true(chaining.with.timestamp.mode=true).Record Ordering: Choose between
GLOBALorRELATIVEordering.
Record ordering modes
The chaining.with.timestamp.mode.record.ordering configuration determines how records are ordered across API queries. Chaining offset with timestamp mode supports two types of record ordering:
Global
Relative
Global ordering
To use global ordering, set the chaining.with.timestamp.mode.record.ordering to GLOBAL. You can use global ordering when the source API guarantees a consistent ordering across all queries, regardless of time windows.
Configuration payload
chaining.with.timestamp.mode.record.ordering(required): Specifies the record ordering mode. This must be set toGLOBAL.http.offset.json.primary.key.pointer(required): Specifies the JSON pointer to the primary key field in the HTTP response. The extracted value is used as the query parameter forhttp.chaining.pagination.parameter.name.http.chaining.pagination.parameter.name(required): Specifies the name of the query parameter used in the request for chaining offset with timestamp mode. This is used when fetching the next page of results. It is automatically included in the query parameters of the next request if the previous time window yielded a non-empty response.initial.start.timestamp.value(required): Sets the initial start timestamp value used in place of${start_time}for the first request.initial.end.timestamp.value(optional): Sets the initial end timestamp value used in place of${end_time}for the first request.timestamp.format(required): Timestamp format used in the time related request parameters. It should match the format ofinitial.start.timestamp.valueandinitial.end.timestamp.valueSupported Formats:UNIX_TIMESTAMP_MILLISECONDS: “1640995200000” (milliseconds since epoch).UNIX_TIMESTAMP_SECONDS: “1640995200” (seconds since epoch).SIMPLE_DATE_FORMAT: “2022-01-01” (yyyy-MM-dd format).ISO8601: “2022-01-01T00:00:00Z”, “2022-01-01T14:30:00Z”, “2022-01-01T14:30:00+05:30” (with time zone support).
http.timestamp.interval(optional): Timestamp interval between start time and end time parameters. The default value is86400seconds (24 hours). The end time of the previous window sets the start time of the next window, and this interval and the previous window’s end time determine the next window’s end time.http.timestamp.interval.format(optional): Specifies the timestamp format of the interval to define the gap between start time and end time parameters. Defaults toSECONDS.time.range.request.delay(optional): The time in milliseconds to delay a timestamp-based pagination request to avoid potential time drift. Defaults to0. The maximum value is60seconds.
Sample configuration: This sample configuration uses global ordering for sourcing customer data from Stripe and publishing it to a Kafka topic.
{
  "name": "<global-ordering-connector-name>",
  "connector.class": "HttpSourceV2",
  "kafka.auth.mode": "SERVICE_ACCOUNT",
  "kafka.service.account.id": "<service-account-id>",
  "output.data.format": "JSON_SR",
  "auth.type": "BEARER",
  "bearer.token": "<token>",
  "http.api.base.url": "https://api.stripe.com/v1",
  "api1.http.api.path": "/customers",
  "api1.topics": "<topic-name>",
  "api1.http.offset.mode": "CHAINING",
  "api1.chaining.with.timestamp.mode": "true",
  "api1.chaining.with.timestamp.mode.record.ordering": "Global",
  "api1.http.request.parameters": "limit=10&created[gte]=${start_time}&created[lt]=${end_time}",
  "api1.http.request.parameters.separator": "&",
  "api1.http.response.data.json.pointer": "/data",
  "api1.http.offset.json.primary.key.pointer": "/id",
  "api1.time.range.request.delay": "1000",
  "api1.initial.start.timestamp.value": "<start date time>",
  "api1.timestamp.format": "Unix Timestamp Seconds",
  "api1.http.chaining.pagination.parameter.name": "starting_after",
  "tasks.max": "1"
 }
Relative ordering
To use relative ordering, set the chaining.with.timestamp.mode.record.ordering to RELATIVE. You can use relative ordering when the source API provides ordering only within individual queries or time windows, where the order may vary across separate queries.
Note
Unlike global ordering, relative ordering does not require any timestamp-related configuration (for example, timestamp.format). It does not support specifying an end timestamp and always operates considering the end timestamp as the current request timestamp.
Configuration payload
chaining.with.timestamp.mode.record.ordering(required): Specifies the record ordering mode. This must be set toRELATIVE.http.offset.json.primary.key.pointer(required): Specifies the JSON pointer to the primary key field in the HTTP response. The extracted value is used as the query parameter forhttp.chaining.pagination.parameter.name.http.initial.offset: Specifies the initial start timestamp used to initiate pagination.http.offset.json.pointer: Specifies the JSON pointer to the timestamp field in the response, which is used to determine the next offset during pagination.time.range.request.delay(optional): The time in milliseconds to delay a timestamp-based pagination request to avoid potential time drift. Defaults to0. The maximum value is60seconds.
Sample configuration: This sample configuration uses relative ordering for sourcing table data from ServiceNow and publishing it to a Kafka topic.
{
  "name": "<relative-ordering-connector-name>",
  "connector.class": "HttpSourceV2",
  "kafka.auth.mode": "SERVICE_ACCOUNT",
  "kafka.service.account.id": "<service-account-id>",
  "output.data.format": "JSON_SR",
  "auth.type": "BASIC",
  "connection.user": "<username>",
  "connection.password": "<password>",
  "http.api.base.url": "https://dev192002.service-now.com",
  "api1.http.api.path": "/api/now/table/x_1814514_test_h_0_trade_data",
  "api1.topics": "<topic-name>",
  "api1.http.offset.mode": "CHAINING",
  "api1.chaining.with.timestamp.mode": "true",
  "api1.chaining.with.timestamp.mode.record.ordering": "RELATIVE",
  "api1.http.request.parameters": "sysparm_query=sys_updated_on${operator}${offset}^sys_id>${primary_key}^ORDERBYsys_updated_on^ORDERBYsys_id&sysparm_limit=10000&sysparm_no_count=true&sysparm_suppress_pagination_header=true",
  "api1.http.request.parameters.separator": "&",
  "api1.http.request.headers.separator": "|",
  "api1.http.response.data.json.pointer": "/result",
  "api1.http.offset.json.pointer": "/sys_updated_on",
  "api1.http.offset.json.primary.key.pointer": "/sys_id",
  "api1.http.initial.offset": "<start date time>",
  "tasks.max": "1"
 }
Schema evolution
The connector controls how it handles the schema of the records it produces from the source using the api<#>.http.response.schema.enforce configuration property. This is useful when the source data shape changes over time, for example, when new fields are added to the source.
api<#>.http.response.schema.enforce provides the following modes relevant to schema evolution:
NONE(default): The connector infers the schema for each response independently. New fields are registered as optional strings, and the connector does not attempt to keep a single, consistent schema across responses.EVOLVE: The connector maintains a single, evolving schema per topic, using Schema Registry as the source of truth. As new fields appear in responses, the connector adds them to the schema as optional fields and registers a new schema version. The connector emits absent fields from a later response as null rather than dropping them, so the topic schema grows additively and stays consistent across tasks and connector restarts.
Use EVOLVE when you want a stable, additive schema for a topic as the upstream source evolves.
Prerequisites for EVOLVE mode
To use EVOLVE, the following must be true:
output.data.formatis set to a Schema Registry-based format, for example,AVROorJSON_SR, and Schema Registry is enabled.PROTOBUFis not currently supported withEVOLVE. For more information, see thePROTOBUFlimitation under Notes and limitations.Use the default subject naming strategy, which sets the
value.converter.value.subject.name.strategytoTopicNameStrategy(the default).Each API maps to its own topic. The connector evolves the schema independently per topic.
Notes and limitations
Schema evolution depends on the Schema Registry compatibility mode configured for the topic’s subject. When the connector registers an evolved schema, Schema Registry checks the new schema against the subject’s compatibility type and rejects the change if incompatible—so the compatibility mode determines which evolutions succeed. The connector’s changes are additive (new fields are added as optional fields), which are accepted under
BACKWARD(the Schema Registry default) andFULLcompatibility. For the changes each compatibility type allows, see Schema Evolution and Compatibility for Schema Registry on Confluent Cloud and Compatibility types. To change the compatibility mode for a subject, see Change subject level (per topic) compatibility mode of a schema.The
PROTOBUFformat is not currently supported withEVOLVEmode. UseAVROorJSON_SRfor schema evolution.The
behavior.on.errorsetting controls how the connector handles a record when a schema change cannot be applied. The connector either fails the task or ignores the record.Single Message Transformations (SMTs) run after the connector produces a record, downstream of the schema evolution engine. If an SMT adds, removes, renames, or retypes a field, the connector’s schema detector cannot detect the change because it only tracks the schema of record as originally produced from the source response. As a result, the schema that the connector evolves and seeds from Schema Registry can drift from the schema actually registered for the topic. Avoid using SMTs that alter a record’s fields when using
EVOLVEmode.
Quick Start
Use this quick start to get up and running with the Confluent Cloud HTTP Source V2 connector.
Prerequisites
Authorized access to a Confluent Cloud cluster on Amazon Web Services (AWS), Microsoft Azure (Azure), or Google Cloud).
The Confluent CLI installed and configured for the cluster. For help, see Install the Confluent CLI.
Schema Registry must be enabled to use a Schema Registry-based format (for example, Avro, JSON Schema, or Protobuf).
OpenAPI Specification file version 3.0.
Relevant authentication credentials for both Kafka and your data system.
At least one source Kafka topic must exist in your Confluent Cloud cluster before creating the Source connector.
Using the Confluent Cloud Console
Step 1: Launch your Confluent Cloud cluster
To create and launch a Kafka cluster in Confluent Cloud, see Create a kafka cluster in Confluent Cloud.
Step 2: Add a connector
In the left navigation menu, click Connectors. If you already have connectors in your cluster, click + Add connector.
Step 3: Select your connector
Click the HTTP Source V2 connector card.
Step 4: Enter the connector details
Note
Ensure you have all your prerequisites completed.
An asterisk ( * ) designates a required entry.
At the Add HTTP Source V2 Connector screen, complete the following:
Provide the connector name in the Connector name field.
Add the OpenAPI specification file (OAS 3.0 or higher) by adding a URL endpoint or by uploading a YAML/JSON formatted specification file. Note that you can convert Swagger 1.x or 2.0 definitions to OpenAPI 3.0 using the Swagger Converter.
To add a URL endpoint, enter the URL in the Add via URL field. Note that the maximum file size is 3 MB.
To upload a YAML/JSON formatted specification file, select Add a file, then click Upload file to upload the file. Note that the maximum file size is 1 MB.
Select the Output Kafka record value format (data coming from the connector): AVRO, JSON_SR (JSON Schema), or PROTOBUF. A valid schema must be available in Schema Registry to use a schema-based message format (for example, Avro, JSON Schema, or Protobuf).
Select the way you want to provide Kafka Cluster credentials. You can choose one of the following options:
My account: This setting allows your connector to globally access everything that you have access to. With a user account, the connector uses an API key and secret to access the Kafka cluster. This option is not recommended for production.
Service account: This setting limits the access for your connector by using a service account. This option is recommended for production.
Use an existing API key: This setting allows you to specify an API key and a secret pair. You can use an existing pair or create a new one. This method is not recommended for production environments.
Note
Freight clusters support only service accounts for Kafka authentication.
Click Continue.
Click Continue.
Server connection.
Enter your API Base URL in the URL field. The HTTP API Base URL. For example: http://example.com/absenceManagement/v1.
Authentication.
Enter the following authentication details to use for the server connection. Note that you can change the authentication type of the endpoint by clicking Change method. Supported methods are:
The connector authenticates with a username and password. If you select Basic, enter the following details:
Username: The username to be used with an endpoint requiring authentication.
Password: The password to be used with an endpoint requiring authentication.`
Enter the following details:
Bearer token: The bearer authentication token to be used with an endpoint requiring bearer token-based authentication.
This is the default. The endpoint requires no authentication.
Client Credentials grant flow
The connector authenticates using OAuth credentials. Enter the following details:
Client ID: The client ID used when fetching the OAuth2 token.
Client secret: The secret used when fetching the OAuth2 token.
Client authentication mode: Specifies how to encode the Client ID and Client Secret in the OAuth2 authorization request. If set to
header, the credentials are encoded as an'Authorization:Basic <base-64 encoded client_id:client_secret>'HTTP header. If set tourl, then Client ID and Client Secret are sent as URL encoded parameters.Scope: The scope parameter sent when fetching the OAuth2 token.
Token property name: The name of the property containing the OAuth2 token returned by the OAuth2 token URL. Defaults to
access_token.Token server URL: The URL to be used for fetching the OAuth2 token.
(Optional) To customize SSL for your HTTP URL, enable Customize SSL and configure the following SSL settings accordingly:
SSL Protocol: Enter the protocol to use for SSL connections.
Key store: Upload the key store file containing the server certificate.
Key store password: Enter the password used to access the key store.
Key password: Enter the password for the private key in the key store file.
Trust store: Upload the trust store file containing a server CA certificate.
Trust store password: Enter the trust store password containing a server CA certificate.
Click Authenticate. Follow the authentication steps. If successful, you should see a message similar to “Authenticated successfully”.
Click Continue.
Select one or more endpoint paths for connector requests. You can select up to 15 paths. Add any resource IDs or sub-resource IDs as needed for the API endpoint path. The connector supports
GETandPOSToperations.Click Continue.
On the Configuration page, configure the following.
Select topics
Choose the topic(s) you want to get data from. After selecting the desired topic(s), click on the Request configuration tab.
Under Path variables, configure the HTTP path parameters to be added to the request. Parameter values can be templated with different template values like
${key},${topic},${offset}or other field references from the Kafka record.Under Query parameters, configure the HTTP parameters to be added to the request.
Under Headers, configure the HTTP headers to be included in each request.
In the Body field, enter the payload to be sent along with the HTTP request.
Click on the Settings tab.
For Offset mode: Define how offsets should be computed and generated. If set to
Simple incrementing, the${offset}used to generate requests is simply the previous offset (or initial offset) incremented by the number of records in the response. In this mode, the initial offset needs to be set to an integer value. If set toChaining, the configurationhttp.offset.json.pointerneeds to be set, and the offset for a record is set to the value at the JSON pointer in the record data. If set toCursor pagination`, the configurationhttp.next.page.json.pointerneeds to be set and the offset for the last record in each page will be set to the next page value.For Initial offset, define the offset to be used to generate the first request. This needs to be set if either one or more of the following configurations:
url,http.request.parameters, orhttp.request.bodycontain the template variable${offset}.(Optional) Add additional settings, by clicking Show additional settings.
(Optional) Configure the following advanced configurations, and then, click Continue:
Advanced configurations
Schema context
Schema context: Select a schema context to use for this connector, if using a schema-based data format. This property defaults to the Default context, which configures the connector to use the default schema set up for Schema Registry in your Confluent Cloud environment. A schema context allows you to use separate schemas (like schema sub-registries) tied to topics in different Kafka clusters that share the same Schema Registry environment. For example, if you select a non-default context, a Source connector uses only that schema context to register a schema and a Sink connector uses only that schema context to read from. For more information about setting up a schema context, see What are schema contexts and when should you use them?.
Error configurations
Behavior on errors: Select the error handling behavior setting for handling error responses from HTTP requests. Valid options are
Fail connectorandIgnore errors. This defaults toFail connectorwhich is recommended.Error record format: Dictates the content of records produced to the error topic. If set to
Error stringthe value is a human readable string describing the failure. The value will include some or all of the following information if available: http response code, reason phrase, submitted payload, URL, response content, exception and error message. If set tohttp_response, the value would be the plain response content for a failed record.
Subject naming strategy
Key: Determines how to construct the subject name under which the key schema is registered with Schema Registry.
Value: Determines how to construct the subject name under which the value schema is registered with Schema Registry. For more details, see subject name strategy topic.
Data encryption
Enable Client-Side Field Level Encryption for data encryption. Specify a Service Account to access the Schema Registry and associated encryption rules or keys with that schema. For more information on CSFLE setup, see Manage CSFLE for connectors.
Procession position
Define a specific offset position for this connector to being processing from. If adding a new offset manually, refer to Manage custom offsets.
For all property values and definitions, see Configuration Properties.
(Optional) If you wish to test the API, click on the Test tab, and follow the instructions. Else, continue to the next step.
Click Continue.
Click Test. A Test API dialog box should appear. Follow the prompts to check for a valid API response. If the test is successful, you should see a HTTP 200 OK response. Click Close. For more help with using the Test API, see the Test API section
Use SMTs to make simple and lightweight modifications to message values, keys, and headers. Add Predicates to conditionally apply a transformation only to records that match certain conditions. Click Add SMT to add an SMT. For details, see the Single Message Transformations documentation.
Enter the number of tasks for the connector to use in the Tasks field. This number should be equal to the number of HTTP APIs you configured.
Click Continue.
Verify the connection details.
Click Launch connector.
The status for the connector should go from Provisioning to Running.
Step 5: Check for records
Verify that records are being produced at the endpoint.
For more information and examples to use with the Confluent Cloud API for Connect, see the Confluent Cloud API for Connect Usage Examples section.
Tip
When you launch a connector, a Dead Letter Queue topic is automatically created. See View Connector Dead Letter Queue Errors in Confluent Cloud for details.
Using the Confluent CLI
To set up and run the connector using the Confluent CLI, complete the following steps, but ensure you have met all prerequisites.
Step 1: List the available connectors
Enter the following command to list available connectors:
confluent connect plugin list
Step 2: List the connector configuration properties
Enter the following command to show the connector configuration properties:
confluent connect plugin describe <connector-plugin-name>
The command output shows the required and optional configuration properties.
Step 3: Create the connector configuration file
Create a JSON file that contains the connector configuration properties. The following example shows the required connector properties.
{
  "config": {
    "connector.class": "HttpSourceV2",
    "name": "HttpSourceV2Connector_0",
    "kafka.auth.mode": "KAFKA_API_KEY",
    "kafka.api.key": "<my-kafka-api-key>",
    "kafka.api.secret": "<my-kafka-api-secret>",
    "schema.context.name": "default",
    "value.subject.name.strategy": "TopicNameStrategy",
    "output.data.format": "AVRO",
    "tasks.max": "1",
    "behavior.on.error": "IGNORE",
    "http.api.base.url": "http://example.com/absenceManagement/v1",
    "auth.type": "NONE",
    "https.ssl.enabled": "false",
    "apis.num": "1",
    "api1.http.request.method": "GET",
    "api1.http.connect.timeout.ms": "30000",
    "api1.http.request.timeout.ms": "30000",
    "api1.http.offset.mode": "SIMPLE_INCREMENTING",
    "api1.max.retries": "5",
    "api1.retry.backoff.policy": "EXPONENTIAL_WITH_JITTER",
    "api1.retry.backoff.ms": "3000",
    "api1.retry.on.status.codes": "400-",
    "api1.http.request.headers.separator": "|",
    "api1.http.request.parameters.separator": "&",
    "api1.request.interval.ms": "60000",
    "api1.http.path.parameters.separator": "|",
    "api1.test.api": "false",
  }
}
Note the following property definitions:
"connector.class": Identifies the connector plugin name."output.data.format": Sets the output Kafka record value format (data coming from the connector). Valid entries are: AVRO, JSON_SR (JSON Schema), or PROTOBUF. Note that you must have Confluent Cloud Schema Registry configured when using a schema-based format (for example, Avro)."name": Sets a name for your new connector.
"kafka.auth.mode": Identifies the connector authentication mode you want to use. There are two options:SERVICE_ACCOUNTorKAFKA_API_KEY(the default). To use an API key and secret, specify the configuration propertieskafka.api.keyandkafka.api.secret, as shown in the example configuration (above). To use a service account, specify the Resource ID in the propertykafka.service.account.id=<service-account-resource-ID>. To list the available service account resource IDs, use the following command:confluent iam service-account list
For example:
confluent iam service-account list

   Id     | Resource ID |       Name        |    Description
+---------+-------------+-------------------+-------------------
   123456 | sa-l1r23m   | sa-1              | Service account 1
   789101 | sa-l4d56p   | sa-2              | Service account 2
"http.request.method": Enter an HTTP request method:GETandPOST. Defaults toGET.
Note
To enable CSFLE or CSPE for data encryption, specify the following properties:
csfle.enabled: Flag to indicate whether the connector honors CSFLE or CSPE rules.sr.service.account.id: A Service Account to access the Schema Registry and associated encryption rules or keys with that schema.
For more information on CSFLE or CSPE setup, see Manage encryption for connectors.
SMTs: For details about adding SMTs using the Confluent CLI, see the Single Message Transformations documentation. For all property values and descriptions, see Configuration Properties.
Step 4: Load the properties file and create the connector
Enter the following command to load the configuration and start the connector:
confluent connect cluster create --config-file <file-name>.json
For example:
confluent connect cluster create --config-file http-source-v2-config.json
Example output:
Created connector HttpSourceV2Connector_0 lcc-do6vzd
Step 5: Check the connector status
Enter the following command to check the connector status:
confluent connect cluster list
Example output:
ID           |             Name              | Status  | Type   | Trace |
+------------+-------------------------------+---------+--------+-------+
lcc-do6vzd   | HttpSourceV2Connector_0       | RUNNING | Source |       |
Step 6: Check for records
Verify that records are populating the endpoint.
For more information and examples to use with the Confluent Cloud API for Connect, see the Confluent Cloud API for Connect Usage Examples section.
Tip
When you launch a connector, a Dead Letter Queue topic is automatically created. See View Connector Dead Letter Queue Errors in Confluent Cloud for details.
Error records and status codes
The connector may report status_code = -1 in error records when no HTTP response code is available. This usually happens with client-side or transport failures that occur before the server can respond. For example, DNS failures, connection refused errors, socket connect/read timeouts, or TLS handshake errors.
When the server responds with a non-2xx status, the connector reports the actual HTTP code, for example, 400 or 500.
If the connector receives a 2xx response but fails to parse or process the response body, it resets the internal status to -1 for error reporting in source error records. The status_code then appears as null. For diagnostics, use accompanying fields like reason_phrase, response_content, error_message, and exception.
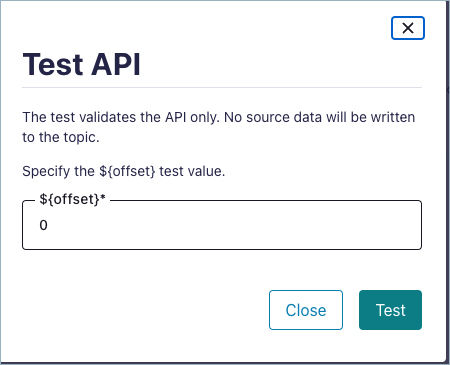
Test API
Use the Test API functionality to test the API with a sample record and view the logs directly in the Confluent Cloud user interface.
Important
This feature is only available for publicly accessible endpoints.
Invoking the Test API on an API may change data on the end system, depending on the API’s behavior.
When using this feature with the HTTP Source V2 connector, configure the following required parameter in the user interface: ${offset}. This is the offset that the connector should read from. The connector uses this value to replace the ${offset} template variable wherever it is configured.
API Chaining
API Chaining refers to obtaining the desired data, by navigating through multiple APIs. The response from the first API determines the value for the template placeholders in the URL for the next API, thereby creating a ‘chain.’ For example, let’s assume there is a SaaS system that supports the following APIs:
Parent API

  GET /users : fetches all the users registered in the service

Child API

  GET /users/${id}/places : fetches all the places visited by a particular user
If the requirement is to create a connector that captures all the places visited by registered users in the system, the steps would broadly include:
Retrieve all users in the system using the
/usersendpoint.Obtain all places visited by calling the
/users/${id}/placesAPI for each user fetched in the first step.
The configuration property, api.chaining.parent.child.relationship can be used to define the relationship between the APIs. For more information, see Configuration Properties.
Considerations
Important points to note with respect to API Chaining:
This feature can only be used with API/CLI/TF.
When this feature is enabled, an additional metadata topic is created in your cluster, and you are responsible for the associated costs.
The value for the placeholders in the child API path (like
${id}in above example) and the offset field values are stored in the metadata topic in unencrypted form. If you are using CSFLE with the HTTP Source V2 connector, you need to ensure that the placeholder and the offset fields do not contain Personally Identifiable Information (PII) data.Currently, only one level of chaining is supported. This means that a child API can not have a child of its own.
Limitations
The ordering between the records may not be maintained in API chaining.
The connector may produce duplicate records in the Kafka topic.
Custom offsets are not supported in API chaining (for both parent and child APIs).
The APIs used for API chaining must support pagination.
Permissions
You need to provide permissions for additional metadata topic and consumer group created as part of API chaining:
Metadata topic is prefixed with
HTTPv2-work-queue-.Consumer group is prefixed with
HTTPv2-work-queue-consumers-.
SNAPSHOT_PAGINATION mode
Some API’s doesn’t allow offset pagination (like /api/path/${offset}), instead it provides a static URL which can have incremental records over time as shown in the example below:
GET /api/path/users at time t1       → R1 to R10
GET /api/path/users at time t2 (>t1) → R1 to R20
GET /api/path/users at time t3 (>t2) → R1 to R27
In such cases, you can use SNAPSHOT_PAGINATION mode to paginate the data. You can use the api<index number>.http.offset.mode configuration to set its value.
Note
All the records should be in sorted order according to some unique key. The same key is used to set under api<index number>.http.offset.json.pointer configuration.
Configuration Properties
Use the following configuration properties with the fully-managed HTTP V2 Source connector. When configuring your APIs, use the configuration properties listed in the API-1 Config section. You’ll just need to update the prefix name for each of the configurations accordingly. For example, for the http.request.headers parameter, it would look similar to: api<indexnumber>.http.request.headers (for example, api2.http.request.headers, api3.http.request.headers, and so forth)
How should we connect to your data?
nameSets a name for your connector.
Type: string
Valid Values: A string at most 64 characters long
Importance: high
Kafka Cluster credentials
kafka.auth.modeKafka Authentication mode. It can be one of KAFKA_API_KEY or SERVICE_ACCOUNT. It defaults to KAFKA_API_KEY mode, whenever possible.
Type: string
Valid Values: SERVICE_ACCOUNT, KAFKA_API_KEY
Importance: high
kafka.api.keyKafka API Key. Required when kafka.auth.mode==KAFKA_API_KEY.
Type: password
Importance: high
kafka.service.account.idThe Service Account that will be used to generate the API keys to communicate with Kafka Cluster.
Type: string
Importance: high
kafka.api.secretSecret associated with Kafka API key. Required when kafka.auth.mode==KAFKA_API_KEY.
Type: password
Importance: high
Schema Config
schema.context.nameAdd a schema context name. A schema context represents an independent scope in Schema Registry. It is a separate sub-schema tied to topics in different Kafka clusters that share the same Schema Registry instance. If not used, the connector uses the default schema configured for Schema Registry in your Confluent Cloud environment.
Type: string
Default: default
Importance: medium
Output messages
output.data.formatSets the output Kafka record value format. Valid entries are AVRO, JSON_SR, or PROTOBUF. Please configure Confluent Cloud Schema Registry.
Type: string
Default: JSON_SR
Importance: high
Number of tasks for this connector
tasks.maxMaximum number of tasks for the connector.
Type: int
Valid Values: [1,…]
Importance: high
Behavior on error
behavior.on.errorError handling behavior setting for handling error response from HTTP requests.
Type: string
Default: FAIL
Importance: low
Authentication
http.api.base.urlThe HTTP API Base URL. For example: http://example.com/absenceManagement/v1.
Type: string
Importance: high
auth.typeAuthentication type of the endpoint. Valid values are
NONE,BASIC,OAUTH2(Client Credentials grant type only),BEARER,API_KEYType: string
Default: NONE
Importance: high
connection.userThe username to be used with an endpoint requiring basic authentication.
Type: string
Importance: medium
connection.passwordThe password to be used with an endpoint requiring basic authentication.
Type: password
Importance: medium
bearer.tokenThe bearer authentication token to be used with an endpoint requiring bearer token based authentication.
Type: password
Importance: medium
oauth2.token.urlThe URL to be used for fetching the OAuth2 token. Client Credentials is the only supported grant type.
Type: string
Importance: medium
oauth2.client.idThe client id used when fetching the OAuth2 token.
Type: string
Importance: medium
oauth2.client.secretThe client secret used when fetching the OAuth2 token.
Type: password
Importance: medium
oauth2.token.propertyThe name of the property containing the OAuth2 token returned by the OAuth2 token URL (defaults to access_token).
Type: string
Default: access_token
Importance: medium
oauth2.client.scopeThe scope parameter sent to the service when fetching the OAuth2 token.
Type: string
Default: any
Importance: medium
oauth2.client.auth.modeSpecifies how to encode
client_idandclient_secretin the OAuth2 authorization request. If set toheader, the credentials are encoded as an ‘Authorization: Basic <base-64 encoded client_id:client_secret>’ HTTP header. If set to ‘url’, thenclient_idandclient_secretare sent as URL encoded parameters.Type: string
Default: header
Importance: medium
oauth2.client.headersHTTP headers to be included in the OAuth2 client endpoint. Individual headers should be separated by
|. This configuration can be set via CLI only.Type: password
Importance: low
oauth2.client.header.separatorSeparator character used in OAuth2 Client Headers. This configuration can be set via CLI only.
Type: string
Default: |
Importance: low
https.ssl.enabledControls whether to enforce TLSv1.3 for HTTPS connections. If false, the connector uses the JVM default TLS configuration (typically TLSv1.2). If true, TLSv1.3 is enforced. Note that, even when disabled, HTTPS connections still use TLS. This setting only controls TLS version enforcement.
Type: boolean
Default: false
Importance: medium
https.ssl.keystorefileThe keystore that contains the client certificate and private key. Supported formats are JKS or PKCS12. File system paths are not supported.
Type: password
Default: [hidden]
Importance: low
https.ssl.keystore.passwordThe store password for the key store file.
Type: password
Importance: high
https.ssl.key.passwordThe password for the private key in the key store file.
Type: password
Importance: high
https.ssl.truststorefileThe truststore that contains the server CA certificate(s). Supported formats are JKS or PKCS12. File system paths are not supported.
Type: password
Default: [hidden]
Importance: high
https.ssl.truststore.passwordThe trust store password containing a server CA certificate.
Type: password
Importance: high
https.ssl.protocolThe protocol to use for SSL connections
Type: string
Default: TLSv1.3
Importance: medium
api.key.locationSpecifies where the API key is included in the HTTP request. Choose
HEADERto send the API key as an HTTP header (for example,X-API-KEY: your-api-key), orQUERYto include it as a query parameter in the URL (for example,?api_key=your-api-key). The default isHEADERwhich is the most common and secure approach.Type: string
Default: HEADER
Importance: medium
api.key.nameThe identifier for the API key used in authentication. The format depends on the
api.key.locationconfiguration. If location isHEADER, use the HTTP header name (for example,X-API-KEY). If location isQUERY, use the query parameter name (for example,api_key,app_id). The default valueX-API-KEYis commonly used for header-based authentication.Type: string
Default: X-API-KEY
Importance: medium
api.key.valueThe API key to be used with an endpoint that requires API key-based authentication
Type: password
Importance: medium
http.proxy.hostThe host or IP address of the HTTP proxy.
Type: string
Importance: medium
http.proxy.portThe port number of the HTTP proxy.
Type: int
Valid Values: [0,…,65535]
Importance: medium
http.proxy.userThe username to be used for proxy authentication.
Type: string
Importance: medium
http.proxy.passwordThe password to be used for proxy authentication.
Type: password
Importance: medium
secret.manager.enabledFetch sensitive configuration values from a secret manager.
Type: boolean
Default: false
Importance: high
Secret manager configuration
secret.managerSelect the secret manager to use for retrieving sensitive data.
Type: string
Importance: high
secret.manager.managed.configsSelect the configurations to fetch their values from the secret manager.
Type: list
Importance: high
secret.manager.provider.integration.idSelect an existing provider integration that has access to your secret manager.
Type: string
Importance: high
APIs
apis.numThe number of http(s) APIs to configure. This value should be less than or equal to 15
Type: int
Default: 1
Importance: high
api.chaining.parent.child.relationshipComma separated list of parent-child relationship in case of API Chaining. For ex - If api1 is the parent API, and api2,api3 are the child APIs of api1, then the value will be set to
api1::api2,api1::api3.Type: string
Default: “”
Importance: high
Reporter
reporter.error.topic.nameThe name of the topic to produce errant records after each unsuccessful API operation. Defaults to ‘error-${connector}’ if not set. You can provide
${connector}in the value to use it as a placeholder for the logical cluster ID.Type: string
Default: error-${connector}
Importance: low
report.errors.asDictates the content of records produced to the error topic. If set to
Error stringthe value would be a human readable string describing the failure. The value will include some or all of the following information if available: http response code, reason phrase, submitted payload, url, response content, exception and error message. If set to http_response, the value would be the plain response content for the request which failed to write the record. In both modes, any information about the failure will also be included in the error records headers.Type: string
Default: Error string
Importance: low
Additional Configs
header.converterThe converter class for the headers. This is used to serialize and deserialize the headers of the messages.
Type: string
Importance: low
producer.override.compression.typeThe compression type for all data generated by the producer. Valid values are none, gzip, snappy, lz4, and zstd.
Type: string
Importance: low
producer.override.linger.msThe producer groups together any records that arrive in between request transmissions into a single batched request. More details can be found in the documentation: https://docs.confluent.io/platform/current/installation/configuration/producer-configs.html#linger-ms.
Type: long
Valid Values: [100,…,1000]
Importance: low
value.converter.allow.optional.map.keysAllow optional string map key when converting from Connect Schema to Avro Schema. Applicable for Avro Converters.
Type: boolean
Importance: low
value.converter.auto.register.schemasSpecify if the Serializer should attempt to register the Schema.
Type: boolean
Importance: low
value.converter.connect.meta.dataAllow the Connect converter to add its metadata to the output schema. Applicable for Avro Converters.
Type: boolean
Importance: low
value.converter.enhanced.avro.schema.supportEnable enhanced schema support to preserve package information and Enums. Applicable for Avro Converters.
Type: boolean
Importance: low
value.converter.enhanced.protobuf.schema.supportEnable enhanced schema support to preserve package information. Applicable for Protobuf Converters.
Type: boolean
Importance: low
value.converter.flatten.unionsWhether to flatten unions (oneofs). Applicable for Protobuf Converters.
Type: boolean
Importance: low
value.converter.generate.index.for.unionsWhether to generate an index suffix for unions. Applicable for Protobuf Converters.
Type: boolean
Importance: low
value.converter.generate.struct.for.nullsWhether to generate a struct variable for null values. Applicable for Protobuf Converters.
Type: boolean
Importance: low
value.converter.int.for.enumsWhether to represent enums as integers. Applicable for Protobuf Converters.
Type: boolean
Importance: low
value.converter.latest.compatibility.strictVerify latest subject version is backward compatible when use.latest.version is true.
Type: boolean
Importance: low
value.converter.object.additional.propertiesWhether to allow additional properties for object schemas. Applicable for JSON_SR Converters.
Type: boolean
Importance: low
value.converter.optional.for.nullablesWhether nullable fields should be specified with an optional label. Applicable for Protobuf Converters.
Type: boolean
Importance: low
value.converter.optional.for.proto2Whether proto2 optionals are supported. Applicable for Protobuf Converters.
Type: boolean
Importance: low
value.converter.scrub.invalid.namesWhether to scrub invalid names by replacing invalid characters with valid characters. Applicable for Avro and Protobuf Converters.
Type: boolean
Importance: low
value.converter.use.latest.versionUse latest version of schema in subject for serialization when auto.register.schemas is false.
Type: boolean
Importance: low
value.converter.use.optional.for.nonrequiredWhether to set non-required properties to be optional. Applicable for JSON_SR Converters.
Type: boolean
Importance: low
value.converter.wrapper.for.nullablesWhether nullable fields should use primitive wrapper messages. Applicable for Protobuf Converters.
Type: boolean
Importance: low
value.converter.wrapper.for.raw.primitivesWhether a wrapper message should be interpreted as a raw primitive at root level. Applicable for Protobuf Converters.
Type: boolean
Importance: low
errors.toleranceUse this property if you would like to configure the connector’s error handling behavior. WARNING: This property should be used with CAUTION for SOURCE CONNECTORS as it may lead to dataloss. If you set this property to ‘all’, the connector will not fail on errant records, but will instead log them (and send to DLQ for Sink Connectors) and continue processing. If you set this property to ‘none’, the connector task will fail on errant records.
Type: string
Default: none
Importance: low
key.converter.key.schema.id.serializerThe class name of the schema ID serializer for keys. This is used to serialize schema IDs in the message headers.
Type: string
Default: io.confluent.kafka.serializers.schema.id.PrefixSchemaIdSerializer
Importance: low
key.converter.key.subject.name.strategyHow to construct the subject name for key schema registration.
Type: string
Default: TopicNameStrategy
Importance: low
value.converter.decimal.formatSpecify the JSON/JSON_SR serialization format for Connect DECIMAL logical type values with two allowed literals:
BASE64 to serialize DECIMAL logical types as base64 encoded binary data and
NUMERIC to serialize Connect DECIMAL logical type values in JSON/JSON_SR as a number representing the decimal value.
Type: string
Default: BASE64
Importance: low
value.converter.flatten.singleton.unionsWhether to flatten singleton unions. Applicable for Avro and JSON_SR Converters.
Type: boolean
Default: false
Importance: low
value.converter.ignore.default.for.nullablesWhen set to true, this property ensures that the corresponding record in Kafka is NULL, instead of showing the default column value. Applicable for AVRO,PROTOBUF and JSON_SR Converters.
Type: boolean
Default: false
Importance: low
value.converter.reference.subject.name.strategySet the subject reference name strategy for value. Valid entries are DefaultReferenceSubjectNameStrategy or QualifiedReferenceSubjectNameStrategy. Note that the subject reference name strategy can be selected only for PROTOBUF format with the default strategy being DefaultReferenceSubjectNameStrategy.
Type: string
Default: DefaultReferenceSubjectNameStrategy
Importance: low
value.converter.value.schema.id.serializerThe class name of the schema ID serializer for values. This is used to serialize schema IDs in the message headers.
Type: string
Default: io.confluent.kafka.serializers.schema.id.PrefixSchemaIdSerializer
Importance: low
value.converter.value.subject.name.strategyDetermines how to construct the subject name under which the value schema is registered with Schema Registry.
Type: string
Default: TopicNameStrategy
Importance: low
API-1 Configs
api1.http.api.pathThe HTTP API path together with the ‘http.api.base.url’ will form the complete HTTP(S) URL. This path can be templated with offset information. For example:
/resource1/${offset}where${offset}will be substituted with the offset generated from the previous request’s response (or if it’s the first request, from ‘http.initial.offset’).Type: string
Importance: high
api1.topicsThe name of the Kafka topics to publish data to.
Type: string
Importance: high
api1.http.request.headersHTTP headers to be included in each request. Header names and values should be separated by :. Distinct headers should be separated by |. For example: From:abcxyz@confluent.io|Content-Length:348.
Type: string
Importance: medium
api1.http.request.methodHTTP Request Method. Valid options are GET and POST.
Type: string
Default: GET
Importance: high
api1.http.request.parametersHTTP parameters to be added to each request. Parameter names and values should be separated by
=. Distinct parameters should be separated by&. Parameter values can be templated with offset information (for example:search_after=${offset}) where${offset}will be substituted with the offset generated from the previous request’s response (or if it’s the first request, from ‘http.initial.offset’). The parameters are only set if ‘http.request.method’ = GET.Type: string
Importance: medium
api1.http.connect.timeout.msThe time in milliseconds to wait for a connection to be established
Type: int
Default: 30000 (30 seconds)
Valid Values: [1,…,600000]
Importance: medium
api1.http.request.bodyThe payload to be sent along with each HTTP request. The value can be templated with offset (for example:
search_after: ${offset}) where${offset}will be substituted with the offset generated from the previous request’s response (or if it’s the first request, from ‘http.initial.offset’). The body is only set if ‘http.request.method’ = POST.Type: string
Importance: medium
api1.http.request.timeout.msThe time in milliseconds to wait for a request response from the server
Type: int
Default: 30000 (30 seconds)
Valid Values: [1,…,600000]
Importance: medium
api1.http.offset.modeThis config indicates how offsets are computed and how requests are generated. If set to
SIMPLE_INCREMENTING, the ${offset} used to generate requests is simply the previous offset (orhttp.initial.offset) incremented by 1 per sourced record. In this mode,http.initial.offsetneeds to be set to an integer value. If set toCHAINING, the config ‘http.offset.json.pointer’ needs to be set, and the offset for a record is set to the value for the configured key in the response data. If the value isCURSOR_PAGINATION, then the config ‘http.next.page.json.pointer’ needs to be set and the offset for the last record in each page will be set to the next page value. If set toSNAPSHOT_PAGINATION, only the config ‘http.offset.json.pointer’ needs to be set.Type: string
Default: SIMPLE_INCREMENTING
Importance: high
api1.http.response.compression.enabledSpecify whether to enable GZip compression on HTTP responses. Valid options are
true(default) andfalse. The HTTP server must support compression for this setting to work.Type: boolean
Default: true
Importance: low
api1.http.initial.offsetThe initial offset to be used to generate the first request. This needs to be set if either one or more of the configs - ‘url’, ‘http.request.parameters’, or ‘http.request.body’ contain the template variable
${offset}.Type: string
Default: “”
Importance: high
api1.max.retriesThe maximum number of times to retry on errors before failing the task. Must be between 1 and 5000
Type: int
Default: 5
Importance: medium
api1.http.response.data.json.pointerThe JSON Pointer to the entity in the JSON response containing the actual data that should be written to Kafka as records. The entity can be an array (multiple records in a single response) or an object / scalar value (single record).
Type: string
Importance: high
api1.retry.backoff.policyThe backoff policy to use in terms of retry - CONSTANT_VALUE or EXPONENTIAL_WITH_JITTER
Type: string
Default: EXPONENTIAL_WITH_JITTER
Importance: medium
api1.http.offset.json.pointerThe JSON Pointer to the value in each record that corresponds to the offset for that record (it is relative to ‘http.response.data.json.pointer’). The offset will be available to the subsequent request as ${offset} and it will also be used for checkpointing and recovery in case of connector failures or restarts. This config should only be set if ‘http.offset.mode’ is set to
CHAINING.Type: string
Importance: medium
api1.retry.backoff.msThe initial duration in milliseconds to wait following an error before a retry attempt is made. Subsequent backoff attempts can be a constant value or exponential with jitter (can be configured using api*.retry.backoff.policy parameter). Jitter adds randomness to the exponential backoff algorithm to prevent synchronized retries.
Type: int
Default: 3000 (3 seconds)
Valid Values: [20,…,100000]
Importance: medium
api1.http.next.page.json.pointerThe JSON pointer to the value in the response which corresponds to the next page reference (either a page token, a full URL or a URL fragment). This will be stored as the offset and will be available to the subsequent request via the template variable ${offset}. This config should only be set if ‘http.offset.mode’ is set to
CURSOR_PAGINATION. The referenced value can be either a string or an integer.Type: string
Importance: medium
api1.retry.on.status.codesComma-separated list of HTTP status codes or range of codes to retry on. Ranges are specified with start and optional end code. Range boundaries are inclusive. For instance, 400- includes all codes greater than or equal to 400. 400-500 includes codes from 400 to 500, including 500. Multiple ranges and single codes can be specified together to achieve fine-grained control over retry behavior. For example, 404,408,500- will retry on 404 NOT FOUND, 408 REQUEST TIMEOUT, and all 5xx error codes. Note that some status codes will always be retried, such as unauthorized, timeouts and too many requests.
Type: string
Default: 400-
Importance: medium
api1.http.request.headers.separatorThe character that separates multiple distinct headers within
http.request.headers. This configuration can be set via CLI only.Type: string
Default: |
Importance: medium
api1.request.interval.msThe time in milliseconds to wait between consecutive requests.
Type: int
Default: 60000 (1 minute)
Valid Values: [100,…]
Importance: medium
api1.http.request.parameters.separatorThe character that separates multiple distinct request parameters within
http.request.parameters. This configuration can be set via CLI only.Type: string
Default: &
Importance: medium
api1.enable.cursor.pagination.with.timestamp.modeWhether to use cursor pagination with timestamp mode.
Type: boolean
Default: false
Importance: medium
api1.http.timestamp.json.pointerJSON pointer to the timestamp field in the response. It is used to construct time related parameters for the subsequent API calls.
Type: string
Default: “”
Importance: medium
api1.initial.start.timestamp.valueThe initial start timestamp to be used to generate the first request. This needs to be set when using
cursor.pagination.with.timestamp.modeorchaining.with.timestamp.modewithchaining.with.timestamp.mode.record.orderingset toGlobal.Type: string
Default: “”
Importance: medium
api1.http.cursor.pagination.parameter.nameName of the request parameter which holds the next page token.
Type: string
Default: “”
Importance: medium
api1.http.request.sensitive.headersSensitive HTTP headers to include in each request. Sensitive header names and values should be separated by
:. Distinct headers should be separated by|. For example:From:abcxyz@confluent.io|Content-Length:348. If a key is present in both regular and sensitive headers, the value in sensitive headers takes priority. This is a CLI-only feature.Type: password
Importance: medium
api1.initial.end.timestamp.valueSets the initial end timestamp to generate the first request when using
enable.cursor.pagination.with.timestamp.modeorchaining.with.timestamp.modewithchaining.with.timestamp.mode.record.orderingset toGlobal.Type: string
Default: “”
Importance: medium
api1.timestamp.formatTimestamp format used in the time related request parameters. It should match the format of initial.start.timestamp.value and initial.end.timestamp.value
Type: string
Default: Unix Timestamp Milliseconds
Importance: medium
api1.timestamp.interval.formatFormat of the timestamp interval provided.
Type: string
Default: Seconds
Importance: medium
api1.http.timestamp.intervalTimestamp interval between start time and end time.
Type: long
Default: 86400
Importance: medium
api1.time.range.request.delayThe time in milliseconds to delay a timestamp-based pagination request to avoid potential time drift.
Type: long
Default: 0
Valid Values: [0,…,600000]
Importance: medium
api1.is.next.page.token.absolute.urlWhether next page token is an absolute url or not.
Type: boolean
Default: true
Importance: medium
api1.http.path.parametersHTTP path parameters to be added to the request. Parameter names and values should be separated by
:. Distinct parameters should be separated by|. Parameter values can be templated with different template values like${offset}.Type: string
Importance: medium
api1.http.path.parameters.separatorThe character that separates multiple distinct path parameters within
http.path.parameters. This configuration can be set via CLI only.Type: string
Default: |
Importance: medium
api1.http.response.schema.enforceControls how strictly the connector enforces the HTTP response schema. When set to
STRICT, the connector validates that the response conforms to the defined OpenAPI response schema. For both missing non-optional and new fields, the connector handles the error (fail or ignore) based on thebehavior.on.errorsetting. When set toNONE, the connector does not enforce the OpenAPI schema and incase non-optional field is missing, connector deduces the schema for the response dynamically otherwise connector registers new fields as optional strings. When set toEVOLVE, the connector evolves a single per-topic schema across responses, using Schema Registry as the persistence layer;value.converter.schema.registry.urlmust be set andvalue.converter.value.subject.name.strategymust beTopicNameStrategy(the default).Type: string
Default: NONE
Importance: medium
api1.chaining.with.timestamp.modeWhether to use chaining with timestamp mode.
Type: boolean
Default: false
Importance: medium
api1.chaining.with.timestamp.mode.record.orderingSpecifies how records are ordered during chaining when using timestamp mode. Use
Relativewhen the source API provides ordering only within a time window, where the order may vary across queries. UseGlobalwhen the source API guarantees a consistent ordering across all queries.Type: string
Default: Global
Importance: medium
api1.http.chaining.pagination.parameter.nameSpecifies the name of the query parameter used in the request for chaining with time window pagination. This is typically used when fetching the next page of results using values like
starting_after.Type: string
Default: “”
Importance: medium
api1.http.offset.json.primary.key.pointerDefines the JSON Pointer to the offset value within each record (relative to
http.response.data.json.pointer). This offset becomes${primary_key}for subsequent requests and enables checkpointing and recovery if the connector fails or restarts. Only applicable whenhttp.offset.modeis set toCHAINING.Type: string
Default: “”
Importance: medium
Auto-restart policy
auto.restart.on.user.errorEnable connector to automatically restart on user-actionable errors.
Type: boolean
Default: true
Importance: medium
Frequently asked questions
Find answers to frequently asked questions about the HTTP Source V2 connector for Confluent Cloud.
Availability and deployment model
Can I run HTTP Source V2 as a self-managed connector on my own Connect cluster?
No. HTTP Source V2 is available only as a fully-managed connector on Confluent Cloud. It cannot be downloaded for self-managed environments.
Networking and connectivity
Why do I see http.api.base.url: Could not connect to the configured host:port?
This error indicates the connector cannot reach the target URL from the Confluent Cloud workers. Common causes include:
Networking Mismatch: If the cluster is
PRIVATE_LINKorPCC, outbound traffic is not enabled by default.Firewall Restrictions: Confluent egress IP ranges or PrivateLink/VPC routes are not allowlisted in your upstream gateway or firewall.
Checklist:
Check network type: Is your cluster
PUBLICorPRIVATE_LINK?Verify PrivateLink: Ensure the VPC path from Confluent to your endpoint is correctly configured.
Allowlist IPs: Confirm the Confluent egress IPs (or VPC CIDRs) are allowlisted at your API perimeter.
Port check: Ensure port
443(or your custom port) is open.
Authentication, tokens and 401s
Which OAuth2 flows are supported? Can I use username/password grants?
Supported: OAuth2 Client Credentials flow (
client_id+client_secret). The connector obtains a bearer token and sends it asAuthorization: Bearer <token>.
Can this connector use API key authentication?
Yes. Use auth.type=API_KEY. This connector issues requests using the headers as shown below:
{
  "auth.type": "API_KEY",
  "api.key.name": "Authorization",
  "api.key.value": "GenieKey <your-api-key>"
}
Note
Use the Confluent CLI or REST API to use API_KEY authentication type.
Our OAuth2 provider does not allow a scope parameter. How do we suppress it?
If your identity provider (IdP) returns a scope parameter not supported error:
Using the REST API or CLI: Set
"oauth2.client.scope": ""to omit the parameter.Cloud UI Workaround: Enter a single space in the UI to prevent it from defaulting to
any.
Schema registry and formats
Why do I get Schema not found; error code: 40403 with JSON_SR?
This occurs when output.data.format=JSON_SR is used but the schema is missing and auto-registration is disabled.
Resolution:
Auto-Register: Set
value.converter.auto.register.schemas=true.Manual Entry: Pre-register the JSON Schema for the target subject (e.g.,
<topic>-value) in Schema Registry.
What does Error registering schema for configured topic mean?
This typically means Schema Registry is blocking writes.
Check mode: Ensure Schema Registry is in
READWRITEmode (notREADONLY).Verify ACLs: Confirm the connector’s service account has
WRITEpermissions on the subject.
Pagination, offsets, and polling
How do I correctly configure cursor pagination with absolute next-page URLs?
To use a full absolute URL as the nextPage token, you must combine these specific settings:
{
  "api1.http.offset.mode": "CURSOR_PAGINATION",
  "api1.enable.cursor.pagination.with.timestamp.mode": "true",
  "api1.is.next.page.token.absolute.url": "true",
  "api1.http.next.page.json.pointer": "/path_to_link"
}
The http.timestamp.json.pointer must point to a scalar value (string/number), not a JSON object.
Why is HTTP Source V2 repeatedly fetching the same records?
Static Parameters: Check if
api1.http.request.parametersis hard-coded (e.g.,offset=1). Use variables like${offset}instead.API Support: Verify that the downstream API actually supports the query parameter you are sending (e.g.,
search_after).
Connector creation and internal topics
Offset management and resets
How do I reset offsets for HTTP Source V2?
V2 connectors use the Connect Offsets Management API. Attempting to use the older DELETE /offsets REST endpoint returns a 405 Method Not Allowed.
For more information about resetting offsets for HTTP Source V2, see Manage custom offsets.
Suggested Reading
The following blog post provides an introduction to the fully-managed HTTP V2 Source connector and a scenario walkthrough.
Blog post: Optimize SaaS Integration with Fully-Managed HTTP Connectors V2 for Confluent Cloud
Next Steps
For an example that shows fully-managed Confluent Cloud connectors in action with Confluent Cloud for Apache Flink, see the Cloud ETL Demo. This example also shows how to use Confluent CLI to manage your resources in Confluent Cloud.