
Egress PrivateLink Endpoints Setup Guide: Self-Managed Services on Azure for Confluent Cloud
Use this guide to set up Egress Private Link Endpoints for self-managed services on Azure and Confluent Cloud to enable fully-managed connectors in Confluent Cloud using Azure Private Link.
Prerequisites
In Confluent Cloud, one of the following cluster types was set up with the specified network resource:
A Dedicated cluster with a Confluent Cloud network
For the steps to create a Confluent Cloud network, see Create a Confluent Cloud network. The Connection type of the network needs to be “Private Link Access”.
A Enterprise cluster with a network gateway
For the steps to create a gateway, see Create a gateway for outbound connectivity in Confluent Cloud.
Step 1: Create a load balancer
Before creating the load balancer, ensure that the Virtual Machine’s Network Security Group (NSG) includes inbound allow rules for all required ports. The load balancer cannot route traffic to ports that are blocked by the NSG.
In the Azure portal, browse to Virtual machines (VM), and select the applicable VM.
Browse to Networking → Load balancing.
If there’s an existing load balancer available that you’d like to use, skip to the Step 2. Create a Private Link service section.
To create a new load balancer, click Add load balancing → Create New → Load Balancer.
Specify the settings for the new load balancer.
Load balancer name
Type: Internal
Protocol: TCP
Load balancer rule
Port: The port for the external endpoint
Backend port: The port used to route traffic to VM
Click Create.
Wait for the load balancer to be successfully created and added. You can check your Azure notifications for status.
If your service needs access to additional ports beyond the one defined above, you must create one load balancing rule for each port.
Go to the newly created load balancer.
Navigate to Settings > Load balancing rules > Add.
Configure the following settings:
Load balancing rule name: Enter the name of your load balancing rule.
Frontend IP address: Select the same frontend IP created with the initial rule.
Backend pool: Select the same backend pool assigned during load balancer creation.
Port: Enter the port for the external endpoint.
Backend port: Enter the port used to route traffic to VM.
Health probe: Select the inline option to create a health probe for this port.
Click Save.
Step 2. Create a Private Link service
In the Azure portal, browse to Private Link Center → Private link services.
Click Create.
Specify the Basic settings for the new private link service.
Project details: Select the applicable subscription and resource group.
Instance details: Provide the name and associated region of the load balancer and the VM.
Click Next: Outbound settings.
Specify the Outbound settings for the new private link service.
Load balancer: Select the previously created load balancer.
Load balancer fronted IP address: Select the associated IP address of the load balancer.
Source NAT subnet: Select the subnet that can route to the load balancer.
All other settings can be left as default.
Click Next: Access security.
You can leave the Access security settings as default, or you can select the proper level of security required.
Click Next: Tags
Add any required tags to the private link service.
Click Next: Review + create
Review that all details are correct
Click Create.
Wait for the deployment to be completed.
Step 3. Retrieve the Resource ID
Once deployment is complete, click Go to Resource.
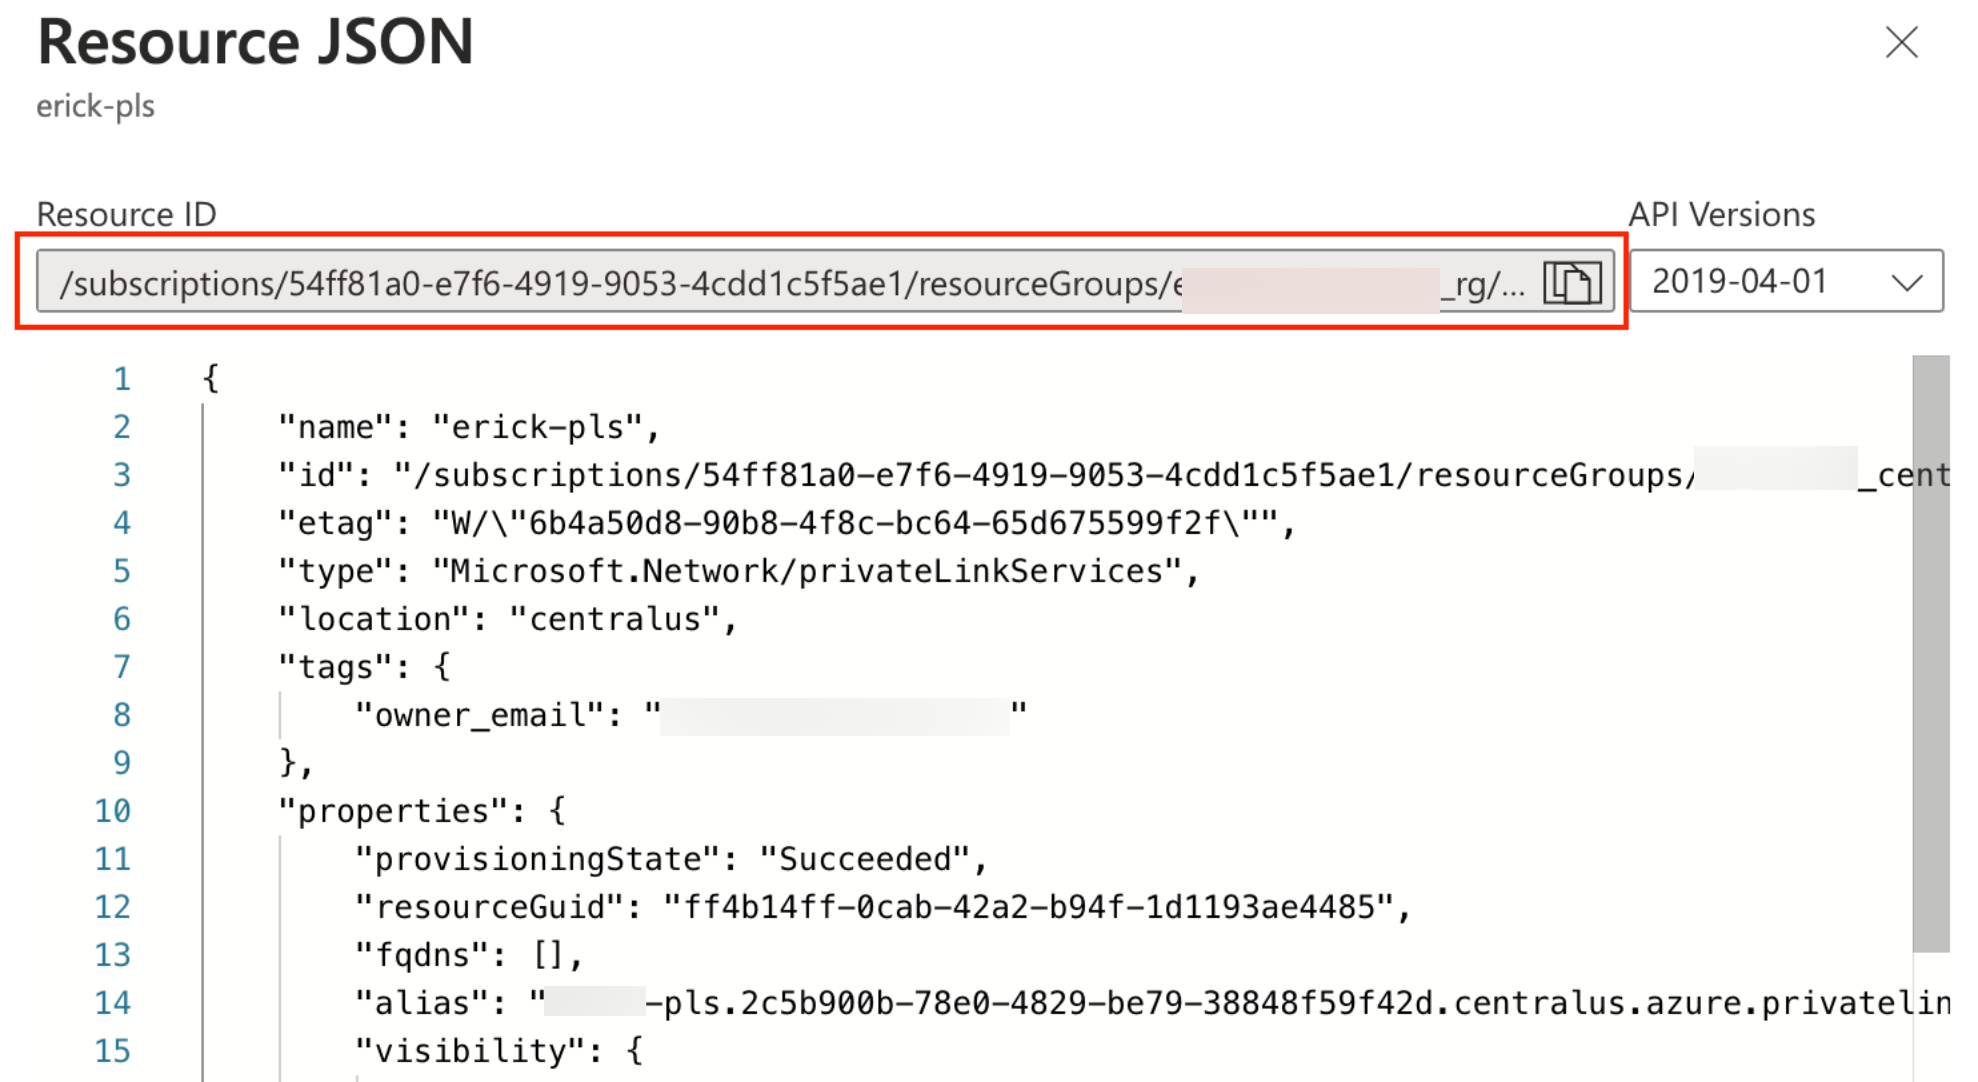
Click JSON View.
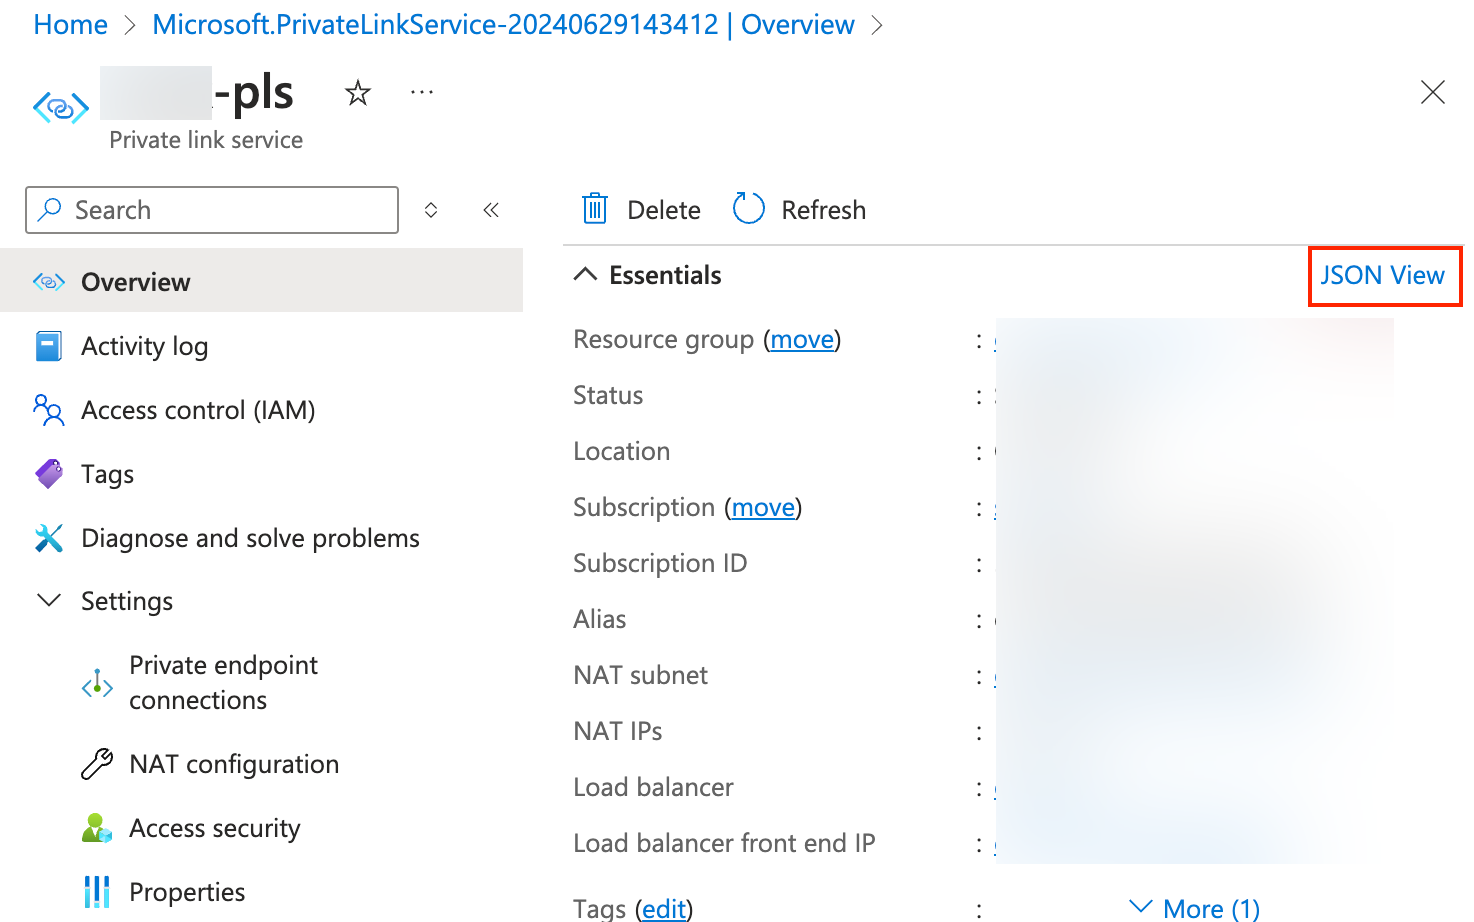
Copy the Resource ID which is required when you create the Egress Private Link Endpoint in Confluent Cloud.
Step 4. Create an Egress PrivateLink Endpoint
Confluent Cloud Egress Private Link Endpoints are Azure Private Endpoints used to connect to Azure Private Link Services.
In the Network management page or tab of the desired Confluent Cloud environment, click the Confluent Cloud network you want to add the Private Link Endpoint to. The Connection Type of the network needs to be “Private Link Access”.
Click Create endpoint in the Egress connections tab.
Click the service you want to connect to. Select Other if you do not see the specific service.
Follow the guided steps to specify the field values, including:
Name: The name of the Private Link Endpoint.
Resource ID: The resource ID of the Private Link service.
The Resource ID is the one noted down above, in the last step of the Step 3 section.
Note that the resource alias is not supported.
Sub-resource name: Leave blank.
Click Create to create the Private Link Endpoint.
If there are additional steps for the specific target service, follow the prompt to complete the tasks, and then click Finish.
In the Network management page or tab of the desired Confluent Cloud environment, click the For serverless products tab.
Click the gateway to which you want to add the Private Link Endpoint.
In the Access points tab, click Add access point.
Select the service you want to connect to.
Specific services are listed based on the cloud provider for the gateway.
Follow the guided steps to specify the field values, including:
Access point name: The name of the Private Link Endpoint.
Resource ID: The resource ID of the Private Link service.
The Resource ID is the one noted down above, in the last step of the Step 3 section. Note that the resource alias is not supported.
Sub-resource name: Leave blank.
Click Create access point to create the Private Link Endpoint.
If there are additional steps for the specific target service, follow the prompt to complete the tasks, and then click Finish.
Step 5. Accept the endpoint connection request
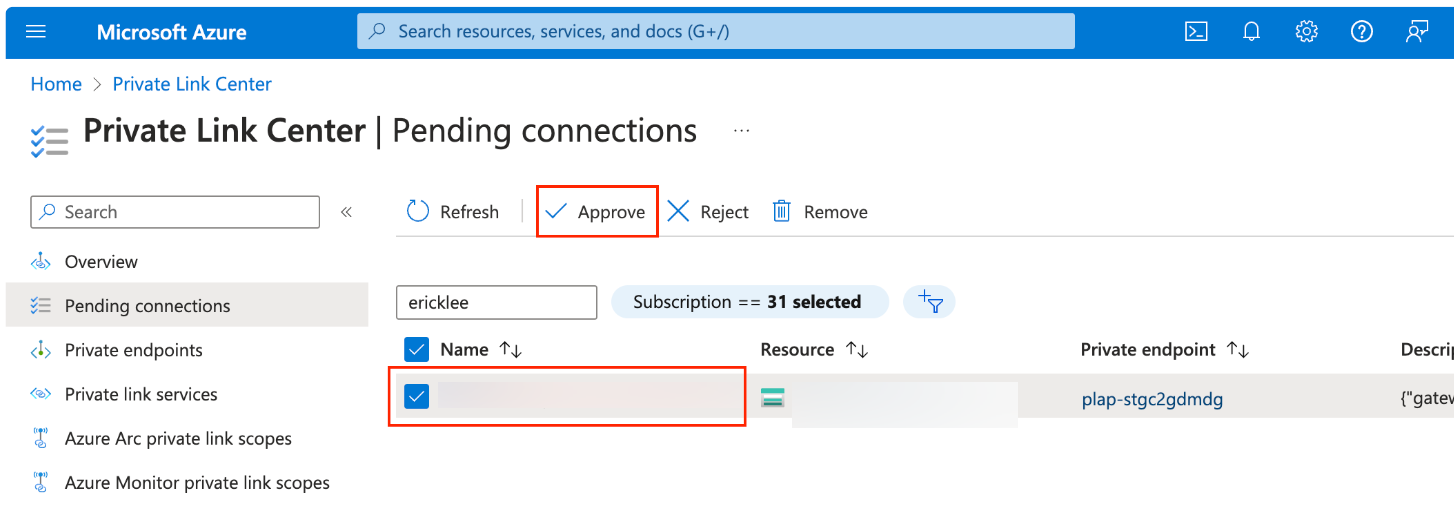
In the Azure portal, When the Private Link Endpoint status becomes “Pending Accept”, go to the Private Link service you previously created → Settings → Private endpoint connections.
Select the pending connection and click Approve.
You can check that this is the connection request by Confluent by looking at the description column which will provide the associated Confluent Cloud gateway and environment ID.
Go back to Confluent Cloud and wait until the Private Link Endpoint status transitions from “Pending accept” to “Ready”.
Step 6. (Optional) Create the DNS record
When the Private Link Endpoint status transitions to “Ready”, click Create DNS record in the DNS tab, or click Create Record on the associated Private Link Endpoint tile.
Specify the following:
Access point: The Egress PrivateLink Endpoint you created in the Step 4 section.
Domain: The associated service endpoint.
In the Network Management tab of your environment, click the Confluent Cloud gateway you want to add the DNS record to.
In the DNS tab, click Create DNS record.
Specify the following field values.
Access point: The Access Point ID you created in the Step 4 section.
Domain: The associated service endpoint.
Click Save.
Step 7. Create the Connector
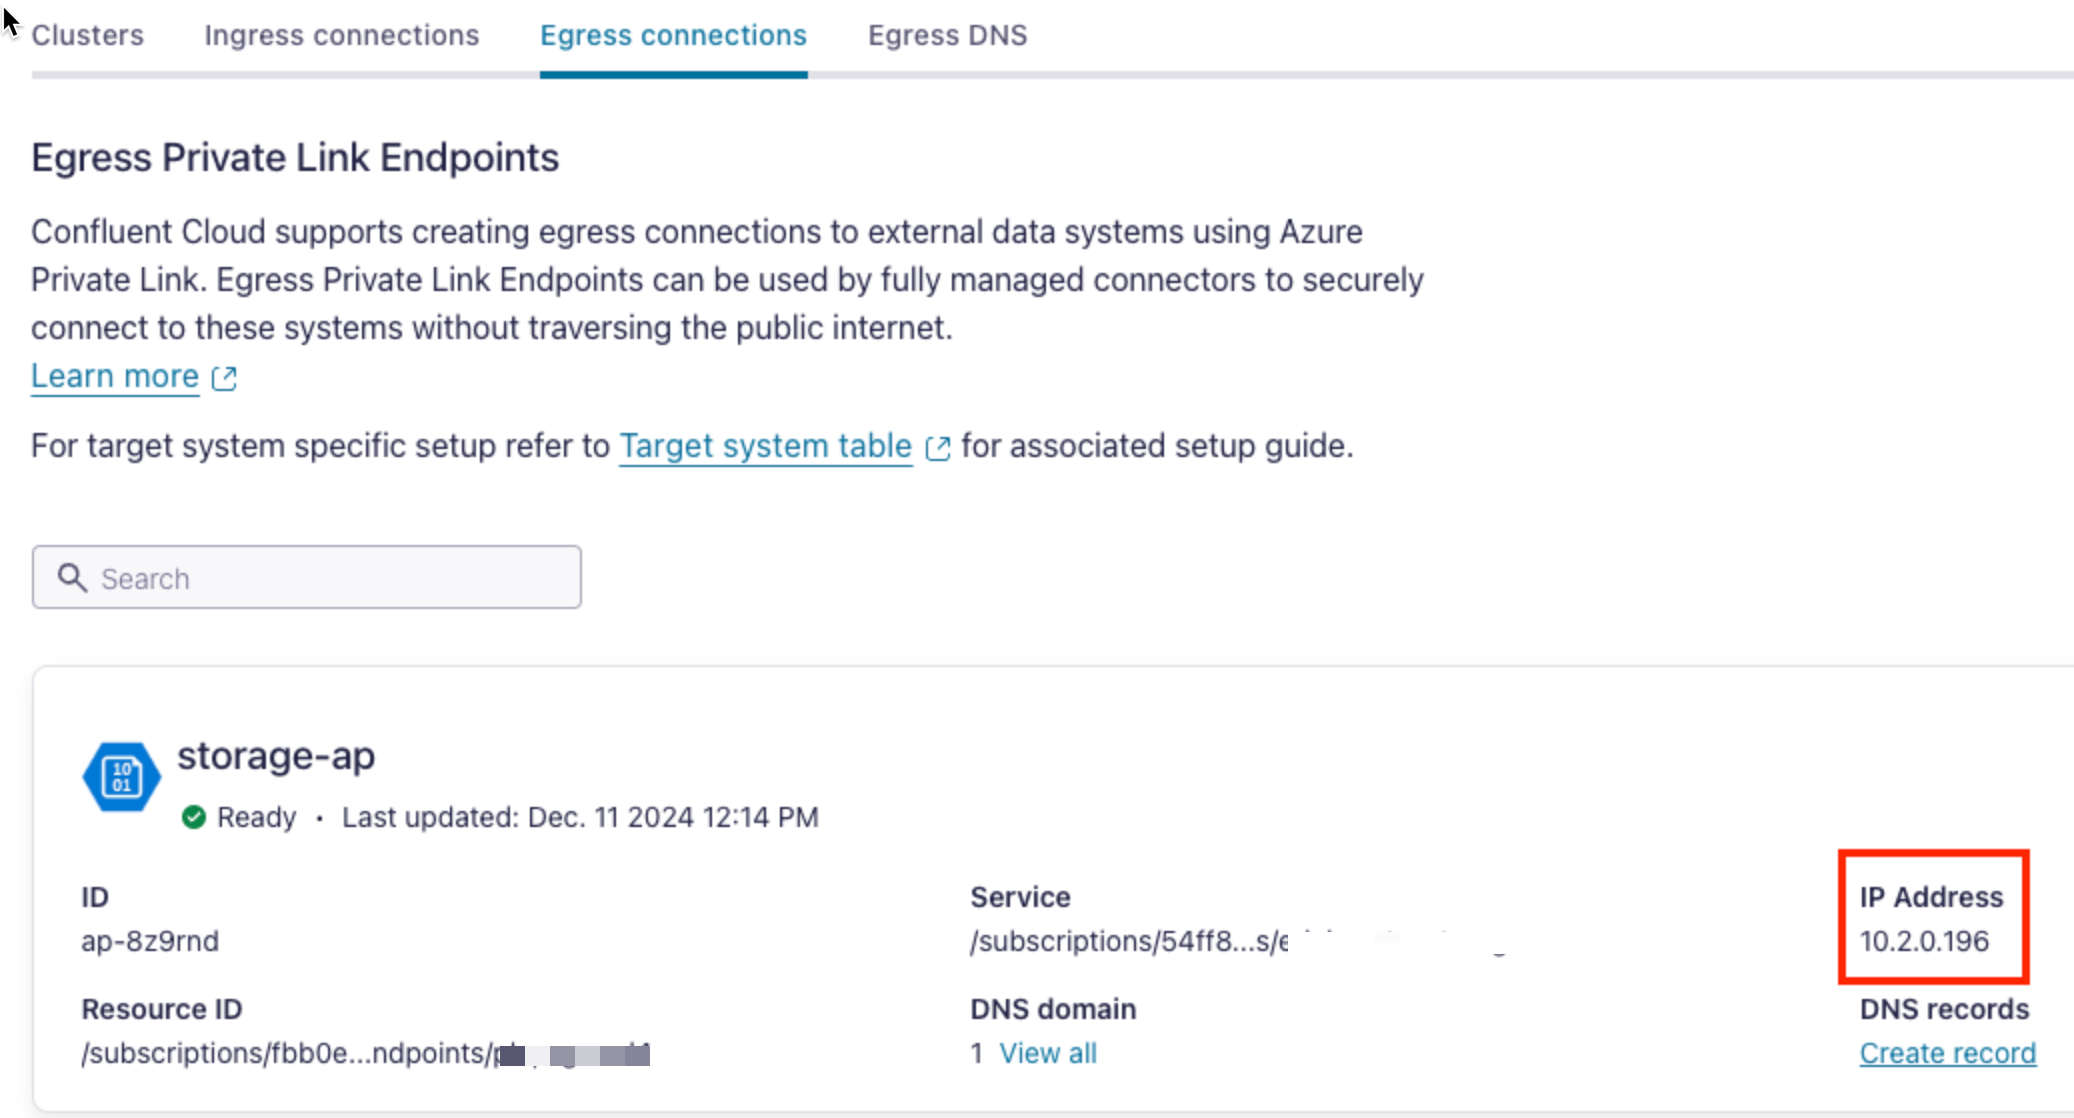
When the DNS Record status transitions to “Ready”, you can create the connector.
For the connector’s Endpoint/Host/Hostname, specify the IP address of the Access Point if no associated DNS records have been created.
For the steps to create the connector, refer to the connector-specific documentation that is listed for your specific connector in Supported connectors.
On-premises resource access
Egress Private Link can be used to privately access resources residing within on-premises environments from Confluent Cloud.
Contact your Azure account team for the recommended proxy setup due to a current limitation where the backend pool must be configured by network interface (NIC) and not IP address.