
Egress Private Service Connect Endpoint Setup: MongoDB Atlas on Google Cloud for Confluent Cloud
The MongoDB Atlas Sink connector for Confluent Cloud supports Google Cloud Private Service Connect through Egress Private Service Connect Endpoints. Use this guide to configure the connector and set up the required endpoints.
Prerequisites
The following is a list of prerequisites for configuring the MongoDB Altas connector with an Egress Private Service Connect Endpoint:
A Confluent Cloud Dedicated cluster was set up and is running with Google Cloud Private Service Connect.
A Dedicated MongoDB Atlas database was set up and is running within same region and cloud as the Confluent Cloud cluster.
Confluent CLI is installed.
jq is installed.
Step 1. Create a MongoDB private endpoint
In MongoDB, create a private endpoint for the Dedicated MongoDB Atlas database you want to access:
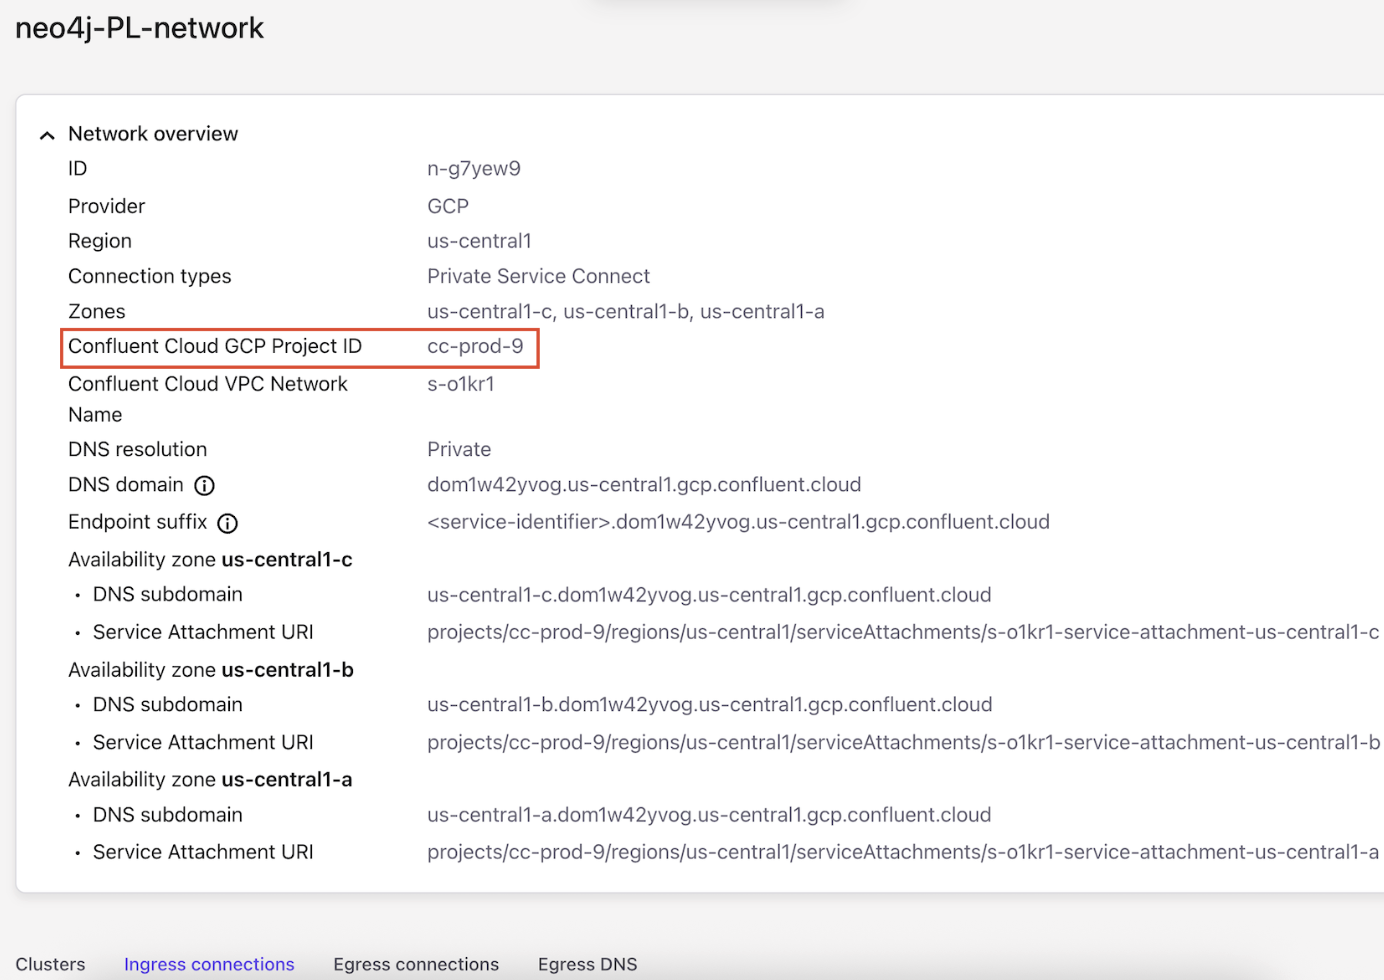
Obtain the Confluent Cloud Project ID.
In the Confluent Cloud Console, select the associated Private Service Connect network you want to use in the Network manage menu in your environment.
Click + Create endpoint in the Egress connections tab.
Click the service you want to connect to, specifically, MongoDB.
Make a note of Confluent’s Google Cloud Account ID associated with the Private Service Connect Endpoint.
You can close the workflow for now by clicking Cancel. You will edit the rest of the configuration in a later step.
In the MongoDB Atlas console, go to Network Access → Private Endpoint.
Click Add Private Endpoint.
Select the associated cloud provider GCP, and click Next.
Select the associated region where your Confluent Cloud cluster resides, and click Next.
In the Google Cloud Project ID field, specify the Confluent Cloud Project ID that you retrieved in Step 1 of this section.
To enable the Next button, you can populate the other fields, VPC Name, Subnet Name, and Private Service Connect Endpoint Prefix, with random text, for example, “x”.
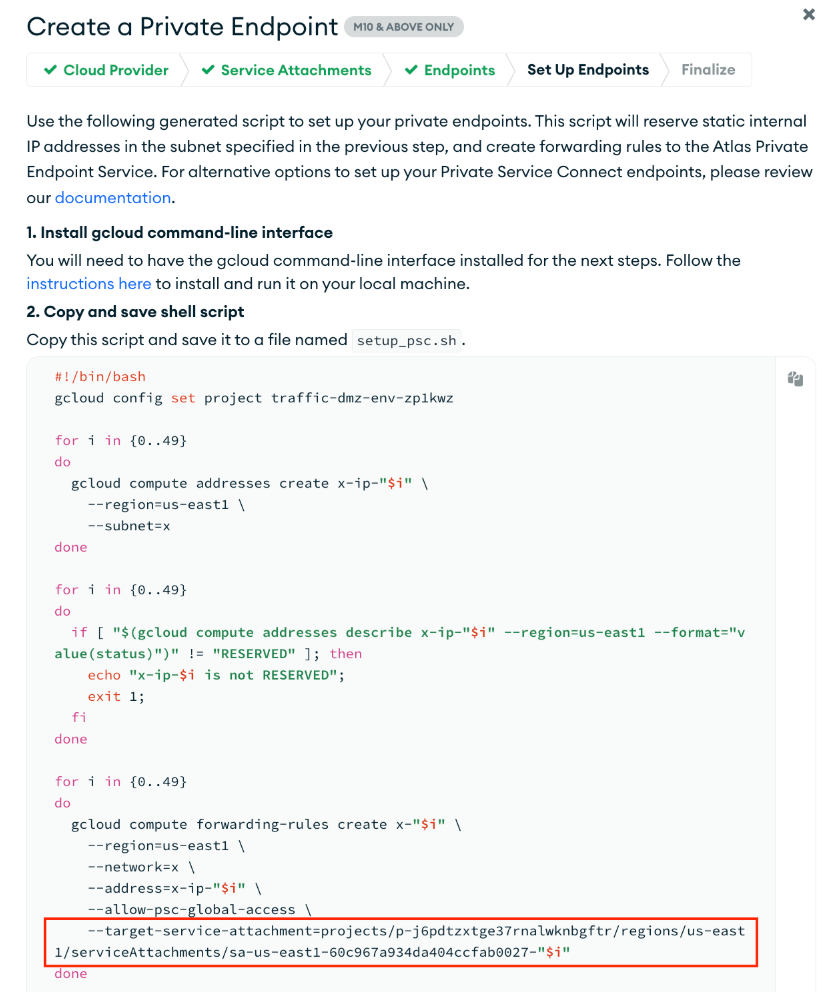
Click Next, and retrieve the Target Service Attachment URI.
Step 2. Create an Egress Private Service Connect Endpoint
MongoDB requires the creation of 50 endpoints. Due to this high amount, the CLI will be used to automate the creation of these endpoints instead of manually creating each one through the console.
Retrieve the gateway ID associated with the Confluent Cloud network
Login to Confluent Cloud using Confluent CLI:
confluent loginGet the network ID of associated the Confluent Cloud network you are using:
confluent network list
Describe the Confluent Cloud network to get the gateway ID of the network ID you retrieved in the previous step:
confluent network describe <confluent-cloud-network-ID>
Create the endpoints with the following command. Use the Confluent Cloud gateway ID you retrieved in the previous step and the MongoDB target service attachment URI you retrieved in the last step in Step 1. Create a MongoDB private endpoint. The URI is in the
projects<...>-"$i"pattern.for i in {0..49} do confluent network access-point private-link egress-endpoint \ create mongo-"$i" --cloud gcp \ --gateway <confluent-cloud-gateway-ID> \ --service <MongoDB-target-service-attachment-URI> sleep 1 done
Generate a JSON file containing a list of the IP addresses and Private Service Connect endpoint names to be uploaded to MongoDB Atlas. Make sure to update the gateway ID.
Note that the filtering is done with jq because the CLI does not support filtering by gateway.
confluent network access-point private-link egress-endpoint list --output json \
  | jq '.[] | \
  select((.name | contains("mongo")) and (.gateway | contains("<Confluent_Cloud_gateway_ID>"))) | \
  {IPAddress: .gcp_private_service_connect_endpoint_ip_address, name: .gcp_private_service_connect_endpoint_name}' | \
  jq -s > atlas.json
Step 3. Configure the MongoDB private endpoint
Finish creating the private endpoint for your Dedicated MongoDB Atlas database.
Go back to the MongoDB console and click on Next to move to the Finalize step of the private endpoint creation workflow.
In the Finalize step, upload the JSON file containing a list of IP addresses and Private Service Connect endpoint names. You created this file in the last step of Step 2. Create an Egress Private Service Connect Endpoint section.
When the Endpoint Status changes to “Available”, you are ready to create the Confluent Cloud MongoDB Sink Connector.
This can take several minutes as endpoint creation must be completed on the Confluent Cloud side and then get accepted on the MongoDB Atlas side.
Step 4. Create the MongoDB Atlas Sink connector
Specify the authentication details for MongoDB.
In the MongoDB Atlas console, click Database under Deployment.
Click Connect for the associated database.
Select the Private Endpoint connection type, and select the endpoint you created in Step 3.
Click Choose a connection method.
Select Shell in the Access your data through tools section.
Get the endpoint.
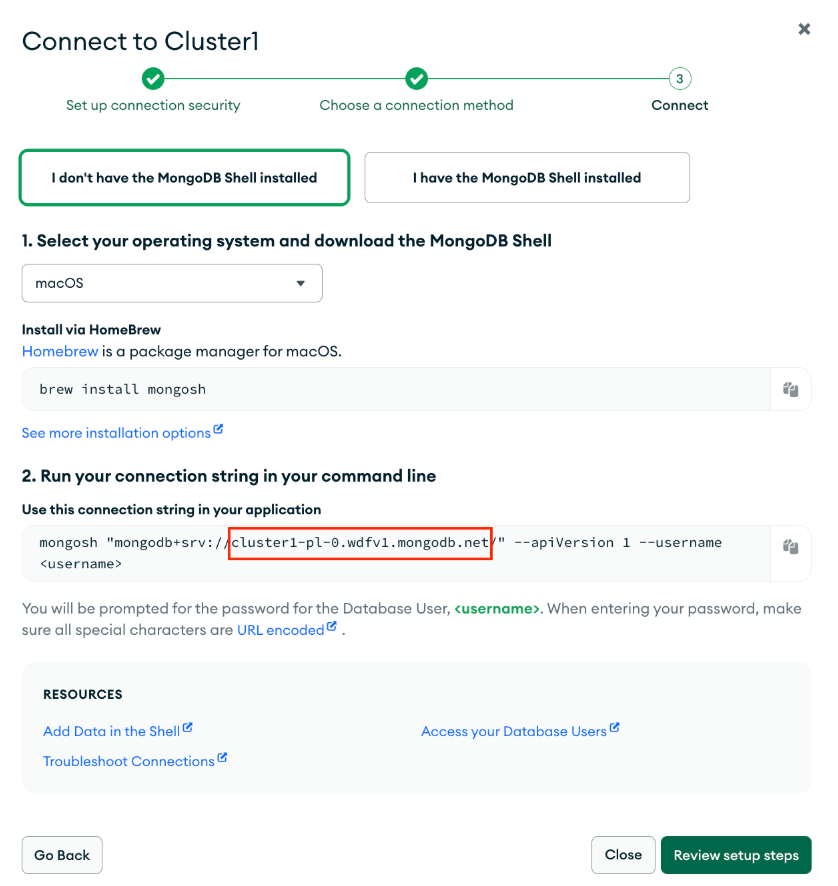
In Confluent Cloud, specify the MongoDB credentials during the connector creation steps.
In the Connection host field, specify the endpoint you retrieved in the previous step.
Follow the steps to create the source connector or the sink connector in Confluent Cloud.