
Custom Connector for Confluent Cloud Quick Start
Before proceeding with this quick start, ensure you review limitations and support for custom connectors.
Getting a connector
After you have identified a data system you want to source data from or sink data to, you need to get a connector. The following options are available for getting a custom connector to use in Confluent Cloud:
Download a connector from Confluent Marketplace
Search in Confluent Marketplace for the data system and see if there is a self-managed connector available.
Go to Confluent Marketplace.
Search for the data system. Confluent Marketplace displays all associated connectors.
Under Filters, select the data source type Sink or Source.
Click on a listed connector name to open the details page.
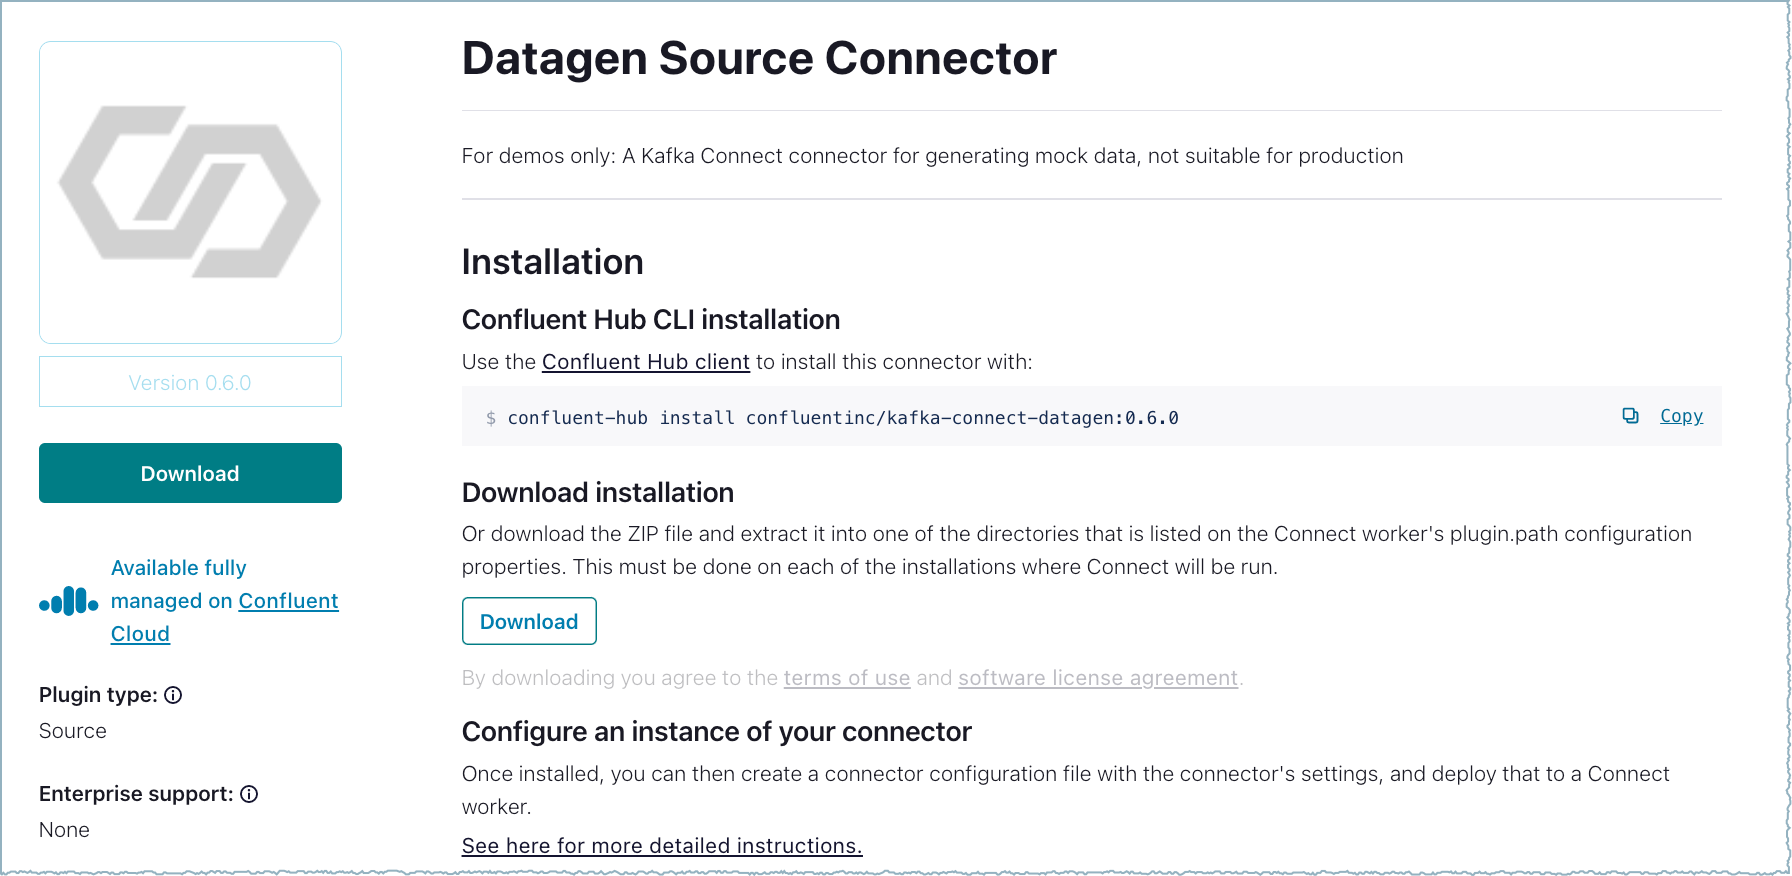
Connector details
Click Download to download the installation file.
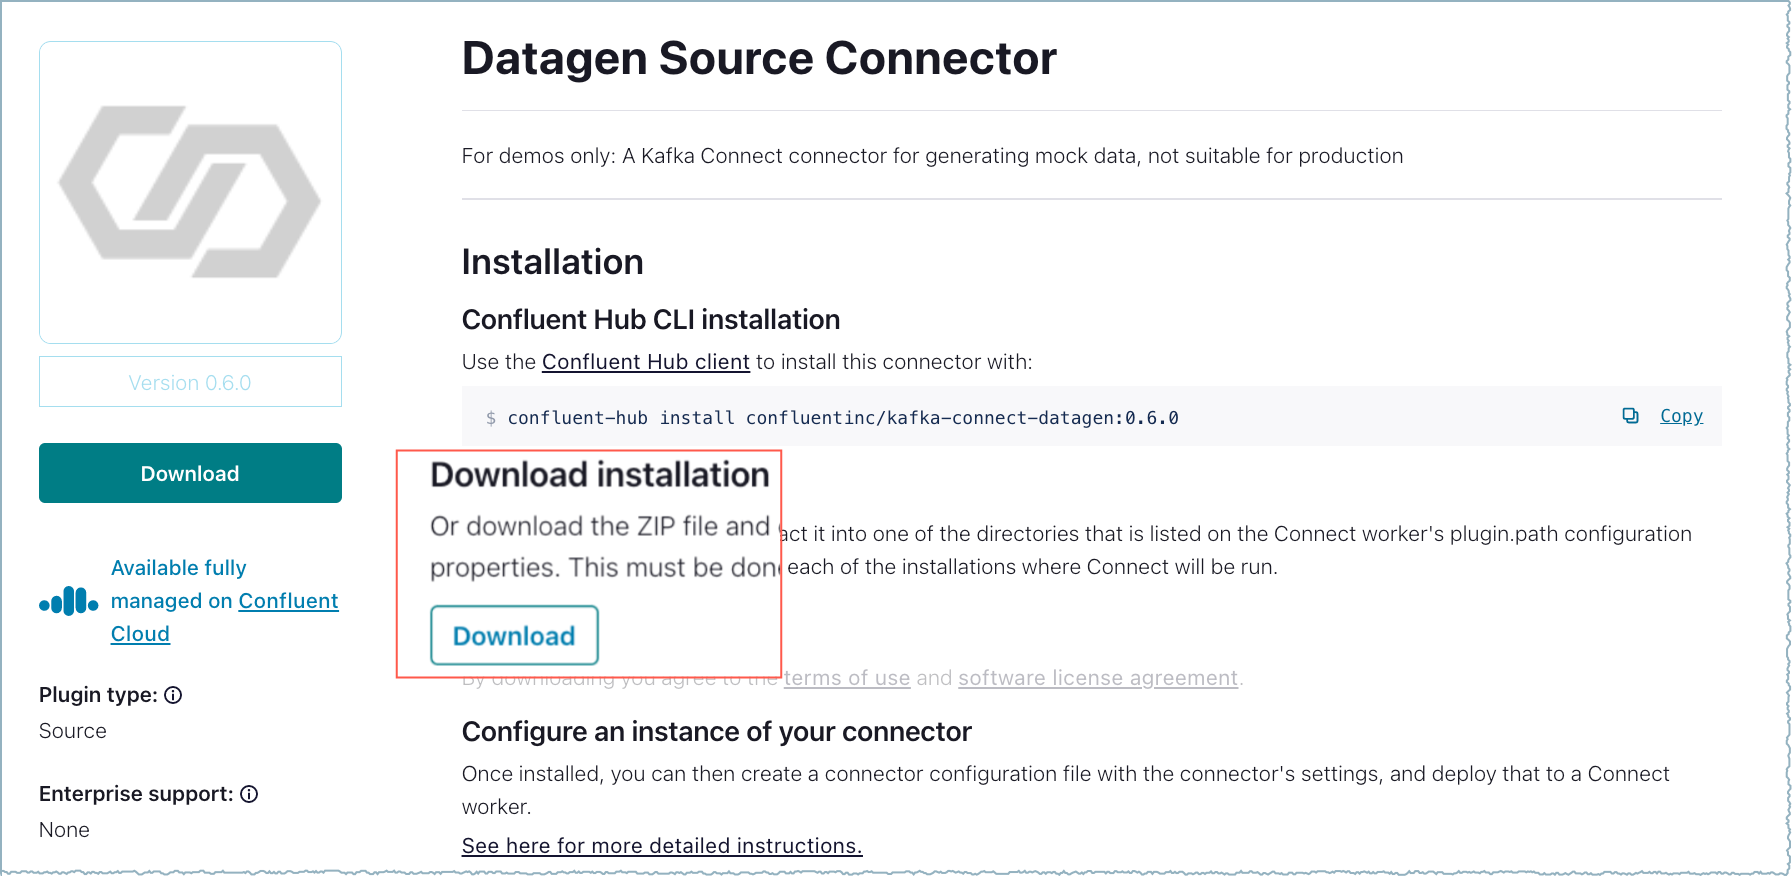
Connector ZIP file download
Any connector ZIP file downloaded from Confluent Marketplace contains the expected file structure and can be uploaded to Confluent Cloud.
If the connector is open source and you want to modify the source code, see Modify an open-source connector.
Upload the connector to Confluent Cloud.
Download a connector from GitHub
Kafka connectors are available on GitHub.
Search in GitHub to find the connector project you want.
Download the project ZIP file.
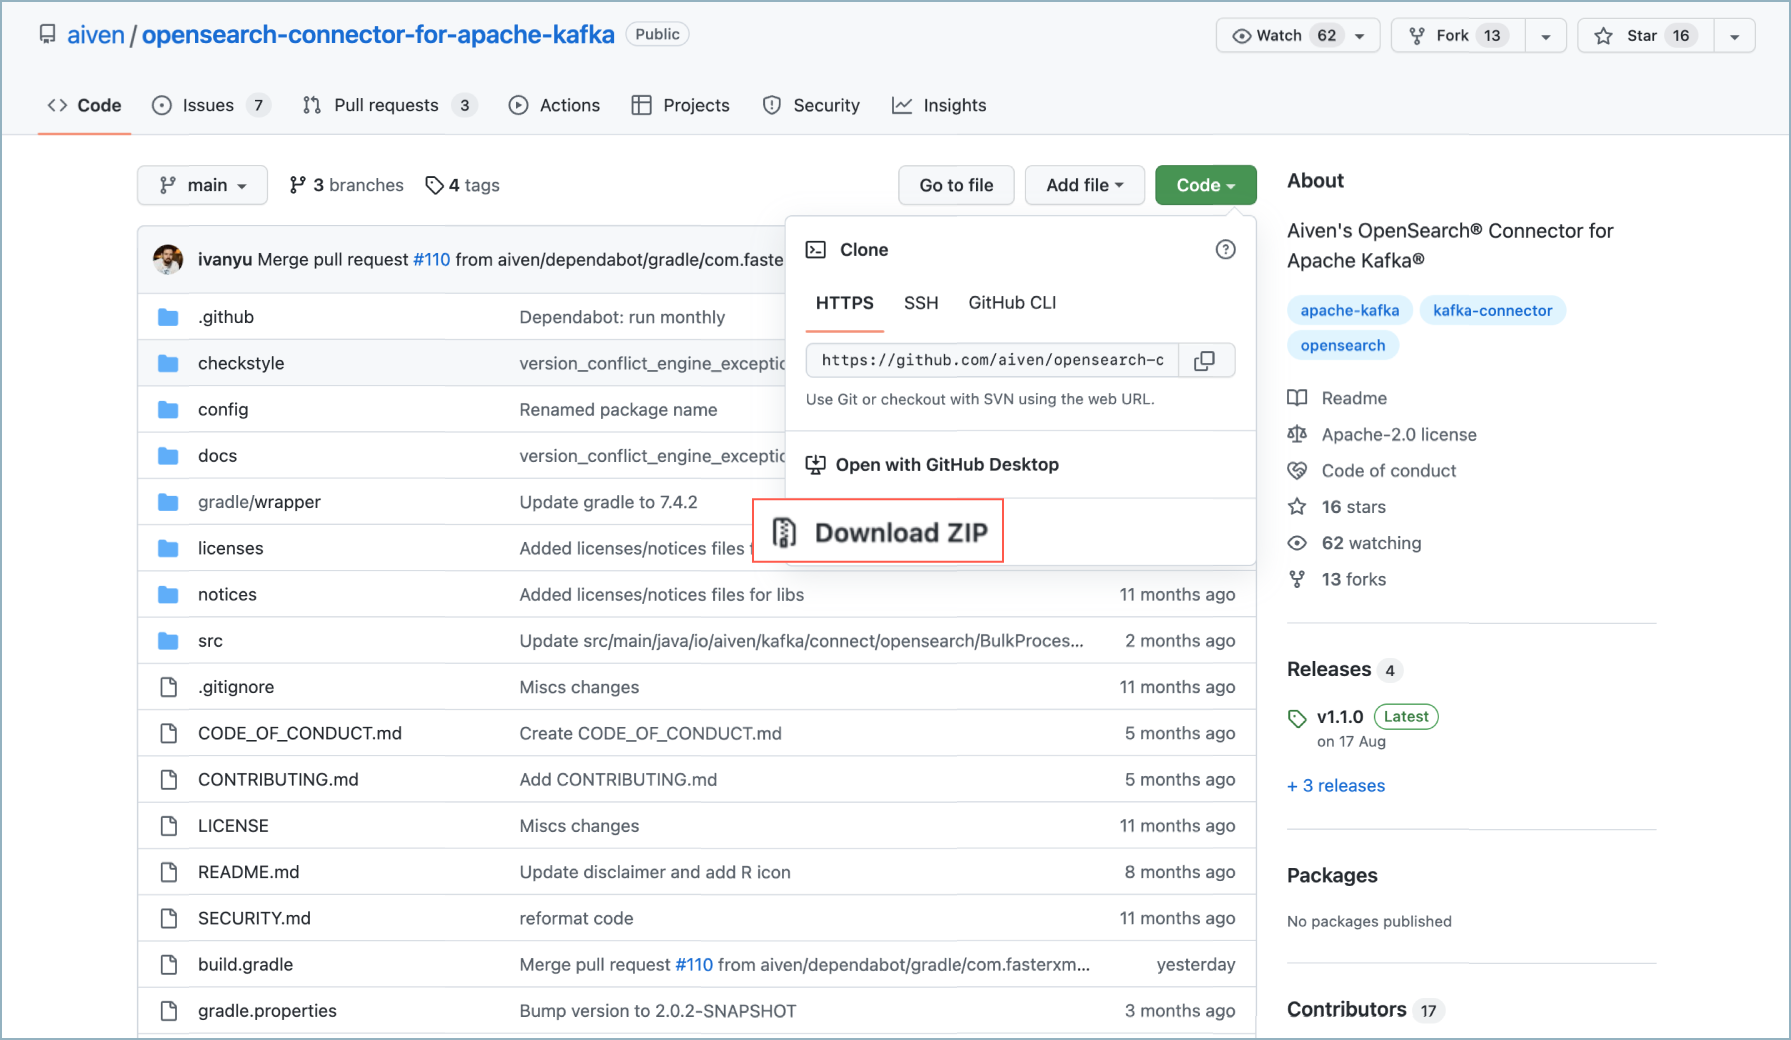
GitHub download
Extract the source files from the ZIP file.
Create the connector archive. A Maven packaging plugin is available that automatically packages your connector files in the required archive format. For more information, see Maven Packaging Plugin.
Upload the connector to Confluent Cloud.
Note
Many public GitHub projects are open source. After you’ve found the GitHub project you want to use, make sure the project owner has licensed the code using an open source license.
Modify an open-source connector
You may want to modify an existing connector for a data system use case that is not supported by an available connector. The source code for many open-source connectors can be found on Confluent Marketplace and GitHub. You can copy one of these projects, make modifications, and create the ZIP (or JAR) file to upload.
Search in Confluent Marketplace to find the connector you want.
Verify that it is an open-source connector. You can list all open- source connectors by selecting Free under License.
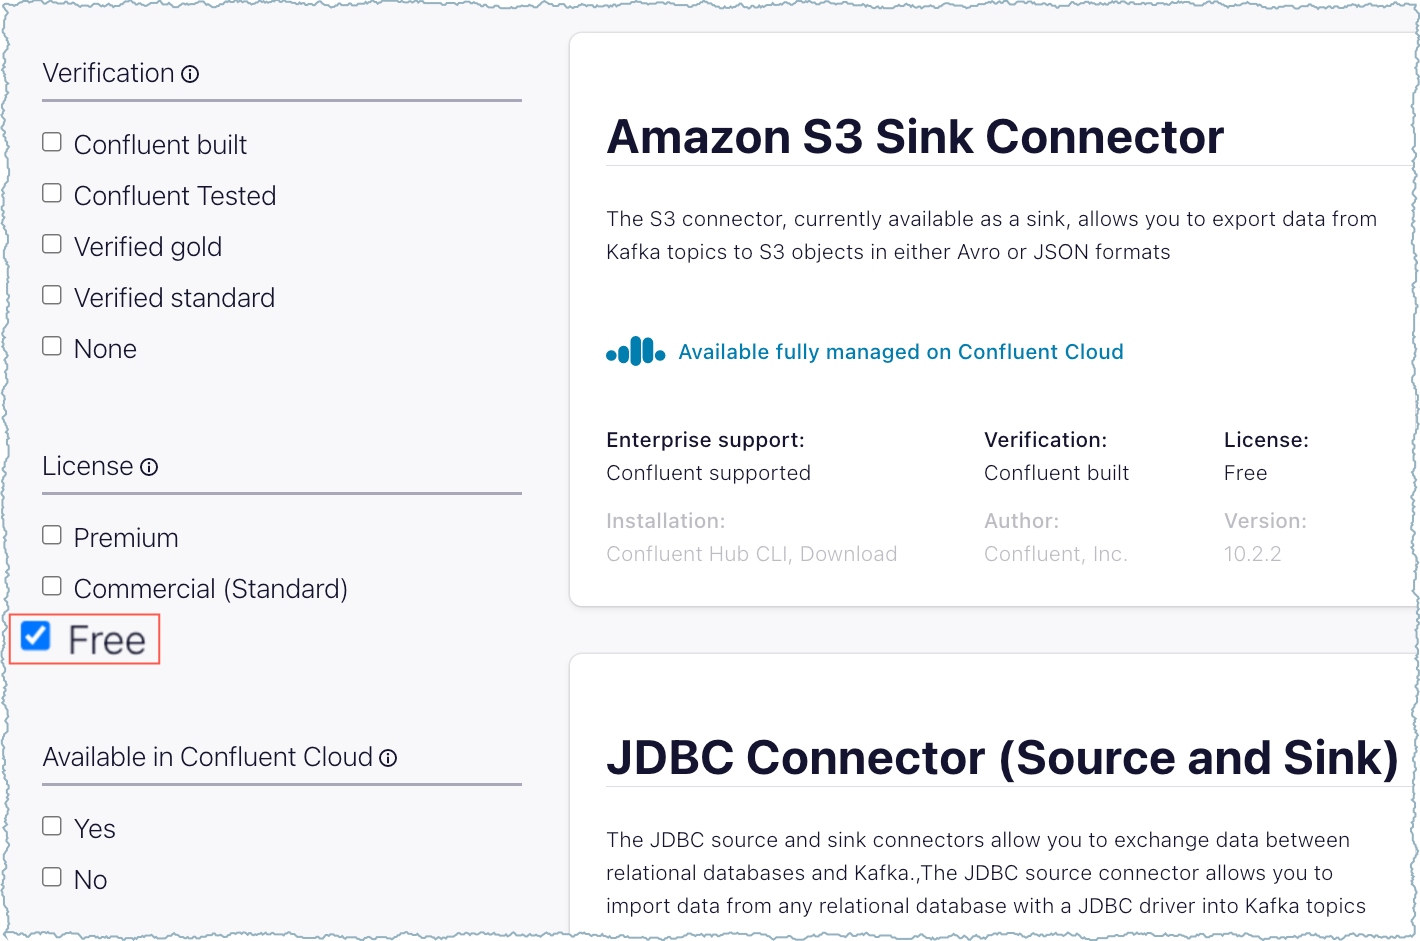
Open-source connectors on Confluent Marketplace
Click on the connector name that you want to use.
In the connector details, click on Source code to go to the GitHub project.
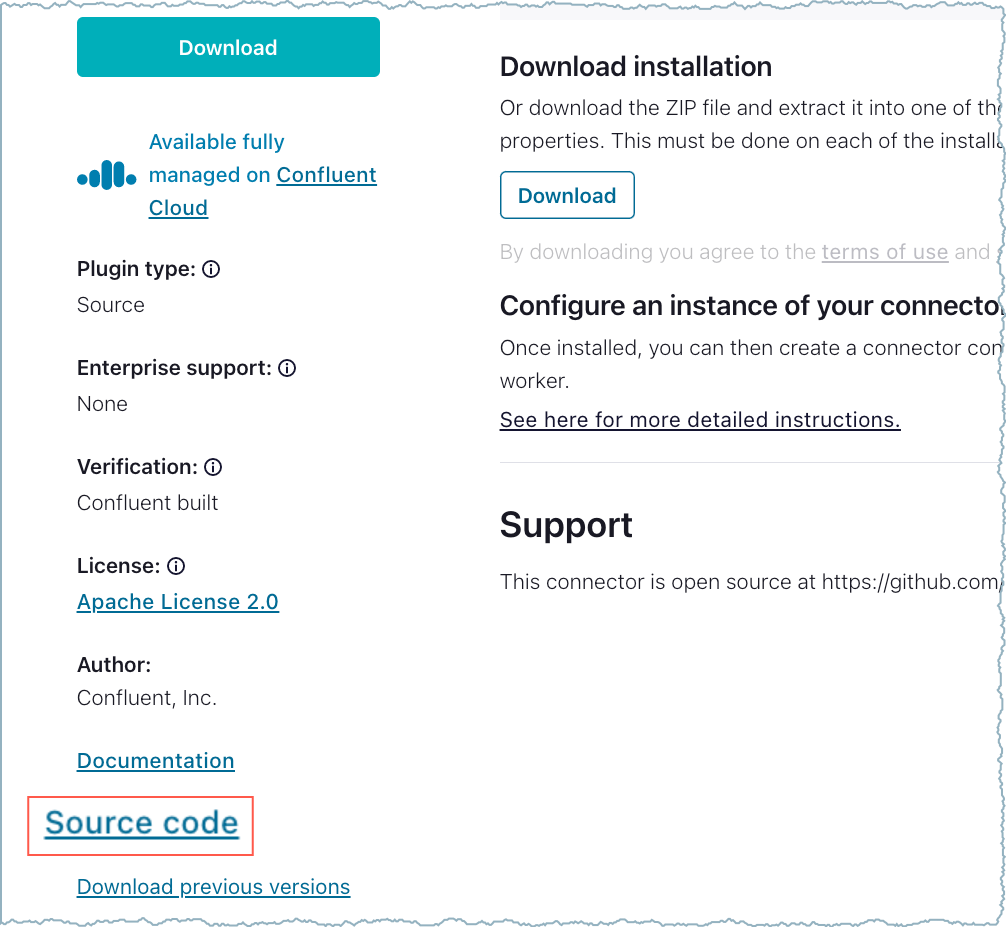
GitHub source code link
Download the project ZIP file.
GitHub download
Modify the source code to meet your requirements. For additional information, see Create an original connector.
Create the connector archive. A Maven packaging plugin is available that automatically packages your connector files in the required archive format. For more information, see Maven Packaging Plugin.
Upload the connector to Confluent Cloud.
Note
Many public GitHub projects are open source. After you’ve found the GitHub project you want to use, make sure the project owner has licensed the code using an open source license.
Search in GitHub to find the connector project you want.
Download the project ZIP file.
GitHub download
Extract the source files from the ZIP file.
Modify the source code to meet your requirements. For additional information, see Create an original connector.
Create the connector archive. A Maven packaging plugin is available that automatically packages your connector files in the required archive format. For more information, see Maven Packaging Plugin.
Upload the connector to Confluent Cloud.
Note
Many public GitHub projects are open source. Once you’ve found the GitHub project you want to use, make sure the project owner has licensed the code using an open source license.
Create an original connector
You build connectors using Maven. A maven quickstart is available that you can use to generate a skeleton Connect plugin. For concepts and other details you need to know when building a new connector, see the Connector Developer Guide.
The following additional resources will be helpful:
How to Write a Connector for Kafka Connect – Deep Dive into Configuration Handling
4 Steps to Creating Apache Kafka Connectors with the Kafka Connect API
Kafka Connect – Source Connectors: A detailed guide to connecting to what you love
Once you have all your connector component files ready to go, you will need to create the connector archive.
Contact Confluent Professional Services
Confluent Professional Services can work alongside your team to provide expert advice and hands-on guidance to build a custom connector. Contact your Confluent representative for more information.
Get a connector from a Confluent Partner
Check with your Confluent representative and find out if there is a partner-supplied connector already available that meets your needs.
Packaging a custom connector
Connector component files must be in a ZIP (.zip) or JAR (.jar) file for upload to Confluent Cloud. The preferred file structure for the archive is the same as the structure used for Confluent-supported connectors. However, this archive structure is only recommended for ZIP archive files.
Important
Only admin RBAC roles have permission to upload an archive file. For more information, see RBAC role mappings.
The archive file size cannot exceed 200 MB.
The archive file must be a .zip or .jar file.
If uploading a .zip file, the archive should be in the Confluent-supported file structure.
The custom connector plugin will be available at the organization level, not just the cluster level.
A Maven packaging plugin is available that automatically packages your connector files in the preferred archive format. For more information, see Maven Packaging Plugin. For component archive format details, including a sample manifest file, see the Confluent Marketplace Component Archive Specification.
The component .zip or .jar file must have the following naming convention:
${componentOwner}-${componentName}-${componentVersion}.<zip> or <jar>
For example:
confluentinc-kafka-connect-datagen-0.6.0.<zip> or <jar>
The component archive includes a manifest.json file, an assets/ folder, a doc/ folder, an etc/ folder that contains sample configurations, and a lib/ folder that contains all JAR files needed to run the connector.
Note
All external client JAR files required by the connector (to be installed on the Connect worker) must be included here.
All JAR files required by the connector must be packaged in the archive. This includes any custom Single Message Transformations (SMTs) and non-Kafka JAR files. The Standard SMT archive is already included for use.
The following examples show the archive structure and files.

confluentinc-kafka-connect-datagen-0.6.0/
assets/
     confluent.png
doc/
     LICENSE
     README.md
     licenses
     licenses.html
     ...
     notices
etc/
     connector_campaign_finance.config
     connector_credit_cards.config
     connector_custom.config
     connector_inventory.config
     ...
lib/
     automaton-1.11-8.jar
     avro-1.11.0.jar
     avro-random-generator-0.4.1.jar
     checker-qual-3.5.0.jar
     common-utils-7.2.0.jar
     commons-compress-1.21.jar
     error_prone_annotations-2.3.4.jar
     ...
     swagger-annotations-2.1.10.jar
manifest.json
Once you have the file, you can upload the connector to Confluent Cloud.
Uploading and launching the connector
Once you have your custom connector archive, you can upload the .zip or .jar file directly to Confluent Cloud. Once uploaded, Confluent Cloud cluster users can select this connector, add the configuration properties, and then launch it to stream events.
Important
Only admin RBAC roles have permission to upload an archive file. For more information, see RBAC role mappings.
The archive file size cannot exceed 200 MB.
The archive file must be a .zip or .jar file.
The archive must be in the Confluent-supported file structure.
The custom connector plugin will be available at the organization level, not just the cluster level.
Upload the connector archive
Complete the following steps to upload the connector archive to Confluent Cloud.
- Prerequisites
Authorized access to a Confluent Cloud cluster in a supported region.
Confluent Cloud RBAC authorization to upload a custom connector archive.
Access to the list of connector configuration properties to add sensitive properties prior to uploading the archive. These are typically supplied in the developer documentation.
Tip
Configuration properties are defined in the
ConfigDefsection of the connector source code. Required configuration properties are set withConfigDef.Importance.HIGH. For example, this is a ConfigDef entry forhostname:ConfigDef config = new ConfigDef(); config.define ( "hostname", ConfigDef.Type.STRING, "", ConfigDef.Importance.HIGH, "Hostname or IP where external system is located" );
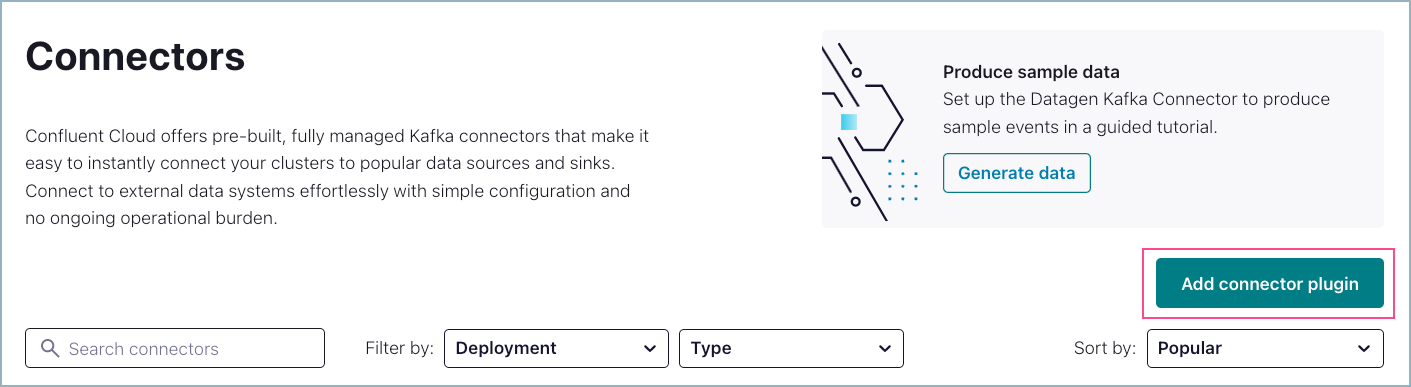
Go to Connectors in your Confluent Cloud cluster. If you have one or more existing connectors, click Add Connector.
Click Add connector plugin.
Add custom connector plugin
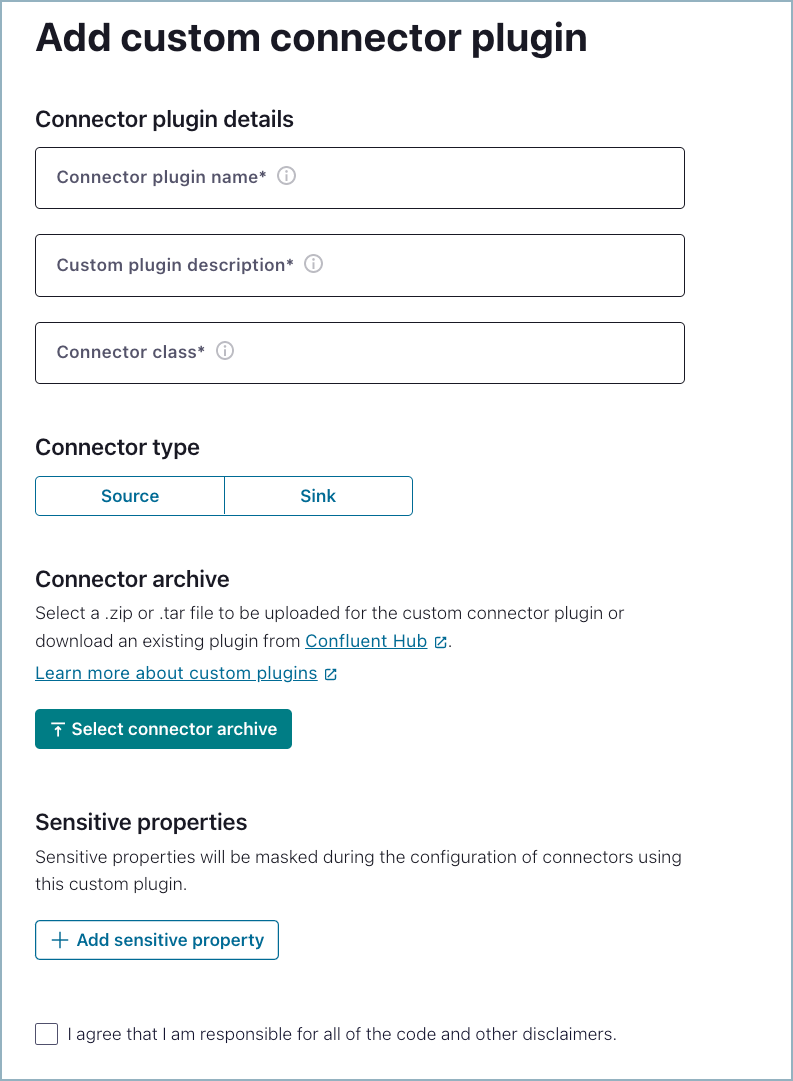
Add the custom connector plugin.
Add connector plugin
Enter the required Connector plugin details:
Connector plugin name: Enter a meaningful name for your custom connector.
Custom plugin description: Provide a description for your custom connector.
Connector class: Enter the Java class or alias for the connector. You can get the connector class from the connector documentation provided by the developer. The example in this procedure uses the Datagen Source connector. The class for this connector is shown in the developer documentation.
Connector type: Click the connector type.
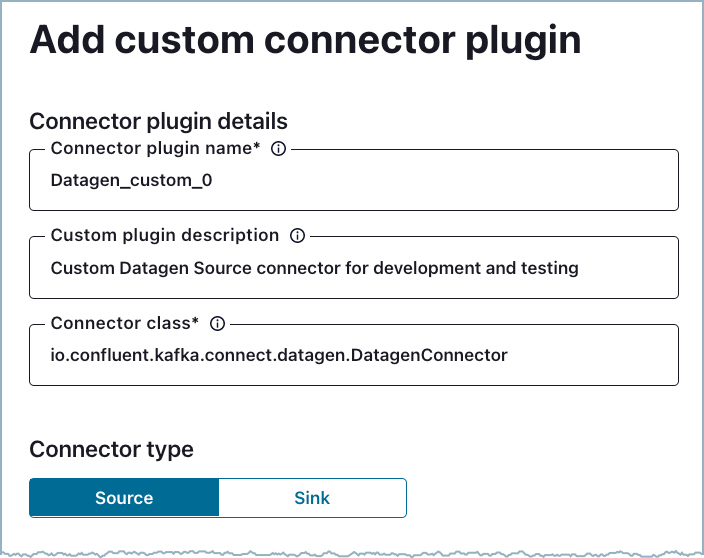
Add connector plugin details
Click Select connector archive and select the local file to upload.
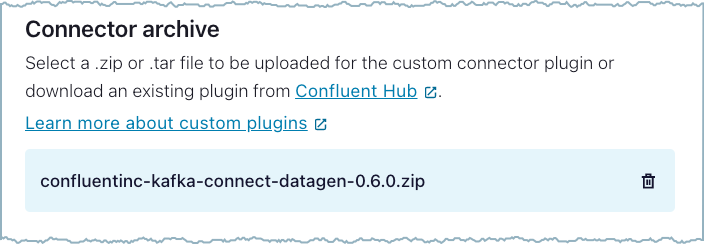
Upload archive file
Add all sensitive properties.
A sensitive property is a connector configuration property that must be hidden after a user enters the property value when setting up the connector (for example: passwords, keys, and tokens). Refer to the developer documentation and add all required and optional sensitive properties that a user could potentially configure for the connector. Marking a property as sensitive ensures that these fields are handled appropriately within the Confluent infrastructure. This includes masking fields, for example exception logging, and encrypting field values in the underlying data store.

Example sensitive properties
You must identify all sensitive properties. Failure to identify sensitive properties can result in the sensitive property value being stored in plain text rather than in encrypted format. Only add connector-specific sensitive properties. Kafka keys, passwords, and service account information should not be entered here.
Check the box that indicates that you are responsible for the connector and then click Submit.
Once you submit the archive, the archive is uploaded and Confluent Cloud makes the connector available to users. The connector selection screen is displayed once the upload is complete.
When the main Connectors screen is displayed, click Filter by: Deployment and select Custom. The uploaded custom connector is displayed. A user can now configure and launch the custom connector.
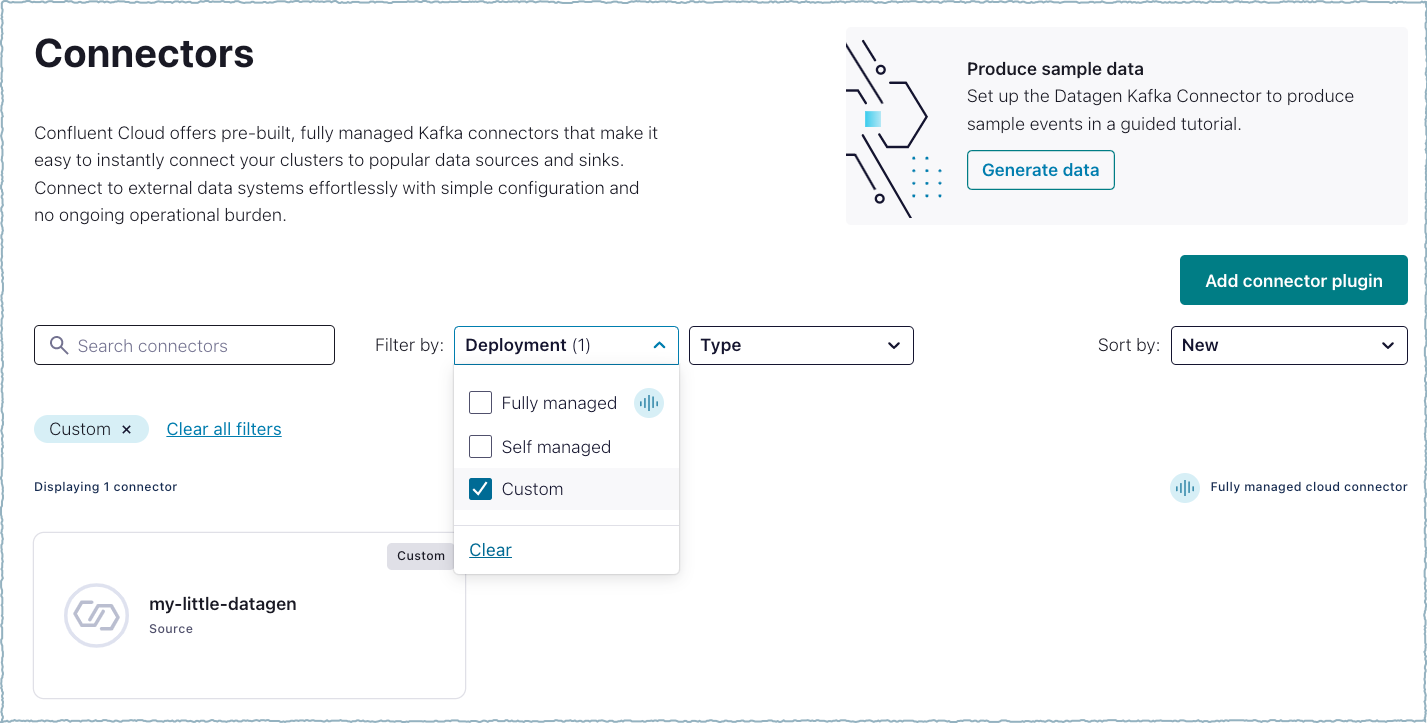
Filter by deployment
Configure and launch the connector
When the custom connector is available in Confluent Cloud, a user can select, configure, and launch the connector.
- Prerequisites
Authorized access to a Confluent Cloud cluster in a supported region.
Credentials for the connector to access the data system.
The egress endpoints required for the connector to access the data system.
Schema Registry must be enabled for the cluster, for the custom connector to use a Schema Registry-based format (for example, Avro, JSON_SR (JSON Schema), or Protobuf). For additional information about using Schema Registry with custom connectors, see Schema Registry integration.
Access to the list of connector configuration properties. These are typically supplied in the developer documentation.
The Confluent CLI installed and configured for the cluster. See Install the Confluent CLI.
Note
For many connectors, a topic must exist before launching the connector. Refer to the connector documentation for details.
Step 1: Add credentials
Select the connector and Get started. If available, click Documentation to get the configuration properties and other connector details. Edit plugin is used for managing the connector.
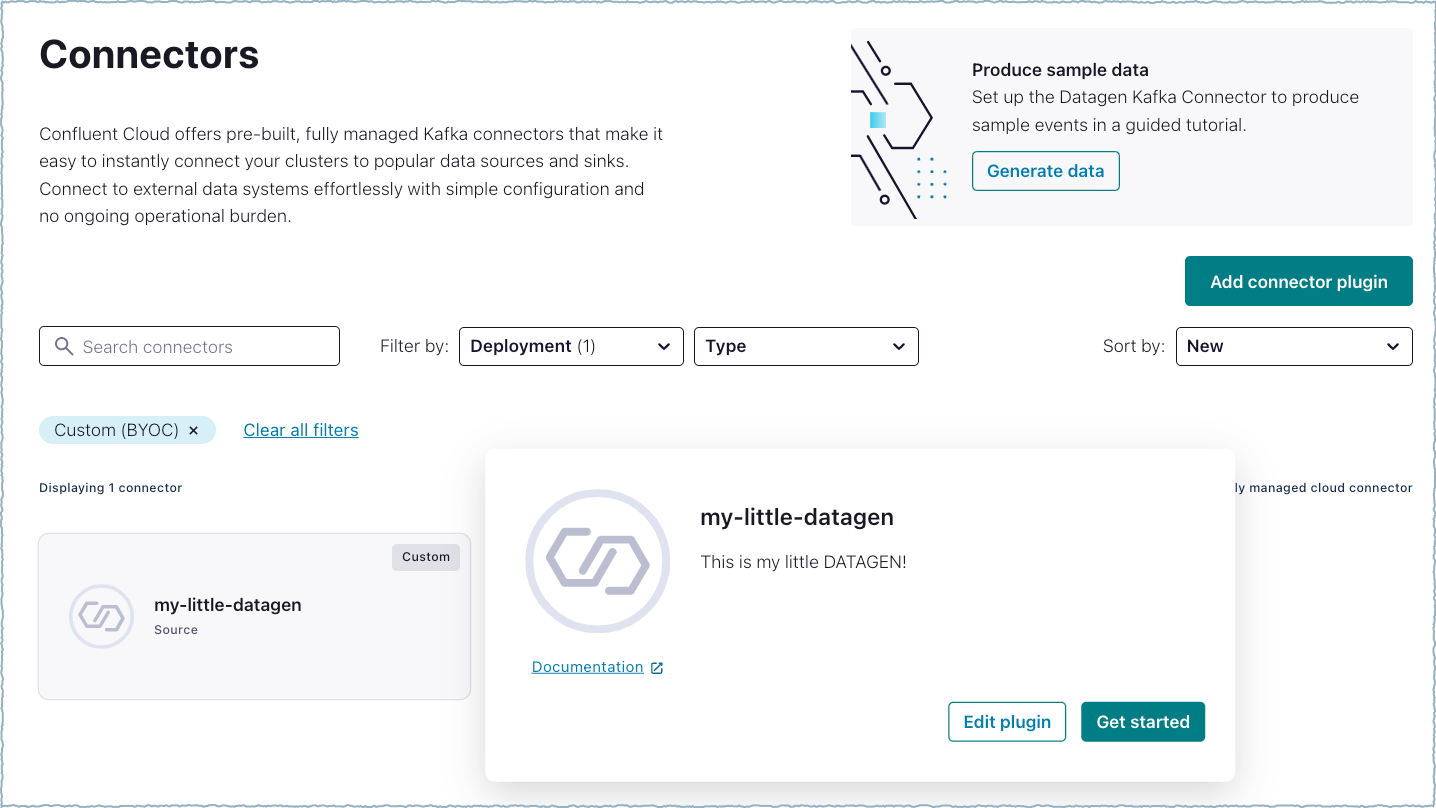
Select the connector
Select the way you want to provide Kafka Cluster credentials. You can choose one of the following options:
Global Access: Allows your connector to access everything you have access to. With global access, connector access will be linked to your account. This option is not recommended for production.
Granular access: Limits the access for your connector. You will be able to manage connector access through a service account. This option is recommended for production.
Use an existing API key: Allows you to enter an API key and secret part you have stored. You can enter an API key and secret (or generate these in the Cloud Console).
Click Continue.
Step 2: Add configuration properties
There are two options for entering configuration properties. You can enter each configuration key and value pair or you can add the JSON configuration.
You can enter configuration properties as key and value pairs. For example:
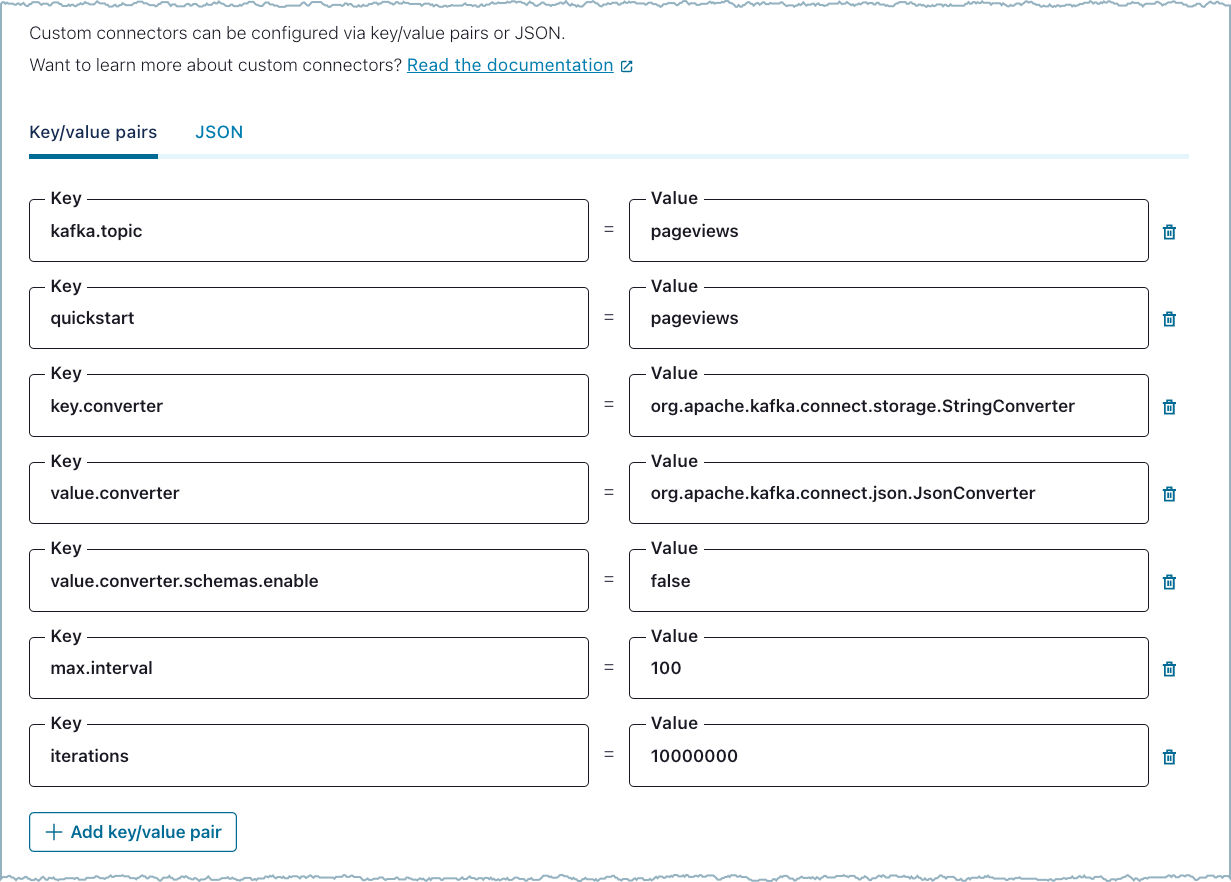
Add Key and Value Pairs
You can enter configuration properties in JSON format. For example:
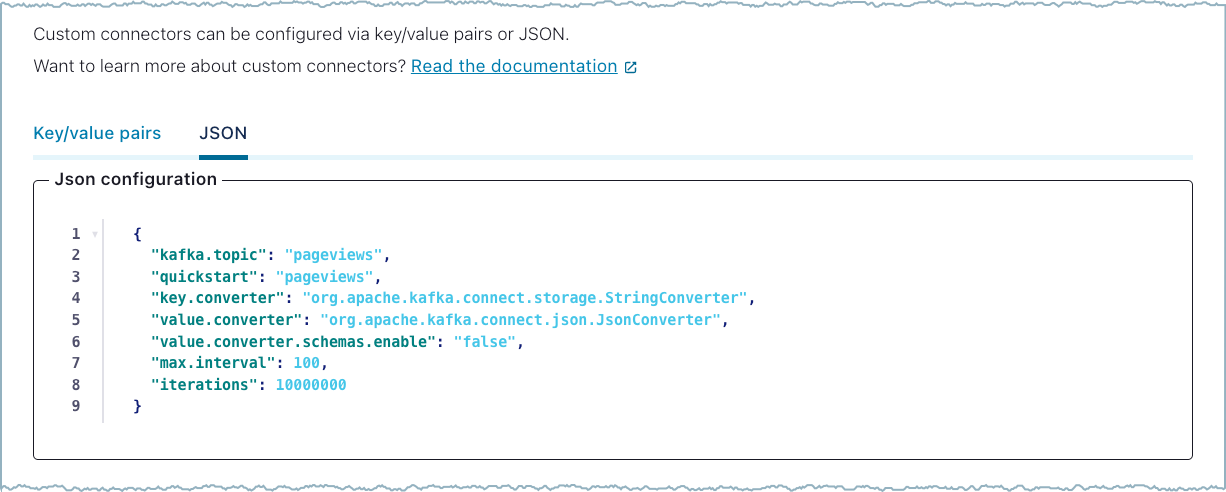
Add JSON
Note
In addition to the connector configuration properties, you also add the key and value pairs for any Single Message Transformations you want to use.
For information about adding Schema Registry properties, see Schema Registry integration.
For information about overriding configuration properties, see Override configuration properties.
Step 3: Configure Schema Registry
If you are using a schema-based data format, you can automatically add the required Schema Registry properties using Auto Configure Schema Registry. Note that you must enable Schema Registry for the Confluent Cloud environment to use a Schema Registry-based format and to have a pre-populated Schema Registry endpoint.

Auto configure Schema Registry
Click Auto Configure Schema Registry.
Select the Key converter type, if the key is using a schema-based format. If you specify None, the
key.converterdefaults toJsonConverter.Select the Value converter type. If you specify None, the
value.converterdefaults toJsonConverter.Click Apply changes.
After you apply the changes, all Schema Registry-related configuration properties are added to the connector configuration. For additional information about using Schema Registry with custom connectors, see Schema Registry integration.
Step 4: Add networking endpoints
Add the Networking egress endpoints for the connector to use when attaching to the sink or source data system. You must use a fully-qualified domain name (FQDN) when adding the networking egress endpoints. The protocol is optional and defaults to TCP. See Endpoint requirements below for additional details.
Use the following pattern when adding endpoints:
<HOSTNAME_PATTERN>:<PORTS_LIST>[:<PROTOCOL>]
For example, to connect to an Amazon S3 bucket in us-west-2 you would use the following endpoint:
s3.us-west-2.amazonaws.com:443
Note
When a domain is provided, Confluent automatically applies a single-level wildcard to the leftmost label of the domain. For example, specifying s3.us-west-2.amazonaws.com:443 will implicitly allow *.s3.us-west-2.amazonaws.com:443.
Direct entry of subdomains or use of multi-level wildcards as input (for example, *.s3.us-west-2.amazonaws.com:443) is not supported.
The following is another example showing an egress endpoint for connecting to Amazon RDS.
mydatabase.abc123ecs2.us-west-2.rds.amazonaws.com:1433:TCP
You can use the wildcard character * in the endpoint. For example:
*database.abc123ecs2.us-west-2.rds.amazonaws.com:1433:TCP
For additional information about using wildcards, see Endpoint requirements.
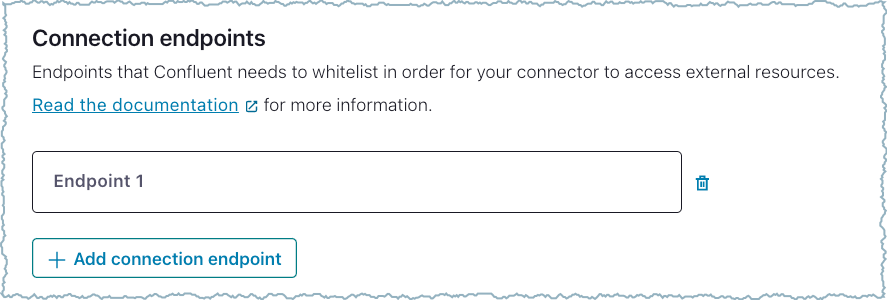
Add endpoints
Endpoint requirements
Separate multiple endpoints using a semicolon.
Separate the hostname, ports, and protocols with colons.
Separate multiple ports using a comma.
Do not include
HTTPorHTTPSwith the endpoint.The protocol is optional and defaults to
TCP. Note that usingANYis not allowed.
Note the following wildcard requirements:
Only one wildcard is allowed per endpoint.
The wildcard is only allowed in the leftmost element of the endpoint entry (as is shown in the previous example).
Using a wildcard for a subdomain is not allowed.
The endpoint is checked for valid characters. Hostnames are checked for valid patterns (excluding a wildcard) and against the Web Risk API. For more information, see Web Risk.
Important
Confluent regularly scans connectors uploaded through the Custom Connector product to detect if uploaded connectors are interacting with malicious endpoints or otherwise present a security risk to Confluent. If malicious activity is detected, Confluent may immediately delete the connector.
Step 5: Set task number
Select the number of Tasks and click Continue.
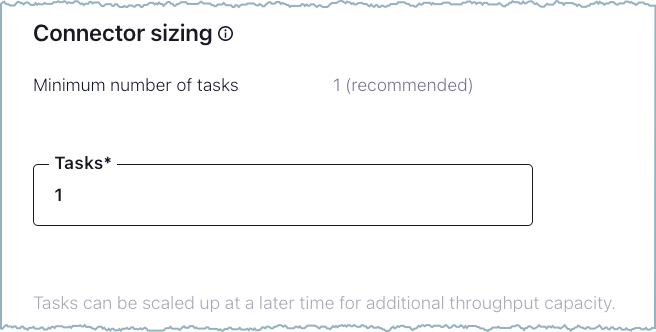
Set Tasks
Step 6: Get provisioning details
Confluent Cloud shows that the connector is provisioning. Click on the card to get the provisioning details.
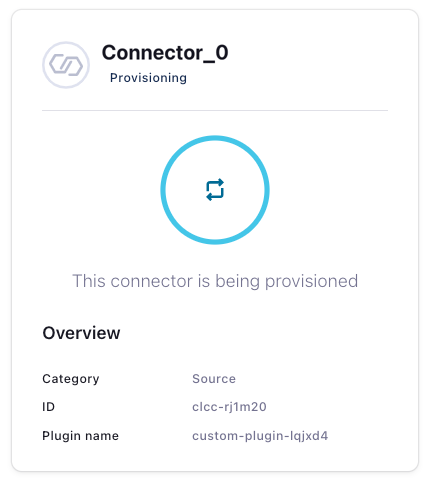
Connector Provisioning
Once the connector completes provisioning, the status changes to running.
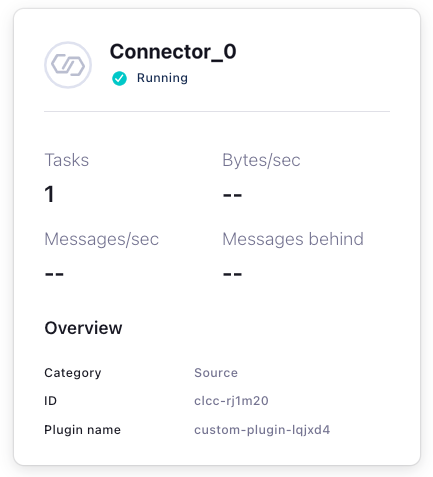
Connector Running
Note
If the connector remains in a provisioning state for a long time, check the connector configuration and make sure all required properties are included and that there are no typos or other mistakes in how the properties were originally set up. For more information, see Modify a custom connector configuration.
Next steps
For custom connector and custom connector plugin API information and examples, see the Confluent Cloud API for Connect Usage Examples.