
Provide Stream Shares from Confluent Cloud
As a data provider, you can send invites and revoke access to shared data using the Confluent Cloud Console, the Confluent CLI, or REST APIs.
Additionally, you can describe the data you share with format and organization information, so that its origin is clear to consumers.
To share data, you must be an administrator in your Confluent Cloud organization or environment.
If you are using role-based access control (RBAC), you must have one of the following roles to start data sharing:
Enable Stream Sharing
There are some prerequisites before an organization can share data.
If they haven’t already, an administrator must select a Stream Governance package for the Confluent Cloud account. For more about Stream Governance, see Manage Stream Governance Packages in Confluent Cloud.
An administrator must enable the Stream Sharing feature.
To share schema-enabled topics, your organization must use Confluent Cloud Schema Registry. If you are using the self-managed Schema Registry, you cannot share schema-enabled topics with Stream Sharing.
To share data without a schema, you do not need Confluent Cloud Schema Registry.
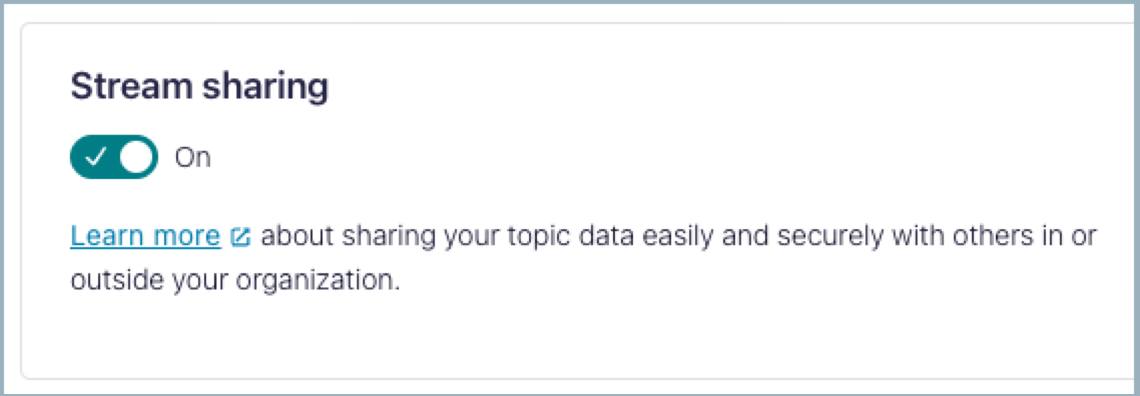
To enable Stream Sharing:
Sign in to the Confluent Cloud Console.
From the Administration menu in the upper-right corner, select an organization to display the Organizations page.
On the Organizations page, choose the organization you want to enable. On the organization page, toggle Stream Sharing on.
Stream shares
After Stream Sharing is enabled for your Confluent Cloud organization, you can share data by inviting users through email. To share data, you must be an administrator for the organization, environment, or cluster. You can send one invitation to an email address. If a consumer cannot access their email invitation, resend the invitation. You can send invitations as often as you like until the invitation is accepted. After an invitation is accepted, generating more invitations results in an error.
Invitations contain a token for authentication. The token is automatically generated and added to the invitation. A token is redeemable only once.
The consumer uses the token to get an API key and secret. The API key and secret give the consumer read-only access to your shared topics and schemas. Confluent restricts access to your resources with an internal service account and RBAC. To restrict access to your data, Confluent binds the internal service account to these internal RBAC roles:
StreamShareRead: Provides read access to shared topics.
Allows consumers to read topics and groups.
StreamShareSchemaRegistryRead: Provides read access to the Schema Registry subject.
Allows consumers to read Schema Registry subjects.
Note
You can’t directly use the internal Stream Sharing RBAC service account or the associated RBAC roles.
The following examples show you how to share a stream with an email invitation.
To share data in Cloud Console:
Sign in to Confluent Cloud with an administrator account.
Select the environment and cluster that contains the topic you want to share.
Click Topics in the navigation menu.
On the Topics page, take one of the following actions:
Hover over the topic you want to share and select
 .
.Select a topic and then select Actions and point to Share this topic.
The Share option is only available to the administrator of a particular cluster, environment, or organization. You cannot share topics in a resource that you don’t administer.
Enter the email of the person to whom you want to give read access to the topic. Optionally, you can also specify one or more Schema subjects to share with this account. Enter one email address at a time. If the email address is incorrectly formatted, you get an error.
Note
To view the status of all invitations to this topic, click Shared with. To resend or revoke invitations, click Manage invites.
Click Invite to send the invitation. A consumer has seven days to access the data through the link provided, before the link expires. After redemption, the data share becomes active and remains so indefinitely until you revoke access or the consumer deletes (deactivates) it.
To share topics with the Confluent CLI.
Sign in to Confluent Cloud with an administrator account.
confluent login
Use the
invitecommand to create an invite, specifying the environment and cluster that contains the topic to share, and the topic name. Specify the email address for the user you want to share the data with.confluent stream-share provider invite create --email some-person@confluent.io --environment env-xyz123 --cluster lkc-10000 --topic users --schema-registry-subjects strings
Your response should resemble:
+----------------------------+----------------------------+
| ID                         | ss-3vpvd                   |
| Consumer Name              | some-person@confluent.io   |
| Consumer Organization Name |                            |
| Cloud                      | Another Person             |
| Status                     | INVITED                    |
| Delivery method            | Email                      |
| ServiceAccountId           |                            |
| SharedResourceId           |                            |
| Invited At                 | 2022-09-01 15:35:17.508228 |
|                            |                            |
| Redeemed At                |                            |
| Invite Expiration          | 2022-09-08 15:35:17.508228 |
+----------------------------+----------------------------+
To share data with the REST API for a schema-enabled cluster that includes a schema subject, send an HTTP POST call to the https://api.confluent.cloud/cdx/v1/provider-shares endpoint, specifying the environment, cluster, any schema subjects, and delivery method in a JSON payload.
POST /cdx/v1/provider-shares

{
   "delivery_method": "Email",
   "consumer_restriction": {
      "kind": "Email",
      "email": "user@example.com"
   },
   "resources": [
      "crn://confluent.cloud/environment=env-abc123/cloud-cluster=lkc-q55555/kafka=lkc-q55555/topic=users"
      "crn://confluent.cloud/environment=env-abc123/schema-registry=lsrc-12345/subject=users-value"
   ]
}
Schema subjects are optional but require a schema-enabled cluster.
Your response should resemble:
{
   "api_version": "v1",
   "cloud_cluster": {
      "environment": "env-abc123",
      "id": "lkc-q55555",
      "related": "",
      "resource_name": ""
   },
   "consumer_restriction": {
      "email": "user@example.com",
      "kind": "Email"
   },
   "consumer_user_name": "user@example.com",
   "delivery_method": "Email",
   "id": "ss-ex123",
   "invite_expires_at": "2023-01-31T00:39:07.626255Z",
   "invited_at": "2023-01-24T00:39:07.624591Z",
   "kind": "ProviderShare",
   "metadata": {
      "created_at": "2023-01-24T00:39:07.624591Z",
      "resource_name": "crn://confluent.cloud/organization=example-7abc-4abc-a123-123456789b19/environment=env-abc123/cloud-cluster=lkc-q55555/provider-share=ss-ex123",
      "self": "https://api.confluent.cloud/cdx/v1/provider-shares/ss-ex123",
      "updated_at": "2023-01-24T00:39:07.624591Z"
   },
   "provider_user": {
      "id": "u-q50gkd",
      "related": "",
      "resource_name": ""
   },
   "provider_user_name": "rogert",
   "service_account": {
      "id": "",
      "related": "",
      "resource_name": ""
   },
   "status": {
      "phase": "INVITED"
   }
}
Note
If you share a topic from a cluster on a Confluent Cloud network, you provide the email recipient with details on how to connect to your private Confluent Cloud network.
List stream shares
List the streams you have shared with other users.
Sign in to Confluent Cloud with an administrator account.
From the navigation menu, select Data portal.
View the list of shared streams in Data shared by me.
To view a list of data streams you have shared:
Sign in to Confluent Cloud with an administrator account.
confluent loginList the shares with the
listcommand.confluent stream-share provider share list
Your response should resemble:

To list shared data with an API, perform an HTTP GET against the https://api.confluent.cloud/cdx/v1/provider-shares URI.
The request must also include an authorization header that contains the API key and secret, base-64 encoded. For more information, see Authentication.
An example request to list the shared data:
GET /cdx/v1/provider-shares
Your response should resemble:
{
   "api_version": "v1",
   "data": [
      {
         "api_version": "v1",
         "cloud_cluster": {
            "environment": "env-abc123",
            "id": "lkc-q55555",
            "related": "",
            "resource_name": ""
         },
         "consumer_restriction": {
            "email": "user@example.com",
            "kind": "Email"
         },
         "consumer_user_name": "user@example.com",
         "delivery_method": "Email",
         "id": "ss-ex123",
         "invite_expires_at": "2023-01-31T00:39:07.626255Z",
         "invited_at": "2023-01-24T00:39:07.624591Z",
         "kind": "ProviderShare",
         "metadata": {
            "created_at": "2023-01-24T00:39:07.624591Z",
            "resource_name": "crn://confluent.cloud/organization=example-7abc-4abc-a123-123456789b19/environment=env-abc123/cloud-cluster=lkc-q55555/provider-share=ss-ex123",
            "self": "https://api.confluent.cloud/cdx/v1/provider-shares/ss-ex123",
            "updated_at": "2023-01-24T00:39:07.624591Z"
         },
         "provider_user": {
            "id": "u-q50gkd",
            "related": "",
            "resource_name": ""
         },
         "provider_user_name": "rogert",
         "service_account": {
            "id": "",
            "related": "",
            "resource_name": ""
         },
         "status": {
            "phase": "INVITED"
         }
      },
      {
         "api_version": "v1",
         "cloud_cluster": {
               "environment": "env-abc123",
               "id": "lkc-q55555",
               "related": "",
               "resource_name": ""
         },
         "consumer_restriction": {
               "email": "user@example.com",
               "kind": "Email"
         },
         "consumer_user_name": "user@example.com",
         "delivery_method": "Email",
         "id": "ss-exabc",
         "invite_expires_at": "2023-01-31T00:31:13.108718Z",
         "invited_at": "2023-01-24T00:31:13.106964Z",
         "kind": "ProviderShare",
         "metadata": {
               "created_at": "2023-01-24T00:31:13.106964Z",
               "resource_name": "crn://confluent.cloud/organization=example-7abc-4abc-a123-123456789b19/environment=env-abc123/cloud-cluster=lkc-q55555/provider-share=ss-exabc",
               "self": "https://api.confluent.cloud/cdx/v1/provider-shares/ss-exabc",
               "updated_at": "2023-01-24T00:31:13.106964Z"
         },
         "provider_user": {
               "id": "u-q50gkd",
               "related": "",
               "resource_name": ""
         },
         "provider_user_name": "rogert",
         "service_account": {
               "id": "",
               "related": "",
               "resource_name": ""
         },
         "status": {
               "phase": "INVITED"
         }
      },
   ],
   "kind": "ProviderShareList",
   "metadata": {}
}