
Tableflow Quick Start with Iceberg Tables Using Managed Storage in Confluent Cloud
Confluent Tableflow enables exposing Apache Kafka® topics or Apache Flink® tables as Apache Iceberg™ tables by using Confluent Managed Storage (CMS). With CMS, Confluent manages the underlying object storage, so you don’t configure a storage bucket yourself. You select the CMS option when you enable Tableflow on your topic.
Complete these steps to materialize an Kafka topic as an Iceberg table using Confluent Managed Storage:
Prerequisites
DeveloperRead access on all schema subjects
CloudClusterAdmin access on your Kafka cluster
Assigner access on all provider integrations
For more information, see Grant Role-Based Access for Tableflow in Confluent Cloud.
Step 1: Create a topic and publish data
In this step, you create a stock-trades topic by using Confluent Cloud Console. Click Create topic, provide the topic name, and create it with default settings. You can skip defining a contract.
Publish data to the stock-trades topic by using the Datagen Source connector with the Stock Trades data set. When you configure the Datagen connector, click Additional configuration and proceed through the provisioning workflow. When you reach the Configuration step, in the Select output record value format, select Avro. Click Continue and keep the default settings. For more information, see Datagen Source Connector Quick Start.
Step 2: Enable Tableflow on your topic
Navigate to the
stock-tradestopic and click Enable Tableflow.In the Enable Tableflow dialog, click Use Confluent storage.
The topic status updates to Tableflow Syncing.
Materializing a newly created topic as an Iceberg table can take a few minutes.
For low-throughput topics in which Kafka segments have not been filled, Tableflow tries optimistically to publish data every 15 minutes. This is best-effort and not guaranteed.
Step 3: Set up access to the Iceberg REST Catalog
To access Tableflow Iceberg tables through the built-in Iceberg REST Catalog, you must get an endpoint URI, an API key, and the secret associated with your account.
In the navigation menu, click Tableflow to open the Tableflow overview page.
In the API access section, copy the REST Catalog Endpoint, which resembles:
https://tableflow.{CLOUD_REGION}.aws.confluent.cloud/iceberg/catalog/organizations/{ORG_ID}/environments/{ENV_ID}.In the API access section, click Create/View API keys.
In the API keys page, click Add API key.
In the Create API key page, select either My account or Service account, and click Next. Ensure that the user account or service account you select has the RBAC access specified in the Prerequisites section.
In the Resource scope page, select Tableflow and click Next.
(Optional) Enter a name and description for your API key.
Click Create API key and save your key and secret in a secure location.
Click Complete.
Once you obtain the API key and secret values, use them in the format
<apikey>:<secret>wherever you need to specify the Iceberg REST Catalog credentials for your Iceberg Reader applications or compute engines.
It can take around 10 minutes to materialize a newly created topic as an Iceberg table.
Step 4: Query Iceberg tables from Spark
In this step, you read Iceberg tables created by Tableflow by using PySpark.
Ensure that Docker is installed and running in your development environment.
Run the following command to start PySpark in a docker container. In this command, the AWS_REGION option must match your Kafka cluster region, for example,
us-west-2.docker run -d \ --name spark-iceberg \ -v $(pwd)/warehouse:/home/iceberg/warehouse \ -v $(pwd)/notebooks:/home/iceberg/notebooks/notebooks \ -e AWS_REGION=${YOUR_CLUSTER_REGION} \ -p 8888:8888 \ -p 8080:8080 \ -p 10000:10000 \ -p 10001:10001 \ tabulario/spark-iceberg
Once the container has started successfully, you can access Jupyter notebooks in your browser by going to http://localhost:8888.
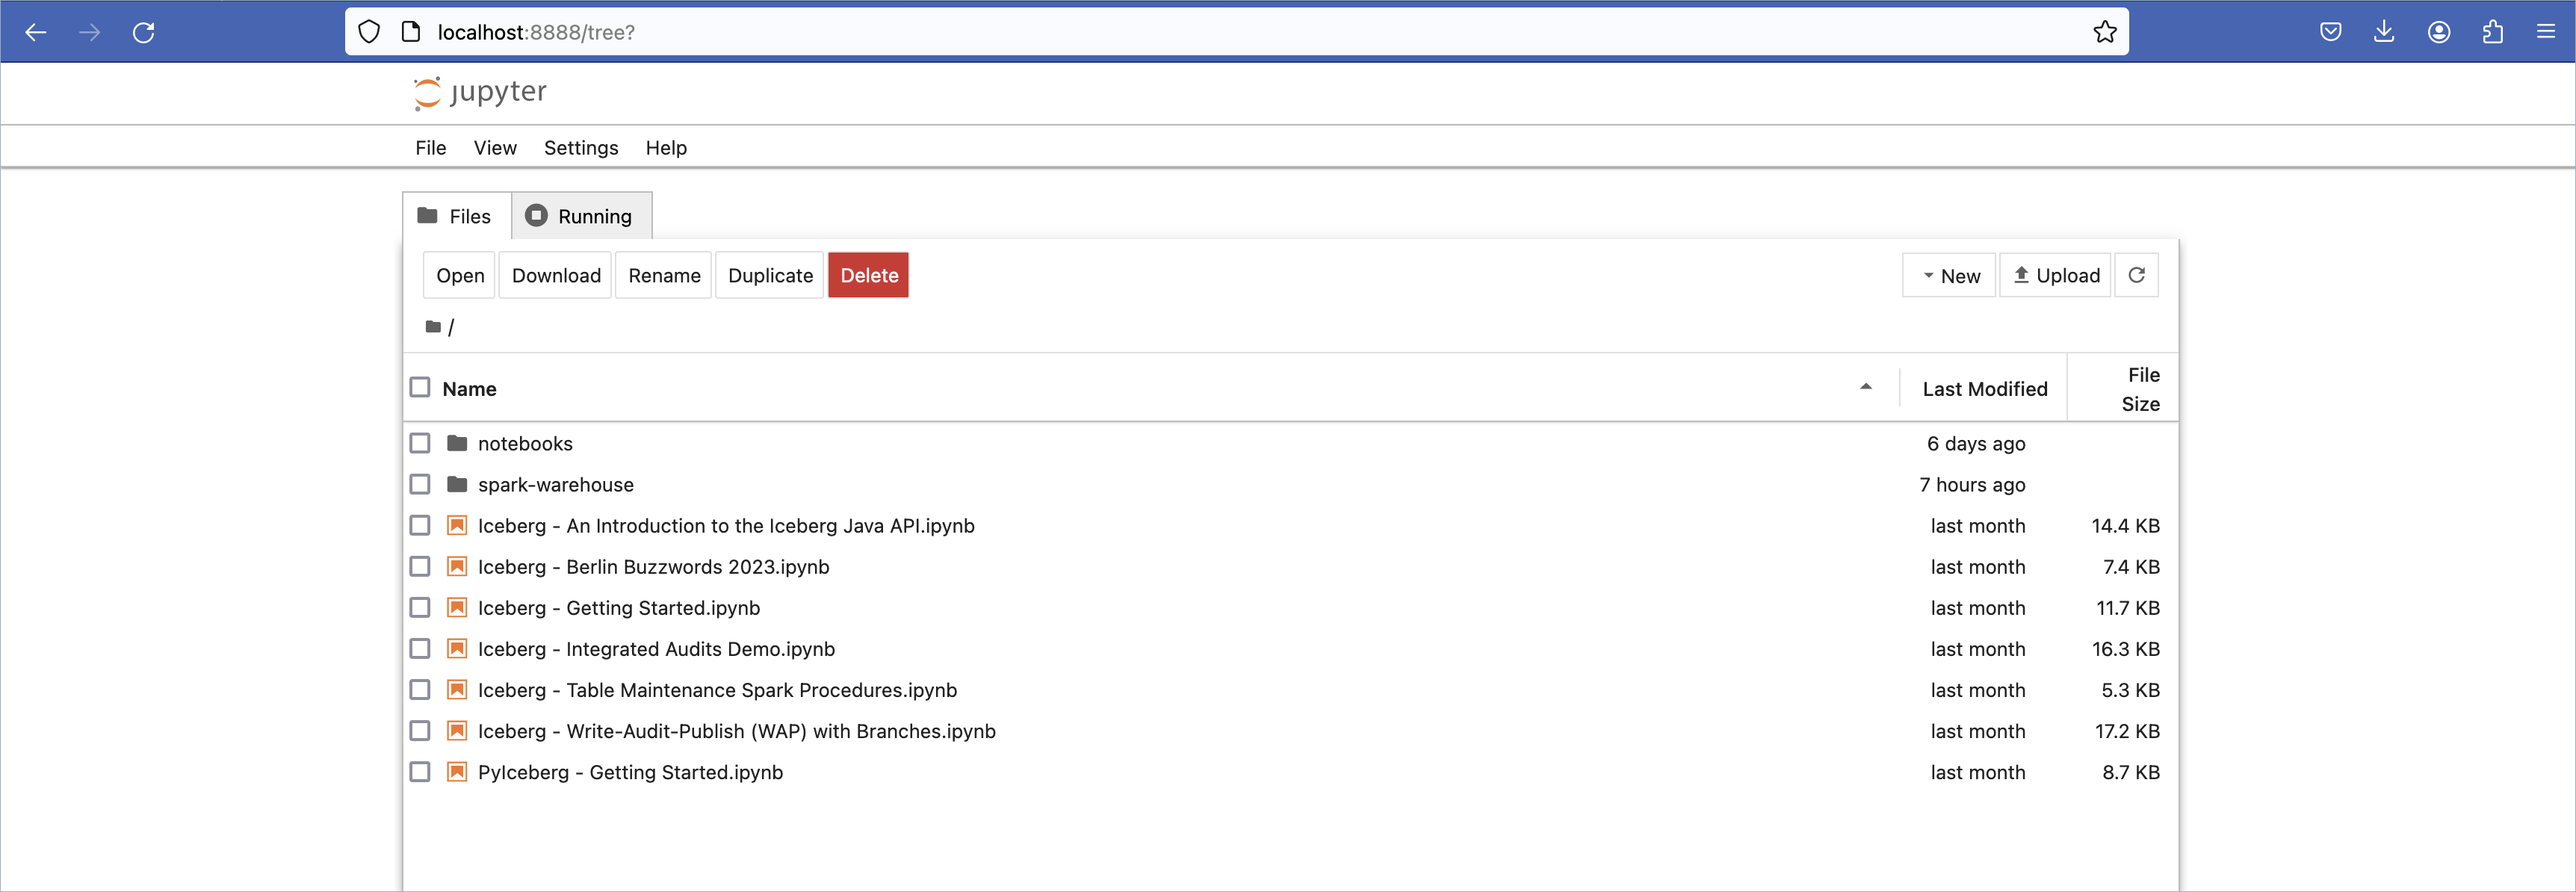
Upload the following
ipynbfile by clicking Upload. This file pre-populates the notebook that you use to test Tableflow.tableflow-quickstart.ipynb
{
   "cells": [
{
   "cell_type": "markdown",
   "id": "2b3b8256-432a-46a8-8542-837777aada52",
   "metadata": {},
   "source": [
   "## Register rest catalog as default catalog for Spark"
   ]
},
{
   "cell_type": "code",
   "execution_count": 1,
   "id": "e4d27656-867c-464e-a8c0-4b590fd7aae2",
   "metadata": {},
   "outputs": [
   {
   "name": "stderr",
   "output_type": "stream",
   "text": [
      "24/05/18 07:27:44 WARN SparkSession: Using an existing Spark session; only runtime SQL configurations will take effect.\n"
   ]
   }
   ],
   "source": [
   "from pyspark.sql import SparkSession\n",
   "\n",
   "conf = (\n",
   "    pyspark.SparkConf()\n",
   "        .setAppName('Jupyter')\n",
   "        .set(\"spark.sql.extensions\", \"org.apache.iceberg.spark.extensions.IcebergSparkSessionExtensions\")\n",
   "        .set(\"spark.sql.catalog.tableflowdemo\", \"org.apache.iceberg.spark.SparkCatalog\")\n",
   "        .set(\"spark.sql.catalog.tableflowdemo.type\", \"rest\")\n",
   "        .set(\"spark.sql.catalog.tableflowdemo.uri\", \"<Tableflow REST Catalog URI>\")\n",
   "        .set(\"spark.sql.catalog.tableflowdemo.credential\", \"<api_key>:<secret>\")\n",
   "        .set(\"spark.sql.catalog.tableflowdemo.io-impl\", \"org.apache.iceberg.aws.s3.S3FileIO\")\n",
   "        .set(\"spark.sql.catalog.tableflowdemo.rest-metrics-reporting-enabled\", \"false\")\n",
   "        .set(\"spark.sql.defaultCatalog\", \"tableflowdemo\")\n",
   "        .set(\"spark.sql.catalog.tableflowdemo.s3.remote-signing-enabled\", \"true\")\n",
   ")\n",
   "spark = SparkSession.builder.config(conf=conf).getOrCreate()\n"
   ]
},
{
   "cell_type": "markdown",
   "id": "3f7f0ed8-39bf-4ad1-ad72-d2f6e010c4b5",
   "metadata": {},
   "source": [
   "## List all the tables in the db"
   ]
},
{
   "cell_type": "code",
   "execution_count": null,
   "id": "89fc7044-4f9e-47f7-8fca-05b15da88a9c",
   "metadata": {},
   "outputs": [],
   "source": [
   "%%sql \n",
   "SHOW TABLES in `<your-kafka-cluster-id>`"
   ]
},
{
   "cell_type": "markdown",
   "id": "9282572f-557d-4bb7-9f3e-511e86889304",
   "metadata": {},
   "source": [
   "## Query all records in the table"
   ]
},
{
   "cell_type": "code",
   "execution_count": null,
   "id": "345f8fef-9d1f-4cc5-8015-babdf4102988",
   "metadata": {},
   "outputs": [],
   "source": [
   "%%sql \n",
   "SELECT *\n",
   "FROM `<your-kafka-cluster-id>`.`stock-trades`;"
   ]
}
],
"metadata": {
"kernelspec": {
   "display_name": "Python 3 (ipykernel)",
   "language": "python",
   "name": "python3"
},
"language_info": {
   "codemirror_mode": {
   "name": "ipython",
   "version": 3
   },
   "file_extension": ".py",
   "mimetype": "text/x-python",
   "name": "python",
   "nbconvert_exporter": "python",
   "pygments_lexer": "ipython3",
   "version": "3.9.18"
}
},
"nbformat": 4,
"nbformat_minor": 5
}
A new notebook named tableflow-quickstart appears.
Double-click the tableflow-quickstart notebook to open it.
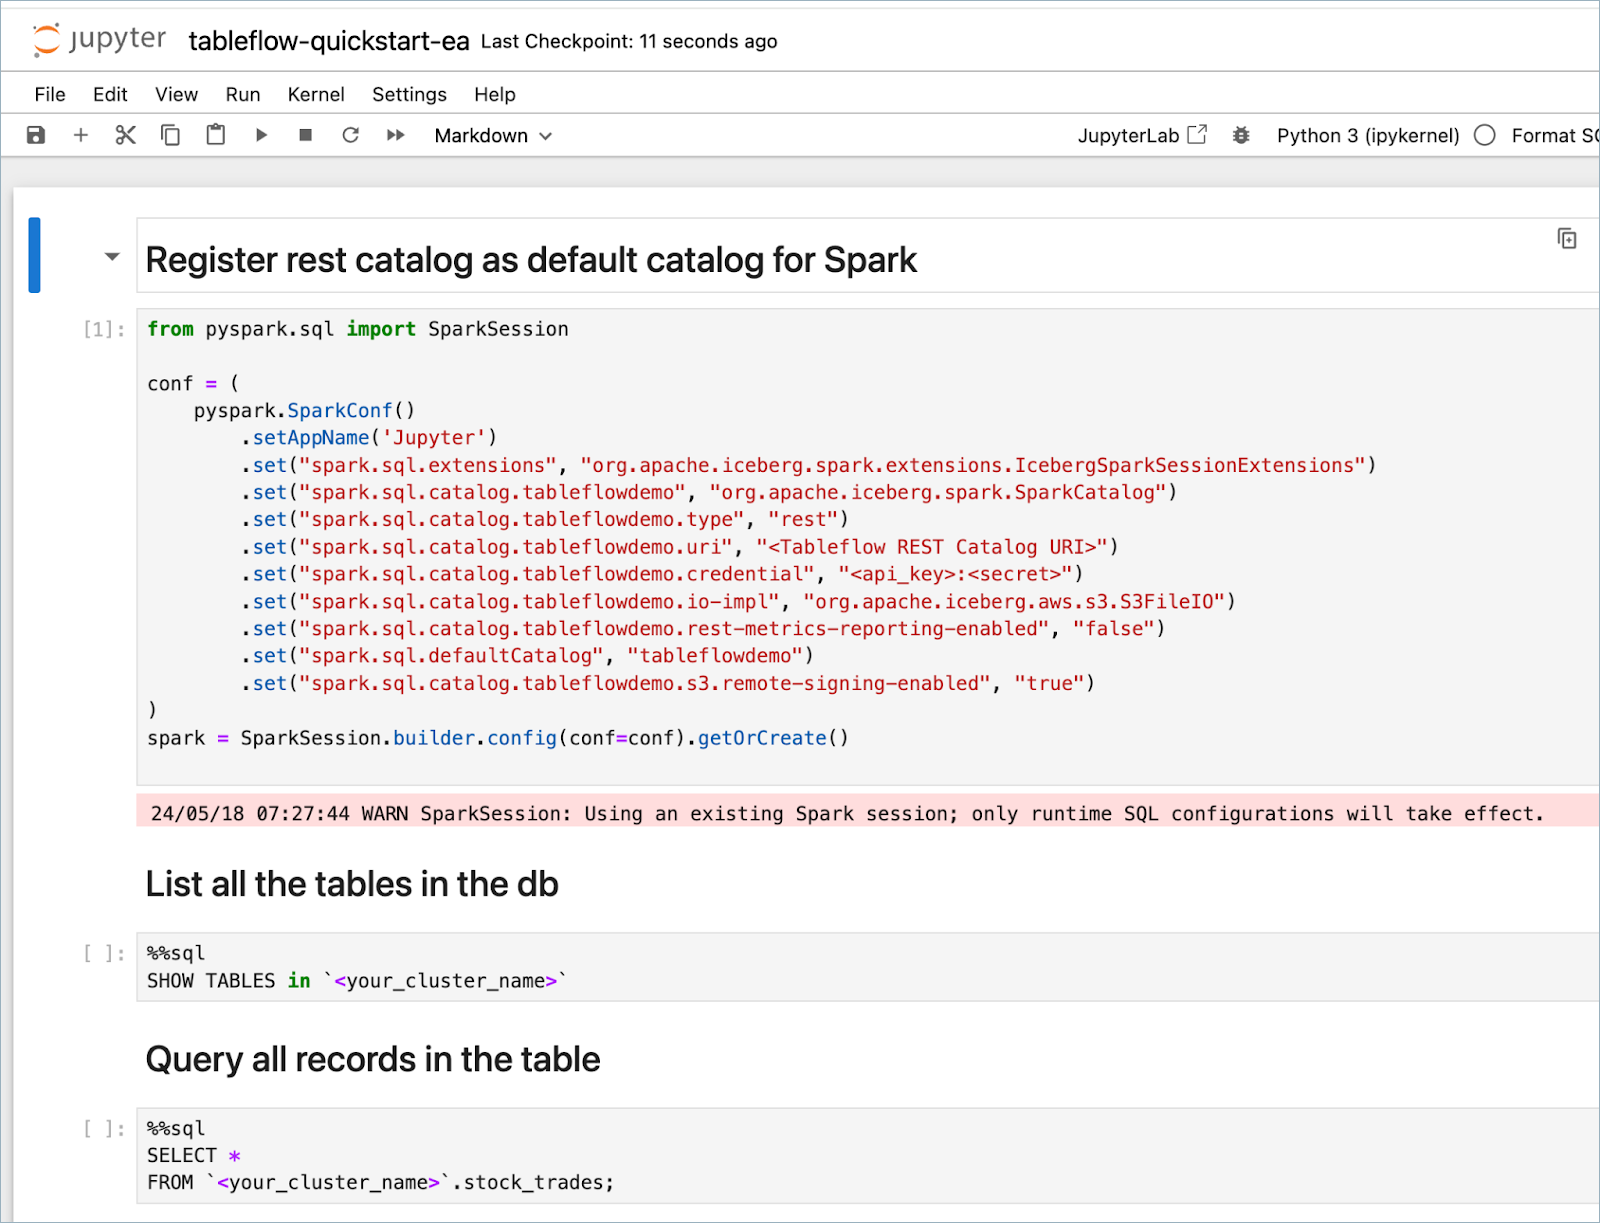
Update the following properties of the Spark configuration with the values from Step 3.
spark.sql.catalog.tableflowdemo.urispark.sql.catalog.tableflowdemo.credential <apikey>:<secret>
Run each cell individually from the Run menu by updating the query with the information corresponding to your cluster and topics.
Note
Query with the cluster ID, not the cluster name.
You can see the list of tables and table data in the cells’ output.
Step 5: Read Iceberg data from analytics engines (optional)
Amazon Athena for Spark (PySpark)
Amazon Athena PySpark supports reading Iceberg tables using the Iceberg REST Catalog. This means that you can use Athena to query Tableflow Iceberg tables.
Ensure that you have the values from Step 1 and Step 2.
Tableflow REST Catalog endpoint
Credentials to access the Tableflow REST Catalog
Log in to Amazon Athena.
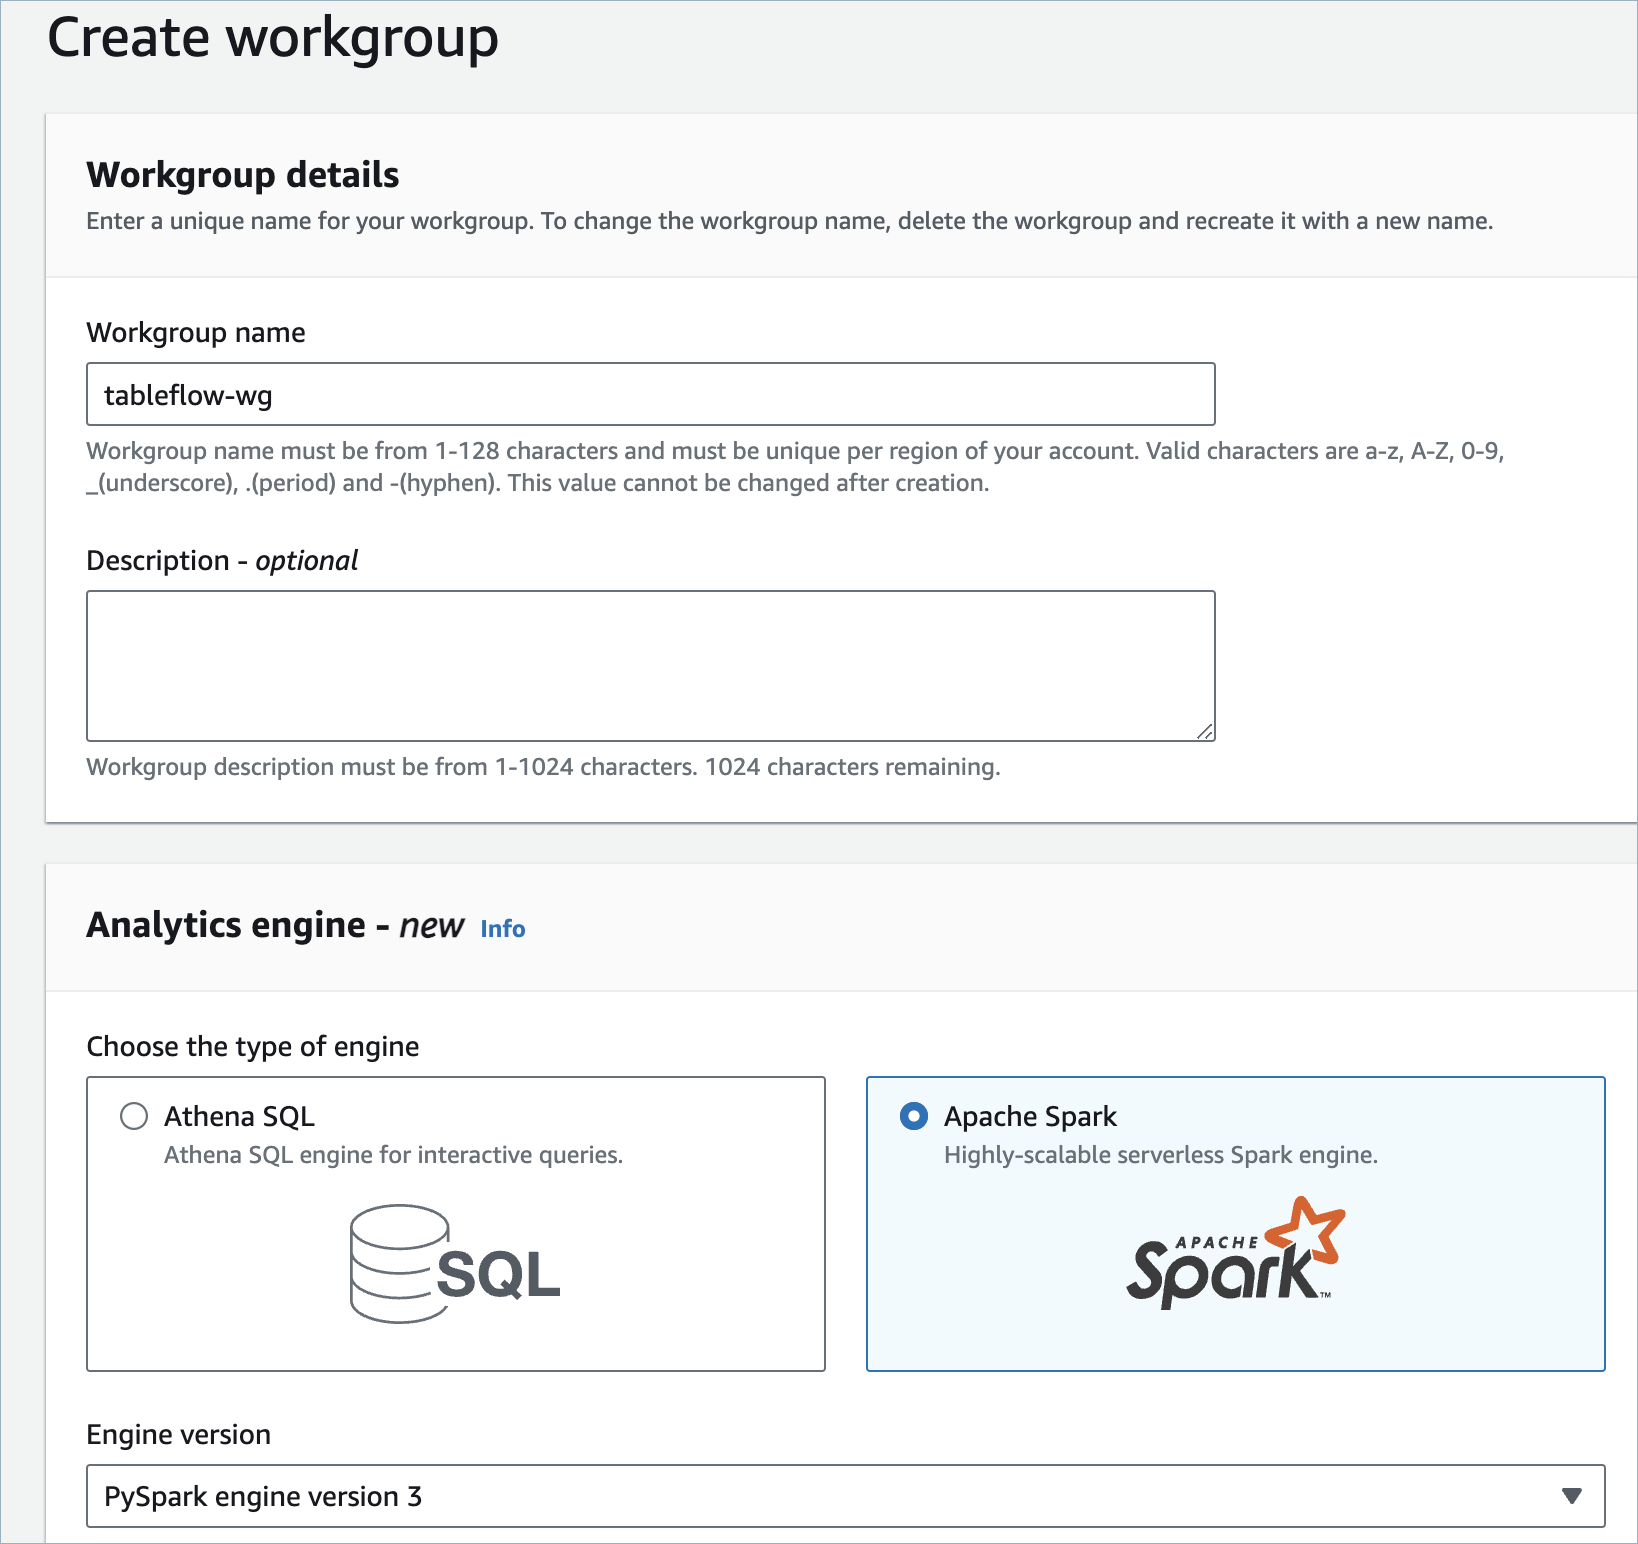
Create a workgroup. Provide a name, like “tableflow-wg”, for the workgroup and select Apache Spark as the analytics engine. Ensure that PySpark engine version 3 is selected. Click Create to create the workgroup.
Under the workgroup you created in previous step, create a new notebook. Name your workbook, and in the Apache Spark properties section, select Custom to provide Spark properties in JSON format.
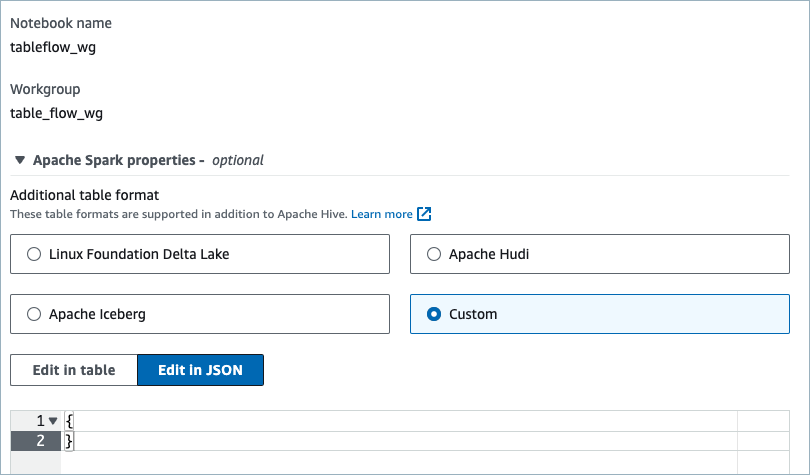
Copy the following Spark properties configuration to Athena. Update
spark.sql.catalog.tableflow-cluster.uriandspark.sql.catalog.tableflow-cluster.credentialwith the values from Step 3.{ "spark.sql.catalog.tableflow-cluster": "org.apache.iceberg.spark.SparkCatalog", "spark.sql.catalog.tableflow-cluster.catalog-impl": "org.apache.iceberg.rest.RESTCatalog", "spark.sql.catalog.tableflow-cluster.uri": "<Tableflow-REST-Catalog-URI>", "spark.sql.catalog.tableflow-cluster.credential": "<cloud-api-key>:<secret>", "spark.sql.catalog.tableflowdemo.s3.remote-signing-enabled": "true", "spark.sql.defaultCatalog": "tableflow-cluster", "spark.sql.extensions": "org.apache.iceberg.spark.extensions.IcebergSparkSessionExtensions" }
Run the following query in Athena PySpark to see the Iceberg tables in the Tableflow Catalog.
%%sql
SHOW TABLES in `<your-kafka-cluster-id>`
Select a table of your choice and query data with the following PySpark query. In the current example, replace
<table-name>withstock-trades.%%sql SELECT * FROM `<your-kafka-cluster-id>`.<table-name>;
Note
If you get this exception: org.apache.iceberg.exceptions.ForbiddenException: Forbidden: Forbidden: not authorized to sign the request for, check whether you have configured the Spark client to be in the same region as the Kafka cluster.
Step 6: Query data with other analytics engines (optional)
Explore other integration options for using Tableflow with analytics engines: