HTTP Sink Connector for Confluent Cloud
Tip
Confluent recommends upgrading to version 2 of this connector if you are using the OpenAPI specification to avoid future migration issues. For more information, see Moving from V1 to V2.
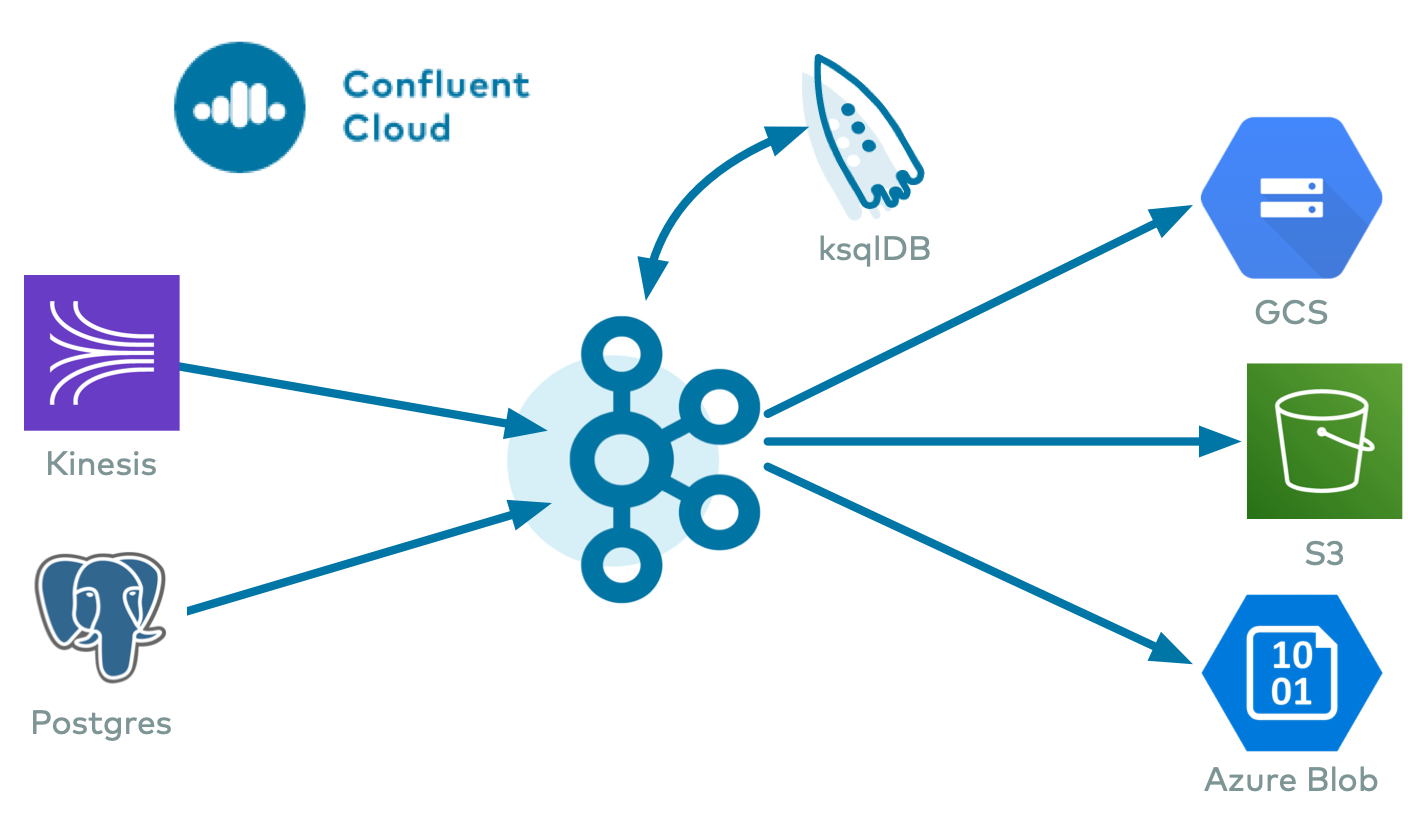
The fully-managed HTTP Sink connector for Confluent Cloud sends Apache Kafka® records to an HTTP or HTTPS API endpoint.
The connector consumes records from Kafka topics and converts each record value to STRING or JSON format before sending it, in the request body, to the configured http.api.url. The API URL can reference a record key or topic name using substitution variables ${topic} and ${key} in the URL property. You can also use fields from the Kafka record. The targeted API must support either a POST, PATCH, or PUT request.
The connector batches records up to the set Batch max size (batch.max.size) before sending the batched request to the API. Each record is converted to its String representation or its JSON representation with Request Body Format (request.body.format=json) and then separated with the Batch separator (batch.separator). See Configuration Properties for configuration property descriptions.
The HTTP Sink connector supports connecting to APIs using SSL along with Basic Authentication, OAuth2, or a Proxy Authentication Server.
Note
This Quick Start is for the fully-managed Confluent Cloud connector. If you are installing the connector locally for Confluent Platform, see HTTP Sink Connector for Confluent Platform.
If you require private networking for fully-managed connectors, make sure to set up the proper networking beforehand. For more information, see Manage Networking for Confluent Cloud Connectors.
Features
The HTTP Sink connector supports the following features:
At least once delivery: This connector guarantees that records from the Kafka topic are delivered at least once.
Supports multiple tasks: The connector supports running one or more tasks. More tasks may improve performance (that is, consumer lag is reduced with multiple tasks running).
Automatically creates topics: The following three topics are automatically created when the connector starts:
Success topic
Error topic
The suffix for each topic name is the connector’s logical ID. In the example below, there are the three connector topics and one pre-existing Kafka topic named pageviews.
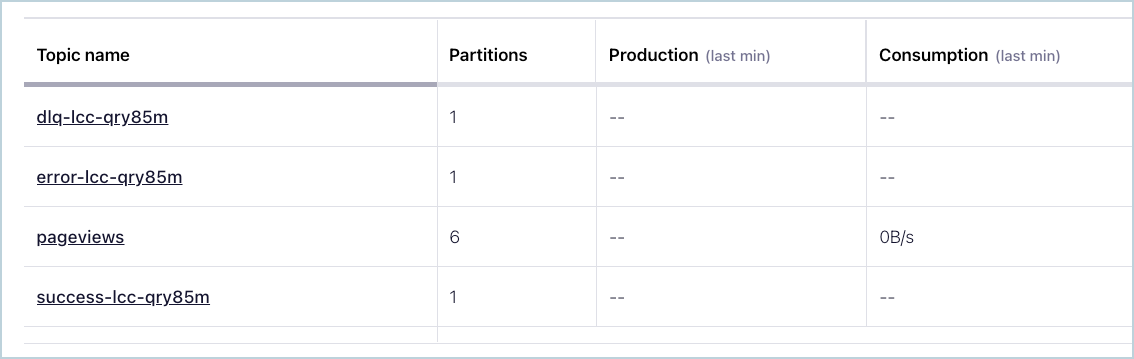
Connector Topics
If the records sent to the topic are not in the correct format, or if important fields are missing in the record, the errors are recorded in the error topic, and the connector continues to run.
Supported data formats: The connector supports Avro, JSON Schema (JSON-SR), Protobuf, JSON (schemaless), and Bytes formats. Schema Registry must be enabled to use a Schema Registry-based format (for example, Avro, JSON Schema, or Protobuf).
Template parameters: The connector allows you to specify fields from the Kafka record, other than
{$topic}and{$key}and constructs a unique URL using these parameters.Regex Replacements: The connector can take a number of regex patterns and replacement strings that are applied to a record before it is submitted to the destination API. To do this, the connector uses the configuration options
regex.patterns,regex.replacements, andregex.separator.Supports Batching: The connector batches requests submitted to HTTP APIs for efficiency. Batches can be built with the configuration options
batch.prefix,batch.suffixandbatch.separator. All regex options apply when batching and are applied to individual records before being submitted to the batch.
For more information and examples to use with the Confluent Cloud API for Connect, see the Confluent Cloud API for Connect Usage Examples section.
Limitations
Be sure to review the following information.
For connector limitations, see HTTP Sink Connector limitations.
If you plan to use one or more Single Message Transformations (SMTs), see SMT Limitations.
The connector does not batch requests for messages containing Kafka header values that are different.
Template Parameters
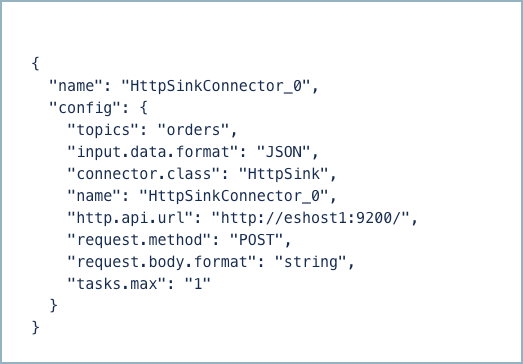
The connector forwards the message (record) value to the HTTP API. You can add parameters to have the connector construct a unique HTTP API URL containing the record key and topic name. For example, you enter http://eshost1:9200/api/messages/${topic}/${key} to have the HTTP API URL contain the topic name and record key.
In addition to the ${topic} and ${key} parameters, you can also refer to fields from the Kafka record. As shown in the following example, you may want the connector to construct a URL that uses the Order ID and Customer ID.
The Avro format that the producer uses to generate records in the Apache Kafka® topic order is shown below:
{
  "name": "MyClass",
  "type": "record",
  "namespace": "com.acme.avro",
  "fields": [
    {
      "name": "customerId",
      "type": "int"
    },
    {
      "name": "order",
      "type": {
        "name": "order",
        "type": "record",
        "fields": [
          {
            "name": "id",
            "type": "int"
          },
          {
            "name": "amount",
            "type": "int"
          }
        ]
      }
    }
  ]
}
To send the Order ID and Customer ID, you would use the following URL in the HTTP API URL (http.api.url) configuration property:
"http.api.url" : "http://eshost1:9200/api/messages/order/${order.id}/customer/${customerId}/"
Assuming the data in the Kafka topic contains the following values:
{
  "customerId": 123,
  "order": {
    "id": 1,
    "amount": 12345
  }
}
The connector constructs the following URL:
http://eshost1:9200/api/messages/order/1/customer/123/
Note
The maximum depth for added parameters is 10. For example, connector validation fails if you were to use the URL
https://eshost1:9200/api/messages/order/${a.b.c.d.e.f.g.h.i.j.k}.When you add parameters to the HTTP API URL, each record can result in a unique URL. For this reason, batching is disabled when using additional URL parameters.
The connector throws a runtime exception if fields referred to in the HTTP API URL do not exist in the Kafka record.
Quick Start
Use this quick start to get up and running with the Confluent Cloud HTTP Sink connector. The quick start provides the basics of selecting the connector and configuring it to stream events to an HTTP endpoint.
- Prerequisites
Authorized access to a Confluent Cloud cluster on Amazon Web Services (AWS), Microsoft Azure (Azure), or Google Cloud.
The Confluent CLI installed and configured for the cluster. See Install the Confluent CLI.
Schema Registry must be enabled to use a Schema Registry-based format (for example, Avro, JSON_SR (JSON Schema), or Protobuf).
At least one source Kafka topic must exist in your Confluent Cloud cluster before creating the sink connector.
Using the Confluent Cloud Console
Step 1: Launch your Confluent Cloud cluster
To create and launch a Kafka cluster in Confluent Cloud, see Create a kafka cluster in Confluent Cloud.
Step 2: Add a connector
In the left navigation menu, click Connectors. If you already have connectors in your cluster, click + Add connector.
Step 3: Select your connector
Click the HTTP Sink connector card.
Step 4: Enter the connector details
Note
Ensure you have all your prerequisites completed.
An asterisk ( * ) designates a required entry.
At the Add HTTP Sink Connector screen, complete the following:
If you’ve already populated your Kafka topics, select the topics you want to connect from the Topics list.
To create a new topic, click +Add new topic.
Select the way you want to provide Kafka Cluster credentials. You can choose one of the following options:
My account: This setting allows your connector to globally access everything that you have access to. With a user account, the connector uses an API key and secret to access the Kafka cluster. This option is not recommended for production.
Service account: This setting limits the access for your connector by using a service account. This option is recommended for production.
Use an existing API key: This setting allows you to specify an API key and a secret pair. You can use an existing pair or create a new one. This method is not recommended for production environments.
Note
Freight clusters support only service accounts for Kafka authentication.
Click Continue.
Configure the authentication properties:
HTTP URL: Enter your HTTP API URL. Use an HTTP or HTTPS connection URL. For example,
http://eshost1:9200/api/messagesorhttps://eshost3:9200/api/messages. The connector sends the record value to the API as part of the request body. You can specify a static URL (for example,http://eshost1:9200/api/messages) or a dynamic URL (for example,http://eshost1:9200/api/messages/${topic}/${key}). You can also specify a dynamic URL using fields from the Kafka record.Note
Note that if the connection URL is HTTPS, HTTPS is used for all connections. A URL with no protocol is considered HTTP.
For additional information, see HTTP Sink Connector limitations.
Endpoint Authentication type: Select an Endpoint Authentication Type. Defaults to
NONE.BASIC: The connector authenticates with a username and password.
NONE (the default): The endpoint requires no authentication.
OAUTH2: The connector authenticates using OAuth credentials. Supports OAuth Client Credentials grant type only.
Auth username: The username to be used with an endpoint requiring authentication.
Auth password: The password to be used with an endpoint requiring authentication.
OAuth2 token URL: The URL to be used for fetching the OAuth2 token in the field. Client Credentials is the only supported grant type.
OAuth2 client ID: The client ID used when fetching the OAuth2 token.
OAuth2 secret: The secret used when fetching the OAuth2 token.
OAuth2 token property name: The name of the property containing the OAuth2 token returned by the HTTP proxy. Defaults to
access_token.OAuth2 auth mode mechanism: Specifies how to encode
client_idandclient_secretin the OAuth2 authorization request. If set toheader, the connector encodes credentials as anAuthorization:Basic <base-64 encoded client_id:client_secret>HTTP header. If set tourl, thenclient_idandclient_secretare sent in body as URL encoded parameters. Defaults toheader.OAuth2 scope: The scope used when fetching OAuth2 token. If left empty, this parameter is not set in the authorization request. Defaults to
any.Add JWT token: Whether to generate and add a JSON Web Token (JWT) to a request. The signing algorithm used is the RS256 algorithm. If set to
true, the JWT is added as ajwt_tokenrequest parameter. Defaults tofalse. When set totrue, the following additional configuration properties appear:JWT keystore: Click and upload the key store containing the private key used to sign the JWT.
JWT keystore password: Enter the password used to access the key store.
JWT keystore type: Sets the key store type to
JKSorPKCS12. Defaults toJKS.JWT JSON claims: Add any necessary JWT claims as a JSON string. For example:
{
 "iss": "<issuer>",
 "aud": "<audience>",
 "sub": "<subject>"
 }
Note
The connector sets the JWT claim
iat(issued at) to the JWT creation time (current time). The connector setsexp(expiry) to five minutes from time of issue. The claimjtiis set to a random string. The connector overwrites these values if you add values for them here.
JWT keystore: Click and upload the key store containing the private key used to sign the JWT.
JWT keystore password: Enter the password used to access the key store.
JWT keystore type: Sets the key store type to
JKSorPKCS12. Defaults toJKS.JWT JSON claims: Add any necessary JWT claims as a JSON string.
Key password: The password of the private key in the key store file. This is optional for client.
Key Store: The key store containing the server certificate. Only required if using HTTPS.
Keystore Password: The store password for the key store file. This is optional for a client and is only needed if
https.ssl.keystore.locationis configured.Trust store: The trust store containing the server CA certificate. Only required if using HTTPS.
Trust store password: The trust store password containing the server CA certificate. Only required if using HTTPS.
SSL Protocol: The protocol to use for SSL connections. Defaults to
TLSv1.3.Enable host verification: Whether SSL host verification should be enabled. Defaults to
true.
Click Continue.
Input Kafka record value format: Select the input Kafka record value format (data coming from the Kafka topic). Valid entires are AVRO, PROTOBUF, JSON_SR, JSON, or BYTES. A valid schema must be available in Schema Registry to use a schema-based message format (for example, Avro, JSON Schema, or Protobuf).
Tip
Select schemaless JSON to consume STRING data.
Show advanced configurations
Schema context: Select a schema context to use for this connector, if using a schema-based data format. This property defaults to the Default context, which configures the connector to use the default schema set up for Schema Registry in your Confluent Cloud environment. A schema context allows you to use separate schemas (like schema sub-registries) tied to topics in different Kafka clusters that share the same Schema Registry environment. For example, if you select a non-default context, a Source connector uses only that schema context to register a schema and a Sink connector uses only that schema context to read from. For more information about setting up a schema context, see What are schema contexts and when should you use them?.
Input Kafka record key format: Sets the input Kafka record key format. Valid entries are BYTES or STRING.
HTTP Request Method: The request method to use. Options are
PUT,POST, andPATCH. Defaults toPOST.HTTP Headers: HTTP headers to be included in all requests. Individual headers should be separated by the Header Separator.
HTTP Headers Separator: Separator character used in headers.
Sensitive HTTP Headers: Sensitive HTTP headers (for example, credentials) to be included in all requests. Individual headers should be separated by the Header Separator.
OAuth2 Client Headers: HTTP headers to be included in the OAuth2 client endpoint. Individual headers should be separated by OAuth2 Client Headers Separator.
OAuth2 Client Headers Separator: Separator character used in OAuth2 Client Headers.
Behavior for null valued records: How to handle records with a non-null key and a null value (that is, Kafka tombstone records). Valid options are
ignore,deleteandfail. Defaults toignore.Behavior on errors: Error handling behavior configuration for handling error responses from HTTP requests. Valid options are
ignoreandfail. Defaults toignore.Report errors as: Dictates the content of records produced to the error topic. If set to
error_string, the value is a human readable string describing the failure. The error string includes the following information if available: HTTP response code, reason phrase, submitted payload, URL, response content, exception and error message.Retry on HTTP codes: Comma-separated list of HTTP codes or range of codes to retry on.
Maximum Retries: The maximum number of times to retry on errors before failing the task.
Retry Backoff (milliseconds): The time in milliseconds to wait following an error before a retry attempt is made.
Connect timeout (milliseconds): The time in milliseconds to wait for a connection to be established.
Request timeout (milliseconds): The time in milliseconds to wait for a request response from the server.
Request Body Format: Used to produce request body in either JSON or String format.
Batch key pattern: Pattern used to build the key for a given batch.
Batch max size: The number of records accumulated in a batch before the HTTP API is invoked. Note that batching is disabled if you use template parameters other than
$keyand$topic. Defaults to1.Batch prefix: Prefix added to record batches. This is applied once at the beginning of the batch of records. Only used when
request.body.formatis set tostring.Batch suffix: Suffix added to record batches. This is applied once at the end of the batch of records. Only used when
request.body.formatis set tostring.Batch separator: Separator for records in a batch.
Batch json as array: Whether or not to use an array to bundle JSON records. Only used when
request.body.formatis set to JSON.Regular expression patterns: Regular expression patterns used for replacements in the message sent to the HTTP service.
Regular expression replacements: Regex replacements to use with the patterns in
regex.patterns.Regular expression separator: Separator character used in
regex.patternsandregex.replacementsproperty.Retry Backoff Policy: The backoff policy to use in terms of retry -
CONSTANT_VALUEorEXPONENTIAL_WITH_JITTER.
Additional Configs
value.converter.replace.null.with.default: Whether to replace fields that have a default value and that are null to the default value. When set to true, the default value is used, otherwise null is used. Applicable for JSON Converter.
Value Converter Schema ID Deserializer: Sets the class name of the schema ID deserializer for values. The deserializer reads schema IDs from message headers.
Value Converter Reference Subject Name Strategy: Sets the subject reference name strategy for values. Valid entries are
DefaultReferenceSubjectNameStrategyorQualifiedReferenceSubjectNameStrategy. You can use this strategy only withPROTOBUFformat; the default strategy isDefaultReferenceSubjectNameStrategy.Schema ID For Value Converter: Sets the schema ID to use for deserialization when using
ConfigSchemaIdDeserializer. This lets you specify a fixed schema ID for deserializing message values. This property is applicable only whenvalue.converter.value.schema.id.deserializeris set toConfigSchemaIdDeserializer.value.converter.schemas.enable: Include schemas within each of the serialized values. Input messages must contain schema and payload fields and may not contain additional fields. For plain JSON data, set this to false. Applicable for JSON Converter.
errors.tolerance: Use this property if you would like to configure the connector’s error handling behavior. WARNING: This property should be used with CAUTION for SOURCE CONNECTORS as it may lead to dataloss. If you set this property to ‘all’, the connector will not fail on errant records, but will instead log them (and send to DLQ for Sink Connectors) and continue processing. If you set this property to ‘none’, the connector task will fail on errant records.
value.converter.ignore.default.for.nullables: When set to true, this property ensures that the corresponding record in Kafka is NULL, instead of showing the default column value. Applicable for AVRO,PROTOBUF and JSON_SR Converters.
Key Converter Schema ID Deserializer: Sets the class name of the schema ID deserializer for keys. The deserializer reads schema IDs from message headers.
Value Converter Decimal Format: Specifies the
JSONorJSON_SRserialization format for ConnectDECIMALlogical type values with two allowed literals:BASE64to serializeDECIMALlogical types as base64 encoded binary data, andNUMERICto serializeDECIMALlogical type values inJSONorJSON_SRas a number representing the decimal value.Schema GUID For Key Converter: Sets the schema GUID to use for deserialization when using
ConfigSchemaIdDeserializer. This lets you specify a fixed schema GUID for deserializing message keys. This property is applicable only whenkey.converter.key.schema.id.deserializeris set toConfigSchemaIdDeserializer.Schema GUID For Value Converter: Sets the schema GUID to use for deserialization when using
ConfigSchemaIdDeserializer. This lets you specify a fixed schema GUID for deserializing message values. This property is applicable only whenvalue.converter.value.schema.id.deserializeris set toConfigSchemaIdDeserializer.Value Converter Connect Meta Data: Enables the Connect converter to add its metadata to the output schema. Applies to Avro converters.
Value Converter Value Subject Name Strategy: Determines how to construct the subject name under which the value schema is registered with Schema Registry.
Key Converter Key Subject Name Strategy: Determines how to construct the subject name for key schema registration.
Schema ID For Key Converter: Sets the schema ID to use for deserialization when using
ConfigSchemaIdDeserializer. This lets you specify a fixed schema ID for deserializing message keys. This property is applicable only whenkey.converter.key.schema.id.deserializeris set toConfigSchemaIdDeserializer.
Auto-restart policy
Enable Connector Auto-restart: Enables the auto-restart behavior of the connector and its task in the event of user-actionable errors. Defaults to
true, enabling the connector to automatically restart in case of user-actionable errors. Set this property tofalseto disable auto-restart for failed connectors. If disabled, you must manually restart the connector.
Consumer configuration
Max poll interval(ms): Sets the maximum delay between subsequent consume requests to Kafka. Use this property to improve connector performance in cases when the connector cannot send records to the sink system. The default is 300,000 milliseconds (5 minutes).
Max poll records: Sets the maximum number of records to consume from Kafka in a single request. Use this property to improve connector performance in cases when the connector cannot send records to the sink system. The default is 500 records.
Transforms
Single Message Transformations: To add a new SMT, see Add transforms. For more information about unsupported SMTs, see Unsupported transformations.
Processing position
Set offsets: Click Set offsets to define a specific offset for this connector to begin procession data from. For more information on managing offsets, see Manage offsets.
See Configuration Properties for all property values and definitions.
Click Continue.
Based on the number of topic partitions you select, you will be provided with a recommended number of tasks.
To change the number of recommended tasks, enter the number of tasks for the connector to use in the Tasks field.
Click Continue.
Verify the connection details.
Click Launch.
The status for the connector should go from Provisioning to Running.

Step 5: Check for records
Verify that records are being produced at the endpoint.
For more information and examples to use with the Confluent Cloud API for Connect, see the Confluent Cloud API for Connect Usage Examples section.
Tip
When you launch a connector, a Dead Letter Queue topic is automatically created. See View Connector Dead Letter Queue Errors in Confluent Cloud for details.
Using the Confluent CLI
To set up and run the connector using the Confluent CLI, complete the following steps.
Note
Make sure you have all your prerequisites completed.
Step 1: List the available connectors
Enter the following command to list available connectors:
confluent connect plugin list
Step 2: List the connector configuration properties
Enter the following command to show the connector configuration properties:
confluent connect plugin describe <connector-plugin-name>
The command output shows the required and optional configuration properties.
Step 3: Create the connector configuration file
Create a JSON file that contains the connector configuration properties. The following example shows the required connector properties.
{
  "connector.class": "HttpSink",
  "input.data.format": "JSON",
  "name": "HttpSinkConnector_0",
  "kafka.auth.mode": "KAFKA_API_KEY",
  "kafka.api.key": "<my-kafka-api-key>",
  "kafka.api.secret": "<my-kafka-api-secret>",
  "http.api.url": "http:://eshost1:9200/api/messages",
  "request.method": "POST",
  "tasks.max": "1",
  "topics": "orders",
}
Note the following property definitions:
"connector.class": Identifies the connector plugin name."input.data.format": Sets the input Kafka record value format (data coming from the Kafka topic). Valid entries are AVRO, JSON_SR, PROTOBUF, JSON, or BYTES. You must have Confluent Cloud Schema Registry configured if using a schema-based message format (for example, Avro, JSON_SR (JSON Schema), or Protobuf).Tip
Select schemaless JSON to consume STRING data.
"name": Sets a name for your new connector.
"kafka.auth.mode": Identifies the connector authentication mode you want to use. There are two options:SERVICE_ACCOUNTorKAFKA_API_KEY(the default). To use an API key and secret, specify the configuration propertieskafka.api.keyandkafka.api.secret, as shown in the example configuration (above). To use a service account, specify the Resource ID in the propertykafka.service.account.id=<service-account-resource-ID>. To list the available service account resource IDs, use the following command:confluent iam service-account list
For example:
confluent iam service-account list

   Id     | Resource ID |       Name        |    Description
+---------+-------------+-------------------+-------------------
   123456 | sa-l1r23m   | sa-1              | Service account 1
   789101 | sa-l4d56p   | sa-2              | Service account 2
"http.api.url": Use an HTTP or HTTPS connection URL. For example,http://eshost1:9200/api/messagesorhttps://eshost3:9200/api/messages. The connector sends the record value to the API as part of the request body. You can specify a static URL (for example,http://eshost1:9200/api/messages) or a dynamic URL (for example,http://eshost1:9200/api/messages/${topic}/${key}). You can also specify a dynamic URL using fields from the Kafka record.Note
Note that if the connection URL is HTTPS, HTTPS is used for all connections. A URL with no protocol is considered HTTP.
For additional information, see HTTP Sink Connector limitations.
"request.method": Enter an HTTP API Request Method:PUT,POST, orPATCH. Defaults toPOST."tasks.max": Enter the maximum number of tasks for the connector to use. More tasks may improve performance (that is, consumer lag is reduced with multiple tasks running)."topics": Enter the topic name or a comma-separated list of topic names.
SMTs: For details about adding SMTs using the Confluent CLI, see the Single Message Transformations documentation.
See Configuration Properties for all property values and descriptions.
Step 3: Load the properties file and create the connector
Enter the following command to load the configuration and start the connector:
confluent connect cluster create --config-file <file-name>.json
For example:
confluent connect cluster create --config-file http-sink-config.json
Example output:
Created connector HttpSinkConnector_0 lcc-do6vzd
Step 4: Check the connector status.
Enter the following command to check the connector status:
confluent connect cluster list
Example output:
ID           |             Name              | Status  | Type | Trace
+------------+-------------------------------+---------+------+-------+
lcc-do6vzd   | HttpSinkConnector_0           | RUNNING | sink |       |
Step 5: Check for records
Verify that records are populating the endpoint.
For more information and examples to use with the Confluent Cloud API for Connect, see the Confluent Cloud API for Connect Usage Examples section.
Tip
When you launch a connector, a Dead Letter Queue topic is automatically created. See View Connector Dead Letter Queue Errors in Confluent Cloud for details.
Configuration Properties
Use the following configuration properties with the fully-managed connector. For self-managed connector property definitions and other details, see the connector docs in Self-managed connectors for Confluent Platform.
Note
These are properties for the fully-managed cloud connector. If you are installing the connector locally for Confluent Platform, see HTTP Sink Connector for Confluent Platform.
Which topics do you want to get data from?
topicsIdentifies the topic name or a comma-separated list of topic names.
Type: list
Importance: high
Schema Config
schema.context.nameAdd a schema context name. A schema context represents an independent scope in Schema Registry. It is a separate sub-schema tied to topics in different Kafka clusters that share the same Schema Registry instance. If not used, the connector uses the default schema configured for Schema Registry in your Confluent Cloud environment.
Type: string
Default: default
Importance: medium
Input messages
input.data.formatSets the input Kafka record value format. Valid entries are AVRO, JSON_SR, PROTOBUF, JSON or BYTES. Note that you need to have Confluent Cloud Schema Registry configured if using a schema-based message format like AVRO, JSON_SR, and PROTOBUF.
Type: string
Default: JSON
Importance: high
input.key.formatSets the input Kafka record key format. Valid entries are BYTES or STRING.
Type: string
Default: BYTES
Valid Values: BYTES, STRING
Importance: high
How should we connect to your data?
nameSets a name for your connector.
Type: string
Valid Values: A string at most 64 characters long
Importance: high
Kafka Cluster credentials
kafka.auth.modeKafka Authentication mode. It can be one of KAFKA_API_KEY or SERVICE_ACCOUNT. It defaults to KAFKA_API_KEY mode, whenever possible.
Type: string
Valid Values: SERVICE_ACCOUNT, KAFKA_API_KEY
Importance: high
kafka.api.keyKafka API Key. Required when kafka.auth.mode==KAFKA_API_KEY.
Type: password
Importance: high
kafka.service.account.idThe Service Account that will be used to generate the API keys to communicate with Kafka Cluster.
Type: string
Importance: high
kafka.api.secretSecret associated with Kafka API key. Required when kafka.auth.mode==KAFKA_API_KEY.
Type: password
Importance: high
HTTP server details
http.api.urlSpecifies the API endpoint to which connector should write to.
Type: string
Importance: high
request.methodSpecifies the HTTP request method (POST, PUT, PATCH) the connector should use for sending API request.
Type: string
Default: POST
Importance: high
headersHTTP headers to be included in all requests. Individual headers should be separated by the Header Separator
Type: string
Importance: high
header.separatorSeparator character used in headers
Type: string
Importance: high
sensitive.headersSensitive HTTP headers (eg: credentials) to be included in all requests. Individual headers should be separated by the Header Separator
Type: password
Importance: high
behavior.on.null.valuesHow to handle records with a non-null key and a null value (i.e. Kafka tombstone records). Valid options are
ignore,deleteandfailType: string
Default: ignore
Importance: low
HTTP server error handling
behavior.on.errorDescribes the error handling behavior configuration for handling error responses from HTTP requests. Accepted values are
ignoreandfail.Type: string
Default: ignore
Importance: medium
report.errors.asDictates the content of records produced to the error topic. Accepted values are
error_stringandhttp_response. If set toerror_string, the value would be a human readable string describing the failure. The value will include some or all of the following information if available: http response code, reason phrase, submitted payload, url, response content, exception and error message. If set tohttp_response, the value would be the plain response content for the request which failed to write the record. In both modes, any information about the failure will also be included in the error record’s headers.Type: string
Default: error_string
Importance: medium
HTTP server batches
request.body.formatUsed to produce request body in either JSON or String format
Type: string
Default: string
Importance: medium
batch.key.patternPattern used to build the key for a given batch. ${key} and ${topic} can be used to include message attributes here
Type: string
Importance: high
batch.max.sizeThe number of records accumulated in a batch before the HTTP API is invoked
Type: int
Default: 1
Importance: high
batch.prefixPrefix added to record batches. This is applied once at the beginning of the batch of records
Type: string
Importance: high
batch.suffixSuffix added to record batches. This is applied once at the end of the batch of records
Type: string
Importance: high
batch.separatorSeparator for records in a batch
Type: string
Importance: high
batch.json.as.arrayWhether or not to use an array to bundle json records. Only used when request.body.format is set to json. This can be disabled only when batch.max.size is set to 1.
Type: boolean
Importance: high
HTTP server authentication
auth.typeSpecifies the authentication type of the API endpoint. Valid values are
NONE,BASIC,OAUTH2(Client Credentials grant type only).Type: string
Default: NONE
Importance: high
connection.userThe username to be used with an endpoint requiring authentication
Type: string
Importance: high
connection.passwordThe password to be used with an endpoint requiring authentication
Type: password
Importance: high
oauth2.token.urlThe URL to be used for fetching OAuth2 token. Client Credentials is the only supported grant type.
Type: string
Importance: high
oauth2.client.idThe client id used when fetching OAuth2 token
Type: string
Importance: high
oauth2.client.secretThe secret used when fetching OAuth2 token
Type: password
Importance: high
oauth2.token.propertyThe name of the property containing the OAuth2 token returned by the http proxy.
Type: string
Default: access_token
Importance: high
oauth2.client.auth.modeSpecifies how to encode
client_idandclient_secretin the OAuth2 authorization request. If set to ‘header’, the credentials are encoded as an'Authorization: Basic <base-64 encoded client_id:client_secret>'HTTP header. If set to ‘url’, thenclient_idandclient_secretare sent in body as URL encoded parameters.Type: string
Default: header
Importance: low
oauth2.client.scopeThe scope used when fetching OAuth2 token. If empty, this parameter is not set in the authorization request
Type: string
Default: any
Importance: low
oauth2.jwt.enabledWhether to generate and add JWT token to request. If selected, JWT token will be added as ‘jwt_token’ request param
Type: boolean
Default: false
Importance: medium
oauth2.jwt.keystore.pathKeystore containing private key to use to sign JWT.
Type: password
Default: [hidden]
Importance: medium
oauth2.jwt.keystore.passwordPassword to access keystore
Type: password
Default: [hidden]
Importance: medium
oauth2.jwt.keystore.typeJWT keystore type
Type: string
Default: JKS
Importance: medium
oauth2.jwt.claimsetJSON containing JWT claims
Type: string
Default: “”
Importance: medium
oauth2.client.headersHTTP headers to be included in the OAuth2 client endpoint. Individual headers should be separated by OAuth2 Client Headers Separator
Type: string
Importance: low
oauth2.client.header.separatorSeparator character used in OAuth2 Client Headers
Type: string
Importance: low
HTTP server retries
retry.on.status.codesThe HTTP error codes to retry on. Comma-separated list of codes or range of codes to retry on. Ranges are specified with start and optional end code. Range boundaries are inclusive. For instance, ‘400-’ includes all codes greater than or equal to 400. ‘400-500’ includes codes from 400 to 500, including 500. Multiple ranges and single codes can be specified together to achieve fine grained control over retry behavior. For example, ‘404,408,500-’ will retry on 404 NOT FOUND, 408 REQUEST TIMEOUT, and all 5xx error codes
Type: string
Default: 400-
Importance: medium
max.retriesThe maximum number of times to retry on errors before failing the task
Type: int
Default: 3
Importance: medium
retry.backoff.msThe initial duration in milliseconds to wait following an error before a retry attempt is made. Subsequent backoff attempts will be exponentially larger than the first duration. Note that this value is the initial backoff before retrying. After that, the connector will retry using exponential jitter. Jitter adds randomness to the exponential backoff algorithm to prevent synchronized retries.
Type: int
Default: 3000 (3 seconds)
Valid Values: [100,…]
Importance: medium
http.connect.timeout.msThe time in milliseconds to wait for a connection to be established
Type: int
Default: 30000 (30 seconds)
Importance: medium
http.request.timeout.msThe time in milliseconds to wait for a request response from the server
Type: int
Default: 30000 (30 seconds)
Importance: medium
retry.backoff.policyThe backoff policy to use in terms of retry - CONSTANT_VALUE or EXPONENTIAL_WITH_JITTER
Type: string
Default: EXPONENTIAL_WITH_JITTER
Importance: medium
HTTP server regular expressions
regex.patternsRegular expression patterns used for replacements in the message sent to the HTTP service. Multiple regular expression patterns can be specified, but must be separated by
regex.separatorType: string
Importance: medium
regex.replacementsRegex replacements to use with the patterns in
regex.patterns. Multiple replacements can be specified, but must be separated byregex.separator.${key}and${topic}can be used here.Type: string
Importance: medium
regex.separatorSeparator character used in
regex.patternsandregex.replacementsproperty.Type: string
Importance: medium
HTTP server SSL
https.ssl.key.passwordThe password of the private key in the key store file. This is optional for client
Type: password
Importance: high
https.ssl.keystorefileThe key store containing server certificate. Only required if using https
Type: password
Default: [hidden]
Importance: low
https.ssl.keystore.passwordThe store password for the key store file. This is optional for a client and is only needed if https.ssl.keystore.location is configured
Type: password
Importance: high
https.ssl.truststorefileThe trust store containing server CA certificate. Only required if using https
Type: password
Default: [hidden]
Importance: high
https.ssl.truststore.passwordThe trust store password containing server CA certificate. Only required if using https
Type: password
Importance: high
https.ssl.protocolThe protocol to use for SSL connections
Type: string
Default: TLSv1.3
Importance: medium
https.host.verifier.enabledTrue if SSL host verification should be enabled
Type: boolean
Default: true
Importance: medium
Consumer configuration
max.poll.interval.msThe maximum delay between subsequent consume requests to Kafka. This configuration property may be used to improve the performance of the connector, if the connector cannot send records to the sink system. Defaults to 300000 milliseconds (5 minutes).
Type: long
Default: 300000 (5 minutes)
Valid Values: [60000,…,1800000] for non-dedicated clusters and [60000,…] for dedicated clusters
Importance: low
max.poll.recordsThe maximum number of records to consume from Kafka in a single request. This configuration property may be used to improve the performance of the connector, if the connector cannot send records to the sink system. Defaults to 500 records.
Type: long
Default: 500
Valid Values: [1,…,500] for non-dedicated clusters and [1,…] for dedicated clusters
Importance: low
Number of tasks for this connector
tasks.maxMaximum number of tasks for the connector.
Type: int
Valid Values: [1,…]
Importance: high
Additional Configs
key.converter.use.schema.guidThe schema GUID to use for deserialization when using ConfigSchemaIdDeserializer. This allows you to specify a fixed schema GUID to be used for deserializing message keys. Only applicable when key.converter.key.schema.id.deserializer is set to ConfigSchemaIdDeserializer.
Type: string
Importance: low
key.converter.use.schema.idThe schema ID to use for deserialization when using ConfigSchemaIdDeserializer. This allows you to specify a fixed schema ID to be used for deserializing message keys. Only applicable when key.converter.key.schema.id.deserializer is set to ConfigSchemaIdDeserializer.
Type: int
Importance: low
value.converter.connect.meta.dataAllow the Connect converter to add its metadata to the output schema. Applicable for Avro Converters.
Type: boolean
Importance: low
value.converter.use.schema.guidThe schema GUID to use for deserialization when using ConfigSchemaIdDeserializer. This allows you to specify a fixed schema GUID to be used for deserializing message values. Only applicable when value.converter.value.schema.id.deserializer is set to ConfigSchemaIdDeserializer.
Type: string
Importance: low
value.converter.use.schema.idThe schema ID to use for deserialization when using ConfigSchemaIdDeserializer. This allows you to specify a fixed schema ID to be used for deserializing message values. Only applicable when value.converter.value.schema.id.deserializer is set to ConfigSchemaIdDeserializer.
Type: int
Importance: low
errors.toleranceUse this property if you would like to configure the connector’s error handling behavior. WARNING: This property should be used with CAUTION for SOURCE CONNECTORS as it may lead to dataloss. If you set this property to ‘all’, the connector will not fail on errant records, but will instead log them (and send to DLQ for Sink Connectors) and continue processing. If you set this property to ‘none’, the connector task will fail on errant records.
Type: string
Default: all
Importance: low
key.converter.key.schema.id.deserializerThe class name of the schema ID deserializer for keys. This is used to deserialize schema IDs from the message headers.
Type: string
Default: io.confluent.kafka.serializers.schema.id.DualSchemaIdDeserializer
Importance: low
key.converter.key.subject.name.strategyHow to construct the subject name for key schema registration.
Type: string
Default: TopicNameStrategy
Importance: low
value.converter.decimal.formatSpecify the JSON/JSON_SR serialization format for Connect DECIMAL logical type values with two allowed literals:
BASE64 to serialize DECIMAL logical types as base64 encoded binary data and
NUMERIC to serialize Connect DECIMAL logical type values in JSON/JSON_SR as a number representing the decimal value.
Type: string
Default: BASE64
Importance: low
value.converter.ignore.default.for.nullablesWhen set to true, this property ensures that the corresponding record in Kafka is NULL, instead of showing the default column value. Applicable for AVRO,PROTOBUF and JSON_SR Converters.
Type: boolean
Default: false
Importance: low
value.converter.reference.subject.name.strategySet the subject reference name strategy for value. Valid entries are DefaultReferenceSubjectNameStrategy or QualifiedReferenceSubjectNameStrategy. Note that the subject reference name strategy can be selected only for PROTOBUF format with the default strategy being DefaultReferenceSubjectNameStrategy.
Type: string
Default: DefaultReferenceSubjectNameStrategy
Importance: low
value.converter.replace.null.with.defaultWhether to replace fields that have a default value and that are null to the default value. When set to true, the default value is used, otherwise null is used. Applicable for JSON Converter.
Type: boolean
Default: true
Importance: low
value.converter.schemas.enableInclude schemas within each of the serialized values. Input messages must contain schema and payload fields and may not contain additional fields. For plain JSON data, set this to false. Applicable for JSON Converter.
Type: boolean
Default: false
Importance: low
value.converter.value.schema.id.deserializerThe class name of the schema ID deserializer for values. This is used to deserialize schema IDs from the message headers.
Type: string
Default: io.confluent.kafka.serializers.schema.id.DualSchemaIdDeserializer
Importance: low
value.converter.value.subject.name.strategyDetermines how to construct the subject name under which the value schema is registered with Schema Registry.
Type: string
Default: TopicNameStrategy
Importance: low
Auto-restart policy
auto.restart.on.user.errorEnable connector to automatically restart on user-actionable errors.
Type: boolean
Default: true
Importance: medium
Frequently asked questions
Find answers to frequently asked questions about the HTTP Sink connector for Confluent Cloud.
Performance and consumer lag
Why do I see consumer lag or Commit of offsets timing out errors?
This occurs when the connector takes longer than max.poll.interval.ms to process the records specified in max.poll.records. When this timeout is exceeded, the task’s consumer is removed from the consumer group, causing the connector to reprocess messages and potentially send duplicates to the endpoint.
Common Causes:
Slow endpoint response: The HTTP endpoint takes too long to process each request.
No batching: Records are sent individually (POST by POST) rather than in batches, causing each request to be processed separately.
Endpoint load: The target endpoint is under heavy load and cannot respond quickly.
Resolution:
Tune consumer properties: Increase
max.poll.interval.msto give the connector more time to process records. For fully-managed connectors, this is configured asconsumer.max.poll.interval.msin the connector settings.Reduce batch size: Decrease
max.poll.recordsto process fewer records per poll. For fully-managed connectors, this is configured asconsumer.max.poll.records.Enable batching: If your endpoint supports arrays, configure
batch.max.sizeto batch multiple records in a single HTTP request.Test endpoint performance: Use tools like Postman or curl to measure how long your endpoint takes to respond to requests.
Why am I seeing duplicate messages at my endpoint?
The connector guarantees at least once delivery. If the connector fails to commit offsets before a timeout or rebalance occurs, it reprocesses messages from the last committed offset, resulting in duplicates at the endpoint.
Solution: Follow the recommendations in the consumer lag section above to ensure offsets are committed successfully.
OAuth and authentication
Why does the connector not automatically refresh the OAuth2 token?
The HTTP Sink connector refreshes OAuth2 tokens only when it receives an HTTP 401 (Unauthorized) response and retries are enabled. By default, retry.on.status.codes is set to "400-" (all error codes >= 400), which includes 401.
Issue: If you override retry.on.status.codes and exclude 401, token refresh does not work.
Resolution:
Ensure your retry.on.status.codes configuration includes 401. For example:
"retry.on.status.codes": "401,403,429,500-"
Why do I get invalid_scope error with OAuth2 authentication?
This error occurs when the oauth2.client.scope is rejected by your token endpoint.
Causes:
The supplied scope is invalid for your endpoint.
If no scope is defined, the connector defaults to
"any", which may be rejected.
Resolution:
Verify if your token endpoint requires a specific scope.
If no scope is required, set an empty string using the Confluent Cloud API or CLI:
"oauth2.client.scope": ""
Or using the CLI:
confluent connect cluster update lcc-<id> --config oauth2.client.scope=""
Batching and data processing
Why is the connector not batching my records even though I set batch.max.size?
The connector does not batch requests when messages contain different Kafka header values. This is because Kafka headers are passed as HTTP headers with each request, and messages with different headers cannot be batched together.
Solution:
Ensure all messages in your topic have the same Kafka headers if you need batching.
If headers vary, consider whether your endpoint truly requires them, or if you can use SMTs to remove or standardize headers.
Why does batching not work when I use template parameters in the URL?
When you use template parameters beyond ${topic} and ${key} (for example, ${order.id} or ${customerId}), each record can result in a unique URL. Batching is automatically disabled in this scenario because each request must go to a potentially different URL.
Solution: This is expected behavior. If you need batching, use a static URL or limit template parameters to only ${topic} and ${key}.
Error handling and monitoring
How do I check if records are being sent to the error topic?
For fully-managed connectors, the error topic is automatically created with the naming pattern error-lcc-<id> where <id> is your connector ID.
Monitoring:
In the Confluent Cloud Console, navigate to your cluster’s Topics view.
Look for the topic named
error-lcc-<your-connector-id>.Check if the topic has any recent production activity or retained bytes.
Similarly, check the success topic
success-lcc-<your-connector-id>for successfully sent messages.
Headers: Each message in the error or success topic includes headers showing the original record details:
input_record_offset: Offset of the original messageinput_record_timestamp: Timestamp of the original messageinput_record_partition: Partition of the original messageinput_record_topic: Topic name of the original message
How do I troubleshoot missing data at my endpoint?
Checklist:
Check error topic: Verify if records were routed to
error-lcc-<id>instead of being sent successfully.Review connector logs: Look for HTTP error codes, connection issues, or authentication failures.
Test endpoint manually: Use curl or Postman to verify your endpoint is reachable and accepting requests.
Check for duplicates: Verify if missing data might actually be present but with duplicates due to offset commit issues.
Template parameters and URL construction
Why does the connector fail when a field referenced in the URL does not exist?
The connector throws a runtime exception if any field referenced in the HTTP API URL (http.api.url) does not exist in the Kafka record.
Solution:
Ensure all fields used in template parameters exist in every record.
Use data validation or SMTs to ensure required fields are present before records reach the connector.
Networking and connectivity
Why do I see UnknownHostException or connection errors?
This error indicates the connector cannot resolve or reach the target hostname.
Common Causes:
DNS resolution failure: The hostname cannot be resolved.
Firewall restrictions: The endpoint is blocked by firewall rules.
Network type mismatch: For
PRIVATE_LINKorPCCclusters, outbound traffic may not be configured.
Resolution:
Verify hostname: Ensure the
http.api.urlhostname is correct and publicly resolvable (or resolvable from Confluent Cloud if using PrivateLink).Check network configuration: Confirm your Confluent Cloud cluster’s network type and any required PrivateLink or VPC peering configurations.
Allowlist IPs: Ensure Confluent Cloud egress IPs for your region are allowlisted in your firewall or API gateway.
Test connectivity: Use curl or similar tools from a location with similar network access to verify the endpoint is reachable.
For more information on network configuration, see Prerequisites.
Next Steps
For an example that shows fully-managed Confluent Cloud connectors in action with Confluent Cloud for Apache Flink, see the Cloud ETL Demo. This example also shows how to use Confluent CLI to manage your resources in Confluent Cloud.