Egress PrivateLink Endpoints Setup Guide: Self-Managed Services on AWS for Confluent Cloud
Egress PrivateLink can be used to privately access resources residing within on-premises environments from Confluent Cloud.
This topic presents the steps for setting up Egress PrivateLink Endpoints for self-managed services to enable fully managed connectors in Confluent Cloud using AWS PrivateLink.
Refer to AWS documentation for step-by-step setup and associated limitations.
Prerequisites
In Confluent Cloud, one of the following cluster types was set up with the specified network resource:
A Dedicated cluster with a Confluent Cloud network
For the steps to create a Confluent Cloud network, see Create a Confluent Cloud network. The Connection type of the network needs to be “PrivateLink Access”.
A Enterprise cluster with a network gateway
For the steps to create a gateway, see Create a gateway for outbound connectivity in Confluent Cloud.
Clear/disable the Enforce inbound rules on PrivateLink traffic setting in AWS.
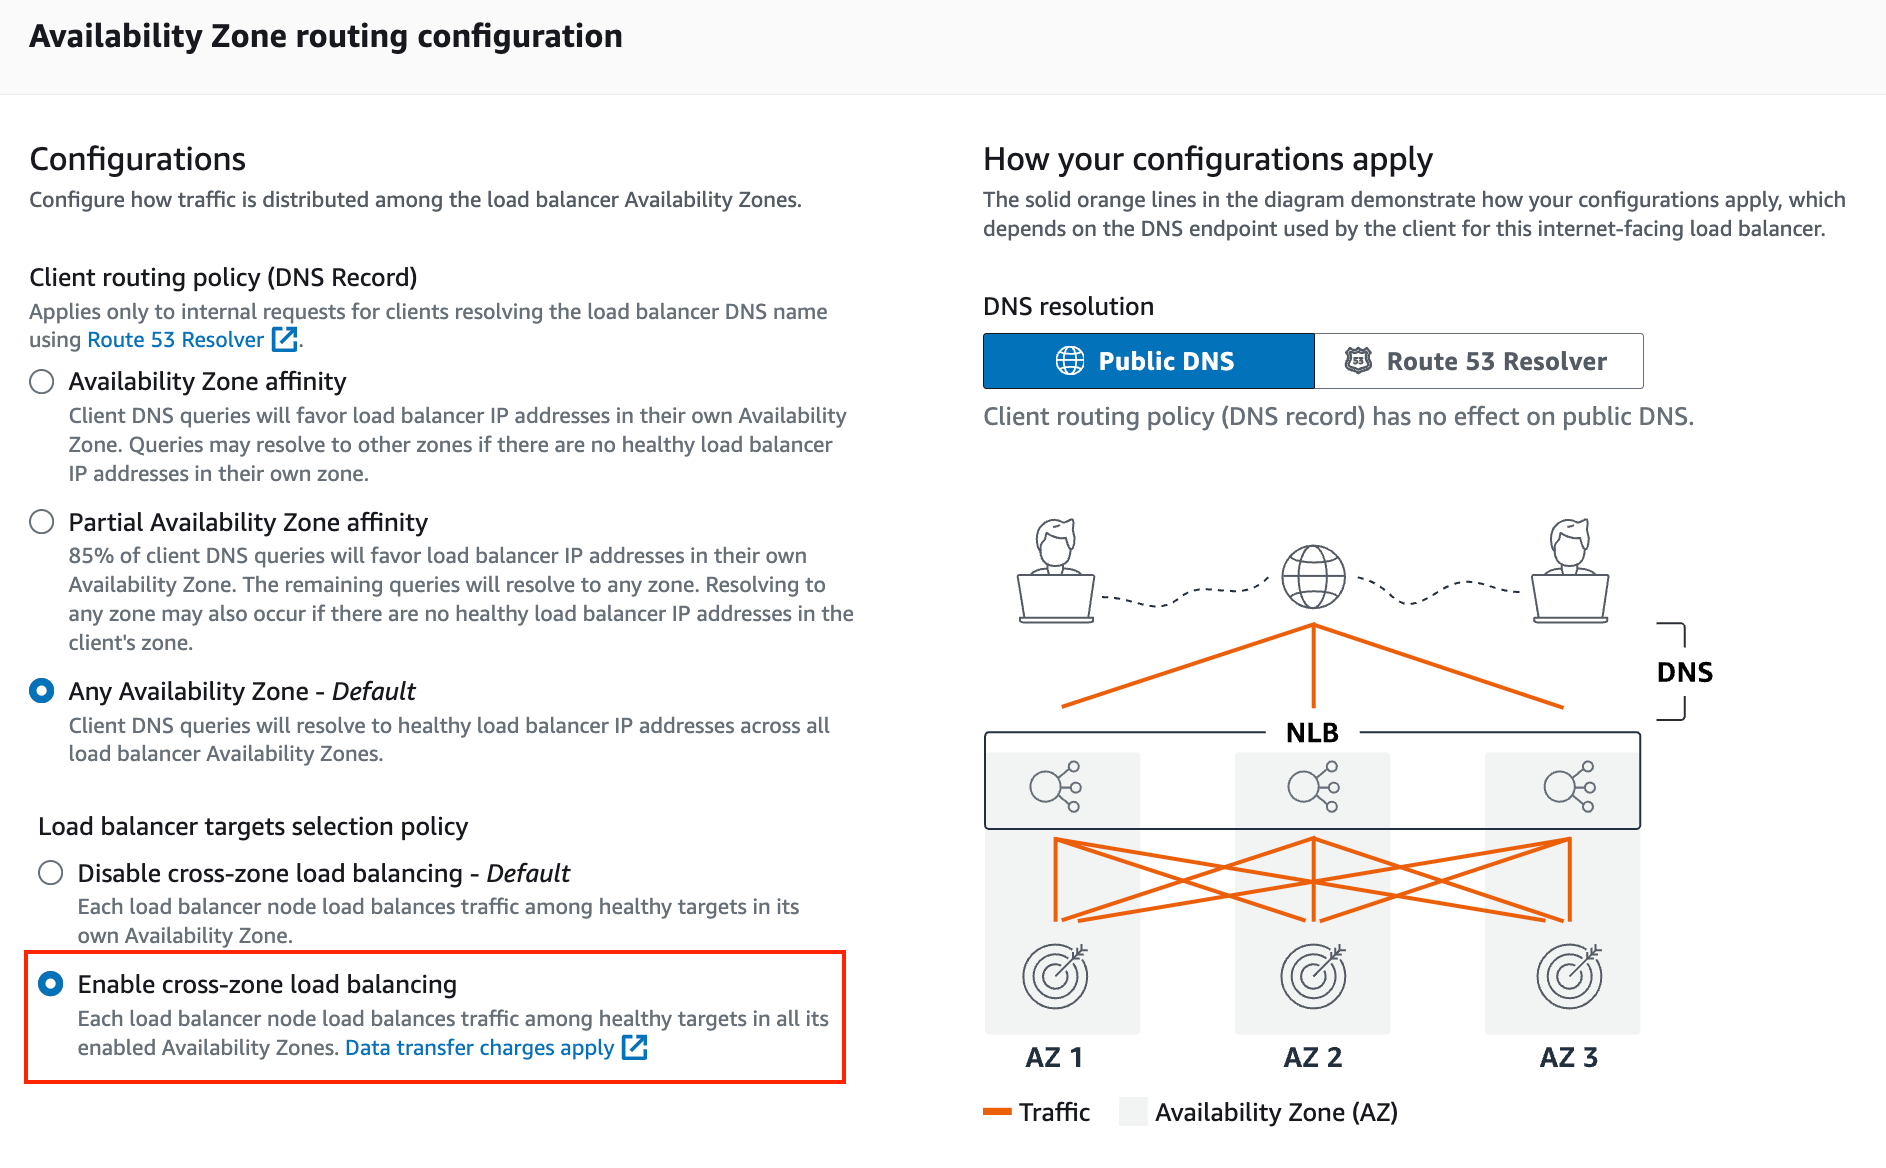
If the service endpoint does not advertise availability zones that overlap with the Confluent Cloud’s endpoint, the cross-zone load balancing option should be enabled in AWS.
For the steps to enable cross-zone load balancing, see Issue: Connector is unable to connect to the target system even with the Egress PrivateLink Endpoint in the Ready state.
Step 1. Identify the IP address(es) of the self-managed services
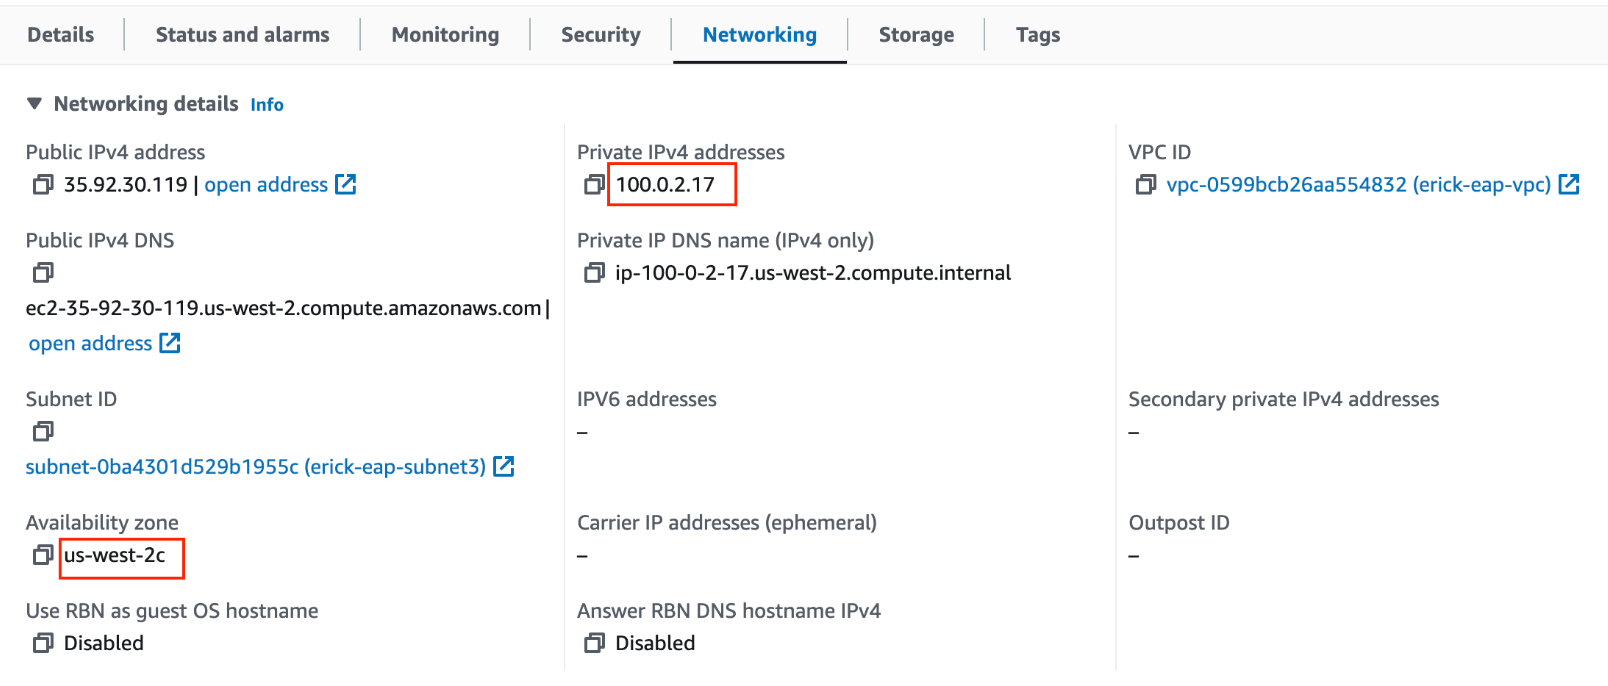
Go to the instance page and note down the private IP address and the zone of the instance.
The following are example entries for an EC2 instance.
Step 2. Create target groups
If your self-managed service uses multiple ports, create a separate target group for each required port. Repeat the following steps for every port that your service requires.
For example, Couchbase commonly requires the following ports: 8091, 8092, 8093, 8094, 8095, 11210.
In the AWS EC2 Dashboard, browse to Load Balancing → Target Groups.
Click Create target group.
Specify the group details:
Choose a target type: IP addresses
Target group name: The name of the target group
Protocol: TCP
Port: The port number for this specific service port
VPC: VPC where service is hosted
Health check protocol: TCP
Click Next.
Register the targets.
Network: Select Other private IP address.
Enter a private IP address: The private IP address of the instance captured above.
Ports: check that the port number is correct.
Click Include as pending below.
Review targets.
Ensure that proper private IP address, the correct port number, and the zone are listed for your service.
Click Create target group.
Step 3. Create a load balancer
In the AWS EC2 Dashboard, browse to Load Balancing → Load Balancers.
Click Create load balancer.
Click Create to create a Network Load Balancer.
Specify the Basic configuration settings.
Load balancer name: The name of your load load balancer.
Scheme: Internal
IP address type: IPv4
Specify the Network mapping settings.
VPC: Select the VPC where you want to deploy the load balancer.
Mappings: Select the associated subnets.
IPv4 address: Leave the Private IPv4 address field unchanged.
In the Security groups section, ensure that you have applied an inbound rule for the required port numbers.
Specify the Listeners and routing settings.
Add a listener for each required service port and associate it with the corresponding target group created in Step 2. Create target groups.
Protocol: TCP
Port: The port number of the service
Forward to: The target group created for this port in Step 2. Create target groups.
Click Create load balancer.
Wait for the load balancer status to change to “Active”.
Step 4. Create an endpoint service
In the AWS VPC Dashboard, browse to Virtual private cloud → Endpoint services.
Click Create endpoint service.
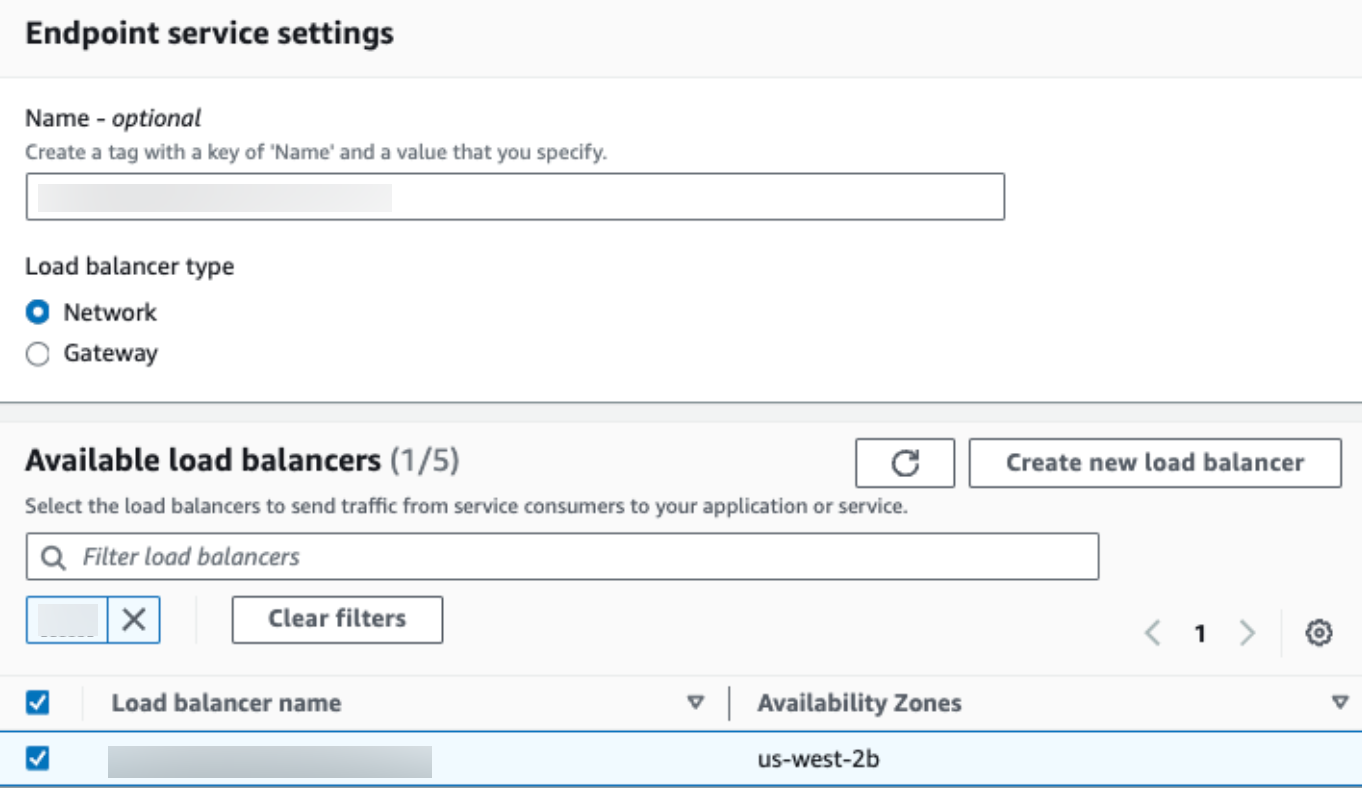
Specify the Endpoint service settings.
Name: name endpoint service
Load balancer type: Network
In the Specify Available load balancers section, select the network load balancer created in Step 3.
Specify the Additional settings.
Require acceptance for endpoint: Acceptance required
Supported IP address types: IPv4
Click Create.
Note the Service name of the created endpoint service.

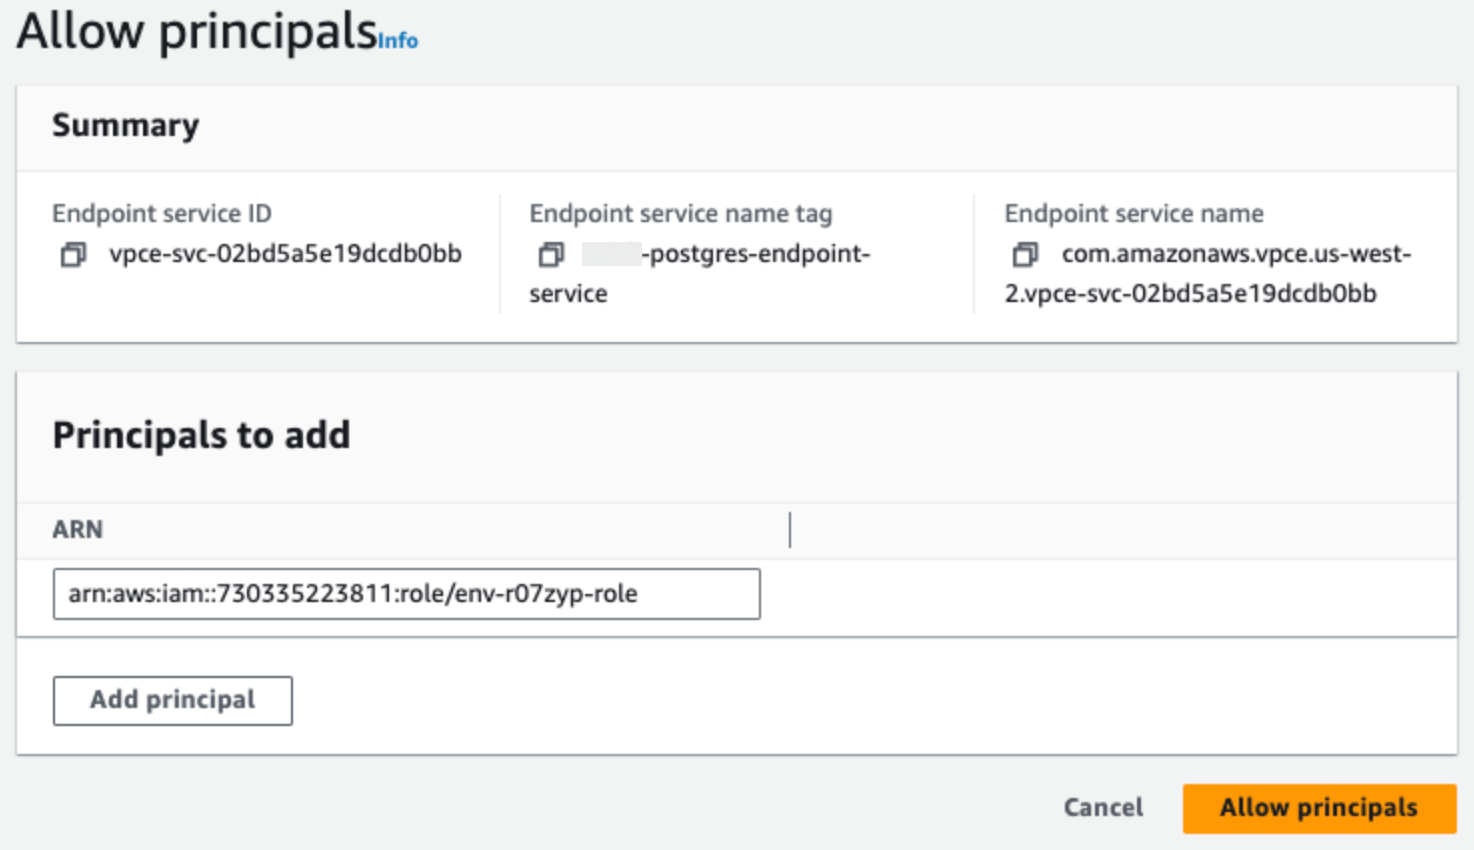
Step 5. Allow Confluent principal
Step 6. Create an Egress PrivateLink Endpoint
In the Network management page or tab of the desired Confluent Cloud environment, click the Confluent Cloud network you want to add the PrivateLink Endpoint to. The Connection Type of the network needs to be “PrivateLink Access”.
Click Create endpoint in the Egress connections tab.
Click the service you want to connect to. Select Other if you do not see the specific service.
Follow the guided steps to specify the field values, including:
Name: Name of the PrivateLink Endpoint.
PrivateLink service name: The name of the PrivateLink service.
The service name is the one noted above, in the last step of the Step 4. Create an endpoint service section.
Create an endpoint with high availability: Check the box if you wish to deploy an endpoint with High Availability.
Endpoints deployed with high availability have network interfaces deployed in multiple availability zones.
Click Create to create the PrivateLink Endpoint.
If there are additional steps for the specific target service, follow the prompt to complete the tasks, and then click Finish.
In the Network management page or tab of the desired Confluent Cloud environment, click the For serverless products tab.
Click the gateway to which you want to add the PrivateLink Endpoint.
In the Access points tab, click Add access point.
Click the service you want to connect to. Select Other if you do not see the specific service.
Specific services are listed based on the cloud provider for the gateway.
Follow the guided steps to specify the field values, including:
Access point name: Name of the PrivateLink Endpoint.
Create an endpoint with high availability: Check the box if you wish to deploy an endpoint with High Availability.
Endpoints deployed with high availability have network interfaces deployed in multiple availability zones.
PrivateLink service name: The name of the PrivateLink service.
The service name is the one noted above, in the last step of the Step 4. Create an endpoint service section.
Click Create access point to create the PrivateLink Endpoint.
If there are additional steps for the specific target service, follow the prompt to complete the tasks, and click Finish.
Step 7. Accept the endpoint connection request
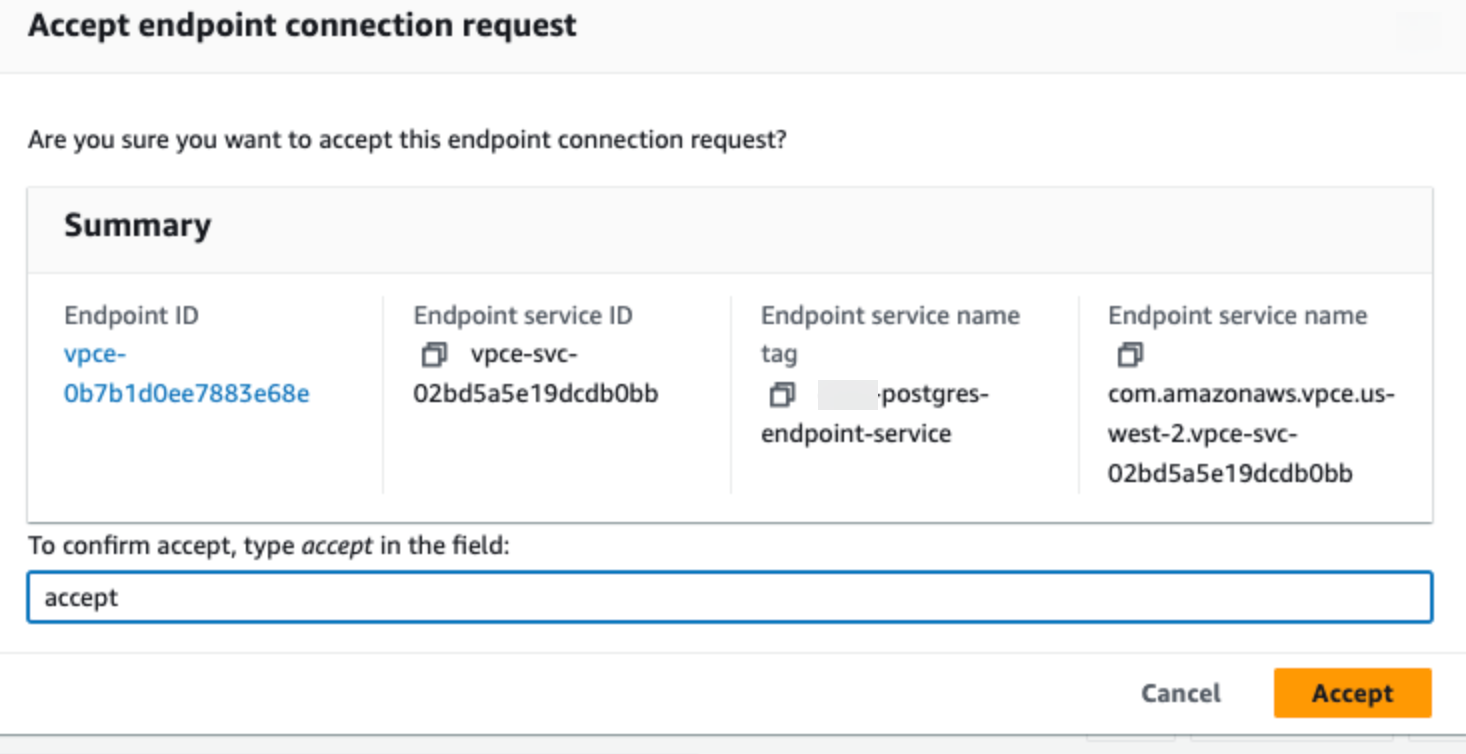
When the PrivateLink Endpoint status changes to “Pending accept”, accept the connection request.
Step 8. (Optional) Create the DNS record
When the PrivateLink Endpoint status transitions to “Ready”, click Create DNS record in the DNS tab, or click Create Record on the associated PrivateLink Endpoint tile.
Specify the following:
Access point: The Egress PrivateLink Endpoint you created in the Step 6. Create an Egress PrivateLink Endpoint section.
Domain: Associated service endpoint (
<service>.<region>.amazonaws.com).
Click Save to create the record.
In the Network Management tab of your environment, click the For serverless products tab, and click the Confluent Cloud gateway you want to add the DNS record to.
In the DNS tab, click Create DNS record.
Specify the following field values:
Access point: The Egress PrivateLink Endpoint you created in the Step 6. Create an Egress PrivateLink Endpoint section.
Domain: Associated service endpoint (
<service>.<region>.amazonaws.com).
Click Save.
Step 9. Create the Connector
When the DNS Record status transitions to “Ready”, you can create the connector.
For the steps to create the connector, refer to the connector-specific documentation that is listed for your specific connector in Supported connectors.
If no DNS record was created, you will need to use the VPC endpoint DNS name for the connector endpoint configuration (i.e. hostname).

Troubleshooting
Issue: Connector is unable to connect to the target system even with the Egress PrivateLink Endpoint in the Ready state
Possible cause: There could be a zonal mismatch.
Solution: Enable cross-zone load balancing on your load balancer and try again.

