
Egress Private Service Connect Endpoint Setup: Snowflake on Google Cloud for Confluent Cloud
The Snowflake Sink connector for Confluent Cloud supports Google Cloud Private Service Connect through Egress Private Service Connect Endpoints. Use this guide to configure the connector and set up the required endpoints.
For details, see Google Cloud Private Service Connect and Snowflake.
Prerequisites
The following are the prerequisites for configuring the Snowflake Sink connector with an Egress Private Service Connect:
A Confluent Cloud Dedicated cluster was set up and is running with Google Cloud Private Service Connect.
A Snowflake instance was created to sink data into and is running within the same region and Google Cloud as the Confluent Cloud cluster.
A database and a schema were created in Snowflake to sink data into.
Note
For added security, you can set up a Network rule within Snowflake to restrict incoming traffic to the specific VPC Endpoint set up as part of Egress Private Service Connect Endpoints.
Step 1. Enable Private Service Connect on the Snowflake account and allow Confluent Cloud Project ID
Obtain the Confluent Cloud Project ID.
In the Confluent Cloud Console, go to Environment → Network, and select the associated Private Service Connect network you want to use.
Click + Create endpoint in the Egress connections tab.
Click the service you want to connect to, specifically, Snowflake.
Make a note of Confluent’s Google Cloud Account ID associated with the Private Service Connect Endpoint.
Open a support case with Snowflake and request enablement of Private Service Connect and request Confluent Cloud Project ID to be allowed.
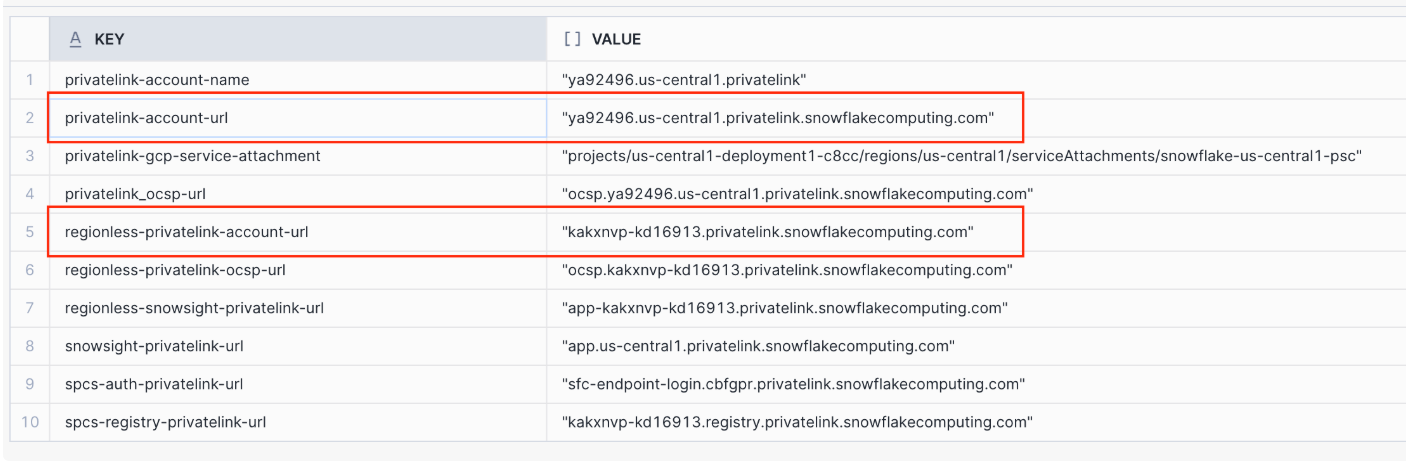
Step 2. Obtain the required Snowflake Private Link information
When the Egress Endpoint status becomes “Ready”, get the following values that you need to create an Egress Private Service Connect Endpoint and DNS records in the next sections:
Service Attachment URI (
private-gcp-service-attachment)Private link account URL (
privatelink-account-url)Regionless private link account URL (
regionless-privatelink-account-url)
Run the following SQL query within Snowflake to retrieve the values:
USE ROLE ACCOUNTADMIN;

SELECT KEY, VALUE
FROM TABLE(FLATTEN(INPUT=>PARSE_JSON(SYSTEM$GET_PRIVATELINK_CONFIG())));
In the output, note the private-gcp-service-attachment, privatelink-account-url, and regionless-privatelink-account-url values.
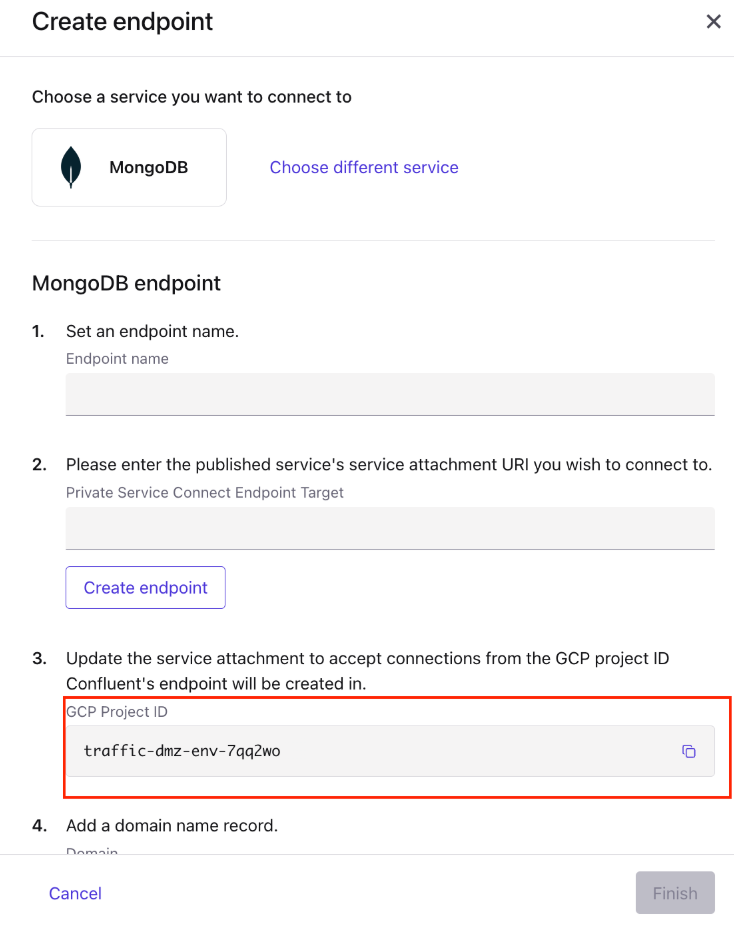
Step 3. Create an Egress Private Service Connect Endpoint
In Confluent Cloud, in the Network Management tab of the desired environment, click the Confluent Cloud network to which you want to add the Private Service Connect Endpoint. The Connection Type of the network needs to be “Private Service Connect Access”.
Click + Create endpoint in the Egress connections tab.
Click the service you want to connect to, specifically, Snowflake.
Follow the guided steps to specify the field values, including:
Name: Name of the Egress Private Service Connect Endpoint.
Private Service Connect Endpoint Target: Google Cloud Service Attachment URI that you retrieve in Step 2. Obtain the required Snowflake Private Link information.
Click Create endpoint.
If there are additional steps for the specific target service, follow the prompt to complete the tasks, and then click Finish.
Step 4. Create a DNS record
Create DNS records associated with your Confluent Cloud Egress Endpoint.
Create a DNS record for Snowflake’s
privatelink-account-urlby clicking Create record on the associated Egress Endpoint section.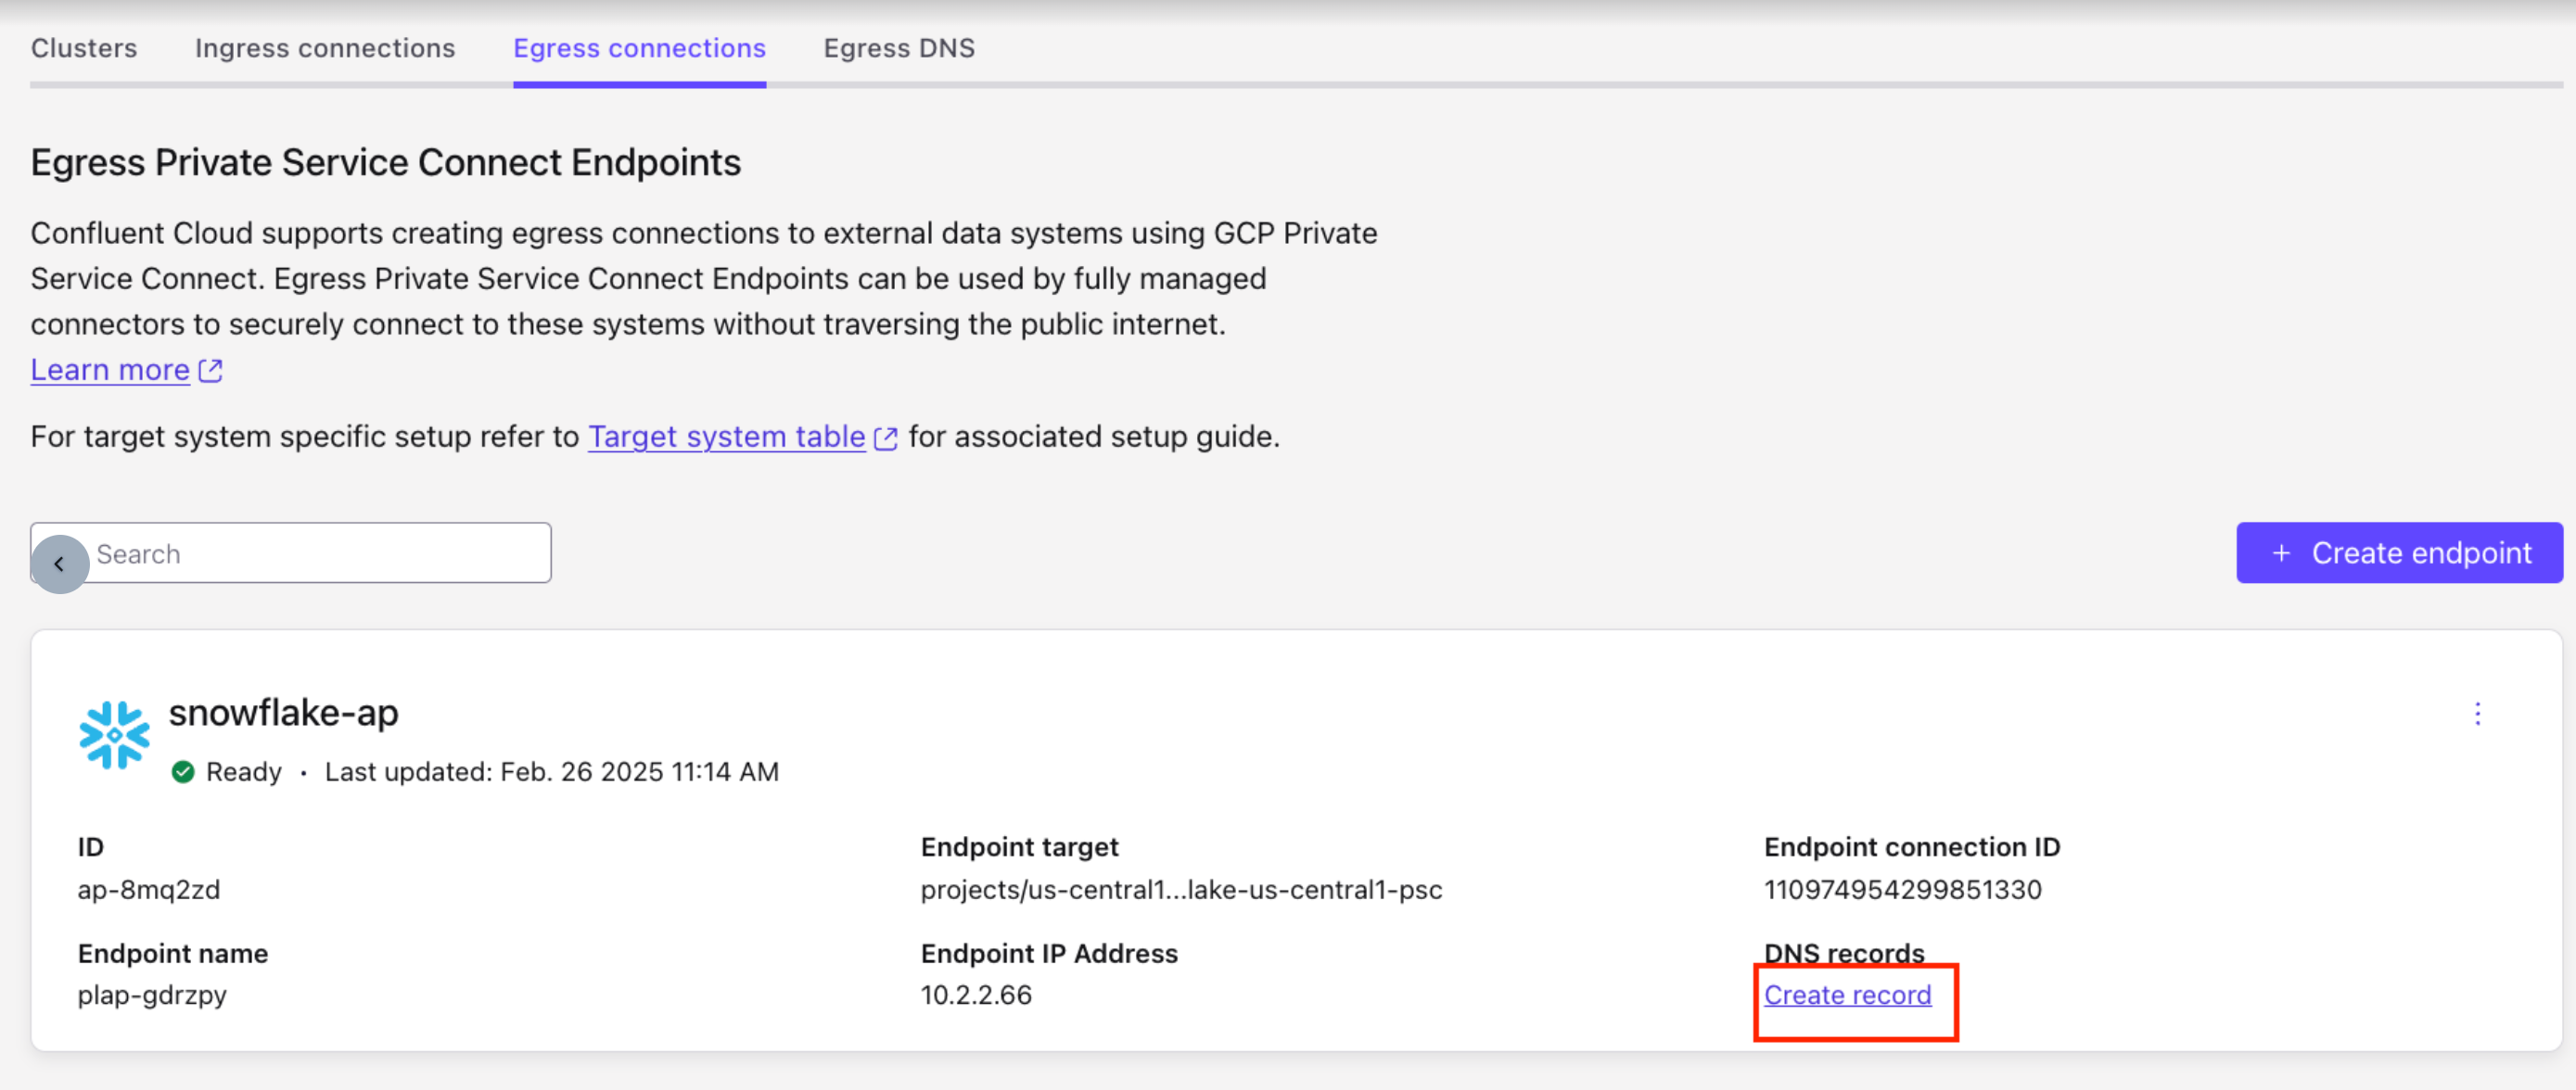
Specify the value:
Egress endpoint: Verify that the correct value is shown.
Domain: Specify the domain value (
privatelink-account-url) retrieved in Step 2. Obtain the required Snowflake Private Link information.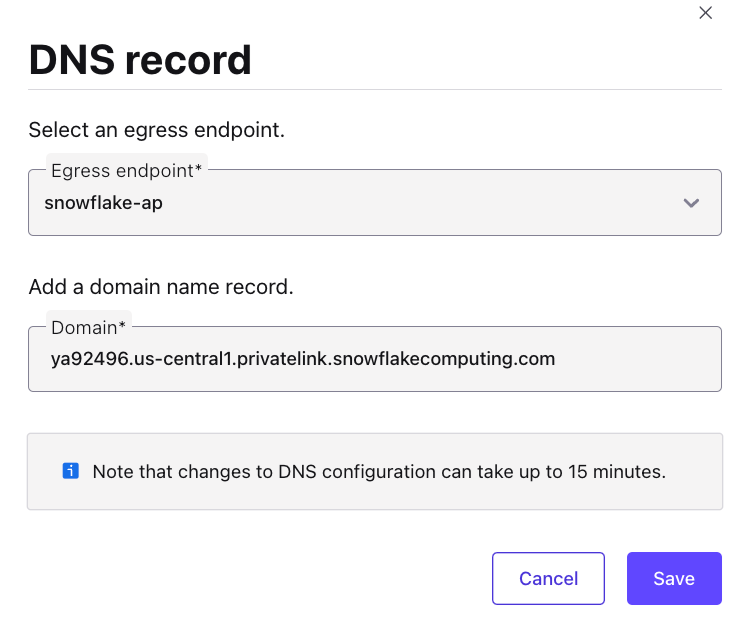
Click Save.
Create an additional DNS record for Snowflake’s
regionless-privatelink-account-url(retrieved in Step 2. Obtain the required Snowflake Private Link information) by clicking Create DNS record.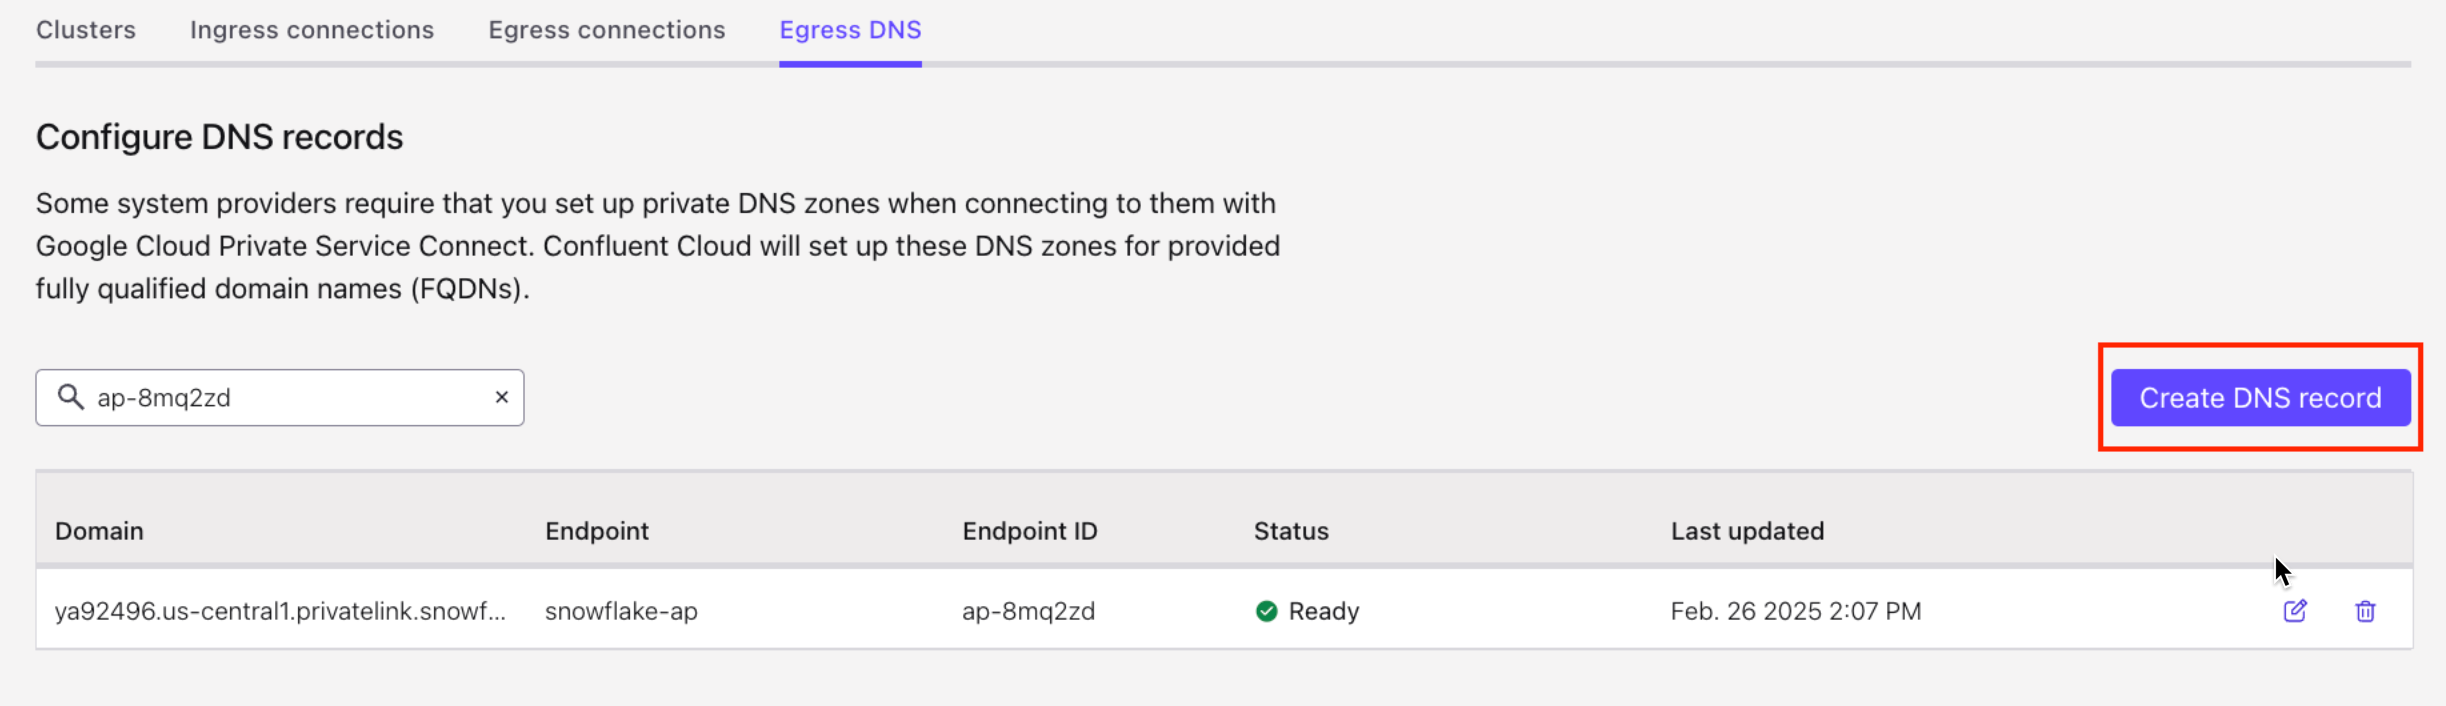
Step 5. Create the Snowflake Sink connector
Specify the authentication details for Snowflake.
For the Connection URL, specify the Snowflake’s private endpoint URL in one of the two possible formats:
Account Locator URL (Legacy):
https://<account_name>.<region_id>.privatelink.snowflakecomputing.comAccount Name URL :
https://<org_name>-<account_name>.privatelink.snowflakecomputing.com

Follow the steps to create the sink connector in Confluent Cloud.