
Egress PrivateLink Endpoint Setup: Snowflake on AWS for Confluent Cloud
The Snowflake Sink connector for Confluent Cloud supports AWS PrivateLink connectivity through Egress PrivateLink Endpoints. Use this guide to configure the connector and set up the required endpoints.
Prerequisites
The following is a list of prerequisites for configuring the Snowflake Sink connector with an Egress PrivateLink Endpoint:
In Confluent Cloud, one of the following cluster types was set up with the specified network resource:
A Dedicated cluster with a Confluent Cloud network
For the steps to create a Confluent Cloud network, see Create a Confluent Cloud network. The Connection type of the network needs to be “PrivateLink Access”.
A Enterprise cluster with a network gateway
For the steps to create a gateway, see Create a gateway for outbound connectivity in Confluent Cloud.
A source topic was created to sink data into the Snowflake database.
Snowflake instance was created to sink data into and is running within the same region and cloud as the Confluent Cloud cluster.
A database and a schema were created in Snowflake to sink data into.
Snowflake imposes restrictions on which DNS hostnames can be used to connect. Be sure to use the hostnames mentioned in AWS PrivateLink and Snowflake.
Note
For added security, you can set up a Network rule within Snowflake to restrict incoming traffic to the specific VPC Endpoint setup as part of Egress PrivateLink Endpoints.
Step 1. Request Snowflake to allowlist Confluent’s AWS account
In the Confluent Cloud Console, go to Environment → Network, and select the associated Privatelink network you want to use.
In the Egress PrivateLink Endpoints tab, make note of Confluent’s AWS Account ID associated with the PrivateLink Endpoint.
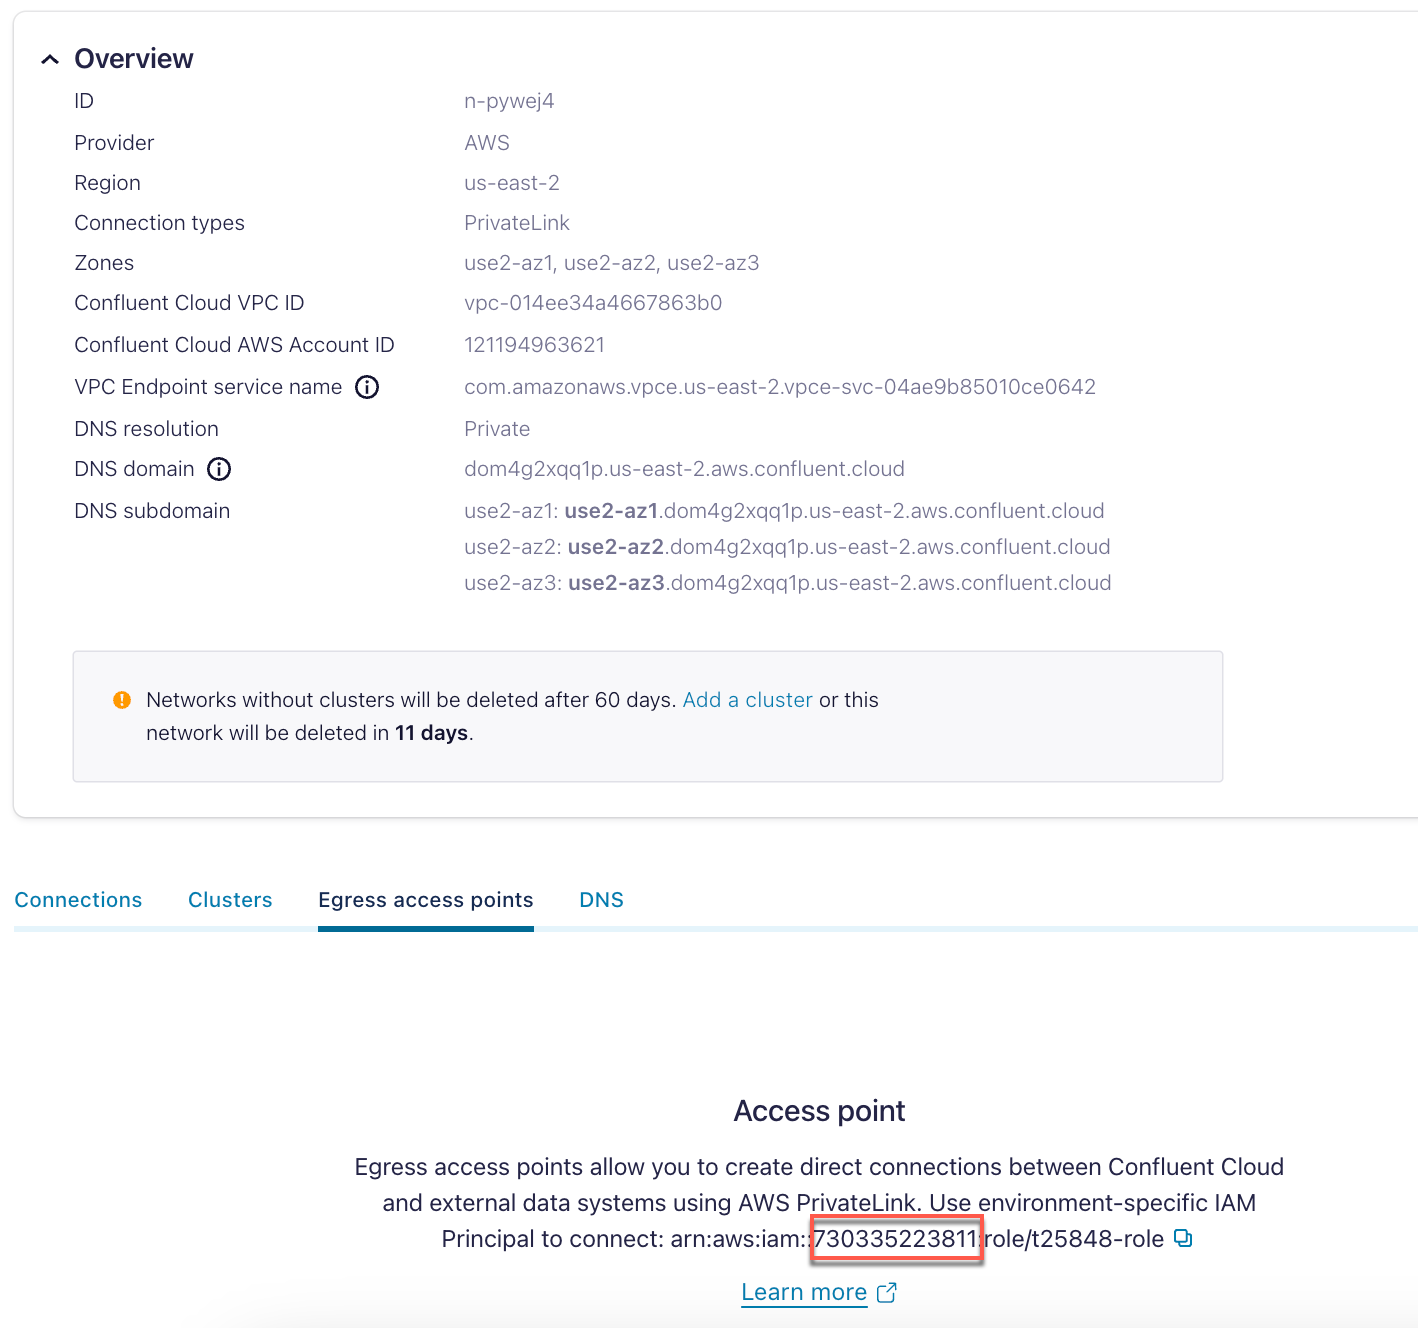
Open a support case with Snowflake with the following information to request that Confluent’s AWS Account ID be allowlisted for private connectivity.
Your Snowflake Account URL.
Confluent’s AWS Account ID associated with the Egress PrivateLink Endpoint. You retrieved this in the previous step.
Wait to receive confirmation from Snowflake that Confluent’s AWS Account ID has been allowlisted before proceeding.
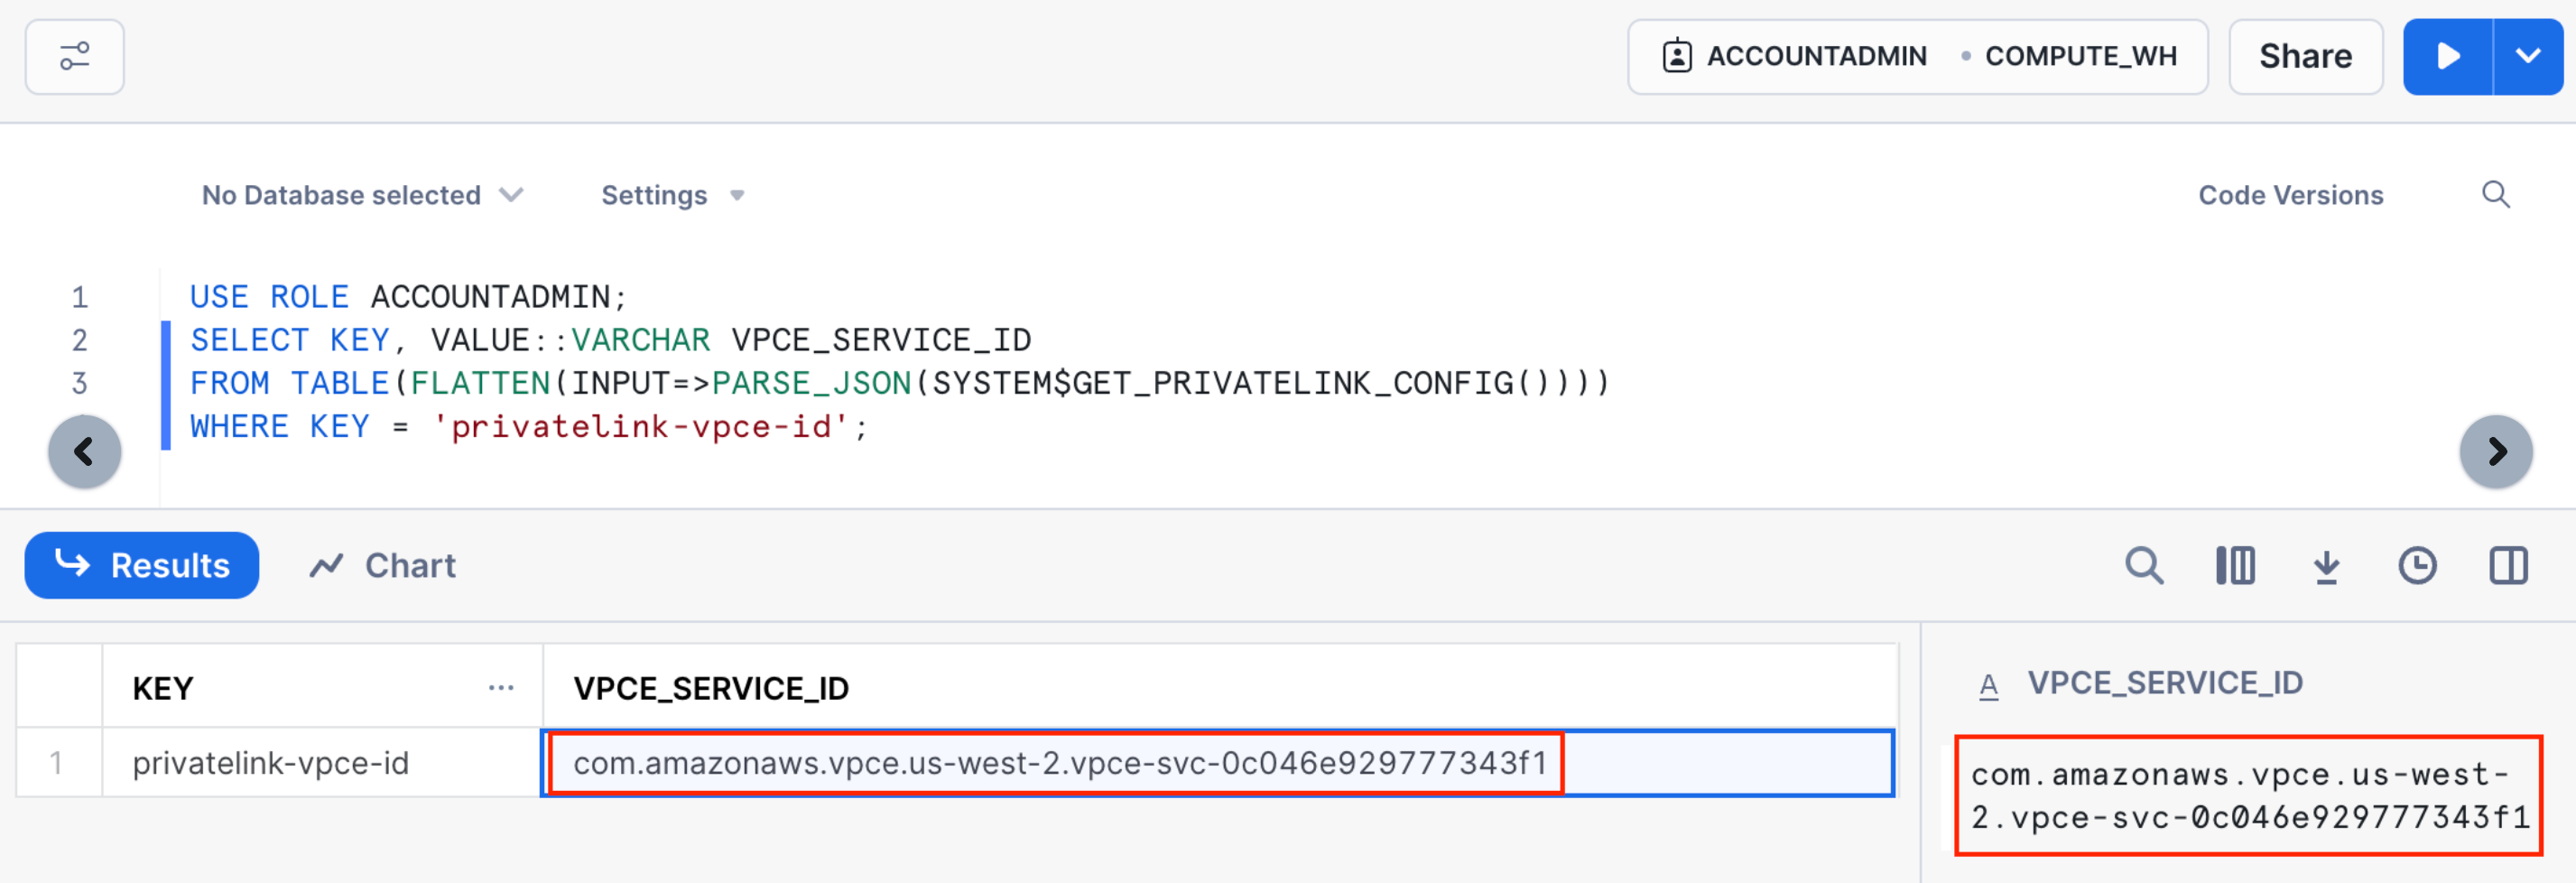
Step 2. Obtain the Snowflake Private Link Service ID
To obtain the Service ID associated with your Snowflake instance, execute the following statement from within your Snowflake account and make note of the value of privatelink-vpce-id:
USE ROLE ACCOUNTADMIN;

SELECT KEY, VALUE::VARCHAR VPCE_SERVICE_ID

FROM TABLE(FLATTEN(INPUT=>PARSE_JSON(SYSTEM$GET_PRIVATELINK_CONFIG())))
WHERE KEY = 'privatelink-vpce-id';
Step 3. Create an Egress PrivateLink Endpoint
In the Network management page or tab of the desired Confluent Cloud environment, click the Confluent Cloud network you want to add the PrivateLink Endpoint to. The Connection Type of the network needs to be “PrivateLink Access”.
Click Create endpoint in the Egress connections tab.
Click the service you want to connect to, specifically, Snowflake.
Follow the guided steps to specify the field values, including:
Name: Name of the PrivateLink Endpoint.
PrivateLink service name: The name of the PrivateLink service you retrieved in Step 2. Obtain the Snowflake Private Link Service ID.
Create an endpoint with high availability: Check the box if you wish to deploy an endpoint with High Availability.
Endpoints deployed with high availability have network interfaces deployed in multiple availability zones.
Click Create to create the PrivateLink Endpoint.
If there are additional steps for the specific target service, follow the prompt to complete the tasks, and then click Finish.
In the Network management page or tab of the desired Confluent Cloud environment, click the For serverless products tab.
Click the gateway to which you want to add the PrivateLink Endpoint.
In the Access points tab, click Add access point.
Click the service you want to connect to. Select Other if you do not see the specific service.
Specific services are listed based on the cloud provider for the gateway.
Follow the guided steps to specify the field values, including:
Access point name: Name of the PrivateLink Endpoint.
Create an endpoint with high availability: Check the box if you wish to deploy an endpoint with High Availability.
Endpoints deployed with high availability have network interfaces deployed in multiple availability zones.
PrivateLink service name: The name of the PrivateLink service you retrieved in Step 2. Obtain the Snowflake Private Link Service ID.
Click Create access point to create the PrivateLink Endpoint.
If there are additional steps for the specific target service, follow the prompt to complete the tasks, and click Finish.
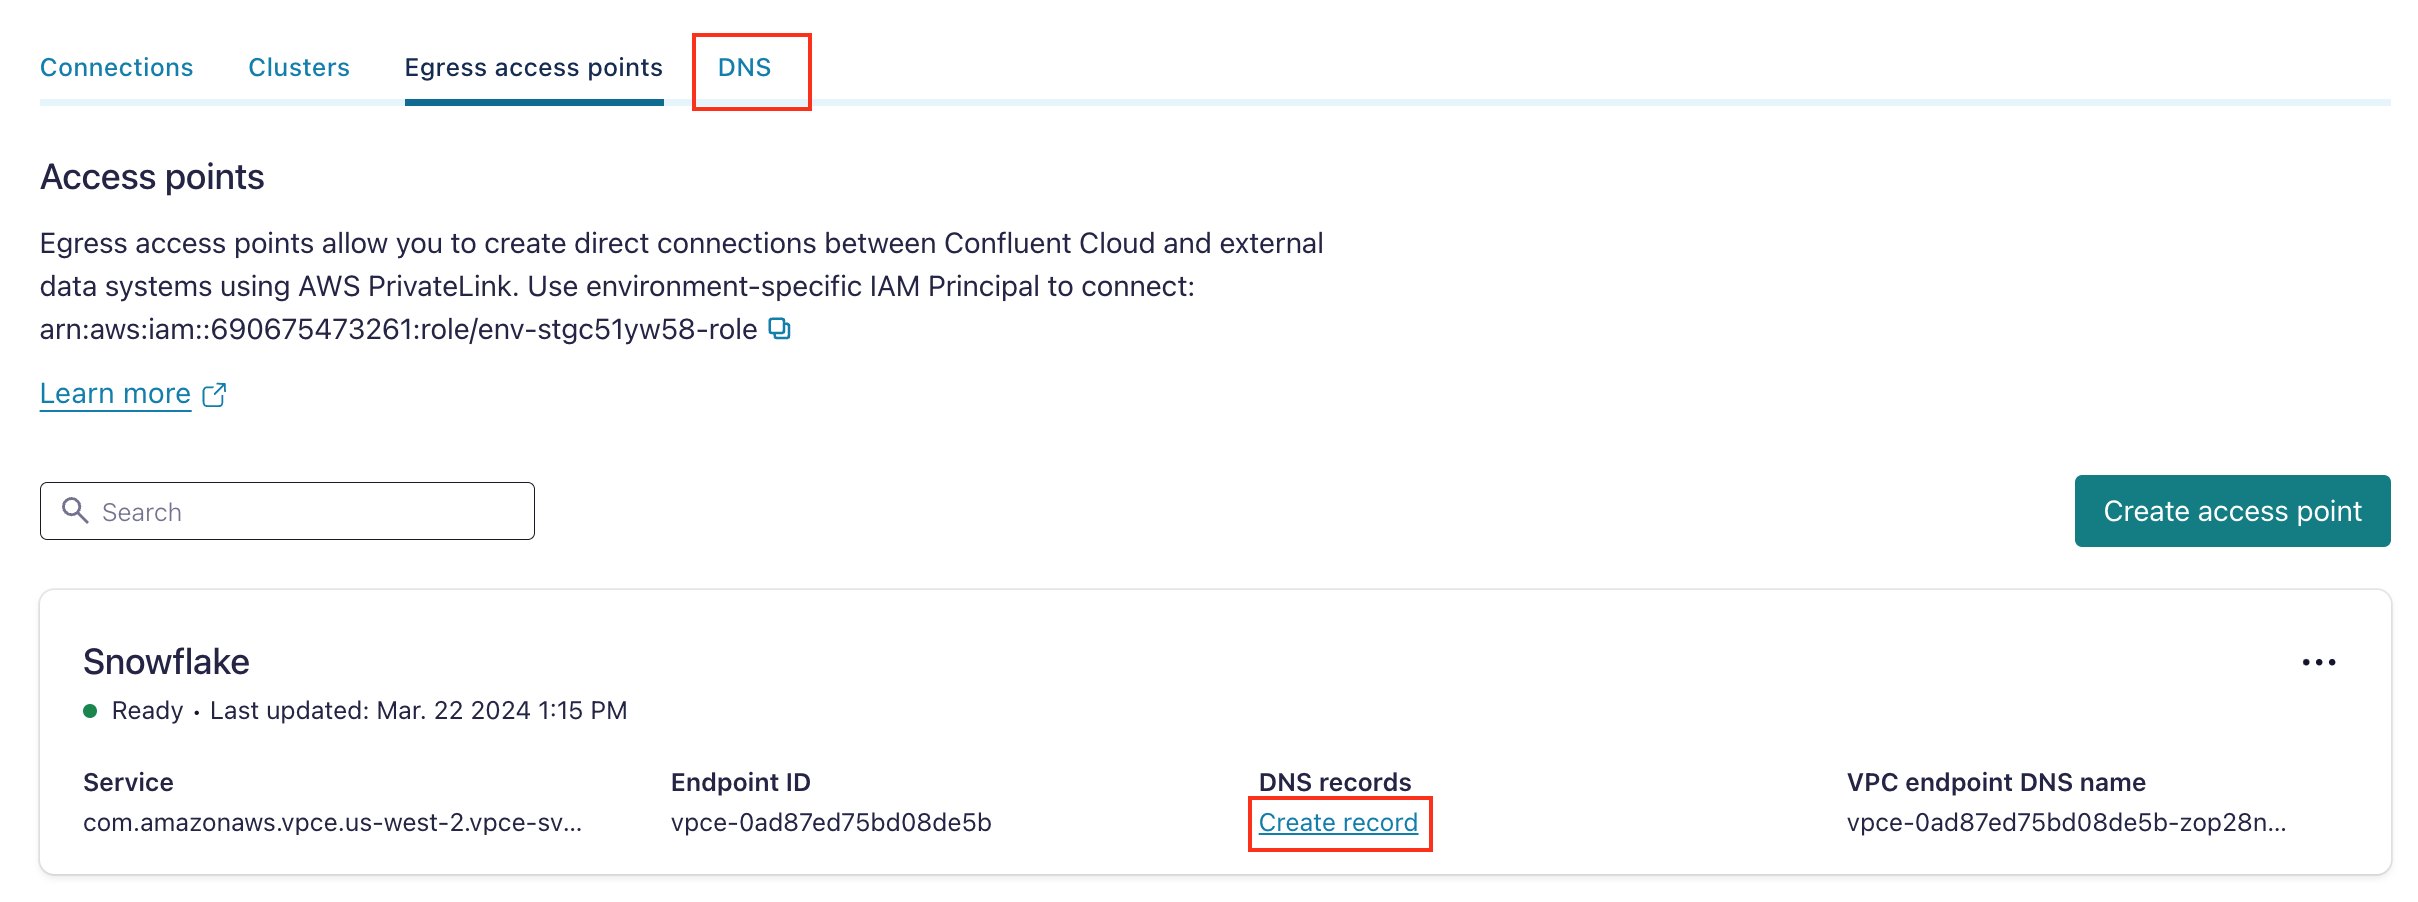
Step 4. Create a DNS record
When the PrivateLink Endpoint status transitions to “Ready”, in the DNS tab, click Create record on the associated PrivateLink Endpoint.
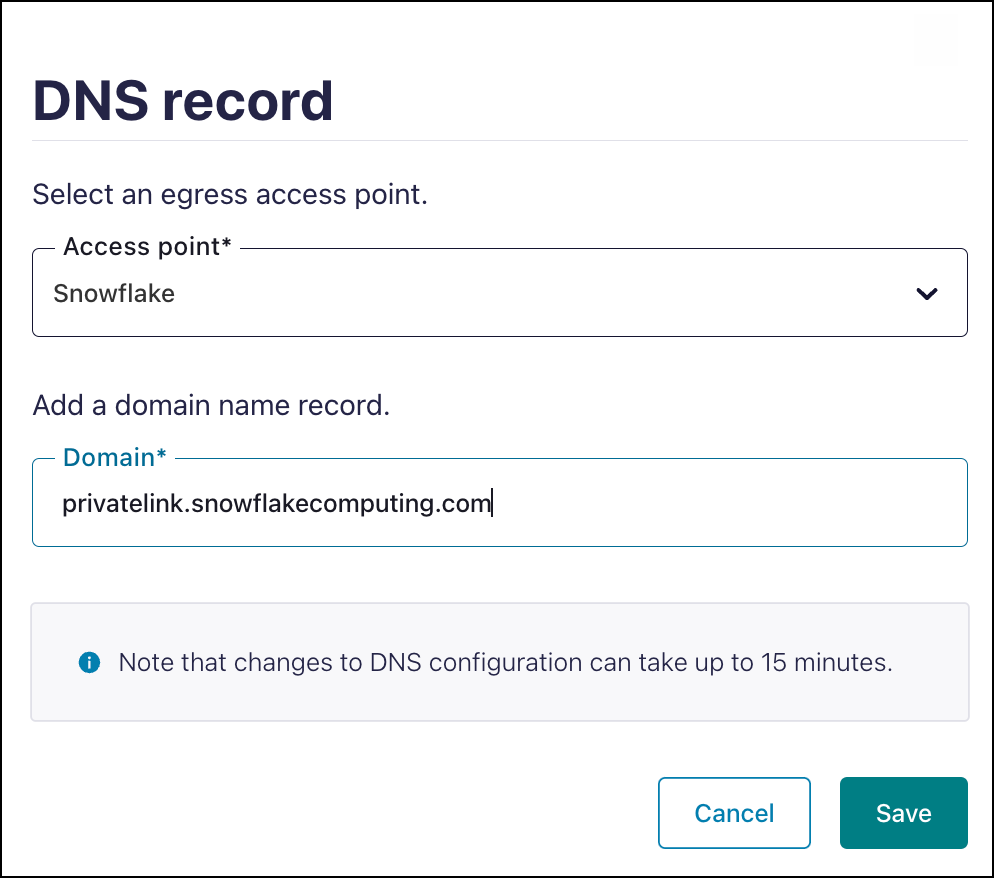
Specify the following, and click Save.
Access point: Select the PrivateLink Endpoint you created above in Step 3. Create an Egress PrivateLink Endpoint.
Domain:
privatelink.snowflakecomputing.com
In the Network Management tab of your environment, click the For serverless products tab, and click the Confluent Cloud gateway you want to add the DNS record to.
In the DNS tab, click Create DNS record.
Specify the following field values:
Access point: The Access Point ID you created in Step 3. Create an Egress PrivateLink Endpoint.
Domain:
privatelink.snowflakecomputing.com
Click Save.
Step 5. Create the Snowflake Sink connector
Specify the authentication details for Snowflake.
For the Connection URL, specify Snowflake’s private endpoint URL (
https://<org_name>-<account_name>.privatelink.snowflakecomputing.com).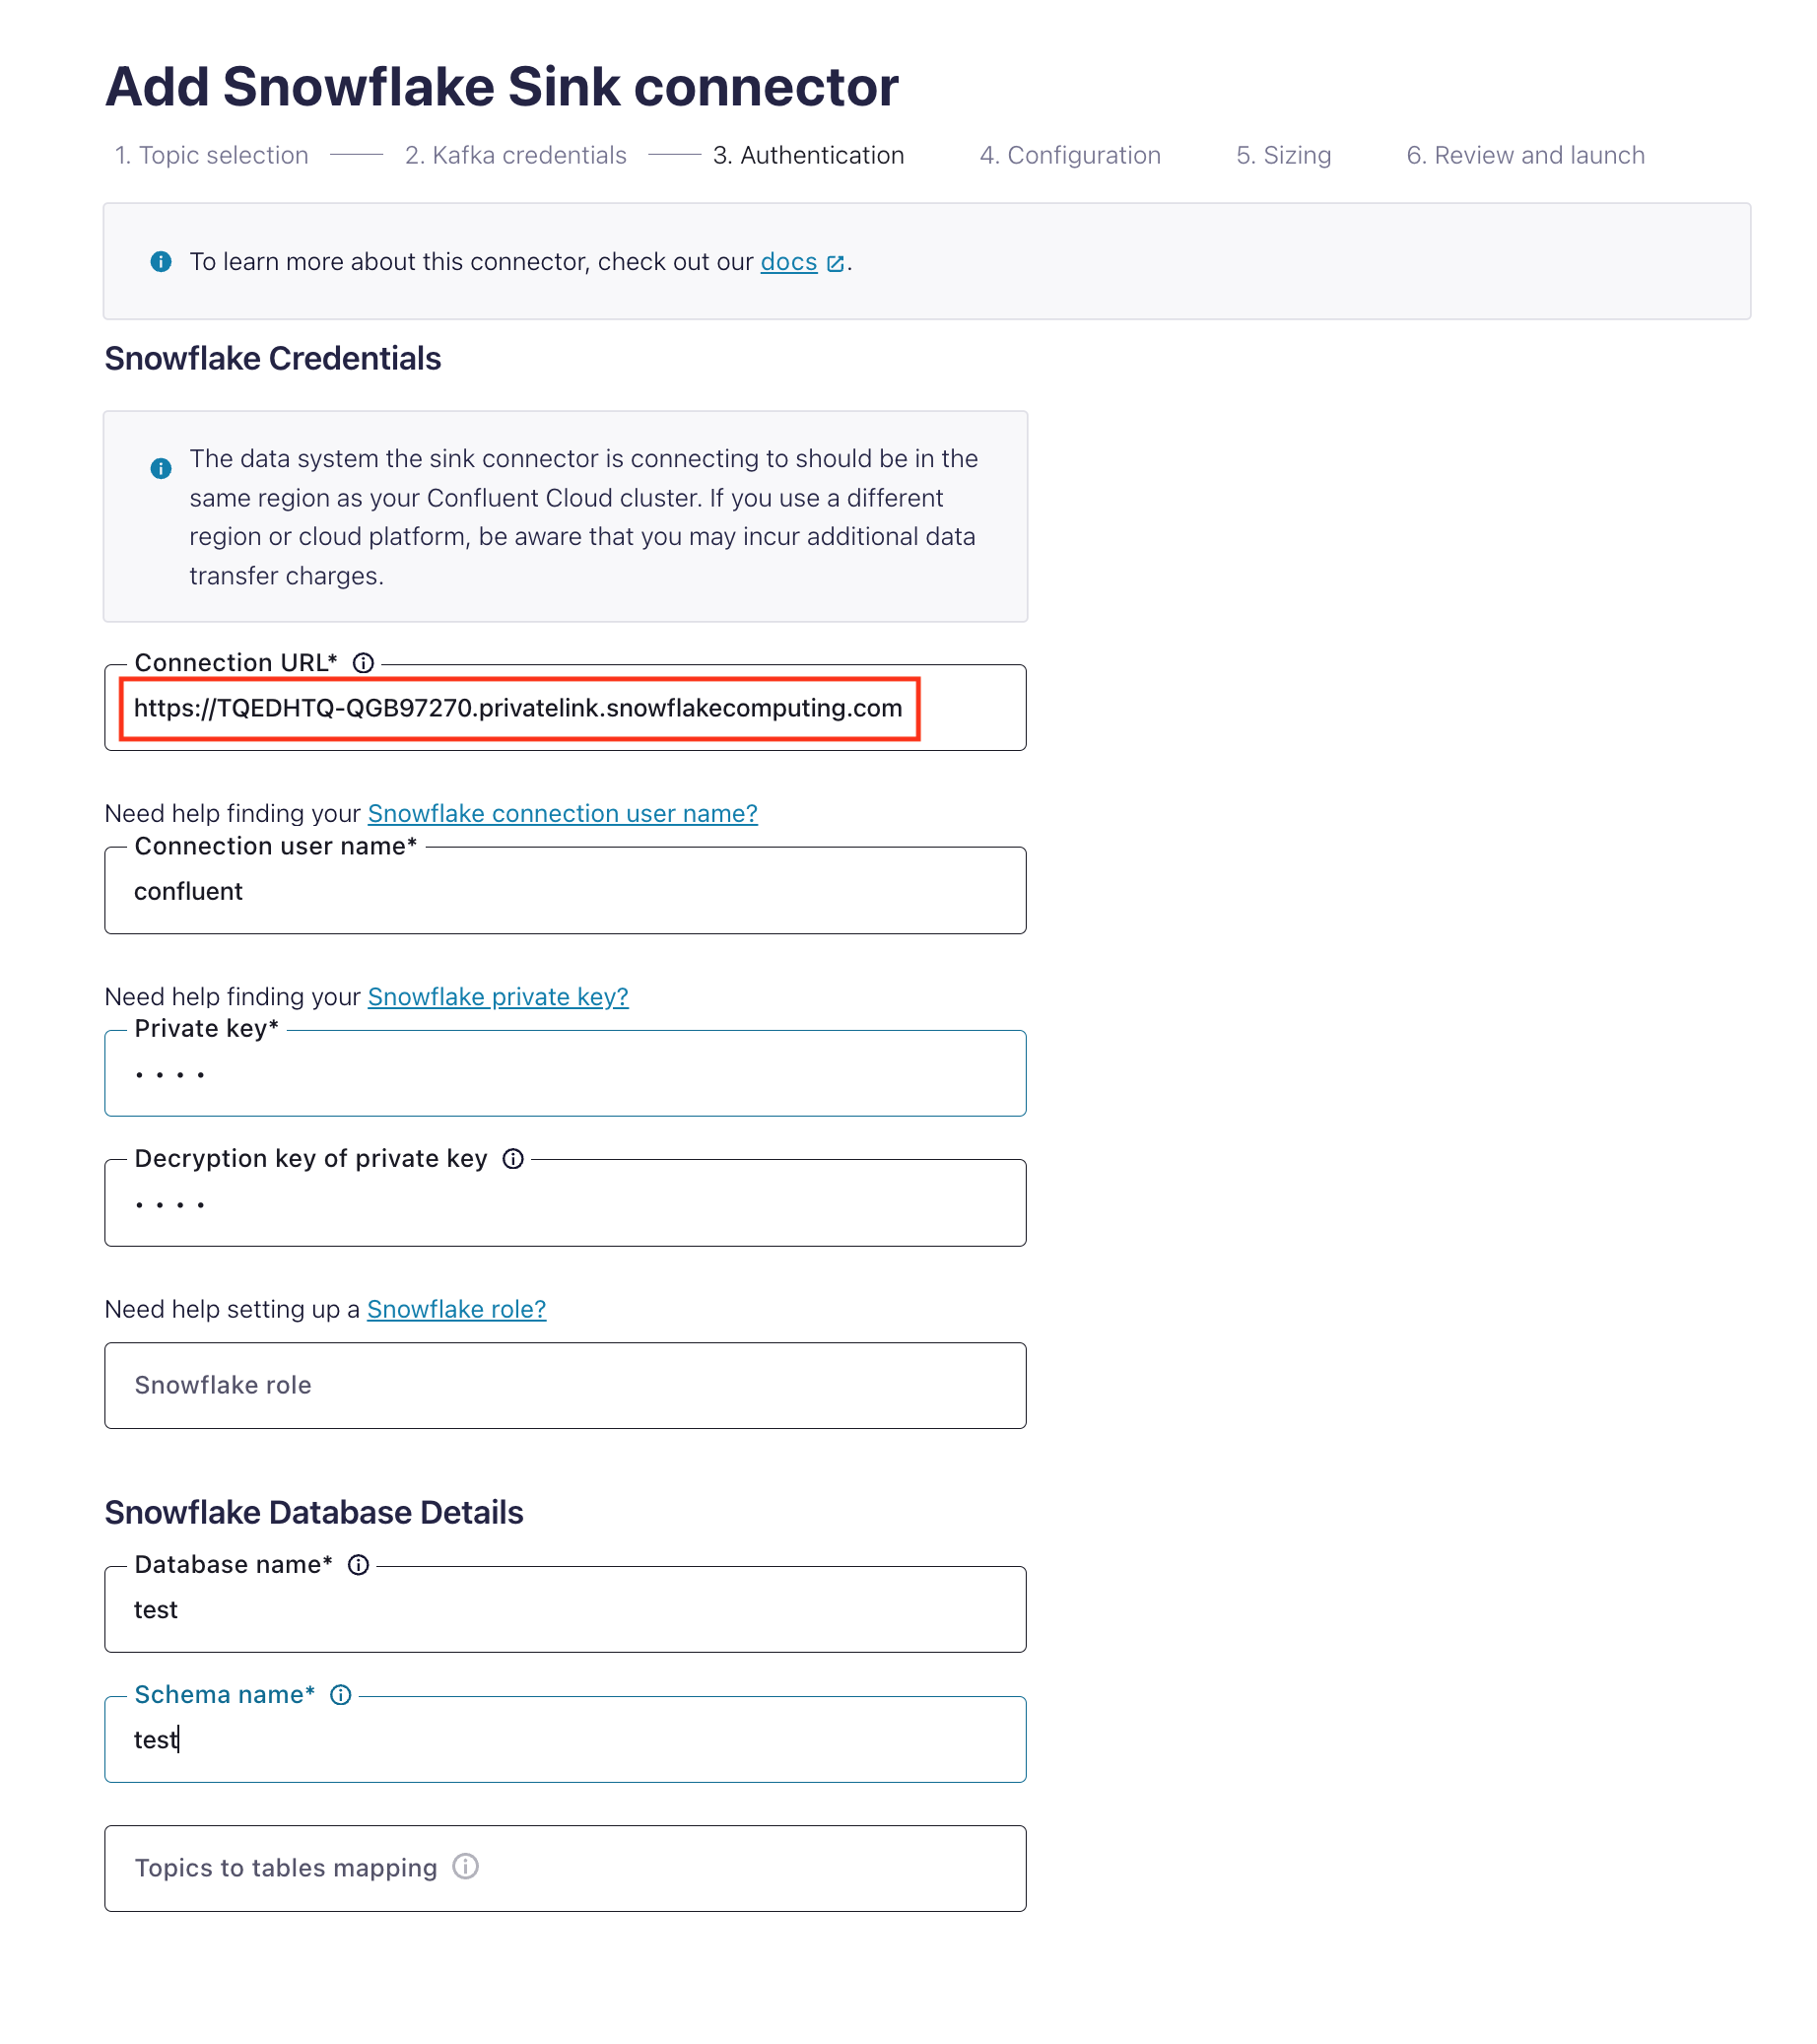
Follow the steps to create the sink connector in Confluent Cloud.