
Tableflow Quick Start with Iceberg Tables Using Your Storage and AWS Glue in Confluent Cloud
Confluent Tableflow enables exposing Apache Kafka® topics as Apache Iceberg™ tables. Iceberg is an open table format for large analytic datasets in object storage.
Complete these steps to materialize an Kafka topic as an Iceberg table using your own S3 storage and the AWS Glue Data Catalog:
Prerequisites
DeveloperRead access on all schema subjects
CloudClusterAdmin access on your Kafka cluster
Assigner access on all provider integrations
For more information, see Grant Role-Based Access for Tableflow in Confluent Cloud.
Step 1: Create a topic and publish data
In this step, you create a stock-trades topic by using Confluent Cloud Console. Click Create topic, provide the topic name, and create it with default settings. You can skip defining a contract.
Publish data to the stock-trades topic by using the Datagen Source connector with the Stock Trades data set. When you configure the Datagen connector, click Additional configuration and proceed through the provisioning workflow. When you reach the Configuration step, in the Select output record value format, select Avro. Click Continue and keep the default settings. For more information, see Datagen Source Connector Quick Start.
Step 2: Configure your S3 bucket and provider integration
Before you materialize your Kafka topic as an Iceberg table, you must configure the storage bucket where the materialized Iceberg tables are stored.
To access your S3 bucket and write materialized data into it, you must create a Confluent Cloud provider integration.
In the AWS Management Console, create an S3 bucket in your preferred AWS account. For this guide, name the bucket tableflow-quickstart-storage.
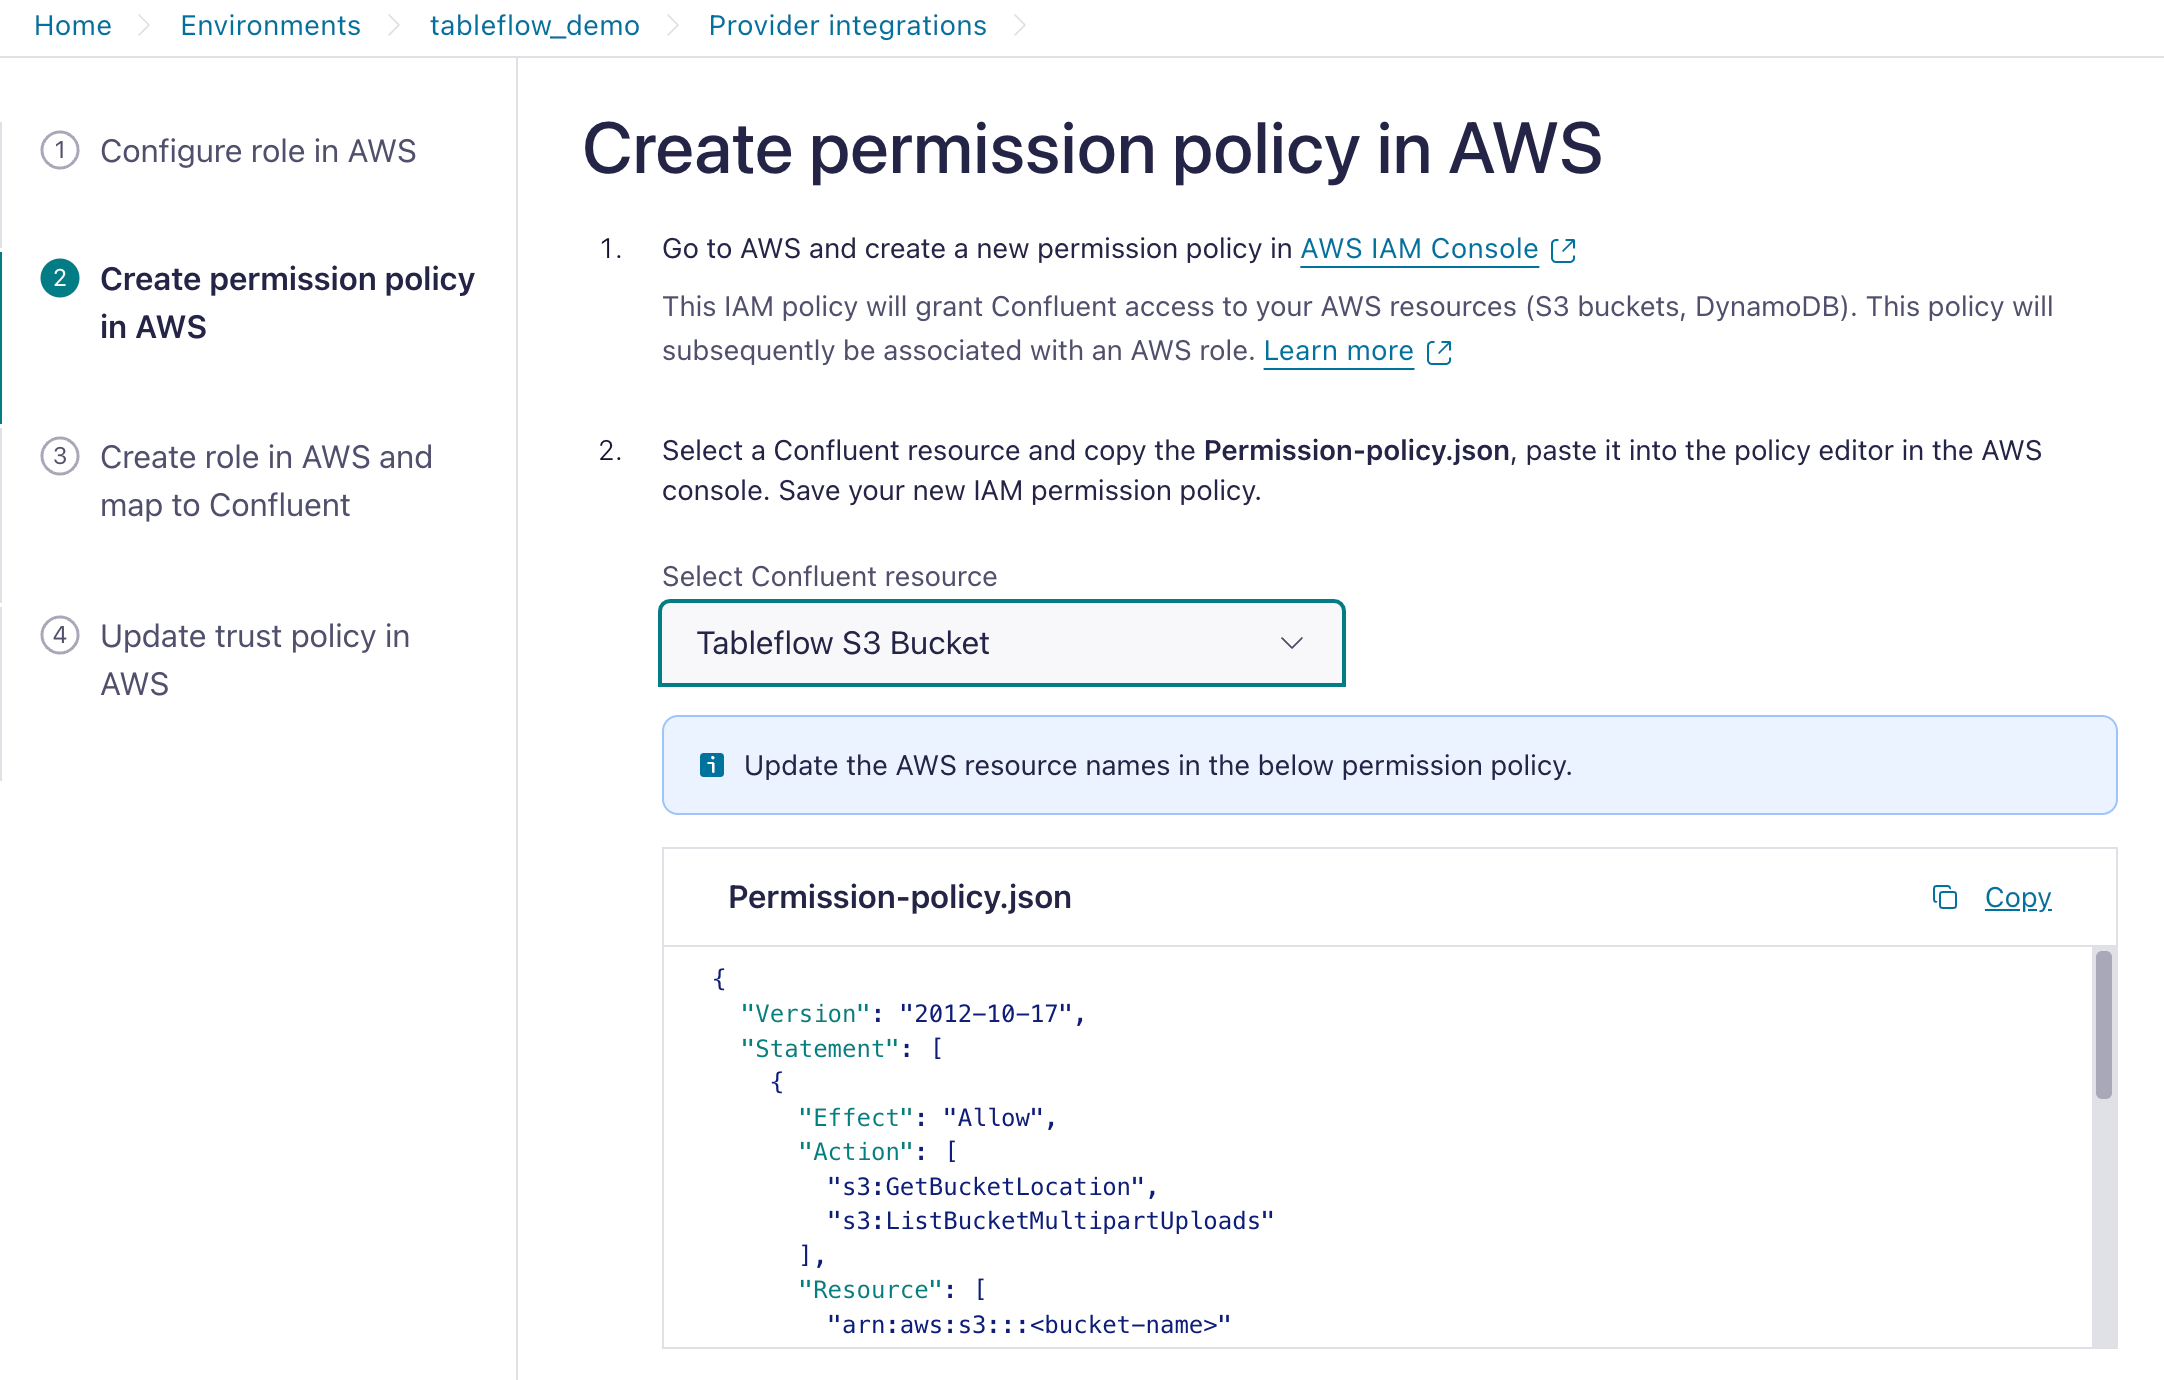
In your Confluent Cloud environment, navigate to the Provider Integrations tab to create a provider integration and grant Confluent Cloud access to your S3 bucket.
Click on Add Integration.
In the Configure role in AWS section, select New Role option.
Select Tableflow S3 Bucket and copy the IAM Policy template.
In the AWS console, navigate to your IAM.
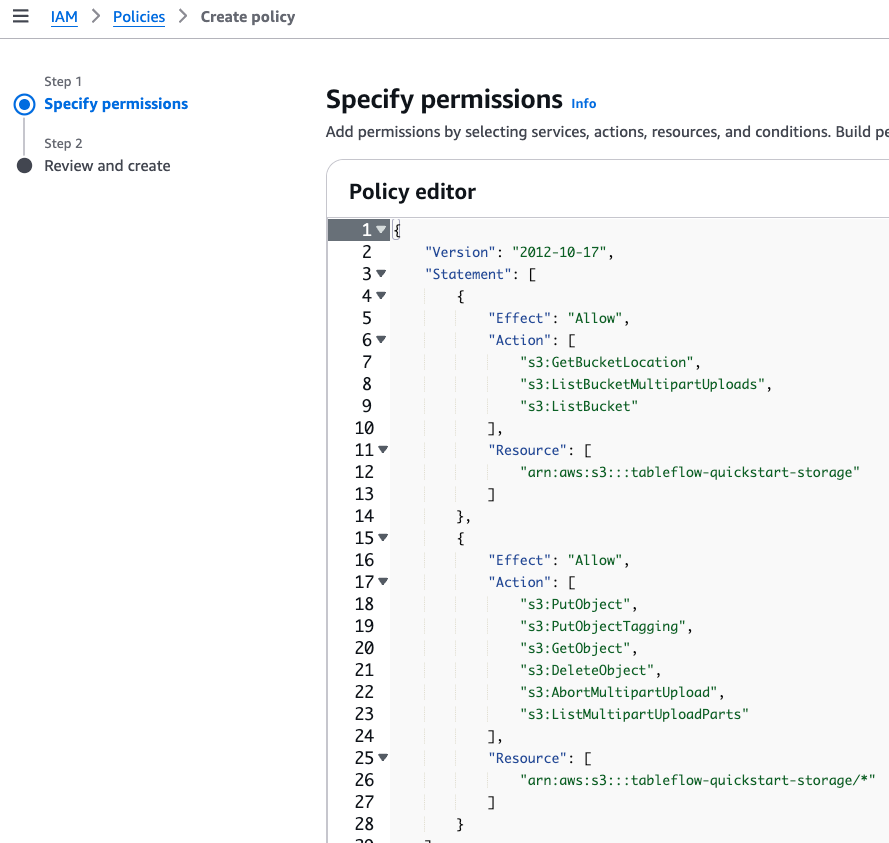
In the Access Management section, click Policies, and in the Policies page, click Create Policy.
As a best practice, you should create a designated IAM policy that grants Confluent Cloud access to your S3 location.
Paste the IAM policy template you obtained previously. Update it with the name of your S3 bucket, for example, tableflow-quickstart-storage, and create a new AWS IAM policy.
Navigate to AWS IAM Roles and click Create Role.
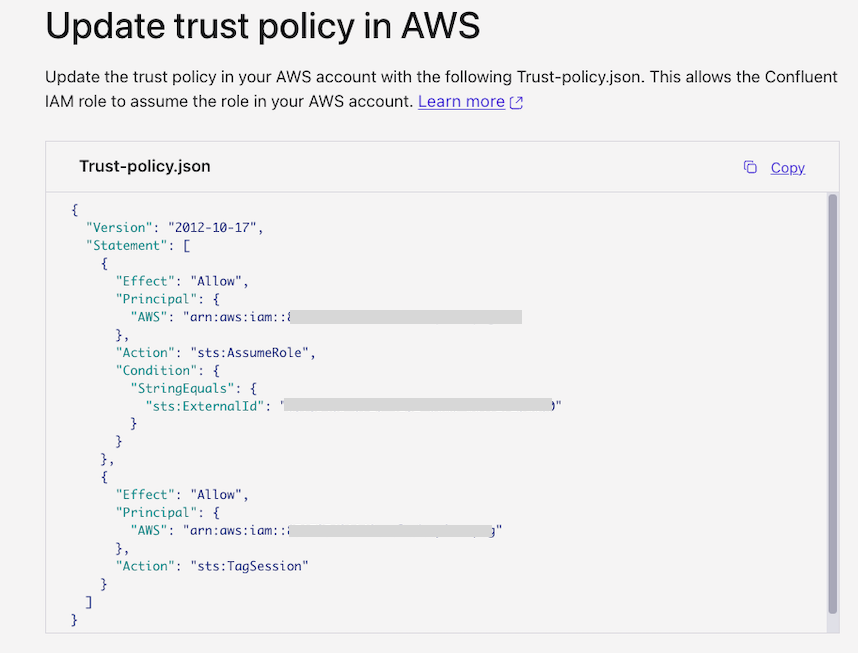
For the Trusted entity type, select Custom trust policy.
From the Tableflow UI in Cloud Console, copy the Trust-policy.json file and paste it into the policy editor in the AWS console.
Attach the permission policy you created previously and save your new IAM role, for example, tableflow-quickstart-role.
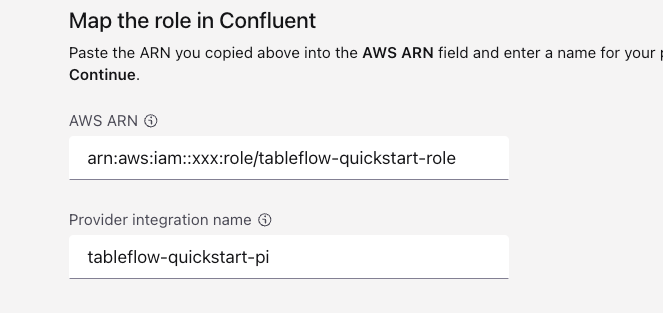
Copy the role ARN, for example,
arn:aws:iam::<xxx>:role/tableflow-quickstart-role.In the Cloud Console, locate the Map the role in Confluent section in the Provider Integration page. In the AWS ARN section, paste the ARN you copied previously and click Continue.
After creating the provider integration, update the trust policy of the AWS IAM role (tableflow-quickstart-role) using the trust policy displayed in Cloud Console.
Step 3: Enable Tableflow on your topic
With the provider integration configured, you can enable Tableflow on your Kafka topic to materialize it as an Iceberg table in the storage bucket that you created in Step 2.
Navigate to your stock-trades topic and click Enable Tableflow.
In the Enable Tableflow dialog, click Configure custom storage.
In the Choose where to store your Tableflow data section, click Store in your bucket.
In the Provider integration dropdown, select the provider integration that you created in Step 2. Provide the name of the storage bucket that you created, which in this guide is tableflow-quickstart-storage.
Click Continue to review the configuration and launch Tableflow.
Materializing a newly created topic as an Iceberg table can take a few minutes.
For low-throughput topics in which Kafka segments have not been filled, Tableflow tries optimistically to publish data every 15 minutes. This is best-effort and not guaranteed.
Step 4: Configure AWS Glue Catalog integration
Follow the steps in Integrate Tableflow with the AWS Glue Catalog to configure AWS Glue Data Catalog as a catalog integration.
After configuring the catalog integration, the stock-trades Iceberg table and a database are created automatically in the AWS Glue Data Catalog. The database name is based on your Kafka cluster ID.
It can take a few minutes to publish Tableflow Iceberg tables to the AWS Glue Data Catalog.
Tip
After you configure the catalog integration, you can monitor each topic’s catalog sync status from the Tableflow page in the Confluent Cloud Console. For more information, refer to Topic catalog sync status.
Step 5: Query Iceberg tables
You can use any AWS Glue and Iceberg-compatible compute engine to query the table. In this example, you use Amazon Athena SQL to query the table.
Follow the steps in Amazon Athena SQL to start writing queries for the stock-trades table.
Step 6: Query data with other analytics engines (optional)
Explore other integration options for using Tableflow with analytics engines: