Google Cloud Spanner Sink Connector for Confluent Cloud
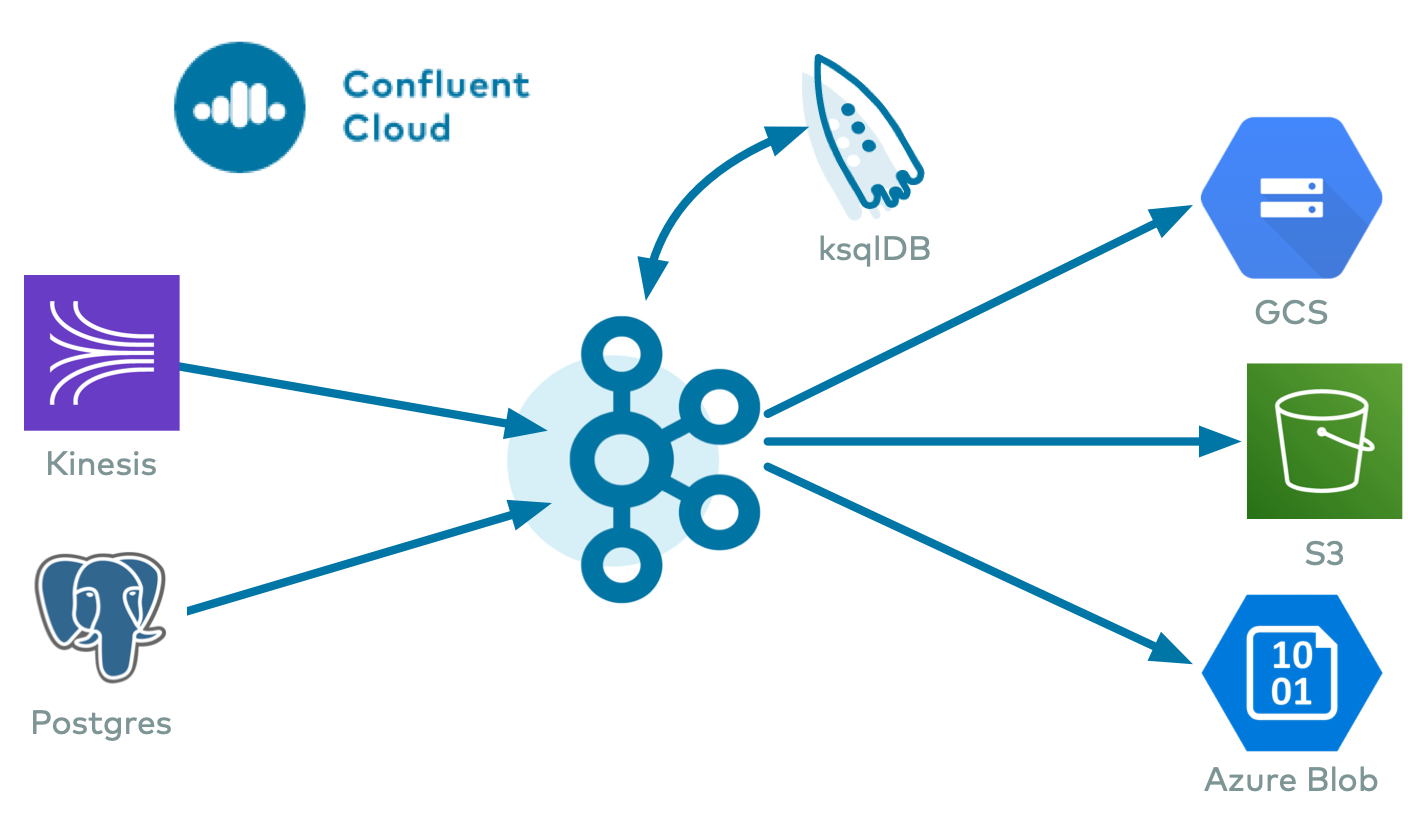
The fully-managed Google Cloud Spanner Sink connector for Confluent Cloud moves data from Apache Kafka® to a Google Cloud Spanner database. It writes data from a topic in Kafka to a table in the specified Spanner database. Table auto-creation and limited auto-evolution are supported.
Confluent Cloud is available through Google Cloud Marketplace or directly from Confluent.
Note
This is a Quick Start for the fully-managed cloud connector. If you are installing the connector locally for Confluent Platform, see Google Cloud Spanner Sink Connector for Confluent Platform.
Features
The Google Cloud Spanner Sink connector provides the following features:
The connector inserts and upserts Kafka records into a Google Cloud Spanner database.
The connector supports Avro, JSON Schema, Protobuf, or JSON (schemaless) input data formats. Schema Registry must be enabled to use a Schema Registry-based format (for example, Avro, JSON_SR (JSON Schema), or Protobuf).
auto.createandauto-evolveare supported. If tables or columns are missing, they can be created automatically.PK modes supported are
kafka``and ``record_value. Used in conjunction with the PK Fields property.
For more information and examples to use with the Confluent Cloud API for Connect, see the Confluent Cloud API for Connect Usage Examples section.
Limitations
Be sure to review the following information.
For connector limitations, see Google Cloud Spanner Sink Connector limitations.
If you plan to use one or more Single Message Transformations (SMTs), see SMT Limitations.
Quick Start
Use this quick start to get up and running with the Confluent Cloud Google Cloud Spanner Sink connector. The quick start provides the basics of selecting the connector and configuring it to stream events to a Spanner database.
- Prerequisites
Authorized access to a Confluent Cloud cluster on Google Cloud.
The Confluent CLI installed and configured for the cluster. See Install the Confluent CLI.
Schema Registry must be enabled to use a Schema Registry-based format (for example, Avro, JSON_SR (JSON Schema), or Protobuf).
An operating Google Cloud Spanner instance and database (a table can be auto-created). For the steps necessary to create an instance using the Google Cloud Console, see Quickstart using the console.
A Google Cloud service account. You download service account credentials as a JSON file. These credentials are used when setting up the connector configuration.
Kafka cluster credentials. The following lists the different ways you can provide credentials.
Enter an existing service account resource ID.
Create a Confluent Cloud service account for the connector. Make sure to review the ACL entries required in the service account documentation. Some connectors have specific ACL requirements.
Create a Confluent Cloud API key and secret. To create a key and secret, you can use confluent api-key create or you can autogenerate the API key and secret directly in the Cloud Console when setting up the connector.
Using the Confluent Cloud Console
Step 1: Launch your Confluent Cloud cluster
To create and launch a Kafka cluster in Confluent Cloud, see Create a kafka cluster in Confluent Cloud.
Step 2: Add a connector
In the left navigation menu, click Connectors. If you already have connectors in your cluster, click + Add connector.
Step 3: Select your connector
Click the Google Cloud Spanner Sink connector card.
Step 4: Enter the connector details
Note
Ensure you have all your prerequisites completed.
An asterisk ( * ) designates a required entry.
At the Add Google Cloud Spanner Sink Connector screen, complete the following:
If you’ve already populated your Kafka topics, select the topics you want to connect from the Topics list.
To create a new topic, click +Add new topic.
Select the way you want to provide Kafka Cluster credentials. You can choose one of the following options:
My account: This setting allows your connector to globally access everything that you have access to. With a user account, the connector uses an API key and secret to access the Kafka cluster. This option is not recommended for production.
Service account: This setting limits the access for your connector by using a service account. This option is recommended for production.
Use an existing API key: This setting allows you to specify an API key and a secret pair. You can use an existing pair or create a new one. This method is not recommended for production environments.
Note
Freight clusters support only service accounts for Kafka authentication.
Click Continue.
Configure the authentication properties:
GCP credentials file: Upload your Google Cloud credentials JSON file. For information about how to set these up, see Create credentials.
Spanner instance ID: In the Spanner instance ID field, enter the ID of the Spanner instance to connect to.
Spanner database ID: In the Spanner database ID field, enter the database ID where tables are located or will be created.
Click Continue.
Note
Configuration properties that are not shown in the Cloud Console use the default values. See Configuration Properties for all property values and definitions.
Input Kafka record value format: Select the input Kafka record value format (data coming from the Kafka topic). Valid entires are AVRO, JSON_SR, or PROTOBUF. A valid schema must be available in Schema Registry to use a schema-based message format (for example, Avro, JSON Schema, or Protobuf).
Insert mode: Select an Insert mode: The insertion mode to use:
INSERT: Use the standardINSERTrow function. An error occurs if the row already exists in the table.UPSERT: This mode is similar toINSERT. However, if the row already exists, theUPSERTfunction overwrites column values with the new values provided.
Show advanced configurations
Schema context: Select a schema context to use for this connector, if using a schema-based data format. This property defaults to the Default context, which configures the connector to use the default schema set up for Schema Registry in your Confluent Cloud environment. A schema context allows you to use separate schemas (like schema sub-registries) tied to topics in different Kafka clusters that share the same Schema Registry environment. For example, if you select a non-default context, a Source connector uses only that schema context to register a schema and a Sink connector uses only that schema context to read from. For more information about setting up a schema context, see What are schema contexts and when should you use them?.
Table name format: A format string for the destination table name, which may contain
${topic}as a placeholder for the originating topic name. For example, to create a table namedkafka-ordersbased on a Kafka topic namedorders, you would enterkafka-${topic}in this field.PK mode: The primary key mode.
PK Fields: List of comma-separated primary key field names.
Max batch size: The maximum number of records that can be batched into a single insert, or upsert, to Spanner.
Auto create table: Whether to automatically create the destination table if it is missing.
Auto add columns: Whether to automatically add columns in the table if they are missing.
Auto-restart policy
Enable Connector Auto-restart: Enables the auto-restart behavior of the connector and its task in the event of user-actionable errors. Defaults to
true, enabling the connector to automatically restart in case of user-actionable errors. Set this property tofalseto disable auto-restart for failed connectors. If disabled, you must manually restart the connector.
Additional Configs
Value Converter Decimal Format: Specifies the
JSONorJSON_SRserialization format for ConnectDECIMALlogical type values with two allowed literals:BASE64to serializeDECIMALlogical types as base64 encoded binary data, andNUMERICto serializeDECIMALlogical type values inJSONorJSON_SRas a number representing the decimal value.Schema GUID For Key Converter: Sets the schema GUID to use for deserialization when using
ConfigSchemaIdDeserializer. This lets you specify a fixed schema GUID for deserializing message keys. This property is applicable only whenkey.converter.key.schema.id.deserializeris set toConfigSchemaIdDeserializer.Value Converter Schema ID Deserializer: Sets the class name of the schema ID deserializer for values. The deserializer reads schema IDs from message headers.
Schema GUID For Value Converter: Sets the schema GUID to use for deserialization when using
ConfigSchemaIdDeserializer. This lets you specify a fixed schema GUID for deserializing message values. This property is applicable only whenvalue.converter.value.schema.id.deserializeris set toConfigSchemaIdDeserializer.Value Converter Reference Subject Name Strategy: Sets the subject reference name strategy for values. Valid entries are
DefaultReferenceSubjectNameStrategyorQualifiedReferenceSubjectNameStrategy. You can use this strategy only withPROTOBUFformat; the default strategy isDefaultReferenceSubjectNameStrategy.Schema ID For Value Converter: Sets the schema ID to use for deserialization when using
ConfigSchemaIdDeserializer. This lets you specify a fixed schema ID for deserializing message values. This property is applicable only whenvalue.converter.value.schema.id.deserializeris set toConfigSchemaIdDeserializer.Value Converter Connect Meta Data: Enables the Connect converter to add its metadata to the output schema. Applies to Avro converters.
Value Converter Value Subject Name Strategy: Determines how to construct the subject name under which the value schema is registered with Schema Registry.
Key Converter Key Subject Name Strategy: Determines how to construct the subject name for key schema registration.
Key Converter Schema ID Deserializer: Sets the class name of the schema ID deserializer for keys. The deserializer reads schema IDs from message headers.
Schema ID For Key Converter: Sets the schema ID to use for deserialization when using
ConfigSchemaIdDeserializer. This lets you specify a fixed schema ID for deserializing message keys. This property is applicable only whenkey.converter.key.schema.id.deserializeris set toConfigSchemaIdDeserializer.
Consumer configuration
Max poll interval(ms): Sets the maximum delay between subsequent consume requests to Kafka. Use this property to improve connector performance in cases when the connector cannot send records to the sink system. The default is 300,000 milliseconds (5 minutes).
Max poll records: Sets the maximum number of records to consume from Kafka in a single request. Use this property to improve connector performance in cases when the connector cannot send records to the sink system. The default is 500 records.
Transforms
Single Message Transformations: To add a new SMT, see Add transforms. For more information about unsupported SMTs, see Unsupported transformations.
Processing position
Set offsets: Click Set offsets to define a specific offset for this connector to begin procession data from. For more information on managing offsets, see Manage offsets.
See Configuration Properties for all property values and definitions.
Click Continue.
Based on the number of topic partitions you select, you will be provided with a recommended number of tasks.
To change the number of recommended tasks, enter the number of tasks for the connector to use in the Tasks field.
Click Continue.
Verify the connection details.
Click Launch.
The status for the connector should go from Provisioning to Running.
Step 5: Check the results in Spanner
From the Google Cloud Console, go to your Spanner project.
Verify that new records are being added to the Spanner database.
For more information and examples to use with the Confluent Cloud API for Connect, see the Confluent Cloud API for Connect Usage Examples section.
Tip
When you launch a connector, a Dead Letter Queue topic is automatically created. See View Connector Dead Letter Queue Errors in Confluent Cloud for details.
Using the Confluent CLI
Complete the following steps to set up and run the connector using the Confluent CLI.
Note
Make sure you have all your prerequisites completed.
Step 1: List the available connectors
Enter the following command to list available connectors:
confluent connect plugin list
Step 2: List the connector configuration properties
Enter the following command to show the connector configuration properties:
confluent connect plugin describe <connector-plugin-name>
The command output shows the required and optional configuration properties.
Step 3: Create the connector configuration file
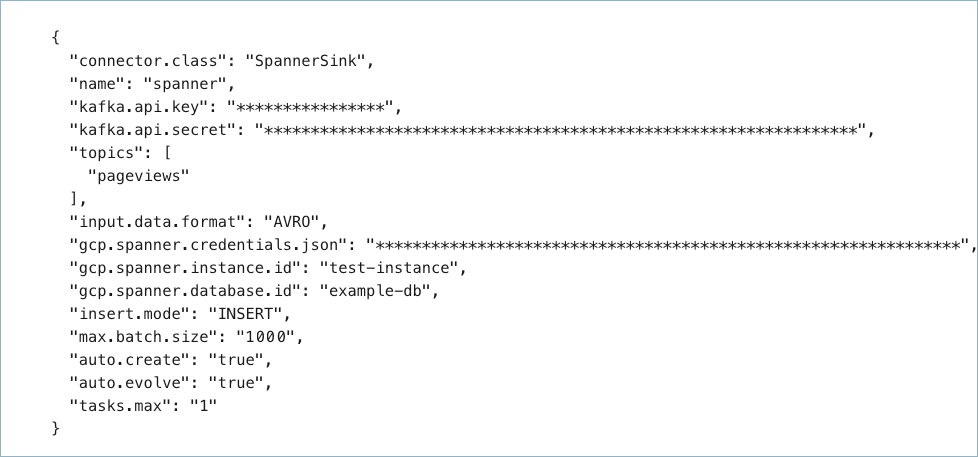
Create a JSON file that contains the connector configuration properties. The following example shows required and optional connector properties:
{
  "connector.class": "SpannerSink",
  "name": "spanner-sink-connector",
  "kafka.auth.mode": "KAFKA_API_KEY",
  "kafka.api.key": "<my-kafka-api-key?",
  "kafka.api.secret": "<my-kafka-api-secret>",
  "topics": "pageviews",
  "input.data.format": "AVRO",
  "gcp.spanner.credentials.json": "<my-gcp-credentials>",
  "gcp.spanner.instance.id": "<my-spanner-instance-id>",
  "gcp.spanner.database.id": "<my-spanner-database-id>",
  "auto.create": "true",
  "auto.evolve": "true",
  "tasks.max": "1"
 }
Note the following property definitions:
"connector.class": Identifies the connector plugin name."name": Sets a name for your new connector.
"kafka.auth.mode": Identifies the connector authentication mode you want to use. There are two options:SERVICE_ACCOUNTorKAFKA_API_KEY(the default). To use an API key and secret, specify the configuration propertieskafka.api.keyandkafka.api.secret, as shown in the example configuration (above). To use a service account, specify the Resource ID in the propertykafka.service.account.id=<service-account-resource-ID>. To list the available service account resource IDs, use the following command:confluent iam service-account list
For example:
confluent iam service-account list

   Id     | Resource ID |       Name        |    Description
+---------+-------------+-------------------+-------------------
   123456 | sa-l1r23m   | sa-1              | Service account 1
   789101 | sa-l4d56p   | sa-2              | Service account 2
"topics": Identifies the topic name or a comma-separated list of topic names."input.data.format": Sets the input Kafka record value format (data coming from the Kafka topic). Valid entries are AVRO, JSON_SR, PROTOBUF, or JSON. You must have Confluent Cloud Schema Registry configured if using a schema-based message format (for example, Avro, JSON_SR (JSON Schema), or Protobuf)."gcp.spanner.credentials.json": This contains the contents of the downloaded JSON file. See Formatting Google Cloud credentials for details about how to format and use the contents of the downloaded credentials file."tasks.max": Maximum number of tasks the connector can run. See Confluent Cloud connector limitations for additional task information.
Optional
"auto.create"(tables) and"auto-evolve"(columns): Sets whether to automatically create tables or columns if they are missing relative to the input record schema. If not entered in the configuration, both default tofalse."pk.mode": (Optional) Supported modes are listed below:kafka: Kafka coordinates are used as the primary key. Must be used with the PK Fields property.record_value: Fields from the Kafka record value are used. This must be a struct type.
"pk.fields": A list of comma-separated primary key field names. The runtime interpretation of this property depends on thepk.modeselected. Options are listed below:kafka: Must be three values representing the Kafka coordinates. If left empty, the coordinates default to__connect_topic,__connect_partition,__connect_offset.none: PK Fields not used.record_value: Used to extract fields from the record value. If left empty, all fields from the value struct are used.
SMTs: For details about adding SMTs using the Confluent CLI, see the Single Message Transformations documentation. For a list of SMTs that are not supported with this connector, see Unsupported transformations.
See Configuration Properties for all property values and definitions.
Formatting Google Cloud credentials
The contents of the downloaded credentials file must be converted to string format before it can be used in the connector configuration.
Convert the JSON file contents into string format.
Add the
\escape character before all\nentries in the Private Key section so that each section begins with\\n(see the highlighted lines below). The example below has been formatted so that the\\nentries are easier to see. Most of the credentials key has been omitted.Tip
A script is available that converts the credentials to a string and also adds additional escape
\characters where needed. See Stringify Google Cloud Credentials.{ "connector.class": "SpannerSink", "name": "spanner-sink-connector", "kafka.api.key": "<my-kafka-api-key?", "kafka.api.secret": "<my-kafka-api-secret>", "topics": "pageviews", "input.data.format": "AVRO", "gcp.spanner.credentials.json": "{\"type\":\"service_account\",\"project_id\":\"connect- 1234567\",\"private_key_id\":\"omitted\", \"private_key\":\"-----BEGIN PRIVATE KEY----- \\nMIIEvAIBADANBgkqhkiG9w0BA \\n6MhBA9TIXB4dPiYYNOYwbfy0Lki8zGn7T6wovGS5pzsIh \\nOAQ8oRolFp\rdwc2cC5wyZ2+E+bhwn \\nPdCTW+oZoodY\\nOGB18cCKn5mJRzpiYsb5eGv2fN\/J \\n...rest of key omitted... \\n-----END PRIVATE KEY-----\\n\", \"client_email\":\"pub-sub@connect-123456789.iam.gserviceaccount.com\", \"client_id\":\"123456789\",\"auth_uri\":\"https:\/\/accounts.google.com\/o\/oauth2\/ auth\",\"token_uri\":\"https:\/\/oauth2.googleapis.com\/ token\",\"auth_provider_x509_cert_url\":\"https:\/\/ www.googleapis.com\/oauth2\/v1\/ certs\",\"client_x509_cert_url\":\"https:\/\/www.googleapis.com\/ robot\/v1\/metadata\/x509\/pub-sub%40connect- 123456789.iam.gserviceaccount.com\"}", "gcp.spanner.instance.id": "<my-spanner-instance-id>", "gcp.spanner.database.id": "<my-spanner-database-id>", "auto.create": "true", "auto.evolve": "true", "tasks.max": "1" }
Add all the converted string content to the credentials section of your configuration file as shown in the example above.
Step 4: Load the configuration file and create the connector
Enter the following command to load the configuration and start the connector:
confluent connect cluster create --config-file <file-name>.json
For example:
confluent connect cluster create --config-file spanner-sink-config.json
Example output:
Created connector spanner-sink-connector lcc-ix4dl
Step 5: Check the connector status
Enter the following command to check the connector status:
confluent connect cluster list
Example output:
ID          |       Name              | Status  | Type
+-----------+-------------------------+---------+------+
lcc-ix4dl   | spanner-sink-connector  | RUNNING | sink
Step 6: Check the results in Spanner.
From the Google Cloud Console, go to your Spanner project.
Verify that new records are being added to the Spanner database.
For more information and examples to use with the Confluent Cloud API for Connect, see the Confluent Cloud API for Connect Usage Examples section.
Tip
When you launch a connector, a Dead Letter Queue topic is automatically created. See View Connector Dead Letter Queue Errors in Confluent Cloud for details.
Configuration Properties
Use the following configuration properties with the fully-managed connector. For self-managed connector property definitions and other details, see the connector docs in Self-managed connectors for Confluent Platform.
Which topics do you want to get data from?
topics.regexA regular expression that matches the names of the topics to consume from. This is useful when you want to consume from multiple topics that match a certain pattern without having to list them all individually.
Type: string
Importance: low
topicsIdentifies the topic name or a comma-separated list of topic names.
Type: list
Importance: high
Schema Config
schema.context.nameAdd a schema context name. A schema context represents an independent scope in Schema Registry. It is a separate sub-schema tied to topics in different Kafka clusters that share the same Schema Registry instance. If not used, the connector uses the default schema configured for Schema Registry in your Confluent Cloud environment.
Type: string
Default: default
Importance: medium
Input messages
input.data.formatSets the input Kafka record value format. Valid entries are AVRO, JSON_SR, or PROTOBUF. Note that you need to have Confluent Cloud Schema Registry configured if using a schema-based message format like AVRO, JSON_SR, and PROTOBUF.
Type: string
Default: JSON
Importance: high
How should we connect to your data?
nameSets a name for your connector.
Type: string
Valid Values: A string at most 64 characters long
Importance: high
Kafka Cluster credentials
kafka.auth.modeKafka Authentication mode. It can be one of KAFKA_API_KEY or SERVICE_ACCOUNT. It defaults to KAFKA_API_KEY mode, whenever possible.
Type: string
Valid Values: SERVICE_ACCOUNT, KAFKA_API_KEY
Importance: high
kafka.api.keyKafka API Key. Required when kafka.auth.mode==KAFKA_API_KEY.
Type: password
Importance: high
kafka.service.account.idThe Service Account that will be used to generate the API keys to communicate with Kafka Cluster.
Type: string
Importance: high
kafka.api.secretSecret associated with Kafka API key. Required when kafka.auth.mode==KAFKA_API_KEY.
Type: password
Importance: high
GCP credentials
gcp.spanner.credentials.jsonGCP service account JSON file with write permissions for Spanner.
Type: password
Importance: high
How should we connect to your Spanner?
gcp.spanner.instance.idThe ID of the Spanner instance to connect to.
Type: string
Importance: high
gcp.spanner.database.idDatabase ID where tables are located or will be created.
Type: string
Importance: high
Database details
insert.modeThe insertion mode to use.
Type: string
Default: INSERT
Importance: high
table.name.formatA format string for the destination table name, which may contain ${topic} as a placeholder for the originating topic name.
For example, kafka_${topic} for the topic ‘orders’ will map to the table name ‘kafka_orders’.
Spanner constraints for table names are {a—z|A—Z}[{a—z|A—Z|0—9|_}+].
Type: string
Default: ${topic}
Importance: medium
Primary Key
pk.modeThe primary key mode, also refer to pk.fields documentation for interplay. Supported modes are:
none: No keys utilized.
kafka: Apache Kafka® coordinates are used as the PK.
record_value: Field(s) from the record value are used, which must be a struct.
Type: string
Importance: high
pk.fieldsList of comma-separated primary key field names. The runtime interpretation of this config depends on the pk.mode:
none: Ignored as no fields are used as primary key in this mode.
kafka: Must be a trio representing the Kafka coordinates, defaults to __connect_topic,__connect_partition,__connect_offset if empty.
record_value: If empty, all fields from the value struct will be used, otherwise used to extract the desired fields.
Type: list
Importance: high
SQL/DDL Support
auto.createWhether to automatically create the destination table if it is missing.
Type: boolean
Default: false
Importance: medium
auto.evolveWhether to automatically add columns in the table if they are
Type: boolean
Default: false
Importance: medium
Connection details
max.batch.sizeThe maximum number of records that can be batched into a single insert, or upsert to Spanner.
Type: int
Default: 1000
Valid Values: [1,…,5000]
Importance: medium
Consumer configuration
max.poll.interval.msThe maximum delay between subsequent consume requests to Kafka. This configuration property may be used to improve the performance of the connector, if the connector cannot send records to the sink system. Defaults to 300000 milliseconds (5 minutes).
Type: long
Default: 300000 (5 minutes)
Valid Values: [60000,…,1800000] for non-dedicated clusters and [60000,…] for dedicated clusters
Importance: low
max.poll.recordsThe maximum number of records to consume from Kafka in a single request. This configuration property may be used to improve the performance of the connector, if the connector cannot send records to the sink system. Defaults to 500 records.
Type: long
Default: 500
Valid Values: [1,…,500] for non-dedicated clusters and [1,…] for dedicated clusters
Importance: low
Number of tasks for this connector
tasks.maxMaximum number of tasks for the connector.
Type: int
Valid Values: [1,…]
Importance: high
Auto-restart policy
auto.restart.on.user.errorEnable connector to automatically restart on user-actionable errors.
Type: boolean
Default: true
Importance: medium
Additional Configs
consumer.override.auto.offset.resetDefines the behavior of the consumer when there is no committed position (which occurs when the group is first initialized) or when an offset is out of range. You can choose either to reset the position to the “earliest” offset (the default) or the “latest” offset. You can also select “none” if you would rather set the initial offset yourself and you are willing to handle out of range errors manually. More details: https://docs.confluent.io/platform/current/installation/configuration/consumer-configs.html#auto-offset-reset
Type: string
Importance: low
consumer.override.isolation.levelControls how to read messages written transactionally. If set to read_committed, consumer.poll() will only return transactional messages which have been committed. If set to read_uncommitted (the default), consumer.poll() will return all messages, even transactional messages which have been aborted. Non-transactional messages will be returned unconditionally in either mode. More details: https://docs.confluent.io/platform/current/installation/configuration/consumer-configs.html#isolation-level
Type: string
Importance: low
header.converterThe converter class for the headers. This is used to serialize and deserialize the headers of the messages.
Type: string
Importance: low
key.converter.use.schema.guidThe schema GUID to use for deserialization when using ConfigSchemaIdDeserializer. This allows you to specify a fixed schema GUID to be used for deserializing message keys. Only applicable when key.converter.key.schema.id.deserializer is set to ConfigSchemaIdDeserializer.
Type: string
Importance: low
key.converter.use.schema.idThe schema ID to use for deserialization when using ConfigSchemaIdDeserializer. This allows you to specify a fixed schema ID to be used for deserializing message keys. Only applicable when key.converter.key.schema.id.deserializer is set to ConfigSchemaIdDeserializer.
Type: int
Importance: low
value.converter.allow.optional.map.keysAllow optional string map key when converting from Connect Schema to Avro Schema. Applicable for Avro Converters.
Type: boolean
Importance: low
value.converter.auto.register.schemasSpecify if the Serializer should attempt to register the Schema.
Type: boolean
Importance: low
value.converter.connect.meta.dataAllow the Connect converter to add its metadata to the output schema. Applicable for Avro Converters.
Type: boolean
Importance: low
value.converter.enhanced.avro.schema.supportEnable enhanced schema support to preserve package information and Enums. Applicable for Avro Converters.
Type: boolean
Importance: low
value.converter.enhanced.protobuf.schema.supportEnable enhanced schema support to preserve package information. Applicable for Protobuf Converters.
Type: boolean
Importance: low
value.converter.flatten.unionsWhether to flatten unions (oneofs). Applicable for Protobuf Converters.
Type: boolean
Importance: low
value.converter.generate.index.for.unionsWhether to generate an index suffix for unions. Applicable for Protobuf Converters.
Type: boolean
Importance: low
value.converter.generate.struct.for.nullsWhether to generate a struct variable for null values. Applicable for Protobuf Converters.
Type: boolean
Importance: low
value.converter.int.for.enumsWhether to represent enums as integers. Applicable for Protobuf Converters.
Type: boolean
Importance: low
value.converter.latest.compatibility.strictVerify latest subject version is backward compatible when use.latest.version is true.
Type: boolean
Importance: low
value.converter.object.additional.propertiesWhether to allow additional properties for object schemas. Applicable for JSON_SR Converters.
Type: boolean
Importance: low
value.converter.optional.for.nullablesWhether nullable fields should be specified with an optional label. Applicable for Protobuf Converters.
Type: boolean
Importance: low
value.converter.optional.for.proto2Whether proto2 optionals are supported. Applicable for Protobuf Converters.
Type: boolean
Importance: low
value.converter.use.latest.versionUse latest version of schema in subject for serialization when auto.register.schemas is false.
Type: boolean
Importance: low
value.converter.use.optional.for.nonrequiredWhether to set non-required properties to be optional. Applicable for JSON_SR Converters.
Type: boolean
Importance: low
value.converter.use.schema.guidThe schema GUID to use for deserialization when using ConfigSchemaIdDeserializer. This allows you to specify a fixed schema GUID to be used for deserializing message values. Only applicable when value.converter.value.schema.id.deserializer is set to ConfigSchemaIdDeserializer.
Type: string
Importance: low
value.converter.use.schema.idThe schema ID to use for deserialization when using ConfigSchemaIdDeserializer. This allows you to specify a fixed schema ID to be used for deserializing message values. Only applicable when value.converter.value.schema.id.deserializer is set to ConfigSchemaIdDeserializer.
Type: int
Importance: low
value.converter.wrapper.for.nullablesWhether nullable fields should use primitive wrapper messages. Applicable for Protobuf Converters.
Type: boolean
Importance: low
value.converter.wrapper.for.raw.primitivesWhether a wrapper message should be interpreted as a raw primitive at root level. Applicable for Protobuf Converters.
Type: boolean
Importance: low
key.converter.key.schema.id.deserializerThe class name of the schema ID deserializer for keys. This is used to deserialize schema IDs from the message headers.
Type: string
Default: io.confluent.kafka.serializers.schema.id.DualSchemaIdDeserializer
Importance: low
key.converter.key.subject.name.strategyHow to construct the subject name for key schema registration.
Type: string
Default: TopicNameStrategy
Importance: low
value.converter.decimal.formatSpecify the JSON/JSON_SR serialization format for Connect DECIMAL logical type values with two allowed literals:
BASE64 to serialize DECIMAL logical types as base64 encoded binary data and
NUMERIC to serialize Connect DECIMAL logical type values in JSON/JSON_SR as a number representing the decimal value.
Type: string
Default: BASE64
Importance: low
value.converter.flatten.singleton.unionsWhether to flatten singleton unions. Applicable for Avro and JSON_SR Converters.
Type: boolean
Default: false
Importance: low
value.converter.reference.subject.name.strategySet the subject reference name strategy for value. Valid entries are DefaultReferenceSubjectNameStrategy or QualifiedReferenceSubjectNameStrategy. Note that the subject reference name strategy can be selected only for PROTOBUF format with the default strategy being DefaultReferenceSubjectNameStrategy.
Type: string
Default: DefaultReferenceSubjectNameStrategy
Importance: low
value.converter.value.schema.id.deserializerThe class name of the schema ID deserializer for values. This is used to deserialize schema IDs from the message headers.
Type: string
Default: io.confluent.kafka.serializers.schema.id.DualSchemaIdDeserializer
Importance: low
value.converter.value.subject.name.strategyDetermines how to construct the subject name under which the value schema is registered with Schema Registry.
Type: string
Default: TopicNameStrategy
Importance: low
Frequently asked questions
Find answers to frequently asked questions about the Google Cloud Spanner Sink connector for Confluent Cloud.
Why does my connector fail with Error writing to Spanner table due to unique key violations?
This error occurs when the connector attempts to insert a record with a primary key that already exists in the Spanner table:
Unique index violation on index {index} at index key {key}. It conflicts with row {row} in table {table}.
Common causes and solutions:
Duplicate primary keys: The connector tries to insert a record with the same primary key as an existing row. Change
insert.modetoupsertto allow the connector to update existing rows instead of failing on duplicates.Nullable primary keys: If your primary key fields are nullable, multiple
NULLvalues will cause unique key violations. Use the Filter SMT to exclude records withNULLprimary key fields.Source data contains duplicates: Verify that your Kafka topic does not contain duplicate records for the same key.
To fix this issue, update your connector configuration to use upsert mode:
"insert.mode": "upsert"
For nullable primary key fields, add a Filter SMT to exclude NULL values:
"transforms": "filter",
"transforms.filter.type": "io.confluent.connect.transforms.Filter$Value",
"transforms.filter.filter.condition": "$[?(@.<primary_key_field> != null)]",
"transforms.filter.filter.type": "include",
"transforms.filter.missing.or.null.behavior": "exclude"
Why does my connector fail with cluster and Spanner instance must be in the same GCP region?
The fully-managed Google Cloud Spanner Sink connector for Confluent Cloud requires that your Confluent Cloud cluster and the target Spanner instance be in the same Google Cloud region.
To resolve this issue:
Verify region alignment: Check that your Confluent Cloud cluster region matches your Spanner instance region in the Google Cloud Console.
Create a new cluster: If regions do not match, create a new Confluent Cloud cluster in the same region as your Spanner instance.
Move Spanner instance: Alternatively, migrate your Spanner database to a new instance in the same region as your Confluent Cloud cluster.
This is a documented connector limitation. For more information, see Google Cloud Spanner Sink Connector.
Why does my connector fail with authentication or Invalid Grant errors?
Authentication failures occur when the connector cannot validate the Google Cloud service account credentials.
Common causes and solutions:
Incorrect credentials JSON: Verify the
gcp.spanner.credentials.jsoncontains a valid, correctly formatted service account JSON. The credentials must be converted to string format with proper escape characters. See Formatting Google Cloud credentials for formatting instructions.Service account does not exist: Ensure the service account specified in
client_emailexists in your Google Cloud project and has not been deleted or renamed.Insufficient IAM permissions: Verify the service account has the required Spanner roles. The service account needs
Cloud Spanner Database Userrole or equivalent permissions to write to Spanner tables.Expired or invalid token: If using temporary credentials or tokens, ensure they have not expired. Re-download the service account key from the Google Cloud Console.
Wrong GCP project: Confirm the service account belongs to the correct Google Cloud project that contains your Spanner instance.
To verify IAM permissions, check the service account in the Google Cloud Console under IAM & Admin > Service Accounts and ensure it has the necessary Spanner database permissions.
Why does my connector fail with deserialization errors like Unknown magic byte?
This error occurs when the connector’s deserializer encounters data that is not properly serialized:
Failed to deserialize data for topic {topic} to Avro
Caused by: java.lang.IllegalArgumentException: Unknown magic byte!
Common causes and solutions:
Mismatched input format: Verify
input.data.formatmatches the actual format of messages in your topic. If messages areAVRO, ensureinput.data.formatis set toAVRO.Schema Registry not enabled: For schema-based formats such as
AVRO,JSON_SR, andPROTOBUF, Confluent Cloud Schema Registry must be enabled. Verify Schema Registry is configured for your environment.Topic contains mixed formats: Check if your topic contains messages in different formats. All messages must use the same serialization format.
Messages not properly serialized: Ensure messages were produced using proper serialization with Schema Registry. Messages produced without Schema Registry integration will fail deserialization.
To resolve this issue:
Verify topic format: Use the Cloud Console to inspect messages in your topic and confirm they are properly formatted messages with schema IDs.
Enable Schema Registry: If not already enabled, enable Schema Registry for your Confluent Cloud environment.
Reproduce messages: If the topic contains incorrectly formatted messages, you may need to reproduce them using proper serialization.
Why is my connector stuck in PROVISIONING state?
If your connector remains in PROVISIONING status indefinitely without logs or errors, this indicates validation or connectivity problems during initial setup.
Common causes and solutions:
Region mismatch: The most common cause is that your Confluent Cloud cluster and Spanner instance are not in the same Google Cloud region. Verify region alignment.
Invalid credentials: The connector cannot validate the service account credentials. Check the
gcp.spanner.credentials.jsonis correctly formatted and contains valid credentials.Network connectivity: The connector cannot reach the Spanner instance. Verify firewall rules and network policies allow connectivity.
Database or instance does not exist: Verify the
gcp.spanner.instance.idandgcp.spanner.database.idexist in your Google Cloud project.
If the connector remains stuck after verifying these settings, delete and recreate the connector with the corrected configuration.
Why does my connector fail with Cannot write timestamps in the future errors?
This error occurs when writing to Spanner columns with the allow_commit_timestamp=true option:
FAILED_PRECONDITION: Cannot write timestamps in the future
This is caused by clock skew between your source system and Spanner’s clock, not bad data. Columns with allow_commit_timestamp enabled will reject timestamps that are even slightly in the future. To resolve this issue, either remove allow_commit_timestamp from the column DDL, or ensure the source system clock is synchronized.
Why does my connector fail with schema or data type mapping errors?
Schema validation errors occur when the data schema from Kafka cannot be properly mapped to Spanner column types.
Common causes and solutions:
Unsupported data types: Spanner does not support certain Kafka Connect data types. Unsupported types include:
MAP types: Use
STRUCTor flatten the data before sending to Kafka.Complex STRUCT types: Nested structures may not map correctly. Consider flattening or restructuring your data.
Arrays as primary keys: Spanner does not allow array columns as primary key fields. Use non-array types for primary keys.
Schema mismatch: The record schema does not match the existing Spanner table schema. Verify column names and types align between Kafka records and Spanner tables.
Missing columns: Records contain fields that do not exist in the Spanner table. Enable
auto.evolve=trueto automatically add missing columns, or manually alter the table to include the new columns.Primary key configuration: Verify
pk.modeandpk.fieldsmatch the Spanner table’s primary key definition. Thepk.fieldsmust exist in both the record schema and the Spanner table.PostgreSQL dialect not supported: The fully-managed connector for Confluent Cloud does not support PostgreSQL dialect. Note that the self-managed connector for Confluent Platform does support PostgreSQL dialect via the
gcp.spanner.database.dialectconfiguration.
Check the connector logs in the Cloud Console for specific type mapping errors and adjust your data schema or Spanner table structure accordingly.
How do I configure table auto-creation and schema evolution?
The connector supports automatic table creation and limited schema evolution:
Auto-create tables:
Enable auto-create: Set
auto.create=trueto allow the connector to create tables that do not exist.Table naming: By default, tables are created with the same name as the Kafka topic. Use
table.name.formatto customize table names.Required permissions: The service account must have permissions to create tables in the Spanner database, including the
spanner.databases.updateDdlpermission.
Auto-evolve schemas:
Enable auto-evolve: Set
auto.evolve=trueto allow the connector to add missing columns when new fields appear in the record schema.Limitations: The auto-evolve feature only supports adding new columns. You cannot remove columns, modify primary keys, or change column data types. Spanner does not support using
ALTER COLUMNto change data types.New columns are optional: Columns added by auto-evolve are created as nullable to prevent schema incompatibility.
Important considerations:
Primary keys: Auto-created tables will use the fields specified in
pk.modeandpk.fieldsas the primary key.Data types: The connector maps Kafka Connect types to Spanner types automatically, such as
INTtoINT64andSTRINGtoSTRING(MAX).Production use: For production environments, it is recommended to pre-create tables with proper schema, indexes, and constraints rather than relying on auto-creation.
How can I improve connector performance and reduce lag?
To optimize the connector performance and throughput:
Increase the number of tasks: Set a higher
tasks.maxvalue to process more partitions in parallel. More tasks improve throughput for multi-partition topics.Tune batch size: Increase
max.batch.sizeto write larger batches to Spanner. Larger batches reduce the number of write operations and improve efficiency. Default is 1000 records.Adjust polling intervals: Configure
consumer.override.max.poll.recordsandconsumer.override.max.poll.interval.msto balance Kafka consumption with Spanner write latency.Use upsert mode: If applicable,
insert.mode=upsertcan be more efficient thaninsertfor workloads with frequent updates.Monitor Spanner capacity: If connector is healthy but lag persists, the bottleneck may be Spanner instance capacity. Monitor Spanner metrics in the Google Cloud Console and consider scaling up the instance.
Optimize table schema: Ensure Spanner tables have appropriate indexes and avoid over-indexing, which can slow down writes.
Monitor connector metrics in the Cloud Console to identify bottlenecks and adjust configuration accordingly.
Next Steps
For an example that shows fully-managed Confluent Cloud connectors in action with Confluent Cloud for Apache Flink, see the Cloud ETL Demo. This example also shows how to use Confluent CLI to manage your resources in Confluent Cloud.